EuroLite LED PAR-64 RGBW+UV Short Spot User Manual
Hide thumbs
Also See for LED PAR-64 RGBW+UV Short Spot:
- User manual (22 pages) ,
- User manual (26 pages) ,
- User manual (22 pages)
Table of Contents
Advertisement
Available languages
Available languages
Quick Links
Download this manual
See also:
User Manual
Advertisement
Table of Contents

Related Manuals for EuroLite LED PAR-64 RGBW+UV Short Spot


Summary of Contents for EuroLite LED PAR-64 RGBW+UV Short Spot
- Page 1 BEDIENUNGSANLEITUNG USER MANUAL LED PAR-64 RGBW+UV Short Spot © Für weiteren Gebrauch aufbewahren! Copyright Keep this manual for future needs! Nachdruck verboten! Reproduction prohibited!
-
Page 2: Table Of Contents
Diese Bedienungsanleitung gilt für die Artikelnummern: / This user manual is valid for the article numbers: 51914073, 51914074 Das neueste Update dieser Bedienungsanleitung finden Sie im Internet unter: You can find the latest update of this user manual in the Internet under: www.eurolite.de 2/22 00066243.DOC, Version 1.1... -
Page 3: Einführung
- sich die letzte Version der Anleitung im Internet herunter laden EINFÜHRUNG Wir freuen uns, dass Sie sich für einen EUROLITE LED PAR-64 RGBW+UV Short Spot entschieden haben. Wenn Sie nachfolgende Hinweise beachten, sind wir sicher, dass Sie lange Zeit Freude an Ihrem Kauf haben werden. - Page 4 Bitte überprüfen Sie vor der ersten Inbetriebnahme, ob kein offensichtlicher Transportschaden vorliegt. Sollten Sie Schäden an der Netzleitung oder am Gehäuse entdecken, nehmen Sie das Gerät nicht in Betrieb und setzen sich bitte mit Ihrem Fachhändler in Verbindung. Der Aufbau entspricht der Schutzklasse I. Der Netzstecker darf nur an eine Schutzkontakt-Steckdose angeschlossen werden, deren Spannung und Frequenz mit dem Typenschild des Gerätes genau übereinstimmt.
-
Page 5: Bestimmungsgemäße Verwendung
BESTIMMUNGSGEMÄßE VERWENDUNG Bei diesem Gerät handelt es sich um einen Effektstrahler, mit dem sich dekorative Lichteffekte erzeugen lassen. Dieses Produkt ist nur für den Anschluss an 230 V, 50 Hz Wechselspannung zugelassen und wurde ausschließlich zur Verwendung in Innenräumen konzipiert. Dieses Gerät ist für professionelle Anwendungen, z. -
Page 6: Gerätebeschreibung
Beachten Sie bitte, dass eigenmächtige Veränderungen an dem Gerät aus Sicherheitsgründen verboten sind. Wird das Gerät anders verwendet als in dieser Bedienungsanleitung beschrieben, kann dies zu Schäden am Produkt führen und der Garantieanspruch erlischt. Außerdem ist jede andere Verwendung mit Gefahren, wie z. - Page 7 Die Aufhängevorrichtungen des Gerätes muss so gebaut und bemessen sein, dass sie 1 Stunde lang ohne dauernde schädliche Deformierung das 10-fache der Nutzlast aushalten kann. Die Installation muss immer mit einer zweiten, unabhängigen Aufhängung, z. B. einem geeigneten Fangnetz, erfolgen. Diese zweite Aufhängung muss so beschaffen und angebracht sein, dass im Fehlerfall der Hauptaufhängung kein Teil der Installation herabfallen kann.
-
Page 8: Anschluss Ans Netz
Hängen Sie das Sicherungsseil in dem Fangseilloch im Hängebügel ein und führen Sie es über die Traverse bzw. einen sicheren Befestigungspunkt. Hängen Sie das Ende in dem Schnellverschlussglied ein und ziehen Sie die Sicherungsmutter gut fest. Der maximale Fallabstand darf 20 cm nicht überschreiten. Ein Sicherungsseil, das einmal der Belastung durch Absturz ausgesetzt war oder beschädigt ist, darf nicht mehr als Sicherungsseil eingesetzt werden. -
Page 9: Master/Slave-Betrieb
Belegung der XLR-Verbindung: Wenn Sie Controller mit dieser XLR-Belegung verwenden, können Sie den DMX-Ausgang des Controllers direkt mit dem DMX-Eingang des ersten Gerätes der DMX-Kette verbinden. Sollen DMX-Controller mit anderen XLR-Ausgängen angeschlossen werden, müssen Adapterkabel verwendet werden. Aufbau einer seriellen DMX-Kette: Schließen Sie den DMX-Ausgang des ersten Gerätes der Kette an den DMX-Eingang des nächsten Gerätes an. -
Page 10: Stand Alone-Betrieb
Stand Alone-Betrieb Der LED PAR-64 RGBW+UV Short Spot lässt sich im Stand Alone-Betrieb ohne Controller einsetzen. Trennen Sie dazu den LED PAR-64 RGBW+UV Short Spot vom Controller. Control Board Das Control Board bietet mehrere Möglichkeiten: so lässt sich z. B. die DMX-Startadresse einstellen. -
Page 11: Dmx-Protokoll
Drücken Sie die MENU-Taste, um die gewünschte Startadresse mit UP/DOWN-Tasten einzustellen. Nun können Sie den LED PAR-64 RGBW+UV Short Spot über Ihren Controller ansteuern. Bitte beachten Sie: Über die Kontroll-LED (DMX) des Gerätes werden die Modi DMX-512 Daten angezeigt. Schalten Sie das Gerät ein. Das Gerät prüft, ob DMX-512 Daten empfangen werden oder nicht. Wenn Daten empfangen werden, leuchtet die Kontroll-LED permanent. -
Page 12: Sicherungswechsel
Abstrahlwinkel: 20° Maße (LxBxH): 278 x 275 x 330 mm Gewicht: 2,3 kg Zubehör: Best.-Nr.: EUROLITE TH-50 Theaterhaken, silber 58000650 EUROLITE TH-50S Theaterhaken, schwarz 58000651 Kabel MC-30, 3m, schwarz, XLR m/f, sym 3022047N Saveking Sicherungsseil 3x600 schwarz 58010252 Bitte beachten Sie: Technische Änderungen ohne vorherige Ankündigung und Irrtum vorbehalten. -
Page 13: Introduction
- download the latest version of the user manual from the Internet INTRODUCTION Thank you for having chosen a EUROLITE LED PAR-64 RGBW+UV Short Spot. If you follow the instructions given in this manual, we are sure that you will enjoy this device for a long period of time. - Page 14 Please make sure that there are no obvious transport damages. Should you notice any damages on the A/C connection cable or on the casing, do not take the device into operation and immediately consult your local dealer. This device falls under protection-class I. The power plug must only be plugged into a protection class I outlet.
-
Page 15: Operating Determinations
OPERATING DETERMINATIONS This device is a lighting effect for creating decorative effects. This product is only allowed to be operated with an alternating voltage of 230 V, 50 Hz and was designed for indoor use only. This device is designed for professional use, e.g. on stages, in discotheques, theatres etc. Lighting effects are not designed for permanent operation. -
Page 16: Description
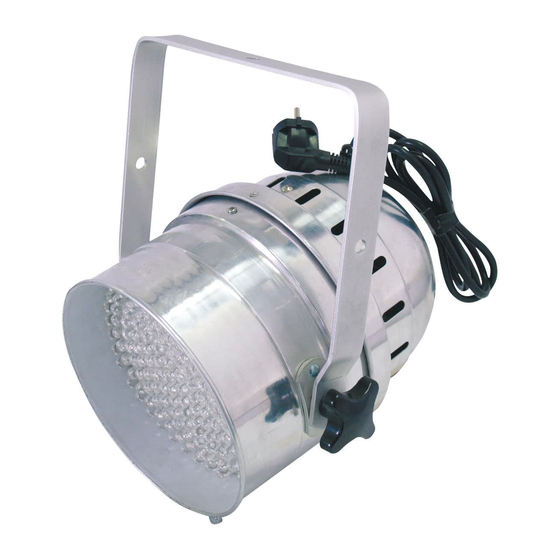
DESCRIPTION Features Versatile LED PAR-64 spot with 3 W LEDs Operable in stand-alone mode or via DMX • DMX512 control possible via any commercial DMX controller (occupies 7 channels) • Sound-control via built-in microphone • Adjustable microphone sensitivity via rotary control •... - Page 17 When rigging, derigging or servicing the fixture staying in the area below the installation place, on bridges, under high working places and other endangered areas is forbidden. The operator has to make sure that safety-relating and machine-technical installations are approved by an expert before taking into operation for the first time and after changes before taking into operation another time.
-
Page 18: Connection With The Mains
DANGER TO LIFE! Before taking into operation for the first time, the installation has to be approved by an expert! Connection with the mains Connect the device to the mains with the power-plug. The occupation of the connection-cables is as follows: Cable International Brown... -
Page 19: Master/Slave Operation
DMX-controlled mode via a DMX controller. After you connected the effect to the mains, the LED PAR-64 RGBW+UV Short Spot starts running. The device features a built-in microphone and a rotary control on the rear panel to adjust the sound sensitivity. -
Page 20: Dmx-Controlled Operation
RGBW+UV Short Spot correctly and independently from any other fixture on the DMX-chain. If several LED PAR-64 RGBW+UV Short Spot are addressed similarly, they will work synchronically. Press the MENU-buttons and the UP/DOWN-buttons for setting the desired starting address. Now you can start operating the LED PAR-64 RGBW+UV Short Spot via your lighting controller. -
Page 21: Dmx-Protocol
Attention: It’s necessary to insert the XLR termination plug (with 120 Ohm) in the last lighting in the link in order to ensure proper transmission on the DMX data link. DMX-protocol Channel: Value: Function: 000 – 255 Red (0 – 100%) Channel: Value: Function:... -
Page 22: Technical Specifications
Number of LEDs: Beam angle: 20° Dimensions (LxWxH): 278 x 275 x 330 mm Weight: 2.3 kg Accessories: EUROLITE TH-50 Theatre hook, silver 58000650 EUROLITE TH-50S Theatre hook, black 58000651 Cable MC-30, 3m, black,XLR m/f,balanced 3022047N Saveking Safety bond 3x600 black 58010252 Please note: Every information is subject to change without prior notice.
Need help?
Do you have a question about the LED PAR-64 RGBW+UV Short Spot and is the answer not in the manual?
Questions and answers