Table of Contents
Advertisement
Advertisement
Table of Contents

Related Manuals for VIPColor VP485


Summary of Contents for VIPColor VP485
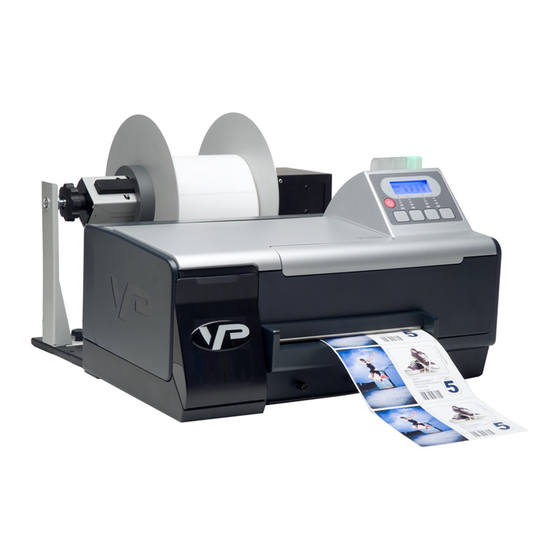
- Page 1 VP485/ VP485e/ VP495 P r i n t e r U s e r G u i d e...
- Page 2 VIPColor Technologies Pte Ltd. Warranty VIPColor Technologies Pte Ltd. takes steps to ensure that this user guide is correct; however, errors may occur. The information in this guide is subject to change without notice. VIPColor Technologies Pte Ltd.
- Page 3 In This Guide The following symbols and conventions are used in this guide. WARNING A WARNING indicates a potentially hazardous situation that could result in an electric shock/fire and serious injury if you ignore the safety precautions. CAUTION A CAUTION indicates a potentially hazardous situation that could result in injury or damage to the printer if you ignore the safety precautions.
-
Page 4: Safety Precautions
Safety Precautions Read the safety warnings and instructions carefully to ensure that you use your printer safely. Do not attempt to use your printer in any way other than described in this guide. WARNING: Electrical Shock Hazard Serious shock hazard leading to death or injury may result if you do not take the following precautions: •... -
Page 5: Table Of Contents
Contents Printer Parts and Functions ....... 7 Front View ..............8 Control Panel . - Page 6 Troubleshooting .........49 If the Printer Does Not Print .
-
Page 7: Printer Parts And Functions
Chapter 1 Printer Parts and Functions Front View Control Panel Rear View... -
Page 8: Front View
Front View Status lights Control panel Top cover Ink cartridge Manual cutter compartment cover Printer Parts and Functions... -
Page 9: Control Panel
Control Panel Status lights Power indicator LCD display Menu buttons Power button CAUTION Do not turn off the printer using the Power switch at the rear of the printer. Always turn it off using the Power button on the control panel, to ensure that the printhead carriage is returned to its proper position at the right side of the printer. -
Page 10: Status Lights
Status Lights The lights on the control panel indicate the status of the printer and are also useful for diagnosing printing problems. Green Amber Table 1 Status Lights Status Light Description Green Printer is online and ready to print. Flashing Printer is receiving data from the computer. -
Page 11: Menu Buttons
Menu Buttons Use the buttons on the control panel to access various setup and maintenance functions, or change printer settings. (For a detailed list of menu options, see Options on Printer Menu on page 68.) Power button (esc) FEED/ MENU/ (clear)/ (up) (down) -
Page 12: Rear View
Rear View Rear module Media feed slot Media width guide Power socket Power switch GPIO port Media sensor Network port USB port NOTE When you need to power off the printer using the Power switch at the rear of the printer, make sure you wait about 8 seconds before you turn it on again. -
Page 13: Setting Up The Printer
Chapter 2 Setting Up the Printer Unpack the Printer Install the Ink Cartridges Install the Printheads Connect the Power Cable Align the Printheads Load Label Media Install the Printer Driver Install the Printer on a Network Choose Display Language... -
Page 14: Unpack The Printer
Unpack the Printer Choose a Location Follow these guidelines to select a suitable location for the printer: • The area must be well ventilated and free from dust. • Avoid places where the printer will be exposed to direct sunlight, heat source, liquids, chemicals, or flammable solvents such as alcohol or thinners. - Page 15 Unpack the Printer 1. Open the printer box and remove the packing material from the top of the box. 2. Carefully lift the printer out from the box and set it on a level and sturdy surface at the selected location. 3.
-
Page 16: Install The Ink Cartridges
Install the Ink Cartridges The printer uses four ink cartridges: cyan, magenta, yellow and black from left to right in the print cartridge compartment. Colored labels over the slots indicate where each ink cartridge should be installed. The ink cartridges have to be correctly installed for the printer to function properly. -
Page 17: Install The Printheads
Install the Printheads The printer uses two printheads. Colored labels over the printhead slots indicate where each printhead should be installed. The printheads have to be correctly installed before the printer can function properly. 1. Open the top cover. The printhead carriage is on the left of the printer. 2. - Page 18 3. Shake the printhead six times as shown. 4. Remove the printhead from its packaging and remove the protective cap and tape. CAUTION Handle the protective cap and tape carefully to avoid staining your clothes or surrounding work area. Once the protective cap and tape are removed, do not touch the electrical contacts or ink nozzles on the printhead.
-
Page 19: Connect The Power Cable
Connect the Power Cable NOTE It is recommended that the printer be run on an uninterruptable power supply. Make sure all packing material has been removed from inside the printer and the top cover is closed. 1. Attach the power cable securely to the printer. 2. -
Page 20: Align The Printheads
Align the Printheads The printhead alignment procedure ensures that the printheads are lined up properly for optimum print quality. If it is not done, your printouts may be misaligned and look fuzzy or blurred. The procedure should be performed whenever new printheads are installed in the printer. - Page 21 4. Insert a sheet of Letter/A4-sized paper into the media feed slot at the rear of the printer. Make sure the media width guide is correctly positioned against the right side of the paper. 5. Press (enter) to start alignment. 6.
-
Page 22: Load Label Media
Load Label Media Make sure the unwinder is properly aligned with the printer before you load media. Refer to the alignment instructions for the VIPColor unwinder model (Type 1 Type 2) that you are using. Type 1 Rear rubber feet of printer fit into... -
Page 23: Load Media
Load Media 1. Load a roll of labels in the unwinder and feed it under the pick-up arm. Make sure the labels will be face-up as they unwind. 2. Connect power to the unwinder and turn it on. 3. Insert the media along the left edge of the media feed slot. -
Page 24: Install The Printer Driver
• Windows 7 • Windows Vista • Windows XP (SP3 or later) For installation on Windows Server 2008 or Windows Server 2003, please contact VIPColor. NOTE VIPColor Technologies rigorously tests the driver with multiple software applications, but does not guarantee that it is error-free, and disclaims any liability resulting from the errors. -
Page 25: Install The Printer On A Network
2. If the Windows Add Hardware Wizard appears, click Cancel. Do not install the printer driver using the Add Hardware Wizard. 3. Insert the VIPColor BarTender UltraLite CD into the disk drive. 4. Select Seagull Printer Drivers and then select Install Printer Driver. - Page 26 6. At the Specify Port step, click Create Port. 7. Select Standard TCP/IP Port and click New Port to run the Add Printer Port Wizard. a Enter the IP address for the printer and a port name. Wait for Windows to detect the TCP/IP port. b For Device Type, select Generic Network Card.
-
Page 27: If The Printer Is Already Installed
You can set up the TCP/IP port from Windows. 1. From the Windows Start menu, Select Devices and Printers 2. Right-click VIPColor VP4X5 and select Printer Properties. 3. On the Ports tab, select the Standard TCP/IP Port for the printer and click Configure Port. -
Page 28: Choose Display Language
Choose Display Language You can change the language displayed in the printer control panel. The supported languages are English, German, Italian, Spanish, and French. 1. On the control panel, press the MENU button. 2. Press (enter) to select Printer Setup. 3. -
Page 29: Using The Printer
Chapter 3 Using the Printer Select Print Media Select Print Settings Cancel a Print Job Create Full-Bleed Labels Adjust Alignment for Printing 380 Adjust for Media Thickness Upgrade or Remove Printer Driver Monitor Printer through Web Interface CAUTION Never attempt to pull media out from the back of the printer. Doing so will cause ink mixing in the printer. -
Page 30: Select Print Media
216 mm • Label roll on a 3” core 76 mm • External roll maximum diameter depends on the unwinder used (9” or 12” VIPColor unwinders) 228.6 mm or 305 mm • Minimum label height 1.5” 38 mm Minimum label width 2.0”... -
Page 31: Label Threshold Setting
Label Threshold Setting The printer is set up for auto-calibration by default. When you load media into the printer, it will automatically calibrate and determine the threshold value, and position the media correctly for printing. Generally you can keep auto-calibration on. If auto-calibration fails or the printer is unable to detect the media, you may need to manually set the threshold value as described in Set Label Threshold... -
Page 32: Select Print Settings
To change and keep the default print settings for future print jobs: 1. From the Windows Start menu, select Devices and Printers 2. Right-click the VIPColor VP4X5 printer, and select Printing preferences. 3. Make the changes and click OK to save. -
Page 33: Cancel A Print Job
Cancel a Print Job Cancel Printing from Printer Control Panel Press (clear) to cancel the current print job. Cancel Printing from Windows 1. Double-click the printer icon in the taskbar. 2. Right-click the document name and select Cancel. Using the Printer... -
Page 34: Create Full-Bleed Labels
Create Full-Bleed Labels When you design and print full-bleed labels, you may find that the image is cut off around the edges of the label, as shown in Figure 1. This a characteristic of the printer: an unprintable zone of 1.5 mm (0.06”) around the edges of any media size. Figure 1 Full-bleed label does not print correctly Design on 60 x 40 mm label Actual print on 60 x 40 mm label... -
Page 35: Using Bartender Ultralite
Using BarTender UltraLite 1. Launch BarTender UltraLite from the Start menu. 2. Select Start a New BarTender document. 3. Let the New Document Wizard guide you through the creation of a new label. Follow the tips below when creating and printing full-bleed labels. Check to see if your label matches a Predefined Media Size, otherwise, follow the instructions for... -
Page 36: Custom Media Size
Custom Media Size If the Predefined Stock does not include your media size, define custom media in the New Document Wizard. Select Specify Custom Settings, which allows you to define various settings for the media, including the size. 1. Add 3 mm (0.12”) to both the actual width and height of the label when defining the size. -
Page 37: Using Other Graphics Software
2. When you finish creating the new document, from the File menu, select Page Setup. On the Layout tab, set margins of 1.5 mm (0.06”) all around. Figure 5 Page Setup 3. Lay out the label as shown in Figure 2, avoiding the margins. -
Page 38: Adjust Alignment For Printing
Adjust Alignment for Printing After designing a label, always print 3 to 5 labels in the desired quality mode to check the alignment of the image on the label. If the image is not centered, adjust the TOF and Right Edge (Figure Figure 6 TOF and Right Edge adjustment –... -
Page 39: Tof Adjustment
1. From the File menu of the graphics software, select Print . 2. Select VIPColor VP4X5 and select Properties or a similar button. 3. On the Stock tab, enter the adjustment for the Top Offset and click OK . -
Page 40: Adjust For Media Thickness
Adjust for Media Thickness Media thickness can change with each roll of media. The difference in media thickness and/or flexibility can result in overprinting or underprinting between swaths in Draft or Fast quality mode. Figure 7 Media thickness adjustment 0.875” (22 mm) single pass underprinting 0.875”... - Page 41 When this happens, adjust the media thickness setting. 1. On the printer control panel, select Menu Printer Setup Select Media Thickness. 2. Select the media type. Ensure that your selection matches the media loaded in the printer. The printer is not able to detect the media type;...
-
Page 42: Upgrade Or Remove Printer Driver
Upgrade or Remove Printer Driver If you should need to upgrade, remove, or reinstall the printer driver, it is recommended that you use the Seagull DriverWizard. 1. Run the DriverWizard (DriverWizard.exe) from folder where the Seagull driver files were installed. The DriverWizard provides the following options: •... -
Page 43: Printer Maintenance
Chapter 4 Printer Maintenance Replacing Ink Cartridges Cleaning Printheads Replacing Printheads Storing Printing Supplies Cleaning the Printer Do not attempt to disassemble or modify the printer. There are no user serviceable parts inside the printer. Never attempt any maintenance procedure which is not described in this guide. -
Page 44: Replacing Ink Cartridges
Replacing Ink Cartridges CAUTION Do not shake the ink cartridges. Ink may leak out and stain clothing or the surrounding area. Estimated ink levels are shown on the control panel display. Note that these are estimates and actual ink volumes may vary. After removing an ink cartridge from its package, install it right away. -
Page 45: Cleaning Printheads
If the quality problem persists after cleaning, replace the printheads. See Replacing Printheads. CAUTION VIPColor is not responsible for damage to the printer that results from modifying the printheads or using incorrect or unauthorized printheads in the printer. Printer Maintenance... -
Page 46: Replacing Printheads
Replacing Printheads 1. On the printer control panel, press the MENU button. Printer Setup a Select Maintenance. Test Maintenance b Select Change Printhead. Eject Media Clean Printheads Change Printhead Firmware Version Set label threshold 2. Open the top cover. 3. Lift up the printhead latch. 4. - Page 47 5. Shake the printhead six times as shown. 6. Remove the printhead from its packaging and remove the protective cap and tape. CAUTION Handle the protective cap and tape carefully to avoid staining your clothes or surrounding work area. Once the protective cap and tape are removed, do not touch the electrical contacts or ink nozzles on the printhead.
-
Page 48: Storing Printing Supplies
Storing Printing Supplies CAUTION Do not ship the printer with the ink cartridge and printheads installed. Ink Cartridges Ink cartridges can be left in the printer for extended periods of time. If you remove the ink cartridges, place them in an airtight container or a resealable plastic bag. CAUTION Store ink cartridges out of the reach of small children. -
Page 49: Troubleshooting
Chapter 5 Troubleshooting If the Printer Does Not Print Other Printer Problems If Error Messages Appear If Printouts are Incorrect or Print Quality is Poor BarTender Problems If There Is a Media Jam Cleaning the Rear Module NOTE Whenever you need to turn off the printer using the rear Power switch, always wait about 8 seconds before you turn it on again. -
Page 50: If The Printer Does Not Print
PC. 2. Double-click the VP4X5 printer icon in Devices and Printers and check that the title bar does not show VIPColor VP4X5 - Use Printer Offline. If it shows, on the Printer menu, click Use Printer Offline to deselect it. -
Page 51: Other Printer Problems
FEED button does not work Feed command. after printing is completed Note the firmware version of your printer and contact your VIPColor reseller to find out if an upgrade is available to resolve this issue. 1. On the control panel, select Menu Maintenance Setup Label ... - Page 52 If you are trying to print a full-bleed label: Printer is skipping labels Check that your full-bleed label was set up and designed as described in Create Full-Bleed Labels on page 34. If you are not printing a full-bleed label: 1.
-
Page 53: If Error Messages Appear
Check Paper Path and Restart (4) 1. Restart the printer using the rear Power switch. Service Station Stall 2. If the error still appears, contact your VIPColor reseller. The top cover or ink cartridge compartment door is open. Door open 1. - Page 54 2. Make sure both printheads are installed and close the latch Printhead not Latched securely. 3. Turn on the printer. 4. If the error still appears, contact your VIPColor reseller. Printer has run out of media. Out of Paper Load media and press Resume on the printer control panel to continue printing.
- Page 55 Message on Control Panel Cause/Solution An ink cartridge has run out. Replace Ink (1) Replace the ink cartridge. See Replacing Ink Cartridges on page 44. Out of Ink (color) No ink cartridges were detected. Replace Ink (2) • Install the ink cartridges. Cartridge Failure (color) •...
-
Page 56: If Printouts Are Incorrect Or Print Quality Is Poor
If Printouts are Incorrect or Print Quality is Poor Check print settings: Blank label or partial image is • Make sure the media size selected matches the size of the printed media loaded in the printer. • Make sure the print quality settings are correct for the media. •... - Page 57 Monochrome. • Make sure the ink cartridge have not been tampered with. Colors are bleeding Always use genuine VIPColor ink cartridges. Refilling and incompatible inks can damage the printer or printheads, and result in reduced print quality.
-
Page 58: Bartender Problems
BarTender Problems • If a BarTender error is displayed, it may be due to Unable to add picture to label insufficient memory on your PC. Check the available memory. • The image may not be compatible. Try using images that are in RGB format, 300 ×... -
Page 59: If There Is A Media Jam
If There Is a Media Jam CAUTION Never attempt to pull media out from the back of the printer. Doing so will cause ink mixing in the printer. Always try to remove media from the front of the printer. Clearing a Media Jam 1. - Page 60 Clearing Media from the Rear Module Do this only if the Clearing a Media Jam procedure does not clear the error. 1. Press the Power button on the control panel to turn off the printer. 2. Turn off the Power switch at the rear of the printer. 3.
- Page 61 6. Before reinstalling the rear module, ensure the pinch plates are in the up position. Pinch plate up Turn gear to rotate pinch plates up, if needed. Pinch plate down Troubleshooting...
- Page 62 7. Reinstall the rear module. a Lock the lifters. b Reconnect cable to printer board. Tuck the cable beside the printer board so it does not get caught when the rear module is replaced. c Replace and secure the rear module. Troubleshooting...
-
Page 63: Cleaning The Rear Module
Cleaning the Rear Module 1. Press the Power button on the control panel to turn off the printer. 2. Turn off the Power switch at the rear of the printer. 3. Remove the rear module. Release rear module. b Disconnect cable from printer board. Troubleshooting... - Page 64 4. Clean the following areas in the rear module. a Press latches down to release lifters. You can lift the upper plate gently to reach the areas between the plates. b Use a lint-free cloth to clean the LED row on the upper plate. c Use a lint-free cloth to clean the clear plastic area on the lower plate.
- Page 65 5. Reinstall the rear module. a Lock the lifters. b Reconnect cable to printer board. Tuck the cable beside the printer board so it does not get caught when the rear module is replaced. c Replace and secure the rear module. Troubleshooting...
- Page 66 Troubleshooting...
-
Page 67: Appendix
Appendix Options on Printer Menu Regulatory Information... -
Page 68: Options On Printer Menu
Options on Printer Menu Table 3 Menu options Menu Option Description Printer Setup Align Printheads Run automatic alignment of new printheads. Two Letter/A4-sized sheets of paper are needed. TOF Alignment Adjust TOF setting. Right Edge Adjust Adjust Right Edge setting. Select Media Thickness Choose media type and make fine adjustments in line feed accuracy to compensate for... - Page 69 Table 3 Menu options (continued) Menu Option Description Configure Network IP Addr Enter network settings for Advanced model only (if enabled) Subnet Mask Gateway Primary DNS Secondary DNS MAC Addr Advanced Ink Limit Increase or decrease amount of ink used for printing.
-
Page 70: Regulatory Information
Regulatory Information General Certification and Compliance Important: Changes or modifications to this product not authorized by VIPColor Technologies USA Inc could void the EMC compliance and negate your authority to operate the product. This product has demonstrated EMC compliance under conditions that included the use of compliant peripheral devices and shielded cables between system components. -
Page 71: Material Safety Data Sheets
VIPColor website at www.vipcolor.com. Material Safety Data Sheets Material Safety Data Sheets (MSDSs) can be obtained from the VIPcolor website at www.vipcolor.com. VIPColor Environmental Policy Product VP4X5 is in compliance with the requirements of VIPColor Environmental Policy and has been assessed to ensure that the rate of recovery, re-use and recycling of constituent parts are acceptable. - Page 72 Recycling The following are design for recycling features that have been incorporated into this product: • The number of materials has been kept to a minimum while ensuring proper functionality and reliability. • Dissimilar materials have been designed to separate easily. •...
-
Page 73: Index
Index full-bleed labels 34 adjust right edge 38 adjust TOF 38 align printheads 20 gap media setting 31 align unwinder and printer 22 auto-calibration 31 ink cartridge compartment cover 8 ink cartridges 16 bands appear in printout 56 failure 53 BarTender Label software 24 handling replace ink cartridges 44 problems 58... - Page 74 network installation 25 rear module cleaning 63 error 55 removing media 60 online 10 Reflective (Black Mark) setting 31 operating systems 24 regulatory information 70 options on printer menu 68 remove ink cartridge 44 out of paper 54 remove printer driver 42 overlapping swaths 40 remove printhead 46 overprinting 40...
Need help?
Do you have a question about the VP485 and is the answer not in the manual?
Questions and answers