Table of Contents
Advertisement
Quick Links
Advertisement
Table of Contents

Related Manuals for Kikusui PWX750ML


Summary of Contents for Kikusui PWX750ML
- Page 1 PART NO. IB022997 Dec. 2014 Installation and Preparation Basic Functions User’s Manual External Control Regulated DC Power Supply Parallel/Series PWX Series Operation PWX750ML Maintenance Specifications Isolated Analog Interface OPtions Troubleshooting...
-
Page 2: About The Pwx750Ml Manuals
If the manual gets lost or soiled, a new copy can be provided for a fee. To replace or purchase a man- ual, please contact your Kikusui agent or distributor. At that time, inform your agent or distributor of the “Part No.” written on the front cover of this manual. -
Page 3: Product Overview
Automatic output on setting You can set the PWX750ML so that when a protection func- tion is activated and the output is turned off, output is auto- matically turned back on when the problem that caused the protection function to be activated is fixed. -
Page 4: Safety Precautions
Notations Used in This Manual Safety Precautions When using this product, be sure to observe the “Safety • In this manual, the PWX750ML Regulated DC Power Sup- ply is referred to as the “PWX Series” or “PWX750ML.” Precautions” in the Safety information manual. -
Page 5: Table Of Contents
Output Operations..........Starting series operation ......Operation Overview ......... CV Power Supply and CC Power Supply ..Maintenance Using the PWX750ML as a CV or CC Power Sup- ply ..............Calibration............Protection Functions and Alarms ..... Calibration overview........Alarm occurrence and clearing alarms.. - Page 6 Appendix A Options ........100 B Troubleshooting ......102...
-
Page 7: Search By Topic
• How do I check the settings in preset p.48 memory? →“Factory Default Settings (Initialization)” • How do I reset the PWX750ML to its fac- p.51 tory default settings? →See the Communication Interface Man- • How do I use the multichannel (VMCB) function to construct a multichannel power ual on the CD-ROM. -
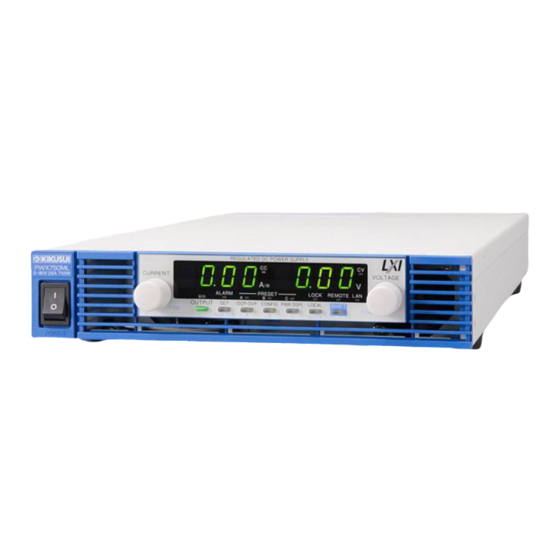
Page 8: Component Names
Component Names Front Panel Display area 16 17 19 20 21 Display area 10 11... - Page 9 Used to set the voltage value or change the value of a CONFIG parameter. p.25, p.36 FINE Used to make fine voltage value adjustments. p.25 Air inlet (louver) Air inlet for cooling the inside of the PWX750ML. – OUTPUT key Used to turn output on and off. p.26 SET key Used to set and confirm the output voltage and output current (the key has an LED).
-
Page 10: Rear Panel
RS232C RS232C port for controlling the PWX750ML remotely Interface Ethernet port for controlling the PWX750ML remotely Manual Air outlet Air outlet for cooling the inside of the PWX750ML – AC INPUT AC inlet p.12 Chassis terminal Connector for grounding the output –... -
Page 11: Installation And Preparation
Installation and Preparation This chapter describes how to turn on the PWX750ML, what kind of load cables to use, and how to connect cables to the out- put connectors. -
Page 12: Connecting The Power Cord
Kikusui agent or distributor. • The power cord with a plug can be used to disconnect the PWX750ML from the AC power line in an emergency. Connect the plug to an easily accessible power outlet so that the plug can be removed from the outlet at any time. -
Page 13: Turning The Power On
OUTPUT terminal cover before turning the POWER switch on. You can use the CONFIG settings to set how the PWX750ML starts when you turn the CAUTION POWER switch on. Depending on the setting, the output may be turned on automatically when the POWER switch is turned on. -
Page 14: Turning The Power Switch Off
Flip the POWER switch to the ( ) side to turn the PWX750ML off. The PWX750ML saves the panel settings (except the output on/off setting) that were in use immediately before the POWER switch was turned off. You can use the CONFIG settings (CF02) to select how the PWX750ML starts when the p.39... -
Page 15: Load Considerations
Note that the output will become unstable if the following types of loads are connected. Loads with peak current or pulse-shaped current The PWX750ML only indicates mean values. Even when the indicated value is less than or equal to the set constant current, the peak values may exceed the set constant current. If this happens, the PWX750ML is instantaneously put into constant-current mode, and the output voltage drops. -
Page 16: Specifications
Connecting a load with accumulated energy, such as a battery, to the PWX750ML may cause current to flow from the load to the internal circuit of the PWX750ML. This current may dam- age the PWX750ML or reduce the life of the load. -
Page 17: Load Cables
This results in a smaller voltage being applied at the load end. The PWX750ML has a sensing function that compensates for this voltage drop up to approximately 4 V for a single line. If the voltage drop exceeds this level, use wires that... -
Page 18: Connecting To The Output Terminals
Use the screw that is attached to the PWX750ML to connect the wire to the chassis terminal. Use the screw that is attached to the output terminal to connect the wire to the output terminal. - Page 19 OUTPUT terminal cover in place if you make the Continue sliding the cover until you hear a click. load cables perpendicular with the PWX750ML. Top cover Push this part toward the panel. Continue sliding the cover until Line up the two halves so you hear a click.
-
Page 20: Sensing
Sensing When the PWX750ML is shipped from the factory, terminal cover and connector are attached to the sensing terminals. For safety reasons, when not using the sensing terminals, be sure to attach to terminal cover. If they are damaged or lost, contact your Kikusui agent or distributor. -
Page 21: Local Sensing
Remote sensing is a feature that stabilizes the output voltage across the load by reducing the influence of voltage drops and other effects caused by the load cable resistance. You can use the PWX750ML’s remote sensing feature to compensate up to 4 V for a single p.17 line. - Page 22 If you want to connect and disconnect the load using a mechanical switch that is inserted between the PWX750ML and the load, be sure to include switches in the sensing cables as shown in the following figure and turn on and off the load cable and the sensing cables simul- taneously.
-
Page 23: Basic Functions
Basic Functions This chapter describes how to turn the out- put on and off and the basic operations that you can perform from the front panel. -
Page 24: Measured Value Display And Setting Display
The voltage and current displays have the following two states. • Measured value display • Setting display In addition to the voltmeter and ammeter, the PWX750ML can display the power, the set OVP or OCP, and the system configuration. Measured value display The present output voltage and load current are displayed. -
Page 25: Panel Operations
Panel Operations Overvoltage protection and overcurrent protection setting display Press OCP•OVP to light its LED and display the present overcurrent protection and overvolt- age protection settings. System configuration setting display Press CONFIG to light its LED and display the present system configuration settings. Panel Operations Measured value display, setting display, and set OVP/OCP display Turn the VOLTAGE knob to change the voltage. -
Page 26: Output Operations
(CF02:Forc), you can set the PWX750ML so that output is turned on at power on. If you set the PWX750ML so that output is turned on at power on, be sure to check the OVP p.32 trip point setting before you turn the PWX750ML off. -
Page 27: Cv Power Supply And Cc Power Supply
Conversely, if load resistance R is less than resistance Rc, the operating point is in area and the PWX750ML operates in CC mode (point q). In this case, set voltage Vs equals to the voltage limit. When operating in CC mode, the output current is maintained at the set current. Output volt- age V is determined by the equation V = Is ×... - Page 28 CV Power Supply and CC Power Supply CV mode and CC mode operation example This section uses a power supply with a rated output voltage of 100 V and a rated output cur- rent of 10 A as an example. ) of 8 Ω...
-
Page 29: Using The Pwx750Ml As A Cv Or Cc Power Supply
Using the PWX750ML as a CV or CC Power Supply When using the PMX750ML as a constant-voltage power supply, the set current is the limit to the current that can flow through the load. When using the PMX750ML as a constant-current power supply, the set voltage is the limit to the voltage that can be applied to the load. -
Page 30: Protection Functions And Alarms
If the PWX750ML is set so that output remains off even after the problem is fixed (CF03: SAFE), output remains off even after the problem that caused the alarm is fixed. -
Page 31: Protection Function Activation
To clear alarms, (press ALM CLR (SHIFT+SET); (2) set pin 5 of the J1 connector to LOW (0 V to 0.5 V) or shorted; or (3) turn the PWX750ML off, fix the problem that caused the alarm, and then turn the PWX series on. - Page 32 Set the OVP and OCP trip points to appropriate values. Immediately after you purchase the PWX750ML or immediately after a load is changed, you have to set the OVP and OCP trip points to values that are appropriate for the load.
- Page 33 Protection Functions and Alarms Checking OVP and OCP operation The OVP and OCP functions are designed to protect the load. If you use the CONFIG settings to limit the voltage setting (CF15: ON), you will no longer be able to set the output voltage to a value that exceeds the OVP trip point. This means that you won’t be able to check the operation of the OVP function.
- Page 34 This protection function is activated when the PWX750ML’s internal temperature rises to an abnormal level. • When the PWX750ML is used in an environment outside its operating ambient tempera- ture range (0 °C to +50 °C [32 °F to 122 °F]) •...
- Page 35 Shutdown (SD) Shutdown (SD) is not activated as a result of the PWX750ML detecting an error. It is a func- p.65 tion that is used to turn the output off through the application of a signal to the rear-panel J1 connector when an abnormal condition occurs.
-
Page 36: Config Settings
CONFIG Settings Use the CONFIG settings to set the PWX750ML system configuration. You can set and dis- play the following parameters in the CONFIG settings. The CONFIG parameters are listed in a separate document (included with this manual). Effects: ● indicates a parameter that may be affected when the panel settings are reset (CF00) or when a preset memory entry is loaded. - Page 37 CURRENT knob CF00, CF33, and CF34 are used to execute operations. CF35 to CF41, CF50, and CF51 are used to display the status of the PWX750ML. You cannot set the values of any of these CON- FIG parameters. The SET key blinks when you have selected a CONFIG parameter whose setting you must confirm by pressing SET (CF00, CF33, or CF34).
- Page 38 CONFIG or PWR DSPL. Some CONFIG parameters will be applied immediately after you set them, some will p.36 be applied after you restart the PWX750ML, and some will be applied after you exe- cute CF33 or CF34. Specifying the CONFIG settings...
-
Page 39: Config Parameter Details
Set the total number of units (1 to 4; 1 indicates independent operation--factory default setting). CF02 Power-on status parameter Sets the condition that the PWX750ML will be in when the power is turned on. This setting is p.13 invalid when you are using an external contact to turn the output off. - Page 40 You can use this CONFIG parameter if you forget what settings have been saved to a preset memory entry or if you want to view the saved settings. You can only specify this parameter when the PWX750ML is being used as a master unit. Value Parameter description The saved contents of preset memory will be recalled without displaying them.
- Page 41 Selects the range that is used when controlling constant current and constant voltage with an p.59, p.61 external voltage or an external resistance (the J1 connector). You can only specify this parameter when the PWX750ML is being used as a master unit. Value Parameter description...
- Page 42 If you do not set the operation mode, CC will be prioritized. You can only specify this parameter when the PWX750ML is being used as a master unit. Value Parameter description CC (constant current) is prioritized.
- Page 43 This parameter is applied when you turn the POWER switch off and on. Value Parameter description nonE Remote control is performed using the PWX750ML commands made by Kikusui (factory default setting). 5700 Remote control is performed using the N5700/N8700 commands made by Agilent Technologies.
- Page 44 Selects whether or not to obtain an IP address from a DHCP server. If you are using a fixed IP address, set this to “oFF.” This parameter is applied when you restart the PWX750ML or when you execute CF34. Value Parameter description A DHCP server is not used.
- Page 45 DHCP server. The address that is assigned by the AUTO IP function is 169.254.x.x (where x is a number between 0 and 254). If you are using a fixed IP address, set this to “oFF.” This parameter is applied when you restart the PWX750ML or when you execute CF34. Value Parameter description The AUTO IP function will not be used.
- Page 46 LAN interface. The MAC addresses are just displayed; they cannot be set from the panel. To set a fixed MAC address, access the PWX750ML through a Web browser. When you access the PWX750ML through a Web browser, do so under conditions in which a DHCP server or AUTO IP can be used.
-
Page 47: Preset Memory Function
Preset Memory Function The PWX750ML has the preset memory that stores three sets of the following settings: the voltage, the current, the OVP, the OCP, and the UVL. You can recall the stored set from the preset memory whenever you need. -
Page 48: Recalling Preset Memory Entries
Preset Memory Function Recalling preset memory entries You can recall preset memory entries from the measured value display (when the SET key LED is off) and from the setting display (when the SET key LED is lit). If the output is on, the values in the preset memory entry are applied to the output the moment that the preset memory entry is recalled (the moment that the settings are applied). -
Page 49: Locking Panel Operations (Key Lock)
Locking Panel Operations (Key lock) The PWX750ML’s key lock function prevents you from accidentally changing the settings. When the keys are locked (when the LOCK LED is lit), only the OUTPUT key is valid. Configure all the settings, such as the output voltage and output cur- rent, as necessary. -
Page 50: Switching From Remote Mode To Local Mode
Fall time 250 seconds Switching from Remote Mode to Local Mode When the PWX750ML is being controlled remotely, the REMOTE LED in the display area lights. To switch the PWX750ML to local mode from the front panel, press LOCAL. -
Page 51: Factory Default Settings (Initialization)
Factory Default Settings (Initialization) If you hold down SHIFT+LOCAL while you turn the POWER switch on, the PWX750ML will be reset to the factory default settings. The factory default settings are shown below. Basic settings Basic item Parameter description... - Page 52 This page is intentionally blank.
-
Page 53: External Control
External Control External Control This chapter explains external control and external monitoring using the J1 connector. -
Page 54: Overview
Overview You can use the J1 connector on the rear panel of the PWX750ML to perform the following types of external control. • Output voltage control Controlled using an external voltage or external resistance • Output current control Controlled using an external voltage or external resistance •... - Page 55 Status signal common for pins 2, 3, and 14 to 16. CV STATUS On when the PWX750ML is in CV mode (open-collector output from a photocoupler). CC STATUS On when the PWX750ML is in CC mode (open-collector output from a photocoupler).
-
Page 56: Output Terminal Insulation
PWX750ML. The signal cable may burn out. If the PWX750ML is to be controlled through an external volt- CAUTION age (Vext), do not ground the external voltage (leave it floating). -
Page 57: When The Output Terminal Is Grounded
(including the sensing terminal) will only require an insulation capacity that is greater than or equal to the maximum output voltage of the PWX750ML with respect to the chassis. There is no need to provide insulation that is greater than or equal to the isolation voltage of the PWX750ML. -
Page 58: Cautions When Using The External Voltage (Vext)
• Do not ground the Vext output, that is, leave it floating. • If you are connecting the shield to the Vext side, do not connect the shield to the output ter- minal of the PWX750ML. 2-core shielded wire Vext... -
Page 59: Controlling The Output Voltage
PWX750ML and the external contact is long, it becomes easy for noise to influence the operation of the PWX750ML. Even if you use cables that are designed to suppress noise, the PWX750ML may not operate properly. -
Page 60: Control Using An External Resistance (Rext)
PWX750ML and the external contact is long, it becomes easy for noise to influence the operation of the PWX750ML. Even if you use cables that are designed to suppress noise, the PWX750ML may not operate properly. -
Page 61: Controlling The Output Current
PWX750ML and the external contact is long, it becomes easy for noise to influence the operation of the PWX750ML. Even if you use cables that are designed to suppress noise, the PWX750ML may not operate properly. -
Page 62: Control Using An External Resistance (Rext)
If the wiring is long, it becomes easy for noise to influence the opera- tion of the PWX750ML. Even if you use wires that are designed to suppress noise, the PWX750ML may not operate properly. If you use a shielded cable, connect the shield to the negative output terminal. -
Page 63: Controlling The Output On And Off States
If the wiring is long, it becomes easy for noise to influence the operation of the PWX750ML. Even if you use wires that are designed to suppress noise, the PWX750ML may not operate properly. - Page 64 Controlling the Output On and Off States For long-distance wiring When you are wiring over a great distance, use a small relay and extend the coil side of the relay. Relay Extend this line.
-
Page 65: Controlling Output Shutdown
If the wiring is long, it becomes easy for noise to influence the operation of the PWX750ML. Even if you use wires that are designed to suppress noise, the PWX750ML may not operate properly. -
Page 66: Controlling The Clearing Of Alarms
If the wiring is long, it becomes easy for noise to influence the operation of the PWX750ML. Even if you use wires that are designed to suppress noise, the PWX750ML may not operate properly. -
Page 67: External Monitoring
Monitor output of output current 0 to approx. 5 V (CF08: Lo) or 0 to approx. 10 V (CF08: Hi) for 0 to the rated output current Shorting V MON and I MON to A COM may damage the PWX750ML. CAUTION Monitor output rating Output impedance: 1 kΩ... - Page 68 STATUS COM This is the status output common. This is the photocoupler emitter output. CV STATUS This is set to low level when the PWX750ML is in constant voltage mode. This is the photocoupler open collector output. CC STATUS This is set to low level when the PWX750ML is in constant current mode.
-
Page 69: Parallel/Series Operation
Parallel/Series Operation Parallel/Series Operation This chapter describes the functions of series operation and the master-slave par- allel operations as well as the connection, setup, and operation procedures. -
Page 70: Master-Slave Parallel Operation
The difference in the output voltage and output current between the master unit and the slave units is within approximately 5 % of the rating. When using the PWX750ML independently or when there are units not using parallel opera- CAUTION tion, disconnect the parallel operation connections. - Page 71 Master-Slave Parallel Operation External monitoring During master-slave parallel operation, do not connect the monitor common cable of the CAUTION master unit to the monitor common cables of the slave units. If the cables connected to the load are disconnected, the common cables will be damaged. •...
-
Page 72: Connection (Master-Slave Parallel Operation)
Connections for parallel operation (two I SUM Decide which PWX750ML to use as the master unit. Connect the J1 connector on the rear panel of the master unit to the J1 connector on the rear panel of the first slave unit. - Page 73 Master-Slave Parallel Operation Connecting the load (parallel operation) Risk of electric shock. Turn the POWER switch off before you touch the OUTPUT ter- WARNING minals. Attach the OUTPUT terminal cover after you finish wiring the load. • When you connect the output terminals to the chassis terminals, be sure to connect the CAUTION same polarity output terminals (positive or negative) of the master unit and the slave units to the chassis terminals.
-
Page 74: Settings (Master-Slave Parallel Operation)
(CF01: SLAV) in master-slave parallel operation. On the master unit, set the number of units in master-slave parallel operation (CF01: 2 to 4). In the factory default settings, the PWX750ML is set to independent operation (CF01: 1). Turn the POWER switch off and on to enable the setting. -
Page 75: Starting Master-Slave Parallel Operation
Master-Slave Parallel Operation CONFIG parameters that can be set on master units • CF00 Resets the panel settings • CF02 Power-on status parameter • CF04 Memory content display parameter • CF05 CC control using an Vext or Rext • CF06 CV control using an Vext or Rext •... -
Page 76: Series Operation
Features of the PWX750ML during series operation The features of the PWX750ML during series operation are as follows: Voltage display and current display The voltage and current are displayed on unit 1 and unit 2. To calculate the total output volt- age, add the voltages of unit 1 and unit 2. - Page 77 Series Operation Remote sensing To perform remote sensing, connect the PWX750MLs in series, and then connect the sensing p.20 cables to them as shown in the following figure. • If the sensing cables are not connected properly, the load may be exposed to excessive CAUTION voltage, and the PWX750MLs may be damaged.
-
Page 78: Connection (Series Operation)
Series Operation Connection (series operation) You can connect up to two units. p.14 Connecting the load (series operation) Connect the load as shown below. Risk of electric shock. Turn the POWER switch off before you touch the OUTPUT ter- WARNING minals. -
Page 79: Settings (Series Operation)
Series Operation Settings (series operation) Setting the voltage and current Set the voltage and current on each unit. The voltage that is output is the total of the voltages of the two units. Set the current to the same value on the two units. Setting the overvoltage protection (OVP) and overcurrent protec- tion (OCP) In series operation, you have to set the overvoltage protection (OVP) and overcurrent protec-... - Page 80 This page is intentionally blank.
-
Page 81: Maintenance
!!!DELETE!!! Maintenance This chapter explains how to perform cali- bration. -
Page 82: Calibration
• Humidity: 80 %rh or less To minimize the calibration error due to initial drift, warm up the PWX750ML for at least 30 minutes before calibration. In addition, warm up the DVM and shunt resistor for as long as is... -
Page 83: Calibration Procedure
Calibration Calibration procedure Use the “KIKUSUI PWX calibration” application software included on the CD-ROM to cali- brate the PWX750ML. The system requirements for the “KIKUSUI PWX calibration” is below. OS • Windows7 (x86/ x64) • Windows Vista (x86/ x64) •... - Page 84 This page is intentionally blank.
-
Page 85: Specifications
Specifications This chapter contains the specifications gives dimensions PWX750ML. -
Page 86: Specifications
Values indicated by “rdng” are readout values. • The PWX750ML operates over a wide range of output voltage and output current within rated output power. However, the current that can be output with rated output voltage and the voltage that can be output with rated output current are limited by the rated output power. -
Page 87: Specifications
PWX750ML Output Rating 80 V Output voltage 28 A Output current Output power 750 W Voltage Setting range 0 V to 84 V Setting accuracy ± (0.05 % of setting + 0.05 % of rtg) ±10 mV Line regulation ±10 mV... - Page 88 PWX750ML Display function Voltage Maximum display 99.99 (fixed decimal point) display Display accuracy ±(0.2 % of rdng + 5 digits) Current Maximum display 99.99 (fixed decimal point) display Display accuracy ±(0.5 % of rdng + 5 digits) The PWR DSPL key lights in red.
-
Page 89: Protection Functions
This does not protect against the discharge current peak that is generated from the capacitors inside the PWX750ML output section when the load is changed suddenly. Use the CONFIG settings to specify what happens when a protection function is activated and the output is turned off. -
Page 90: Control Features
PWX750ML Control features External Output voltage control 0 % to 100 % of the rated output voltage (VPGM) Selectable control voltage range: 0 V to 5 V or 0 V to 10 V control Accuracy 5 % of rtg Output current control... - Page 91 Has a compatibility mode (switchable) • Genesys series made by TDK-Lambda • N5700 and N8700 made by Agilent Technologies • DSC series made by Sorensen • PAG series made by Kikusui RS232C Hardware Complies with the EIA232D specifications (excluding the con-...
- Page 92 PWX750ML Isolated Analog Interface (Factory option) Isolated external control input (Voltage control) Isolated output voltage control 0 % to 100 % of the rated output voltage (VPGM_IS) Selectable control voltage range: 0 V to 5 V or 0 V to 10 V...
-
Page 93: Isolated Analog Inter
PWX750ML General Weight (main unit only) Approximately 5 kg (11.02 lb) Dimensions See the outline drawing Environmental Operating Indoor use, overvoltage category II conditions environment Operating 0 °C to +50 °C (32 °F to +122 °F) temperature Operating humidity 20 %rh to 85 %rh (no condensation) Storage temperature -20 °C to +70 °C (-4 °F to +158 °F) -
Page 94: Outline Drawing
15 (0.59) 214 (8.43) #10-32 screw holes × 6 (3 on each side) M4 screw holes × 4 Max. screw insertion depth: Max. screw insertion depth: 6 mm (0.31 inches). 8 mm (0.31 inches). unit: mm (inches) PWX750ML outline drawing... -
Page 95: Isolated Analog Interface
Isolated Analog Interface Isolated Analog Interface (Factory option) This chapter describes the setup and oper- ations of the isolated analog interface. -
Page 96: Introduction
PWX Series. This option is installed inside the PWX750ML before ship- ment. You can use a signal that is isolated from the reference potential of the PWX750ML to perform the following the following types of control. -
Page 97: Isolated Analog Interface Connector
The isolated analog interface connector, which is on the rear panel, can be split into two parts: the socket (attached to the PWX750ML) and the detachable plug. To minimize the influence of noise, we recommend that you use shielded twisted pair wires to make connections. -
Page 98: Setup And Operation
Setup and Operation To prevent damage to the product, do not set the output voltage and output current to values CAUTION that exceed the product’s ratings. Using the voltage control interface Use the CONFIG settings to set the following parameters. p.36 CONFIG parameter Setting... - Page 99 Appendix A Options B Troubleshooting...
- Page 100 Options The PWX750ML has the following options. For information about options, contact your Kiku- sui agent or distributor. Rack mount option The PWX750ML can be used with JIS millimeter racks and EIA inch racks. Name Model Notes Rack mount adapter...
-
Page 101: Power Cord
Options You can use rack mount slide rails CC3001-00-S160 to mount the PWX750ML to a rack. Slide rail for rack mounting CC3001-00-S160 (Made by General Devices) Use #10-32 screws with a maximum length of 0.38 inches to mount the slide rails. - Page 102 In some cases, the problem can be solved quite easily. If none of the items apply to your case, we recommend that you initialize the PWX750ML to p.51 its factory default settings. If the remedy does not correct the problem, contact your Kikusui agent or distributor.
- Page 103 Increase the set con- stant current or increase the current capacity. The output voltage is offset Has 30 minutes passed since the power Warm up the PWX750ML for at least 30 — from the voltage that the was turned on? minutes.
- Page 104 Is the LOCK LED lit? Release the panel operation lock. p.49 ations. Is the REMOTE LED lit? To control the PWX750ML from the panel, p.50 press the LOCAL switch to switch to local Is the PWX750ML being controlled via the mode.
- Page 105 Troubleshooting Unable to perform remote control Symptom Items to Check Remedy Remote control through the Have you selected the communication Select the remote control communication p.43 communication interface can- interface that you want to use in the CON- interface (CF20). not be performed.
- Page 106 This page is intentionally blank.
- Page 107 Index accessories ..............2 MAC address display ..........46 AC-FAIL ..............35 memory contents, display ........40 alarm memory function ............47 clearing ............31 multichannel (VMCB) ..........3 display ............31 channel ............44 alarm occurrence ............. 30 domain ............44 alarm signal .............
- Page 108 UVL ................34 vendor ID display ............46 version ................2 VMCB (Virtual Multi Channel Bus) channel ............44 domain ............44 voltage monitoring, range .........41 voltage setting limit ...........42...
- Page 110 KIKUSUI ELECTRONICS CORP. 1-1-3 Higashiyamata, Tsuzuki-ku, Yokohama, 224-0023, Japan Tel: +81-45-593-7570 Fax: +81-45-593-7571 http://www.kikusui.co.jp Website KES4022 Printed in Japan...
Need help?
Do you have a question about the PWX750ML and is the answer not in the manual?
Questions and answers