
Related Manuals for Roberts Revival iStream2


Summary of Contents for Roberts Revival iStream2
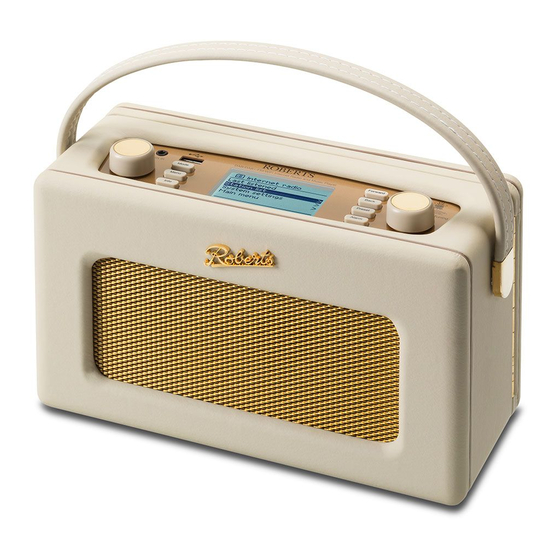
- Page 1 DAB / FM and WiFi Internet Radio with Music Player and Spotify Connect and remote control with the ConnectR app for iPhone and Android Please read this manual before use...
-
Page 2: Table Of Contents
Contents Introduction ..................2-9 DAB mode ..................57-65 Before you can use this product ............3 Selecting a DAB radio station ............58 About this instruction manual............... 4 Display modes ................59-60 Controls and connections ..............5-6 Finding new DAB radio stations ............61 Battery operation ................. -
Page 3: Introduction
Introduction Introduction iStream 2 internet radio features The Roberts iStream 2 provides the following features in an attractive ● Compatible with Spotify Connect, allowing your Spotify selections to compact unit:- be played through the radio, remotely controlled from your iPhone, iPad or Android device. -
Page 4: Before You Can Use This Product
Before you can use this product Before you can use your internet radio, you must have the following: ● A broadband Internet connection (not required for DAB, FM or Music Player functions). ● A wireless access point (WiFi) connected to your broadband Internet Service Provider, preferably via a router. -
Page 5: About This Instruction Manual
This instruction manual is split into sections for each of the different (page 10) Confi guration operating modes of your Roberts iStream 2 internet radio. Each section is clearly identifi ed by the shaded heading in the top right hand corner of each pair of pages. -
Page 6: Controls And Connections
Controls and connections Top view 1. On-Off / Volume control 6. Tuning / Select / Snooze control 11. Mode button 2. Headphone socket 7. Alarm button 12. Menu button 3. Auxiliary input socket 8. Preset / Play-Pause button 13. Info button 4. -
Page 7: Controls And Connections
Introduction Controls and connections - cont. Rear view 15. Telescopic aerial (antenna cable socket behind) 16. WiFi antenna (internal) 17. Line output socket 18. DC in socket... -
Page 8: Battery Operation
Battery operation We recommend for economy that the iStream 2 is used with the AC adaptor whenever possible with battery operation for occasional use only. Inserting the adaptor plug into the DC input socket will disconnect the batteries. If using batteries, only alkaline types should normally be used. Battery life will vary according to the operating mode of the radio, listening volume, battery type and temperature. -
Page 9: Navigation Controls
Introduction Navigation controls These pages describe the basic means of controlling your iStream 2 internet radio. Detailed instructions for each operating mode are given in the later sections of this book. 1. Pressing and releasing the On/Off control brings your internet radio out of the Standby mode if running from the mains or switches it on if using batteries. -
Page 10: Text Entry
Navigation controls cont. Text entry There are several occasions when you may need to enter text characters into your radio. For example, when setting up the WiFi connection, or when searching for artists or albums. When entering text you can use the Tuning/Select control alone or in conjunction with some of the buttons. The rotary control allows you choose from all of the available characters, while the buttons allow you to move up and down or left and right through the list of characters. -
Page 11: Confi Guration
3. When you apply power, the display on the radio will light up and say: 'ROBERTS' and 'STARTING' with a progress indicator. After a few seconds the radio will then enter Standby and the clock will display '00:00' as shown. - Page 12 Plugging in and language selection - cont. 6. Your radio will ask whether the Setup Wizard should be run at the next start up. Although the 'YES' option is highlighted if you wish to change the language you should select the 'NO' option. Rotate the Tuning/Select control to highlight the 'NO' option.
-
Page 13: Clock And Time Settings
Confi guration Clock and time settings The following instructions assume that you have either just plugged in your radio (see page 10) or that you have just specifi ed the language option for the menus (see page 11). 1. Rotate the Tuning/Select control to highlight the desired clock format (either 12 or 24 hour) then press the control to enter your selection. -
Page 14: Connecting Your Radio To Your Computer Network
Connecting to your computer network Before you can use your iStream 2 radio to listen to internet radio or to music streamed from your computer, it must fi rst be connected to your computer network. This section of this book describes how to connect the radio to your network using the wireless (WiFi) connection. - Page 15 Confi guration Connecting to your computer network - cont. You will fi rst need to identify your network in the list of network names presented by the Network Wizard. If no networks are found then you may have to get your wireless router working (please see the instructions supplied with it) or you may be too far from the router.
- Page 16 Connecting to your computer network - cont. 6. When the SSID for the wireless network you wish to connect to is highlighted on the screen, press the Tuning/Select control. If WiFi Protected Setup (WPS) was indicated, you will see an additional menu at this point, otherwise proceed to step 7. Choose one of the WPS menu options as required for your router (WPS may be via push button, or using an identifi...
- Page 17 Confi guration Connecting to your computer network - cont. WEP keys are 10 or 26 characters long (using 0 - 9, and A - F). Some wireless routers can also use pass-phrases for WEP but these are not supported by your radio.
- Page 18 Connecting to your computer network - cont. If you have followed the steps on the preceding pages successfully, your radio will have connected to your router, and then made a connection to the Internet and set its clock. If this is the case, then you can try listening to radio stations via the Internet as described on page 22 onwards.
- Page 19 Confi guration Manual network confi guration If you do not wish to use DHCP for automatic confi guration, or if your network is confi gured with a hidden Network wizard SSID, then you will need to enter some network settings manually. (Note - a hidden SSID may prevent WPS WiFi setup casual observers from detecting your network, but it is not recommended as a means of network security.) View settings...
-
Page 20: Manual Network Confi Guration
Manual network confi guration - cont. 5. In most installations the DNS settings (DNS = Domain Name Server) will be set to the same IP address as your router. In this case the secondary DNS may be left at zero. To enter the DNS address, rotate the Tuning/Select control to set the value for each group of digits and then press the control to enter the value and to move on to the next group. - Page 21 Confi guration Manual network confi guration - cont. The three controls on the right-hand side of the screen have special functions. You can quickly access these by pressing the Info button and then use the Tuning/Select control as needed: select ' ' to erase a character just entered (long press to clear);...
-
Page 22: Network Remote Control Options
NetRemote PIN Setup how this feature can be used are explained in the separate documentation available from the Roberts Radio website. The default PIN is '1234' and is entered in the ConnectR application on your device when it fi rst connects to your radio. You may change the PIN if desired using the 'NetRemote PIN Setup' option in the Network settings menu. -
Page 23: Internet Radio Mode
Internet Radio Internet Radio Internet Radio - the basics Before you can use your radio to listen to broadcasts via the Internet, it is necessary to have connected it to your computer network using the wireless (WiFi) connection. There are literally many thousands of radio broadcasts available via the Internet as well as 'Podcasts'. -
Page 24: Selecting A Radio Station By Location And Genre
Selecting a radio station by location 1. Press and release the On/Off control to switch the radio on. Then press the Mode button to select the Internet radio mode display. 2. Press the Menu button to enter the main Internet radio menu. Rotate the Tuning/Select control until 'Station list' is highlighted on the display and then press the control to select the option. - Page 25 Internet Radio Selecting a radio station by location - cont. 8. Rotate the Tuning/Select control to highlight your chosen radio station and then press the control to enter your selection. The display will show 'Connecting...' while the radio connects to the new station. The station should then start playing.
-
Page 26: Selecting A Radio Station By Genre
Selecting a radio station by genre 1. Press the Menu button to enter the main Internet radio menu. Rotate the Tuning/Select control until 'Station list' is highlighted on the display and then press the control to select. 2. Rotate the Tuning/Select control until 'Stations' is highlighted on the display and then press the control to select. -
Page 27: Searching For A Radio Station By Name
Internet Radio Searching for a radio station by name There may be occasions when you know the name of a radio station but you do not know the location or genre. This facility allows you to search for the station using a part (or parts) of the radio station name. 1. -
Page 28: Selecting A New Or Popular Station
Selecting a new or popular station As described in the section 'Internet Radio - the basics' on page 22, your radio connects via the Internet to a database of radio stations. This option is provided to highlight stations which are newly added to the list of those available, or stations which are particularly popular with listeners around the world. -
Page 29: Selecting A Podcast / Bbc Listen Again
Internet Radio Selecting a podcast / BBC Listen Again Some radio stations allow you to listen to programmes that have already been broadcast. The BBC's Listen Again service is an example of this. In addition, radio broadcasters and individuals may make programmes which are intended normally to be downloaded into a computer or copied onto a portable media player. -
Page 30: Presetting Stations
Presetting stations With so many Internet radio stations available, it is desirable to have a means of rapidly selecting the stations that you listen to most frequently. Your radio has ten memory presets which can easily be set to store the details of any Internet radio station. -
Page 31: Last Listened
Internet Radio Last Listened It is often helpful to be able to go back to a station that you have recently listened to. Your radio has a 'Last Listened' feature which provides you with quick access to the ten most recently listened to radio stations or podcasts. -
Page 32: Display Modes
Display modes - cont. c. Reliability Displays the reliability of the data stream from the station currently being received. d. Format Displays the bit rate and format of the station being received. e. Playback buffer Displays status when connecting to and playing a radio station. -
Page 33: Customising Your Radio
Internet Radio Customising your radio In addition to storing your favourite radio stations in the radio presets, your radio allows you to create customised lists of stations which can appear in two special menus on the radio called 'My Favourites' and 'My Added Stations'. - Page 34 'My Favourites'. your radio will normally display an error message of some kind. Roberts iStream 2 can play MP3, WMA and AAC internet radio streams. 5. To look at, modify or delete your favourite stations lists on the web site, use the link 'My favourites' in the 'My account' area.
- Page 35 Internet Radio Customising your radio - cont. Selecting your favourite stations 1. Press the Menu button to enter the main Internet radio menu. 2. Rotate the Tuning/Select control until 'Station list' is highlighted on the display. Press the Tuning/Select control to enter the menu. 3.
-
Page 36: Selecting Your Added Stations
In addition, as mentioned on page 33, it is possible to specify audio streams for 'My added stations' which are not compatible with your radio. In this event the station will not be playable. The Roberts iStream 2 can only play MP3, WMA, FLAC and AAC audio streams. -
Page 37: Music Player Mode
Music Player Music Player Use with Windows, Apple Mac, Linux, USB memory The Music Player allows you to play audio fi les which are stored on a Many UPnP server applications are also capable of sharing pictures and computer on your network or on a USB memory device plugged into the radio. video fi... -
Page 38: Accessing Your Audio Fi Les Via Upnp Using Windows 7 & 8
Accessing your audio fi les via a UPnP server If your computer is running Windows 7 or 8, then Windows Media Player Enabling Media Streaming in Windows Media Player 12 includes a UPnP server which will make your fi les available to your radio. There are other UPnP server solutions available for non-Windows users and for Windows users who may wish to use an alternative (see the preceding page). - Page 39 Music Player Set up UPnP access on a Windows PC - cont. 4. Rotate the Tuning/Select control until 'Shared media' is highlighted and press the control to select. The radio will scan for all available UPnP servers. It may take a few seconds for the radio to complete its scan.
-
Page 40: Locating And Playing Media Fi Les Using Upnp
Locating and playing media fi les using UPnP Once the UPnP server has been confi gured to share media fi les with your radio, you may select the fi les that you wish to play as follows:- 1. Press and release the On/Off control to switch on the unit. Press the Mode button as needed until the Music Player mode display is shown. -
Page 41: Media Selection
Music Player Media selection When searching via UPnP you will have a selection of search criteria as determined by the UPnP server software on your computer. This allows you to search by a given information type (Album, Artist, Genre, etc.) and then to narrow the search to an album or to a particular track within an album. -
Page 42: Controlling Playback
Listening to a particular track 1. If you wish to play only a particular track from an album or folder, fi rst choose the album or folder as described on the preceding pages. 2. Rotate the Tuning/Select control until the required track is highlighted. - Page 43 Music Player Controlling playback cont. Repeat tracks 1. Ensure you are in the main Music Player menu. 2. Rotate the Tuning/Select control until 'Repeat play' is highlighted. 3. To activate the repeat option press the Tuning/Select control so that 'On' appears on the display.
- Page 44 Display modes Your radio has a range of display options when in Music Player mode. Note that the availability of information depends on the specifi c media fi les, their format and upon the server capability. (Not all UPnP servers make information from the media fi...
-
Page 45: Using Usb Memory Devices
Music Player Using USB memory devices This section describes how to use your radio to access and playback your audio fi les via USB memory devices. 1. USB memory devices plug into the rectangular slot on the top of your radio on the left hand side. - Page 46 Playing fi les from USB memory devices 1. Carefully insert the USB memory device into the USB slot. Press and release the On/Off control to switch on the radio. The radio may detect that the memory has been connected, in which case it will ask whether you wish to open the folder view of the memory contents.
- Page 47 Music Player Playlists Sometimes you may wish to set up a list of music tracks or albums which can then be played without further action - as background music for a party, for example. Your radio can be confi gured to hold a queue of up to 500 tracks in a playlist menu.
- Page 48 Viewing your playlist 1. Press and release the On/Off control to switch on the unit. Press the Mode button as needed until the Music Player mode display is shown. The Music Player menu will then be shown on the display. 2.
-
Page 49: Playlists
Music Player Clearing the playlist 1. Press the Menu button to enter the main Music Player menu. 2. To clear the whole playlist rotate the Tuning/Select control until 'Clear My playlist' is highlighted on the display. Press the control. 3. To clear the whole playlist rotate the Tuning/Select control until 'YES' is highlighted on the display. -
Page 50: Prune Servers
Prune servers Your radio stores details of UPnP servers that it has seen via its network connection in its internal memory. If you use the radio at different locations you may fi nd that there are servers listed by the radio that you are no longer interested in. -
Page 51: Windows 'Play To' Function
Connect, the 'Play to' function or any remote control software such as the playlist at the computer and then tell Windows that this should be played Roberts ConnectR app. on the radio using the 'Play to' function. Using suitable software (sometimes known as a UPnP Control Point),... - Page 52 6. Windows will then open a 'Play to' window showing the track or tracks to be played. Your computer will then take control of your radio. Your radio will enter the Digital Media Renderer mode (DMR) and after a few seconds the radio will start playing.
-
Page 53: Spotify Connect
Spotify Connect Spotify Connect Spotify Connect - the basics Setting up Spotify Connect Spotify is an internet-based on line music service with millions of songs For more details about setting up Spotify Connect, please go to available which you can access wirelessly using your radio, your computer spotify.com/connect and other devices. -
Page 54: Playing Music Using Spotify Connect
Connect icon will show a list of Connect enabled devices and allow remote control of the volume. 4. To select your radio choose Roberts iStream 2 on the Spotify Connect devices screen. You are now ready to play music through your radio using Spotify Connect. -
Page 55: Controlling Spotify On Your Radio
Spotify Connect Controlling Spotify on your radio The music can be controlled using the controls on your radio as well as by any Spotify enabled device. Spotify Magic Lantern Artist: 1. Press and release the Preset button to pause playback of the current Edgar Froese track. -
Page 56: Display Modes
Display modes - Spotify Connect Spotify Your radio has a range of display options when playing Spotify Connect. Magic Lantern 1. Press the Info button to cycle through the different options. 5:05 a. Progress bar Displays the playback progress for the Spotify track currently playing. -
Page 57: Streaming Data Rate
Spotify Connect Streaming data rate - Spotify Connect Your radio is able to stream content from Spotify at different data rates. If your internet connection has a low data usage allowance, or has a relatively low maximum data rate, you may wish to specify that your radio uses a lower data rate for Spotify connections. -
Page 58: Dab Mode
DAB Radio Using DAB mode for the fi rst time 1. Carefully extend the telescopic aerial. 2. Press and release the On/Off control to switch on the radio. If the radio has been used before the last used mode will be selected. 3. -
Page 59: Selecting A Dab Radio Station
DAB Radio Selecting a DAB radio station 1. When playing a DAB radio station, the display normally shows the name of the current station with other related information. 2. Rotate the Tuning/Select control to access the radio station list and to scroll through the available stations. -
Page 60: Display Modes
Display modes Your radio has a range of display options when in DAB mode:- 1. Press the Info button to cycle through the different options. a. Text Displays text messages such as the artist or track name, phone in number, traffi... - Page 61 DAB Radio Display modes - cont. e. Bit rate and audio type Displays the digital bit rate and audio coding information for the station being listened to. Date Displays the current date. g. DL Plus text Some stations may provide other programme related information for display in addition to the regular text.
-
Page 62: Finding New Dab Radio Stations
Finding new DAB radio stations Should you wish to use your radio for DAB reception in a new location, or if no stations were detected during the initial scan, you can follow this procedure to allow your radio to fi nd out which DAB radio stations are available. -
Page 63: Manual Tuning
DAB Radio Manual Tuning Manual tuning allows you to tune directly to the various Band III DAB channels (5A to 13F). At the time of writing, all UK DAB stations are located in the range of channels 11B to 12D. 1. -
Page 64: Dynamic Range Control Settings
Dynamic Range Control settings Dynamic Range Control (also known as DRC) can make quieter sounds easier to hear when your radio is used in a noisy environment by reducing the dynamic range of the audio signal. 1. Press and release the On/Off control to switch on your radio. 2. -
Page 65: Station Order Setup
DAB Radio Station order setup Your radio has 3 station order settings from which you can choose. The station order settings are, alphanumeric, ensemble and valid. Note: The default station order on your radio is alphanumeric. 1. Press and release the On/Off control to switch on your radio. 2. -
Page 66: Prune Stations
Prune stations If you move to a different part of the country, some of the stations which were listed may no longer be available. Also, from time to time, some DAB services may stop broadcasting, or may change location or frequency. Stations which cannot be found, or which have not been received for a very long time are shown in the station list with a question mark. -
Page 67: Fm Mode
FM Radio FM Radio Operating your radio in FM mode 1. Carefully extend the telescopic aerial and press and release the On/ Off control to switch on your radio. 2. Press the Mode button as needed to select FM radio mode. 3. -
Page 68: Manual Tuning
Manual tuning 1. Carefully extend the telescopic aerial and press and release the On/ Off control to switch on your radio. 2. Press the Mode button as needed to select FM radio mode. 3. Rotate the Tuning/Select control to control the frequency that the radio will tune to. -
Page 69: Display Modes
FM Radio Display modes Your radio has a range of display options when in FM mode:- 1. Press the Info button to cycle through the different options. a. Text Displays text messages such as the artist or track name, phone in number, traffi... -
Page 70: Scan Setting
Scan setting When using the FM mode your radio can be set to either scan only for strong signals (typically local stations and major national stations) or to scan all stations including distant radio stations. 1. Press the Mode button as needed to select FM radio mode. 2. -
Page 71: Stereo / Mono Switching
It is possible to reduce this hiss by forcing the radio to play the station in mono rather than stereo. On the Roberts Revival iStream 2 radio this function only affects listening via headphones or when using the line output. For normal listening via the loudspeaker, the left and right channels of stereo broadcasts are already combined, and this control will have little or no audible effect. -
Page 72: Presetting Stations In Dab And Fm Modes
Presetting stations in DAB and FM modes There are 10 memory presets each for DAB and FM radio. They are used in the same way for each operating mode. Storing a preset 1. Press and release the On/Off control to switch on your radio. Tune to the required station using one of the methods described on the preceding pages. -
Page 73: Clock And Alarms
Clock and Alarms Clock and Alarms Automatically updating the clock Your radio will normally update the clock automatically when connected to the internet. If you enter a time setting manually, the radio will calculate a local time offset which is then stored in memory. Whenever it synchronises the clock using the internet, including after a power failure, your radio will then set the clock automatically using this information. -
Page 74: Setting The Clock Format
Setting the clock format The clock display used in Standby mode and on the playing mode screens can be set to 12 or 24 hour format. The selected format is then also used when setting the alarms. 1. With your radio switched on, press the Menu button to access the menu for the current mode. -
Page 75: Manually Setting The Clock
Clock and Alarms Manually setting the clock Your radio will normally set its clock automatically to UK time after a connection to the Internet has been established. Should you need to set the time manually, change the time zone, or manually switch from winter to summer time (GMT to BST - also known outside the UK as Daylight Savings Time), then please follow this procedure. - Page 76 Manually setting the clock - cont. 8. Rotate the Tuning/Select control to select the correct year. Press the control to enter the selection. The hour digits will then fl ash. 9. Rotate the Tuning/Select control to select the correct hour. Press the 8-14 control to enter the selection.
-
Page 77: Setting The Alarm Clock
Clock and Alarms Setting the alarm clock Your radio has two separate alarms which can be set to wake you to either the radio or a buzzer alarm. In the event of a power interruption your radio has a built in memory that will retain your alarm settings. - Page 78 Setting the alarm clock - cont. 9. Rotate the Tuning/Select control to highlight 'Enable' and press the control. The display will show the Frequency options for the alarm. The alarm frequency options are as follows: 'Off' - the alarm will be disabled 9-11 'Daily' - the alarm will sound everyday 'Once' - the alarm will sound once...
-
Page 79: When The Alarm Sounds
Clock and Alarms Setting the alarm clock - cont. 12. Rotate the Tuning/Select control until the 'Volume:' option is highlighted on the display and press the control if you wish to change it. The radio uses the saved volume setting for each alarm when it sounds. Rotate the control to set the required volume and then press the control to confi... -
Page 80: Snooze Timer
Snooze timer 1. The buzzer or radio alarm can be silenced for 5 minutes by pressing the Tuning/Select/Snooze control. Should you wish for a longer snooze duration this can be extended. Pressing the control again while the radio is snoozed will set the available snooze time to 5, 10, 15 or 30 minutes. -
Page 81: Sleep Timer
Clock and Alarms Sleep timer Your radio can be set to turn off after a preset time has elapsed. The sleep timer setting can be adjusted between 15 and 120 minutes in 15 minute Music player increments. (See also the section Inactive Standby on page 86.) AUX in 1. -
Page 82: Display And Audio
Display and Audio Equaliser function The sound on your radio can be adjusted to suit your personal taste for the material that you are listening to. The iStream 2 has a range of equaliser modes. Alternatively you may set the treble and bass levels to your own preferences which can be accessed from the My EQ menu item. - Page 83 Display and Audio Setting up your My EQ profi le If you fi nd the preset equaliser functions not to your liking, you may set up a custom treble and bass setting as follows: 1. Follow steps 1-3 on the preceding page in order to enter the Equaliser menu.
-
Page 84: Brightness And Contrast Controls
Brightness control The brightness of the display can be adjusted for when the radio is in Standby and for when it is in use. If you use the unit in the bedroom, you may prefer a lower Standby brightness level than the standard setting. There are three brightness levels and an almost off 'night-time' setting. - Page 85 Display and Audio Contrast / viewing angle control The contrast of the display can be adjusted. The adjustment also changes the angle from which the display can best be seen. Brightness Contrast Inactive Standby 1. Access the menu for the current mode by pressing the Menu button. Language Rotate the Tuning/Select control until 'System settings' is highlighted Factory Reset...
-
Page 86: Headphone Socket And Line Out Socket
Headphone socket A 3.5mm stereo Headphone Socket located on the top left hand corner of your radio is provided for use with headphones. Inserting a plug automatically mutes the internal loudspeaker. Please be aware that the sensitivity of headphones can vary widely. We therefore recommend setting the volume to a low level before connecting headphones to the radio. -
Page 87: Auxiliary Input Socket
Display and Audio Auxiliary input socket A 3.5mm stereo Auxiliary Input socket located on the top of your radio is provided for connecting the audio signal from an external audio source such as an iPod, MP3 or CD player. 1. Connect a stereo lead from the headphone output of your MP3 or CD player to the Aux In socket on the top of the radio. -
Page 88: Information
Information Factory reset If you wish to completely reset your radio to its initial state this may be performed by following this procedure. By performing a factory reset, all user entered settings will be erased. 1. Access the menu for the current mode by pressing the Menu button. Rotate the Tuning/Select control to highlight the 'Main menu' option, then press the control to select. -
Page 89: Software Update
Internet connection. You should not attempt to update your radio unless it is recommended to you by Roberts Customer Services. Updating the software may remove all network settings, radio station presets and alarm settings from your radio. -
Page 90: Network Profi Les
Network profi les Each time that you connect your radio to a WiFi network, the radio will store the details of that connection (SSID, security key, DHCP/IP address settings) as a profi le. Up to four such profi les are stored in the radio so that if the unit is used in multiple locations there is no need to enter the network settings when returning to a location previously visited. -
Page 91: Software Version Display
2. Rotate the Tuning/Select control until 'Help' is highlighted on the Friendly Name: display. Press the Tuning/Select control to enter the Help menu. Roberts iStream 2 0012 34a12a1a 3. Rotate the Tuning/Select control until 'FAQ' is highlighted. Press the control to display some frequently asked questions. -
Page 92: Friendly Name
Roberts ConnectR app, UPnP server and control software, and the Spotify app. By default, your radio's Friendly Name will be shown as the "Roberts iStream 2" followed by a 12 digit alphanumeric code which is the network MAC address that is unique to your radio. -
Page 93: Troubleshooting
Information Troubleshooting If you experience any trouble with your radio, then you may fi nd it useful You can view the radio’s MAC address using the menu items ‘Main to visit the help section on our website. Menu' -> 'System settings' -> 'Network' -> 'View settings' -> 'MAC address'. - Page 94 Troubleshooting - cont. If your radio can connect to the network, but is unable to play a particular If you cannot play the station via your PC this may indicate that the problem internet radio station, it may be due to one these causes: is not necessarily due to your radio, but it could be your network, your internet connection, the broadcaster, or internet congestion.
-
Page 95: Audio Codecs
Information Audio codecs Your radio supports a range of audio codecs which provide compatibility with a wide range of Internet Radio stations. These also allow users to stream music from their computers or to play directly from USB fl ash memory devices. Note that for any given audio codec, there are many streaming protocols available, and thus even if an Internet Radio station uses a supported format, this does not guarantee that every such station will work with your radio. -
Page 96: Cautions And Specifi Cations
Cautions • The radio should not be exposed to dripping or splashing and no objects Do not allow your radio to be exposed to water, steam or sand. fi lled with liquids, such as vases, should be placed on the radio. Do not leave your radio where excessive heat could cause damage. -
Page 97: Circuit Features
Information Specifi cations Circuit features Power Requirements Loudspeaker 75 mm full range Mains 100-240 volts AC, 50 - 60Hz only Output Power 1.0 Watt (use only the supplied adaptor) Headphone socket 3.5mm stereo Batteries 4 x LR20 (D size) Aux In socket 3.5mm stereo Line out socket 3.5mm stereo... - Page 98 Software license information Use of the software in this radio is subject to software licence terms contained in this user manual - by using the radio, you are agreeing to comply with these licence terms: Thompson Licensing: MP3 audio decoder MPEG Layer-3 audio coding technology licensed from Fraunhofer IIS and Thomson Fraunhofer: MPEG-4 HE AAC Audio decoder MPEG-4 HE-AAC audio coding technology licensed by Fraunhofer IIS:...
-
Page 99: Guarantee
In the event that it is not possible to return the product to the Roberts dealer from whom it was purchased, please contact Roberts Radio using the contact details on the www.robertsradio.com website. - Page 100 ROBERTS RADIO LIMITED PO Box 130 Mexborough South Yorkshire S64 8YT Website: http://www.robertsradio.com © 2014 Roberts Radio Limited Issue 2...
Need help?
Do you have a question about the Revival iStream2 and is the answer not in the manual?
Questions and answers