Table of Contents
Advertisement
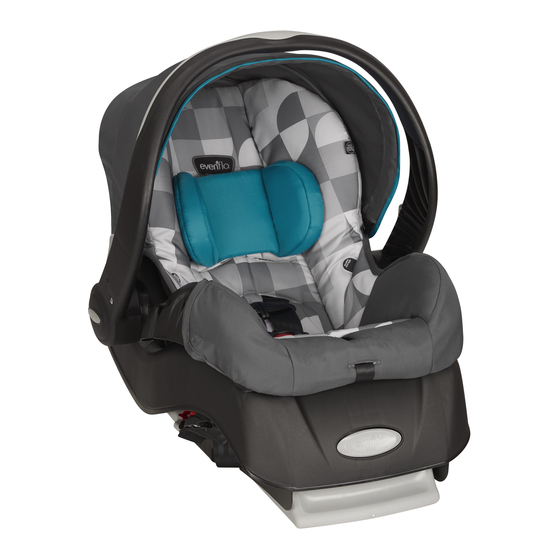
OWNER'S MANUAL
Keep for future use.
Embrace
™
Rear-facing
Child Restraint System
Child Requirements
Weight: 2.3 – 10 kg (5 – 22 lbs)
Height: 48 – 74 cm (19 – 29 in.)
WARNING
WARNING
To reduce the risk
of SERIOUS INJURY or
DEATH, read this owner's
manual prior to installing
and using this child
restraint.
25700422 11/09
© Evenflo Company, Inc. 2009
Advertisement
Table of Contents

Related Manuals for Evenflo Embrace


Summary of Contents for Evenflo Embrace
- Page 1 OWNER’S MANUAL Keep for future use. Embrace ™ Rear-facing Child Restraint System Child Requirements Weight: 2.3 – 10 kg (5 – 22 lbs) Height: 48 – 74 cm (19 – 29 in.) WARNING WARNING To reduce the risk of SERIOUS INJURY or DEATH, read this owner’s...
-
Page 2: Table Of Contents
Installing the Carrier without the Convenience Base ............28 Securing the Child in the Carrier ........31 Removing the Child from the Carrier .......32 Changing the Harness Position on an Embrace without A-Lock .............34 Changing the Harness Position on an Embrace with A-Lock ..............36 Changing the Crotch Strap Position .........38... -
Page 3: Warnings
WARNING WARNING Air Bag Warnings General Warnings • DO NOT use this restraint in the front seat of a • Failure to follow installation instructions can result vehicle equipped with an air bag. Interaction in your child striking the vehicle’s interior during between a rear facing restraint and air bags may a sudden stop or crash. - Page 4 WARNING WARNING Location Warnings – cont. • The headrest on the vehicle seat that the child faces should be placed in the lowest position. The vehicle • Some child restraints do not fit all vehicles or all seat back that the child faces must be fully padded seating locations.
- Page 5 WARNING WARNING LATCH Warnings – cont. • NEVER place this child restraint near the edges of counter tops, tables, shopping cart, or other high • When not in use, the LATCH connectors should be surfaces. The child’s movements can cause the child securely stored in the storage area located in the restraint to slide and fall.
-
Page 6: Safe Practices
Safe Practices Airplane Usage • Everyone rides buckled up or the vehicle does This restraint meets in- not go. Make no exceptions for adults or children. version requirements for Check with If someone unbuckles, stop the vehicle. Being firm airplane use. your airline before and consistent right from the start will mean fewer Airplane installation is the... -
Page 7: Visual Glossary
Belt Buckles Center Lap Belt Back Seat Retractor Lap/Shoulder Belt LATCH Anchors Seat Crease Front Seat Retractor Embrace Convenience Base Locking Clip LATCH Harness Level MPORTANT MPORTANT Adjustment Angle Indicator Indicator Consult your vehicle owner’s manual to determine proper placement of child restraint in your vehicle and familiarize yourself with your vehicle’s... -
Page 8: Front/Back View
Harness Straps Crotch Strap Buckle Anchor Carrier Release Locking Clip (here or on carrier base) Convenience Base Embrace Child Restraint with A-Lock Shown with Convenience Base Front View Back View Carrier Release Handle Canopy Handle Harness Slots Harness Slots Handle... -
Page 9: Using The Embrace Handle
Using the Embrace Handle Using the Embrace Handle To change handle positions, squeeze both red IMPORTANT: Always secure the child in the carrier. handle releases and rotate the handle to the desired Refer to “Securing your Child in the Carrier” on page 30. -
Page 10: Proper Installation With The Convenience Base
Proper Installation Installation Checklist WITH 1. Secure convenience base to the vehicle seat. the Convenience Base Convenience base is securely installed with LATCH system (shown) (p. 18). Child Requirements Weight: 2.3 – 10 kg (5 – 22 lbs) Convenience base is securely installed with Height: Top of head must be at least 25 mm (1 inch) vehicle seat belt (p. -
Page 11: Installing The Convenience Base With The Latch System
WARNING Installing the Convenience Base with the LATCH System • The carrier MUST be locked firmly into the base. Check by lifting up on the carrier. LATCH is a system for attaching the child restraint • NEVER use this child restraint in the forward-facing system to your vehicle seat. - Page 12 Installing the Convenience Base with the Vehicle Seat Belt WARNING • The carrier MUST be locked firmly into the con- venience base. Check by lifting up on the carrier. Refer to your owner’s manual to locate the lower • NEVER use this child restraint in the forward-facing anchors on your vehicle seat.
-
Page 13: The Vehicle Seat Belt
Check your vehicle seat belt type. Pull the shoulder If you have this type of seat belt tightly to remove belt (below) in your vehicle, all slack from the lap Locking MUST install the carrier portion of the belt Clip using the locking clip (p. -
Page 14: Releasing The Carrier From The Base
Releasing the Carrier from the Base The level indicator must be completely green If you have fully adjusted the convenience base and the level indicator is still not level, use a tightly rolled towel or small blanket beneath the front edge of Move the handle to the “carry”... -
Page 15: Proper Installation Without The Convenience Base
Proper Installation Installation Checklist WITHOUT 1. Place the child in the carrier. The child’s back and bottom are flat against the Convenience Base the back and bottom surfaces of the carrier. Top of child’s head is at least 25 mm (1 inch) Child Requirements below the top of the child restraint seat back. -
Page 16: Installing The Carrier Without The Convenience Base
Installing the Carrier without the Check your vehicle seat belt type. Convenience Base If you have this type of seat belt (below) in your vehicle, Locking MUST install the carrier Clip using the locking clip (p. 40). Lap/shoulder seat belt combination that has a buckle tongue that slides freely along the belt... -
Page 17: Securing The Child In The Carrier
Securing the Child in the Carrier Push down on the bottom of the seat using your full weight. Place the baby into the carrier. Baby’s bottom and back should be flat against the seat. If there is a gap, baby will not be comfortable. -
Page 18: Removing The Child From The Carrier
Embrace with A-Lock, press the harness release button while pulling upward on the To tighten the harness straps on an Embrace with harness straps A-Lock, pull the harness adjuster strap on front of the restraint, as shown. -
Page 19: Changing The Harness Position On An Embrace Without A-Lock
Changing the Harness Position on an Embrace without A-Lock When pushing the As your child grows, you will need to change the harness harness assembly strap position so they are routed through the slots through a slot, lead closest to the child’s shoulders. The shoulder harness... -
Page 20: Changing The Harness Position On An Embrace With A-Lock
Changing the Harness Position on an Embrace with A-Lock As your child grows, you will need to change the harness Insert both harness strap position so they are routed through the slots straps into the new closest to the child’s shoulders. The shoulder harness harness position slots. -
Page 21: Changing The Crotch Strap Position
Changing the Crotch Strap Position Removing the LATCH System As your child grows, you will need to change the crotch Press the adjuster release strap position so that it is in the slot closest to your child. button to loosen harness The crotch strap should ALWAYS be as close as possible strap. -
Page 22: Using The Locking Clip
Using the Locking Clip To watch a video about installing a locking clip, go to www.evenflo.com. Use the locking clip with: Lap/shoulder seat belt combination that has a buckle tongue that slides freely along the belt without locking into Hold the lap/shoulder belts together just behind the place and is equipped with free sliding buckle tongue and unfasten the seat... -
Page 23: Using As An Infant Carrier
WARNING Using as an Infant Carrier Secure the child in the carrier by following “Securing the NEVER • place this carrier near the edges of counter Child in the Carrier” on page 31. tops, tables, or other high surfaces. The child’s move- ments can cause the carrier to slide and fall. -
Page 24: Installing The Canopy
Installing the Canopy Place the optional Strap Covers over the harness straps for your child’s comfort. Insert front canopy end into the holder . Repeat on the other side. Replacement Parts Installing the Accessories Not available on all models. Not available on all models. To order replacement parts you can order online at www.evenflo.com or contact Evenflo at 1-800-233-5921. -
Page 25: Care And Cleaning
Most of the OR FITNESS FOR A PARTICULAR PURPOSE ON THIS components in this child restraint are recyclable. PRODUCT IS HEREBY DISCLAIMED. EVENFLO SHALL NOT BE LIABLE FOR ANY INCIDENTAL, CONSEQUEN- 1. Remove all fabric and padding. - Page 27 After thoroughly reading and following these instructions, store them in the carrier behind the seat pad, as shown. Answers. Advice. Affirmation. ™ • www.evenflo.com • USA: 1-800-233-5921 8 AM – 5 PM E.T. • México: 01-800-706-12-00...
Need help?
Do you have a question about the Embrace and is the answer not in the manual?
Questions and answers