Kyocera FS 9530DN Advanced Operation Manual
Kyocera operation guide copier and printer fs-9130dn, fs-9530dn
Hide thumbs
Also See for FS 9530DN:
- Service manual (274 pages) ,
- Operation manual (84 pages) ,
- Specification (2 pages)
Table of Contents
Advertisement
Advertisement
Table of Contents

Related Manuals for Kyocera FS 9530DN


Summary of Contents for Kyocera FS 9530DN
- Page 1 FS-9130DN FS-9530DN Advanced Operation Guide...
-
Page 3: Table Of Contents
Contents Handling Paper...1-1 General Guidelines ...1-2 Special Paper ...1-9 Media Type ...1-13 Loading Paper ...1-14 Using the Operation Panel ...2-1 Understanding the Operation Panel ...2-2 Canceling a Printing Job ...2-10 Using the Operation Panel ...2-11 Using the Menu Selection System ...2-19 Status Pages ...2-20 e-MPS ...2-23 Changing the Interface Parameters ...2-35... - Page 4 Contents ADVANCED OPERATION GUIDE...
- Page 5 ADVANCED OPERATION GUIDE Introduction This guide has the following chapters: • 1 Handling Paper Explains how to choose, handle and load paper. • 2 Using the Operation Panel Explains how to use the operation panel to configure the printer. • 3 Fonts Shows the available fonts.
- Page 6 Conventions Convention Italic Typeface Courier Typeface Bracket Bold Text Typeface Bold Typeface Notes Important Caution Warning This manual uses the following conventions: Description Used to emphasize a key word, phrase or references to additional information. Used to denote messages or names displayed on the operation panel.
-
Page 7: Handling Paper
ADVANCED OPERATION GUIDE 1 Handling Paper This chapter explains the following topics: • General Guidelines... 1-2 • Special Paper ... 1-9 • Media Type... 1-13 • Loading Paper ... 1-14... -
Page 8: General Guidelines
Handling Paper General Guidelines The printer is designed to print on high-quality copier bond paper (the kind used in ordinary dry copier machines), but it can also accept a variety of other types of paper within the limits specified below. NOTE: The manufacturer assumes no liability for problems that occur when paper not satisfying these requirements is used. -
Page 9: Paper Specifications
Paper Specifications Minimum and maximum paper sizes ADVANCED OPERATION GUIDE The following table summarizes the basic paper specifications. Details are given on the following pages. Item Weight Thickness Dimensional accuracy Squareness of corners Moisture content Direction of grain Pulp content The minimum and maximum paper sizes are as follows. -
Page 10: Selecting The Right Paper
Selecting the Right Paper Condition Composition Paper Sizes Envelope Monarch Envelope #10 Envelope #9 Envelope #6 Envelope DL Envelope C5 Laser printing is a process involving laser light, electrostatic discharge, toner, and heat. In addition, as the paper passes through the printer it undergoes considerable sliding, bending, and twisting motions. - Page 11 ISO B5 Executive Envelope C4 Hagaki Oufuku Hagaki Youkei 2 Youkei 4 Smoothness Basis Weight ADVANCED OPERATION GUIDE MP tray Size 250 mm 7-1/4 10-1/2 inches 324 mm 148 mm 200 mm 162 mm 235 mm 394 mm 273 mm Paper with other sizes (custom sizes) can also be fed from the MP tray.
- Page 12 Paper Weight Equivalence Table Thickness (Caliper) The paper weight is listed in pounds (lb) and metric grams per square meter (g/m ). The shaded part indicates the standard weight. U. S. Bond Weight (lb) Thick paper is referred to as high-caliper paper and thin paper as low- caliper paper.
- Page 13 Moisture Content Paper Grain Other Paper Properties ADVANCED OPERATION GUIDE Moisture content is defined as the percent ratio of moisture to the dry mass of the paper. Moisture can affect the paper’s appearance, feedability, curl, electrostatic properties, and toner fusing characteristics. The moisture content of the paper varies with the relative humidity in the room.
- Page 14 Handling Paper Electrostatic properties: During the printing process, the paper is electrostatically charged to attract the toner. The paper must be able to release this charge so that printed sheets do not cling together in the output tray. Whiteness: The contrast of the printed page depends on the whiteness of the paper.
-
Page 15: Special Paper
Special Paper ADVANCED OPERATION GUIDE This section explains printing on special paper. The page printer can use the following types of special paper. In this case, set the media type according to the table below. Paper type to be used Colored paper Preprinted paper Overhead projector... -
Page 16: Specification
Transparency Adhesive-Backed Labels 1-10 Transparency must be able to withstand the heat of fusing during the printing process. It should satisfy the conditions given in the table below. Item Tolerance of heat Thickness Material Dimensional accuracy Squareness of corners If transparency jams frequently, pull the top of the sheet very gently as it leaves the printer. - Page 17 Postcards Envelopes ADVANCED OPERATION GUIDE Some label paper is manufactured with an extra margin of top sheet around the edge. Do not remove the extra top sheet from the carrier sheet until after printing is finished. Acceptable The table below lists the specifications for adhesive label paper. Item Weight of top sheet Composite weight...
- Page 18 Thick Paper Colored Paper Preprinted Paper Recycled Paper 1-12 Do not use envelopes that have an encapsulated liquid adhesive. Avoid long printing runs consisting of envelopes only. Extensive envelope printing can cause premature printer wear. To avoid jamming due to curled envelopes, do not leave more than approximately 10 printed envelopes stacked in the paper trays during multiple envelope printing.
-
Page 19: Media Type
Media Type Paper source MP tray Media Type Plain Transparency Preprinted Labels Bond Recycled Vellum Rough Letterhead Color Prepunched Envelope Cardstock Thick High quality Custom 1 (to 8)* Yes: Can be used No: Cannot be used * This is a paper type defined and registered by the user. Up to eight types of user settings may be defined. -
Page 20: Loading Paper
Handling Paper Loading Paper The following explains the produre for loading paper. Paper can be loaded into the two paper cassettes and the MP tray. IMPORTANT: Fan the paper, then tap it on a level surface. This avoid media jams or skewed printing. Loading Paper into the Paper Cassette Up to about 500 sheets of standard paper (80 g/m ) can be loaded into the... - Page 21 Handling Paper Hold the paper guide and move it to align the paper guide with the required paper width. Paper sizes are marked inside the paper cassette. ADVANCED OPERATION GUIDE 1-15...
- Page 22 1-16 Hold the paper stopper and move it to align with the required paper length. Set the paper flush against the left-hand wall of the paper cassette. IMPORTANT:There is a sticker ( capacity attached to the inside of the paper cassette. Do not load paper above this limit.
- Page 23 ADVANCED OPERATION GUIDE Set the supplied paper size plate so that the size of the paper loaded can be checked by looking at the front of the paper cassette. Push the paper cassette back until it stops. NOTE: Before leaving the printer in disuse for a prolonged period of time, remove the paper from the paper cassette(s) and seal it in its original packaging to protect from moisture.
- Page 24 Loading Paper into the MP (Multi-Purpose) Tray 1-18 Special paper as well as standard paper can be loaded into the MP tray. When printing onto transparencies or thick paper, be sure to use the MP tray. IMPORTANT: When setting special paper, such as transparencies and thick paper, into the MP tray, select the type of paper by referring to Media Type on page 1-13.
- Page 25 ADVANCED OPERATION GUIDE Adjust the insert guides to the size of the paper to be loaded. Insert the paper along the guides as far as it will go. IMPORTANT: When loading paper into the MP tray, make sure that the print side is facing upward.
-
Page 26: Setting Envelopes
Setting Envelopes 1-20 When using the optional printer function, envelopes can be set in the MP tray. NOTE: Do not print on envelopes with flap adhesive exposed. This can cause printer malfunction. Open the MP tray. Align the insert guides with the envelope size. Position the envelope against the insert guides with the print side facing upward, and insert it as far as it will go. - Page 27 Handling Paper NOTE: Do not load more paper than will fit under the load limits on the inside of the MP tray. If the paper is considerably curled in one direction, for example, if the paper is already printed on one side, try to roll the paper in the opposite direction to counteract the curl.
- Page 28 Handling Paper 1-22 ADVANCED OPERATION GUIDE...
-
Page 29: Using The Operation Panel
ADVANCED OPERATION GUIDE 2 Using the Operation Panel This chapter explains the following topics: • Understanding the Operation Panel ... 2-2 • Canceling a Printing Job ... 2-10 • Using the Operation Panel ... 2-11 • Using the Menu Selection System ... 2-19 •... -
Page 30: Understanding The Operation Panel
Understanding the Operation Panel Message Display (Refer to page 2-4) Interface Indicator (Refer to page 2-5) The operation panel has an LCD message display, indicators, and eight keys. Operation Indicators (Refer to page 2-3) Ready - - - A4 PLAIN Keys (Refer to page 2-8) Paper Type Indicator (Refer to page 2-7) -
Page 31: Operation Indicators
Operation Indicators ADVANCED OPERATION GUIDE The following indicators light up during normal operation and when the printer needs attention. Indicator Flashing: Indicates when an error occurs that you can clear by yourself. Lit: Indicates that the printer is on-line. The printer prints received data. READY Off: Indicates that the printer is off-line. -
Page 32: Message Display
Message Display The message display gives information in the form of short messages. The nine messages listed below are displayed during normal warm-up and printing. Other messages that may appear when the printer needs the operator’s attention are explained on page 4-7 in the Operation Guide. Message The printer is self-testing after power-up. -
Page 33: Paper Size Indicator
Indicators in Message Display Paper Size Indicator ADVANCED OPERATION GUIDE The interface Indicator shows the interface that is currently used. It uses the following abbreviations: Ready A4 PLAIN Parallel interface USB interface Network interface Network interface card (option) Serial (RS-232C) interface (option) No interface is active. - Page 34 Message Display * With only the MP tray feeding NOTE: While the printer is processing data, the SIZE display indicates the paper size selected by the application software. Paper Size Folio Youkei 4* Envelope DL* Envelope C5* ISO B5* Executive* Envelope #6* Envelope #9* Japanese Postcard*...
- Page 35 Media Type Indicator ADVANCED OPERATION GUIDE This shows the media type defined for the current paper cassette. Automatic cassette switching is available according to the media type. The media type can be specified at the operation panel. Refer to Creating Custom Paper Type on page 2-82.
- Page 36 Keys The operation panel keys are used to configure the printer. Note that certain keys have a secondary function. NOTE: Settings made with these keys affect only the interface currently in use. GO Key This key switches the printer between on-line and off-line. Use this key to: •...
- Page 37 ADVANCED OPERATION GUIDE Cursor Keys The four cursor keys are used in the menu system to access an item or enter numeric values. The arrow key with the question mark ( ) may be pressed when the paper jam message has appeared on the message display. A help message will then appear to facilitate jam clearing in the location.
-
Page 38: Canceling A Printing Job
Canceling a Printing Job 2-10 While the printer displays Processing, press [CANCEL]. Print Cancel? appears on the message display followed by the interface in use. The interface is indicated by one of the following messages: Parallel Network Serial (option serial interface) Option (option network interface) Press [OK]. -
Page 39: Using The Operation Panel
Using the Operation Panel Menu Selection System These items will not appear unless the printer is installed with the applicable option. Ready --- A4 PLAIN MENU Key Print Ready PAR A4 PLAIN Menu Map Print Status Page e-MPS > >Quick Copy >Private/Stored >Print VMB Data >User ID... - Page 40 Continued Interface > >Netware Network Interface > Option >TCP/IP >AppleTalk >Network Status >Opt. StatusPage Interface > >Parallel I/F Parallel Interface > >Baud Rate Serial >Data Bits >Stop Bits >Parity >Protocol Interface Continued on the next page 2-12 >Netware > >>Frame Type Auto >TCP/IP >...
- Page 41 Continued >Print KPDL Errs Emulation > KPDL Emulation > >Print KPDL Errs KPDL(AUTO) >Alt. Emulation Emulation Line Printer Emulation IBM Proprinter Emulation DIABLO 630 Emulation EPSON LQ-850 Emulation PCL 6 Emulation >KC-GL KC-GL >KC-GL Page Set Font > >Font Select >Code Set >Print Internal >Print Option...
- Page 42 Continued Page Set > >Copies >Zoom >Orientation >Page Protect >LF Action >CR Action >Wide A4 Print Quality > >KIR Mode >EcoPrint Mode >Resolution >Print Density >Read Data Hard Disk > Continued on the next page 2-14 [CS] [CS] Portrait >Orientation Landscape Auto >Page Protect...
- Page 43 Continued RAM DISK Mode >RAM Disk Size RAM DISK Mode > >Read Fonts Memory Card > >Read Data USB Memory > Continued on the next page ADVANCED OPERATION GUIDE >Read Data >Write Data >Delete Data >Delete Font >Print Partition List >Read Data >Write Data >Delete Data...
- Page 44 Continued >MP Tray Mode Paper Handling > >MP Tray Size >MP Tray Type >Cassette1 Size > >Cassette1 Type Plain >Feed Select >Duplex Mode >Stack Select >Stack Selects >Override A4/LT >Type Adjust >Reset Type Adjust Continued on the next page 2-16 Cassette >MP Tray Mode First...
- Page 45 Continued >Printed Pages Life Counters > Security > >Encryption Code >MSG Language Others > >Form Feed Time Out 000sec. >Sleep timer >Print HEX-DUMP >Restart Printer >Resource Prot. >Buzzer >Auto Error Clear Off >Finishing Error Continued on the next page ADVANCED OPERATION GUIDE 0000001 >Overwrite Mode >Secure Format...
- Page 46 Using the Operation Panel Continued >>Print >Service > Status Page >>Paper Feed Normal >>Paper Feed > Special >>Developer >>Charger >>Drum 2-18 ADVANCED OPERATION GUIDE...
-
Page 47: Using The Menu Selection System
Using the Menu Selection System Printing the Menu Map ADVANCED OPERATION GUIDE This section explains the procedure for using the menu selection system. The menu selection system is activated by [MENU] while the printer is Ready. The printer prints a full list of menu selections. Note that menus indicated on the list may vary depending on which option units are installed on the printer. -
Page 48: Status Pages
Status Pages Printing Status Page 2-20 This section explains the procedure for printing the status pages. The status page is a list of parameters and settings for most basic printer configurations. You may be required to produce a status page when requesting service to the printer. -
Page 49: Installed Options
ADVANCED OPERATION GUIDE The following is a sample status page. The numbers below refer to the contents explained on the next page. STATUS PAGE Hardware Information Page Information Network Status Interfaces Test pattern When the Network Status is turned on, the Network Interface Status Page will be printed after the Printer Status. - Page 50 2-22 6 Network Status This shows the IP address, Subnet Mask address, and Default Gateway address for the network interface. 7 Emulation This shows all available emulations of the printer. The printer is shipped from the factory with PCL 6 emulation selected as the default. 8 Error Log This shows the last three instances of the following types of errors, listing them in the order of their occurrence:...
-
Page 51: E-Mps
e-MPS Job Retention ADVANCED OPERATION GUIDE e-MPS is an abbreviation for ‘enhanced-Multiple Printing System’ which implements the following functions that are available from the printer driver: • Job Retention • Job Storage In either job mode, when printing a document, the print data is transferred from the computer to the printer then stored on the printer’s hard disk. - Page 52 Job Storage Virtual Mailbox 2-24 Private Print Primary function To hold the document in printer to prevent unauthorized access Storing started Printer driver Retrieved by Operation panel Default number of Same as storing copies printed at retrieval Maximum number of Private jobs are jobs stored* deleted automatically...
- Page 53 Using Quick Copy Printing Additional Copies using Quick Copy ADVANCED OPERATION GUIDE This mode enables you to print the requested number of copies of a job, simultaneously storing the job on the hard disk. When additional copies are required, you can reprint the required number of copies from the printer operation panel.
-
Page 54: Using Proof-And-Hold
Deleting a Quick Copy Job Using Proof-and-Hold Printing a Private Print/Stored Job 2-26 Press [OK] to finalize the copy count. The printer prints the specified number of copies for the job. All quick copy jobs are automatically deleted when the printer is turned off. If you desire to explicitly delete a stored quick copy job, proceed as follows: Follow steps 1 through 8 in the above section to display the title of the job to be deleted. - Page 55 Releasing a Private Print/Stored Job ADVANCED OPERATION GUIDE Press [MENU]. Press repeatedly until e-MPS > appears. Press Press repeatedly until >Private/ Stored appears. The name entered in the printer driver (Harold, in this example) also appears. Press [OK]. A blinking question mark (?) appears before the user name.
- Page 56 Deleting a Private Print/Stored Job Printing a code job 2-28 You can individually delete stored jobs by performing the following procedure. Jobs saved using Private Print will be automatically deleted if you turn the power off after printing, but jobs saved using Stored Job will not be deleted automatically.
-
Page 57: Retrieving Jobs From Virtual Mailbox (Vmb)
Printing a List of Code Jobs Retrieving Jobs from Virtual Mailbox (VMB) ADVANCED OPERATION GUIDE If you select Permanent Job Storage on the printer driver, you can have a List of Code Jobs printed using the operation panel. Press [MENU]. Press repeatedly until e-MPS >... - Page 58 Printing a List of VMB 2-30 If you have named the virtual mailbox with an alias on the printer driver, the alias (Richard, in this example) will follow the number: Press [OK]. A blinking question mark (?) appears. Press [OK]. The document in the mailbox is printed and automatically deleted from the mailbox.
-
Page 59: Changing E-Mps Configuration
Changing e-MPS Configuration Changing the Maximum Number of Quick Copy/Proof-and-Hold Jobs ADVANCED OPERATION GUIDE You can change the following parameters for e-MPS operation: • Maximum number of Quick Copy/Proof-and-Hold jobs • Maximum space assigned to temporary code jobs • Maximum space assigned to permanent code jobs •... - Page 60 Maximum Space Assigned to Temporary Code Jobs 2-32 This changes the hard disk space that holds temporary code jobs. You can change the maximum space from 0 to 9999 (megabytes). The actual maximum size depends on the size of free hard disk space, however. The default size is 1/6 of the total hard disk space, rounded off in units of 50 MB.
- Page 61 Maximum Space Assigned to Permanent Code Jobs ADVANCED OPERATION GUIDE This changes the hard disk space that holds permanent code jobs. You can change the maximum space from 0 to 9999 (megabytes). The actual maximum size depends on the size of free hard disk space, however. The default size is 1/6 of the total hard disk space, rounded off in units of 50 MB.
- Page 62 Maximum Space Assigned to Virtual Mailboxes (VMB) 2-34 This changes the hard disk space for virtual mailboxes. You can change the maximum space from 0 to 9999 (megabytes). The actual maximum size depends on the size of free hard disk space, however. The default size is 1/6 of the total hard disk space, rounded off in units of 50 MB.
-
Page 63: Changing The Interface Parameters
Changing the Interface Parameters Changing Parallel Interface Modes ADVANCED OPERATION GUIDE The printer is equipped with both a parallel and serial interface or a network interface. Further, an optional RS-232C interface card or network interface card may be installed if desired. Various printing environment parameters such as the default emulation can be changed independently on different interfaces by using the printer’s menu selection system. - Page 64 Changing Serial Interface Modes 2-36 Press to display the desired mode. The display changes as shown below. Press [OK]. Auto (default) Normal High speed Nibble (high) Press [MENU]. The message display returns to Ready. You can make a serial connection by installing the optional RS-232C interface card.
-
Page 65: Changing Network Interface Parameters
Changing Network Interface Parameters ADVANCED OPERATION GUIDE Press . Setting items (e.g., Baud Rate) are displayed in the message display. Press to display each setting item. Definable baud rates: 115200, 57600, 38400, 19200, 9600, 4800, 2400, 1200 Definable data bits: 7, 8 Definable stop bits: 1, 2 Definable parity: None, Odd, Even, Ignore... - Page 66 2-38 To confirm or change network card parameters, proceed as follows: Press [MENU]. Press repeatedly until Interface > appears. One of the interface names shown below appears, indicating the current interface. Parallel (default) Network (only when an optional network interface card is installed) Option (only when an optional RS-232C interface card is installed) Serial...
- Page 67 ADVANCED OPERATION GUIDE The following example explains how to activate TCP/IP protocol to connect the printer in the network. You can select Netware or AppleTalk in a similar manner. If TCP/IP is currently displays Off, select On using . Press [OK] again. Press .
-
Page 68: Printing A Network Interface Status Page
Printing a Network Interface Status Page 2-40 Press [OK]. Press [MENU]. The message display returns to Ready. You can print out a status page for the network interface. The network interface status page shows the firmware version, the network addresses, and other information under various network protocols about the network interface. - Page 69 Using the Operation Panel Press [OK] again. >Network Status Page Press [MENU]. The message display returns to Ready. FS-9530DN Page Printer NETWORK STATUS PAGE ADVANCED OPERATION GUIDE 2-41...
-
Page 70: Making Default Settings
Making Default Settings Default Emulation KPDL (AUTO) Emulation 2-42 Using the operation panel, you can set the default for the following items. The emulation mode for the current interface can be changed. Press [MENU]. Press repeatedly until Emulation appears. One of the emulation names shown below appears, indicating the current emulation. - Page 71 Auto Printing of KPDL Error ADVANCED OPERATION GUIDE Press repeatedly until KPDL (AUTO) appears. Press [OK]. Press . When > Alt. Emulation is displayed, press names of alternative emulations appear. PCL 6 (default) KC-GL Line Printer IBM Proprinter DIABLO 630 EPSON LQ-850 Press [OK].
- Page 72 KC-GL Pen Width 2-44 Press . The message display changes to that shown below. If >Print KPDL Errs is displayed when the KPDL (AUTO) emulation is selected, press change it. Press [OK]. A blinking question mark (?) appears. Select On using Press [OK].
-
Page 73: Default Font
Default Font Selecting the Default Font ADVANCED OPERATION GUIDE Press repeatedly until the desired pen number of 1 to 8 appears. When the desired pen number is displayed, press [OK]. To change the pen width, press press [OK]. A blinking cursor appears at the width value. - Page 74 Changing Type for Courier/Letter Gothic 2-46 Press The letter before the number indicates the type of font as follows: Letter Internal fonts Soft (download) fonts Fonts in an option memory card Fonts in a RAM disk or hard disk Press [OK]. A blinking question mark (?) appears.
- Page 75 Changing the Default Font Size ADVANCED OPERATION GUIDE Press [OK]. A blinking question mark (?) appears. Select Regular or Dark using Press [OK]. Press [MENU] and the message display returns to Ready. You can change the size of the default font. If the default font is a fixed- pitch font such as Courier or Letter Gothic, the character pitch can be changed instead of the font size.
- Page 76 Setting the Character Pitch for Courier/Letter Gothic Setting the character code set 2-48 You can set the character pitch for fixed-pitch fonts when the default font is Courier or Letter Gothic. Press [MENU]. Press repeatedly until Font > appears. Press Press repeatedly until >Font Select >...
- Page 77 Printing a List of Fonts ADVANCED OPERATION GUIDE Press repeatedly until > Code Set appears. Press [OK]. A blinking question mark ( ? ) appears. Press until the desired character code set appears. Press [OK]. Press [MENU]. The display returns to Ready. To help in selecting fonts, you can print a list of the fonts including option fonts.
- Page 78 Using the Operation Panel Press [OK] again. Processing appears, then Ready. The printer prints a list of fonts with a short sample and font ID (number) for each font. Internal Scalable and Bitmapped Fonts List PRESCRIBE Font Name Scalable/Bitmap Password Selection [FSET] Font ID...
-
Page 79: Pagination
Pagination Number of Copies Selecting the Reduced Print ADVANCED OPERATION GUIDE In Page Set menus, you can set the number of copies, the page orientation, and other settings regarding pagination. You can set the number of copies of each page to be printed for the current interface. - Page 80 2-52 Bring up the Zoom menu. The following display will appear. >Zoom [CS] [CS] Source size indicator...This is the paper size before reduction. This must be the same as the paper size set for print data from the computer. Target size indicator...This is the paper size after reduction. This must be the same as the paper size set for the paper cassette.
- Page 81 ADVANCED OPERATION GUIDE Source size indicator [A3] (297 420 mm) Press [MENU]. Press repeatedly until Page Set > appears. Press Press repeatedly until >Zoom appears. Press [OK]. A blinking cursor (_) appears under the paper size. Press to select source size. Both sizes will change simultaneously.
- Page 82 Printing Orientation Page Protect Mode 2-54 You can select the portrait or landscape page orientation. The page orientation can be set whenever the message display indicates Ready. Portrait Press [MENU]. Press repeatedly until Page Set > appears. Press Press repeatedly until >Orientation appears.
- Page 83 Linefeed (LF) Action ADVANCED OPERATION GUIDE Press Press repeatedly until >Page Protect appears. Press [OK]. A blinking question mark (?) appears. Press repeatedly until Auto appears. Press [OK]. Press [MENU]. The message display returns to Ready. This procedure instructs the printer what to do when it receives a linefeed code (character code 0AH).
- Page 84 Carriage-Return (CR) Action Wide A4 Pitch 2-56 This procedure instructs the printer what to do when it receives a carriage- return code (character code 0DH). Press [MENU]. Press repeatedly until Page Set > appears. Press Press repeatedly until >CR Action appears.
- Page 85 ADVANCED OPERATION GUIDE Press [OK]. A blinking question mark (?) appears. Select On or Off using Press [OK]. Press [MENU]. The message display returns to Ready. >Wide A4 ? Off 2-57...
-
Page 86: Setting Print Quality
Setting Print Quality KIR (Kyocera Image Refinement) Mode Optimized stripes Dark vertical stripes 2-58 You can make the following settings to enhance the print quality: Kyocera Image Refinement (KIR), a software algorithm for increasing printout quality; EcoPrint, a printing mode that reduces toner consumption during printing;... - Page 87 White vertical stripes EcoPrint ADVANCED OPERATION GUIDE Set the KIR mode to On. Try printing the status page again. If you still get white vertical stripes, adjust the print density control to a darker setting. Press [MENU]. Press repeatedly until Print Quality >...
-
Page 88: Print Resolution
Print Resolution 2-60 Press [MENU]. Press repeatedly until Print Quality > appears. Press Press repeatedly until >EcoPrint Mode appears. Press [OK]. A blinking question mark (?) appears. Select On or Off using Press [OK]. Press [MENU]. The message display returns to Ready. You can set the default print resolution in three ways: 300 dpi, 600 dpi and Fast 1200 mode. - Page 89 Print Density ADVANCED OPERATION GUIDE The print density can be adjusted in five steps: from 01 (light) to 05 (dark). The factory setting is 03. Press [MENU]. Press repeatedly until Print Quality > appears. Press Press repeatedly until >Print Density appears. Press [OK].
-
Page 90: Operating The Storage Device
Operating the Storage Device Using the CompactFlash Card Reading Font Data 2-62 The printer supports four types of storage device; CompactFlash card, USB flash memory, an option hard disk, and RAM disk. The CompactFlash card and USB flash memory are installed into the dedicated slots of the printer. - Page 91 Reading Data Writing Data ADVANCED OPERATION GUIDE Press [OK]. Processing appears and the reading of data from the memory card starts. Press [MENU] to return to Ready. Data stored on a memory card can be read. To read data on a memory card, proceed as follows.
- Page 92 2-64 Press [MENU]. Press repeatedly until Memory Card > appears. Press Press repeatedly until >Write Data appears. Press [OK]. A blinking question mark (?) appears. Press [OK]. Processing appears, then Waiting. In this state, send the file from the computer to the printer. The file is written onto the memory card given a destination name (also referred to as a partition name) which the printer automatically assigns one after another as follows:...
- Page 93 Deleting Data ADVANCED OPERATION GUIDE Partition Type: Type of data written (currently only type 2 is supported). Partition Name: The destination name of data written to the card. Write Partition Length: The size of the written data on the memory card. Others: Error information.
- Page 94 Formatting 2-66 Formatting allows data to be written to the card. A new memory card must be formatted before it can be used in the printer. Formatting deletes any existing data on the memory card. To format a memory card, proceed as follows. Press [MENU].
- Page 95 Printing a List of Data Names ADVANCED OPERATION GUIDE The printer prints a list of all data names (referred to as partitions) stored in a memory card for reference. (Printing a list is also available for a font card.) To print a list of data names for the memory card, proceed as follows.
-
Page 96: Using Usb Flash Memory
Using USB Flash Memory Printing PDF data 2-68 The USB flash memory is available for only PDF file. PDF files should be stored on the root directory of USB flash memory. The PDF file name can be up to 99 single-byte characters in length. NOTE: The file name which is displayed on the message display can be up to 16 characters. - Page 97 Removing USB Flash Memory Printing a List of Data Names (Partitions) ADVANCED OPERATION GUIDE When removing USB memory from the printer, be sure to proceed with this menu to ensure safe disconnection. NOTE: If you remove USB memory without performing this operation, an error message will appear.
- Page 98 Operating an Option Hard Disk Operating the RAM Disk 2-70 Press [OK]. Processing appears, and the partition list is printed. PARTITION LIST After the USB memory partition list is printed, the message display returns to Ready. By installing the option hard disk into the printer, the e-MPS function can be used.
- Page 99 Setting RAM Disk Size ADVANCED OPERATION GUIDE For example, if the total memory installed in your printer (FS-9130DN) is 64 MB (Default), you can set 28 MB of RAM disk. If you attempt to set the RAM disk size beyond this restriction, the printer automatically rounds it down so that the size is always 36 MB less than the total printer memory.
- Page 100 2-72 Press [OK]. The selected RAM disk size is activated. Press [MENU]. The message display returns to Ready. The operations of the RAM disk are the same as those of the memory card. Refer to the relevant sections in Using the CompactFlash Card on page 2- ADVANCED OPERATION GUIDE...
-
Page 101: Paper Handling
Paper Handling MP Tray Mode Cassette Mode First Mode (Automatic Manual Feeding) ADVANCED OPERATION GUIDE You can change the MP tray mode, the paper size and type for each paper source, the sorter mode, the paper source, and paper destinations. The MP tray can be used in one of two modes: cassette mode or first mode. - Page 102 Setting the MP Tray Size 2-74 When using the MP tray in the cassette mode, you should set the MP tray size to the paper size that is used to format the job to print. If they do not match, printing will not be made on the correct size paper when automatic paper size selection is made by the application (printer driver).
- Page 103 Setting the MP Tray Type ADVANCED OPERATION GUIDE Envelope #6 Envelope DL Envelope C5 B5-R ISO B5 A4-R Press [OK]. Press [MENU]. The message display returns to Ready. You can automatically select the paper cassette according to the selection made by the application (printer driver). The factory default setting is Plain.
-
Page 104: Setting The Cassette Paper Size
Setting the Cassette Paper Size 2-76 Letterhead Color Prepunched Envelope Cardstock Thick High quality Custom 1 (to 8) When the desired MP tray type is displayed, press [OK]. Press [MENU] and the message display returns to Ready. The paper loaded in the cassette will be automatically detected and its size can be displayed in the LCD. - Page 105 Paper Size Unit Selection ADVANCED OPERATION GUIDE The paper size unit (metric or inch system) used in the message display can be selected beforehand. At the time of Ready or when selecting the size display, the unit for some paper may be replaced with the counterpart as shown in the following table.
- Page 106 Setting the Cassette Media Type 2-78 Press to select mm or inch. Press [OK]. Press [MENU]. The message display returns to Ready. Make this setting to match the media type fed from the paper cassette of the printer. If the media type is set correctly, you can perform printing using the media type selection function from the application (printer driver).
-
Page 107: Selecting The Paper Feed Source
Selecting the Paper Feed Source Duplex Printing ADVANCED OPERATION GUIDE You can select from which paper source printing will be performed. If no option units are installed, the only selections are the paper cassette and MP tray of the printer. If option paper feeders are installed, they can also be selected. - Page 108 Binding Mode 2-80 Activating the duplexer is done by selecting either short edge or long edge binding mode. NOTE: Duplex printing can be also performed from the MP tray. When the MP tray is set to First Mode (First), the paper size and paper type will be the same as those of the paper cassette currently set at the paper feed source.
-
Page 109: Selecting The Output Stack
Selecting the Output Stack ADVANCED OPERATION GUIDE Press repeatedly until >Duplex Mode appears. Press [OK]. A blinking question mark (?) appears. Press to display the desired duplex mode. The display changes as shown below. Off (default) Short edge bind Long edge bind When the desired duplex mode is displayed, press [OK]. -
Page 110: Overriding Difference Between A4 And Letter
Overriding Difference between A4 and Letter Creating Custom Paper Type 2-82 This selects whether to enable or disable the difference between A4 size and Letter size. Under the default setting of Off, the paper size of the paper source is matched to the paper size formatting the jobs. If these differ, a corresponding error message is displayed. - Page 111 Setting the Paper Weight ADVANCED OPERATION GUIDE Press Press repeatedly until >Type Adjust > appears. Press [OK]. A blinking question mark (?) appears. Press to display the desired paper type or a definable setting from among Custom 1 through Custom 8 to be registered. Plain Transparency Preprinted...
- Page 112 Setting the Duplex Path 2-84 Press [OK]. A blinking question mark (?) appears. Press to display the desired paper thickness. The display changes as shown below. For details of the default setting for each paper type, refer to Media Type on page 1-13. Paper Thickness Light Normal 1...
-
Page 113: Resetting The Custom Paper Type
Resetting the Custom Paper Type ADVANCED OPERATION GUIDE Resets the custom setting that are set in Creating Custom Paper Type on page 2-82. Press [MENU]. Press repeatedly until Paper Handling > appears. Press Press repeatedly until >Reset Type Adjust appears. Press [OK]. -
Page 114: Reading Life Counters
Reading Life Counters Displaying the Total Printed Pages 2-86 You can display the total number of pages printed by your printer for confirmation whenever necessary. The total number of printed pages can also be checked on the status page. This procedure only displays the total number of printed pages. The number cannot be changed. -
Page 115: Other Modes
Other Modes Selecting the Message Language ADVANCED OPERATION GUIDE The modes described in the following pages can be accessed in the Others submenu. To enter the Others submenu, press displayed. The following submenus can be displayed by pressing • Message Language Selecting •... -
Page 116: Automatic Form Feed Timeout Setting
Automatic Form Feed Timeout Setting Setting the Sleep Timer 2-88 Press [OK]. Press [MENU]. The message display returns to Ready. When the printer receives no data for a certain time, it times out and releases the current interface: it prints whatever data it has in its buffer and feeds out the page. - Page 117 Sleep Timer Timeout Time ADVANCED OPERATION GUIDE Press repeatedly until >Sleep timer > appears. Press and display >>Auto Sleep. Press [OK]. A blinking question mark (?) appears. Select Off using Press [OK]. Press [MENU]. The message display returns to Ready. You can adjust the timer value, the length of time the printer waits before entering sleeping mode in the absence of data.
-
Page 118: Received Data Dumping
Received Data Dumping Printer Resetting 2-90 It is possible to print data received by the printer as hexadecimal code for the purposes of debugging programs and files. Press [MENU]. Press repeatedly until Others > appears. Press Press repeatedly until >Print HEX-DUMP appears. -
Page 119: Resource Protection
Resource Protection ADVANCED OPERATION GUIDE Press Press repeatedly until >Restart Printer appears. Press [OK]. A blinking question mark (?) appears. Press [OK] again. Self test appears while the printer is resetting itself, then Please Wait followed by Ready. When you switch from the PCL 6 emulation to another, all downloaded fonts and macros are lost. -
Page 120: Alarm (Buzzer) Setting
Alarm (Buzzer) Setting 2-92 Press to display the desired mode. The display changes as shown below. Off (default) Permanent Perm / Temp (Permanent/Temporary) When the desired mode is displayed, press [OK]. Press [MENU]. The message display returns to Ready. In addition to the message displayed when the paper supply is exhausted, or when paper jamming occurs, an audio warning is made to sound according to the status. -
Page 121: Auto Continue Setting
Auto Continue Setting ADVANCED OPERATION GUIDE Press [OK]. Repeat steps 6 through 9 for each item to be changed. Press [MENU]. The message display returns to Ready. When Auto Continue is enabled, the printer will automatically print the next received data following a preset amount of time passes after any one of the following errors occurs: Memory overflow Press GO Print overrun Press GO... - Page 122 Setting the Auto Continue Recovery Time 2-94 Follow the procedure given below to change the recovery time for Auto Continue. Press [MENU]. Press repeatedly until Others > appears. Press Press repeatedly until >Auto > appears. Error Clear Press and display >>Error Clear. Press [OK].
- Page 123 Finishing Duplex Printing Error Detection Setting ADVANCED OPERATION GUIDE These settings are possible only when the optional finisher is installed on the printer. This setting controls whether or not the message Duplex disabled Press GO appears when label or some other type of paper that is not supported for duplex printing is specified as the paper type when duplex printing is being performed.
- Page 124 Staple Error Detection Setting 2-96 This setting controls whether or not message Add staples appears when the finisher units runs out of staples during output of a stabled job. Message is displayed and printing pauses. Printing resumes automatically when staples are replenished.
- Page 125 Punch Error Detection Setting ADVANCED OPERATION GUIDE This setting is possible only when the Punch Unit is installed on the optional finisher unit. This setting controls whether or not the message Chad box full appears when the chad box on the punch unit becomes full.
-
Page 126: Service Menu
Service Menu Printing the Service Status Page 2-98 The service menu contains maintenance operations to be performed by service personnel. The Print Status Page, Developer, and Drum menus appear; however, in general, you will only need to use the Print Status Page menus. -
Page 127: Fonts
3 Fonts This chapter contains explanations on the following: • List of Fonts... 3-2 ADVANCED OPERATION GUIDE... -
Page 128: List Of Fonts
Fonts List of Fonts This section contains a full list of the printer’s internal fonts. The printer has 80 PCL fonts and 136 PostScript Level 3 compatible fonts, as well as 1 bitmap font. You can print the font list from the printer by using the printer’s operation panel key. - Page 129 Fonts PCL (Scalable and Bitmap) Fonts ADVANCED OPERATION GUIDE...
-
Page 130: Kpdl Fonts
Fonts KPDL Fonts (1) ADVANCED OPERATION GUIDE... - Page 131 Fonts KPDL Fonts (2) ADVANCED OPERATION GUIDE...
- Page 132 Fonts ADVANCED OPERATION GUIDE...
-
Page 133: Options
ADVANCED OPERATION GUIDE 4 Options This chapter contains explanations on the following topics: • General Information... 4-2 • Network Interface ... 4-6 • Hard Disk... 4-8 • CompactFlash (Memory) Card ... 4-10 • USB Flash Memory ... 4-11 • Expansion Memory Modules ... 4-12 •... -
Page 134: General Information
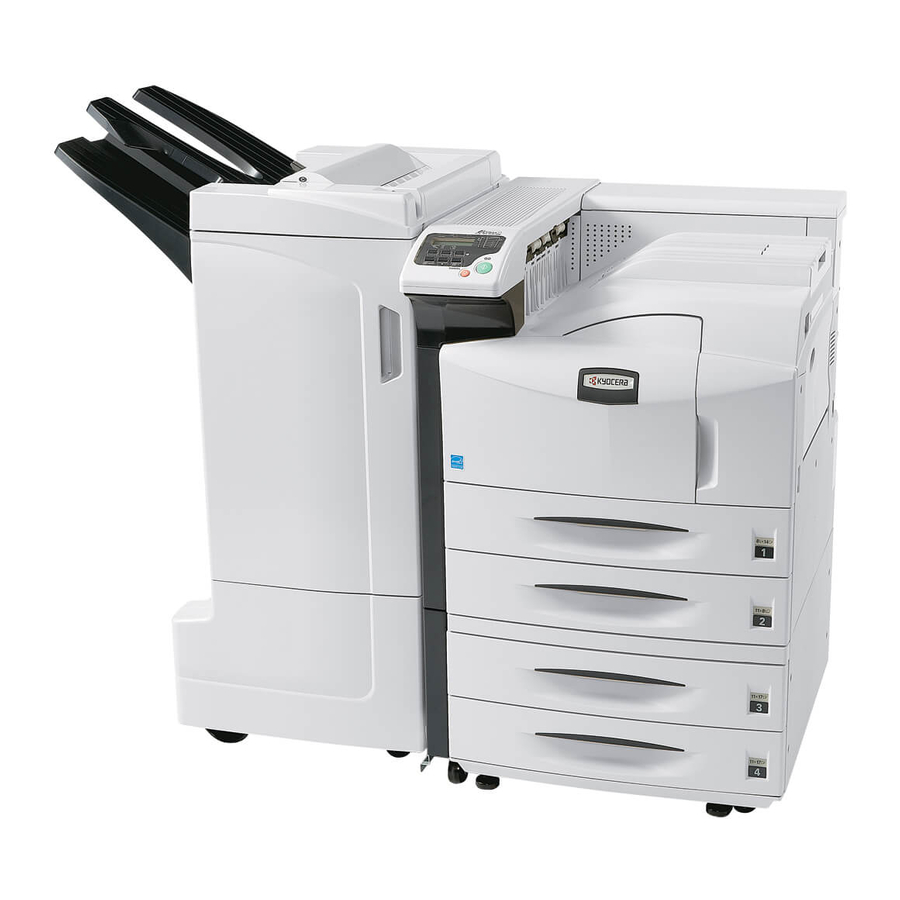
General Information Document Finisher Document Finisher DF-730 DF-710 Booklet Folder BF-710 Punch Unit PH-5A/5C/5D (for DF-710) (for DF-710) * Installed inside DF-710 The printer has the following options available. For instructions on installing individual options, refer to the documentation included with the option. -
Page 135: Network Connections
ADVANCED OPERATION GUIDE PF-700 Paper Feeder Holds approximately 500 sheets of A5 to A3 or Ledger size paper. Up to two paper feeders can be attached to the bottom of the printer. PF-750 Paper Feeder Holds approximately 3000 sheets of A4, B5 or Letter size paper. Only one paper feeder can be attached to the bottom of the printer. - Page 136 DF-710 Document Finisher Provides finishing with about 3,000 sheets at a time with high-speed and large-capacity processes. Also provides a punch function. They are installed to the left side of the printer. DF-710 DF-730 Document Finisher Provides finishing with about 1,000 sheets at a time. Also provides staple and off set functions.
- Page 137 Data Security Kit (C) ADVANCED OPERATION GUIDE • Memory DIMM See your dealer for purchasing information of the DIMM that are best suited for use with this printer. Refer to Chapter 4 Options for the installation procedure. • USB Memory USB memory for directly printing out PDF data inserts in the USB memory connector on the right side of the printer.
-
Page 138: Network Interface
Network Interface The FS-9130DN/FS-9530DN have the standard Network interface. This printer supports the TCP/IP, IPX/SPX, NetBEUI, and AppleTalk protocols, so the network printing under various platforms such as Windows, Macintosh, UNIX, and NetWare is available. An option network interface card can be added by the following procedure. Turn off the printer and disconnect the power cord and printer cable. - Page 139 ADVANCED OPERATION GUIDE Connect the network cable. Set the network address from the printer operation panel (for details about the modes,refer to Changing Network Interface Parameters on page 2-37).
-
Page 140: Hard Disk
Hard Disk Insert the hard disk into option hard disk unit slot on the printer. If a hard disk unit is installed in the printer, received data can be rasterized and stored on this hard disk. This enables high-speed printing of multiple copies using an electric sort function. - Page 141 Options Tighten the two screws to secure the hard disk unit to the main circuit board. ADVANCED OPERATION GUIDE...
-
Page 142: Compactflash (Memory) Card
CompactFlash (Memory) Card 4-10 Insert the memory card into the memory card slot located on the right side of the printer. A memory card is a microchip card that may contain option fonts, macros, forms, etc. The printer reads the contents of the card into its internal memory when printer is turned on. -
Page 143: Usb Flash Memory
Options USB Flash Memory Connect the USB memory to the USB memory slot on the right side of the printer. You can then print PDF data stored in the USB memory. Consult your dealer for USB flash memory usable with the printer. Insert the USB memory into the USB memory slot. -
Page 144: Expansion Memory Modules
Expansion Memory Modules Precautions for handling the memory module Installing the Memory Module 4-12 To expand the printer memory for more complex print jobs and faster print speed, you can plug in optional memory module (dual in line memory module) in the memory slot provided on the printer main controller board. You can select additional memory module from 64, 128, 256 or 512MB. - Page 145 ADVANCED OPERATION GUIDE Remove the screw from the memory slot cover at the back of the printer and remove the memory slot cover. Remove the DIMM from its package. Open the clips on both ends of the DIMM socket. Insert the DIMM into the socket, so that the notches on the DIMM align with the corresponding protrusions in the socket.
-
Page 146: Removing Memory Module
Removing Memory Module Testing the Expanded Memory 4-14 When you finish installing the DIMM, mount the memory slot cover and fasten it with the screw. To remove a memory module, carefully pull the end clips outwards, then pull the memory module out of the socket. After you finish installing DIMMs in the printer, test the printer to see if the installation was successful. -
Page 147: Hdd Security Function
HDD Security Function Overwrite Function Overwrite Methods ADVANCED OPERATION GUIDE Data Security Kit(C) has the functions of overwriting and encryption. NOTE: To use the HDD Security feature, an option hard disk and the Data Security Kit (C) need to be pre- installed. The printer to install this security functions (hereinafter, the machine) by temporarily storing print jobs on an internal hard disk. -
Page 148: Encryption Function
Encryption Function Operation with a hard disk Changing the Hard Disk Overwrite Method 4-16 The printer temporarily stores print jobs on an internal hard disk. If the hard disk is stolen, there is a risk that the data might be passed to unauthorized parties or modified. - Page 149 Secure Formatting ADVANCED OPERATION GUIDE Press to display the desired mode. The display changes as shown below. Normal (default) : Overwrites 3 times. (Overwrites 2 times with random data, then 1 more time with NULL data.) : Overwrites 1 time. (Overwrites with NULL Quick data.) Press [OK].
- Page 150 Options 4-18 ADVANCED OPERATION GUIDE...
-
Page 151: Computer Interface
ADVANCED OPERATION GUIDE 5 Computer Interface This chapter contains explanations on the following topics: • General Information... 5-2 • Parallel Interface ... 5-3 • USB Interface ... 5-5 • Serial Interface (Option) ... 5-6 • RS-232C Protocol ... 5-7 • RS-232C Cable Connection ... -
Page 152: General Information
General Information This chapter explains the signals used in the printer's parallel, USB, and serial (option) interfaces. It also lists pin assignments, signal functions, timings, connector specifications, and voltage levels. This chapter explains the following topics: • Parallel Interface • USB Interface •... -
Page 153: Parallel Interface
Parallel Interface Communication Modes Interface Signals In or Signal Strobe* [nStrobe] Data 0 [Data 1] Data 1 [Data 2] Data 2 [Data 3] Data 3 [Data 4] Data 4 [Data 5] Data 5 [Data 6] Data 6 [Data 7] Data 7 [Data 8] ADVANCED OPERATION GUIDE The printer features fast data transmission with the parallel interface. - Page 154 In or Signal Acknowledge* [nAck] Busy [Busy] Paper Empty [PError] Online (Select) [Select] — [nAutoFd] — — — 0 V DC — Chassis Ground — +5 V DC — Ground return — Ground return — Ground return — Ground return —...
-
Page 155: Usb Interface
USB Interface Specifications Interface Signals ADVANCED OPERATION GUIDE This printer supports the Hi-Speed USB (Universal Serial Bus) interface specifications and interface signals are as follows. Basic specification Complies with the Hi-Speed USB Connectors Printer: B-type receptacle (female) with upstream port Cable: B-type plug (male) Cable Use a shielded cable that complies with Hi-Speed USB and not longer than... -
Page 156: Serial Interface (Option)
Serial Interface (Option) Interface Signals Interface voltage levels The pins of the printer’s RS-232C interface connector carry the signals listed in the table below. The table also indicates whether each signal is incoming or outgoing with respect to the printer. In or out Signal —... -
Page 157: Rs-232C Protocol
RS-232C Protocol Parameters of the RS-232C Protocol ADVANCED OPERATION GUIDE A protocol is a set of rules the computer follows in sending data to the printer. They are indicated on the status page. Parameters can be changed from the operation panel. Refer to Changing Serial Interface Modes on page 2-36. - Page 158 H4: Parity Parameter value The factory default setting is None (0 on the status printout). H5: Protocol logic Parameter value Combination of 1 and 3 below DTR/DSR, positive logic DTR, negative logic XON/XOFF ETX/ACK XON/XOFF recognized only as protocol The factory default setting is 0. H6: Buffer nearly-full threshold This is a percentage from 0 to 99.
-
Page 159: Prescribe Frpo D0 Command
PRESCRIBE FRPO D0 command ADVANCED OPERATION GUIDE The PRESCRIBE FRPO D0 command provides control over XON/XOFF operation when an error occurs on the serial interface. The following table summarizes the error status corresponding to different D0 values. Timing of XON transfer to host while Ready or Waiting XON sent every 3 to 5 seconds XON not sent... -
Page 160: Rs-232C Cable Connection
RS-232C Cable Connection Connecting the Printer to the Computer Setting the RS-232C Parameters 5-10 Check that the power of both the printer and the computer is switched off. Discharge yourself of static electricity by touching a metal object such as a doorknob. - Page 161 ADVANCED OPERATION GUIDE System Properties window opens. Click on the Hardware tab, then click on the Device Manager button, and double click on Ports (COM & LPT). Double click on Communications Port. The Communications Port Properties dialog is displayed for the selected COM port.
- Page 162 5-12 System Properties opens. Click on the Device Manager tab, then click on the COM port to be used. Click on the Properties button. The Properties sheet is displayed for the selected COM port. Click on the Port Settings tab and set the port properties. After setting the properties, click the OK button.
-
Page 163: Glossary
Glossary AppleTalk AppleTalk offers file sharing and printer sharing and it also enables you to utilize application software that is on another computer on the same AppleTalk network. Default Gateway This indicates the device, such as a computer or router, that serves as the entrance/exit (gateway) for accessing computers outside of the network that you are on. - Page 164 KIR (Kyocera Image This is Kyocera Mita’s original smoothing function. It uses software to Refinement) enhance the printer’s resolution and produce high-quality printing. The default setting is On. KPDL KPDL is Kyocera’s implementation of the PostScript page description language Level3. MP tray This is an abbreviation for Multi-Purpose tray.
- Page 165 Access code 2-26, 2-27 Adhesive label 1-10 Alarm (buzzer) how to set 2-92 Auto error clear changing recovery time how to set 2-93 Automatic manual feeding Binding 2-80 Carriage return how to select 2-56 Code job permanent code jobs printing a code jobs 2-28 printing a list of code jobs temporary code jobs...
- Page 166 Finishing duplex printing error detection punch error detection staple error detection Font adjusting character pitch for fixed fonts 2-48 changing the default size printing lists of fonts 2-49 sample of the font list selecting regular or dark Courier/Letter Gothic 2-46 setting the default font using the operator panel 2-45...
- Page 167 Network interface a sample of the network status page installing interface cards printing a network status page protocols and parameters Number of copies how to select 2-51 Operation panel diagram how to use 2-11 menu selection system Options Orientation how to select 2-54 Output Stack how to select...
- Page 168 Specifications paper Status page how to print 2-20 understanding 2-21 Storage device deleting data 2-65 printing a list of partitions reading/writing data 2-63 Thick paper 1-12 Toner container 2-4, 2-22 Top tray 2-81 Transparency 1-10 Index-4 USB flash memory description printing a list of partitions printing PDF removing USB memory...
- Page 171 2006 is a trademark of Kyocera Corporation...
- Page 172 Rev. 1.0 2006.4...
Need help?
Do you have a question about the FS 9530DN and is the answer not in the manual?
Questions and answers