Table of Contents
Advertisement
Advertisement
Table of Contents

Related Manuals for Konica Minolta DiMAGE Z2


Summary of Contents for Konica Minolta DiMAGE Z2
-
Page 1: Instruction Manual
INSTRUCTION MANUAL 9222-2725-11 SY-A402/0402... -
Page 2: Before You Begin
Using accessories or equipment not endorsed by Konica Minolta may result in unsatisfactory per- formance or damage to the product and its accessories. Konica Minolta is a trademark of Konica Minolta Holdings, Inc. DiMAGE is a trademark of Konica Minolta Camera, Inc. Apple, Macintosh, and Mac OS are registered trademarks of Apple Computer Inc. -
Page 3: For Proper And Safe Use
For proper and safe use Read and understand all warnings and cautions before using this product. Using batteries improperly can cause them to leak harmful solutions, overheat, or explode which may damage property or cause personal injury. Do not ignore the following warnings. •... - Page 4 • Take the product to a Konica Minolta Service Facility when repairs are required. • Handling the cord on this product may expose you to lead, a chemical known to the State of California to cause cancer, and birth defects or other reproductive harm.
- Page 5 • Do not use or store the product in a hot or humid environment such as the glove compartment or trunk of a car. It may damage the product and batteries which may result in burns or injuries caused by heat, fire, explosion, or leaking battery fluid. •...
-
Page 6: Table Of Contents
About this manual The basic operation of this camera is covered between pages 12 and 33. This section of the manual covers the camera parts, preparation of the camera for use, and the basic camera operation for recording, viewing, and deleting images. Many of the features of this camera are controlled with menus. - Page 7 Advanced recording...34 Recording mode display ...34 Macro ...35 Program (P) exposure mode ...36 Aperture priority (A) exposure mode ...36 Shutter priority (S) exposure mode ...37 Manual (M) exposure mode ...38 Time exposures ...39 Movie recording...40 Exposure compensation...41 Focus area selection ...42 Attaching an accessory flash ...43 Navigating the recording menus ...44 Drive modes ...46...
- Page 8 Advanced playback...70 Playing back movies ...70 Capturing a movie frame...70 Navigating the playback-mode menu ...72 Frame-selection screen...74 Delete ...75 Format ...76 Lock...77 Movie editing ...78 Copy and E-mail Copy...80 Slide Show ...82 About DPOF ...84 DPOF setup...84 Date print...85 Index print ...85 Viewing images on a television ...86 Setup menu ...87 Opening the setup menu...87...
- Page 9 Data-transfer mode...97 System requirements ...97 Connecting the camera to a computer ...98 Connecting to Windows 98 and 98SE ...99 Automatic installation ...99 Manual installation ...100 Memory card folder organization ...102 Auto power save - data-transfer mode...103 Disconnecting the camera ...104 Windows 98 and 98 Second Edition ...104 Windows Me, 2000 Professional, and XP ...104 Macintosh ...105...
-
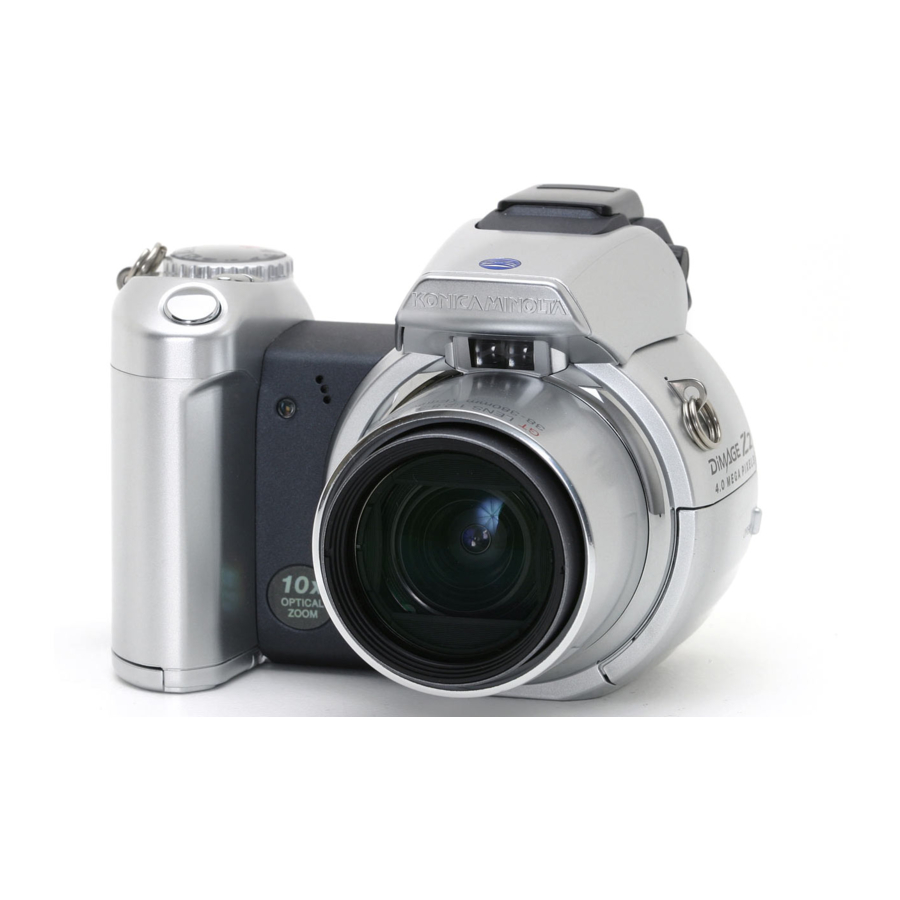
Page 10: Names Of Parts
Names of parts * This camera is a sophisticated optical instrument. Care should be taken to keep these surfaces clean. Please read the care and storage instructions in the back of this manual (p. 116). Speaker Microphone Self-timer lamp (p. 47) The USB port and AV-out terminal are located behind the card-slot door. - Page 11 Flash-mode button (p. 26) Macro button (p. 35) Exposure-mode dial (p. 21, 29, 36 - 40) Accessory shoe (p. 43) Viewfinder* (p. 17) LCD monitor* Zoom lever (p. 20) Controller Access lamp Main switch Mode switch DC terminal Menu button Quick View / Delete button (p.
-
Page 12: Getting Up And Running
Attaching the strap and lens cap Always keep the strap around your neck in the event that the camera is accidentally dropped. An optional leather neck strap, NS-DG1000, is also available from your Konica Minolta dealer. Availability varies with region. -
Page 13: Inserting Batteries
Inserting batteries This digital camera uses four AA-size alkaline or Ni-MH batteries. Do not use other types of AA bat- teries. The camera should be off when replacing batteries. To open the battery-chamber door, slide the lock to the open position (1). -
Page 14: Battery Condition Indicator
Battery condition indicator This camera is equipped with an automatic battery-condition indicator. When the camera is on, the battery-condition indicator appears on the monitor. If the monitor is blank, the batteries may be exhausted or installed incorrectly. Full-battery indicator - the battery is fully charged. This indicator is displayed for three seconds on the monitor when the camera is turned on. -
Page 15: Connecting The Optional Ac Adapter
The kit contains a high-power lithium-ion battery, holder, and charger. The battery, holder, and charger are also available separately. Contact your local Konica Minolta dealer for information on the AC Adapter and the External High- power Battery Pack EBP-100. -
Page 16: Changing The Memory Card
1 of the playback menu (p. 72). When a card is formatted, all the data on the card is permanently erased. If the card-error message appears, press the central button of the controller to close the window; check the Konica Minolta web site for the latest compatibility infor- mation: North America: http://www.konicaminolta.us/... -
Page 17: Turning On The Camera And Displays
Turning on the camera and displays Press the main switch to turn the camera on. Pressing the switch again turns the camera off. Around the main switch is the mode switch. This switch is used to change between the recording and playback modes as well as the selecting the between the monitor and viewfinder display. -
Page 18: Setting The Date And Time
Setting the date and time Set date/time? Date/Time set 2004 . 01 . 01 00 : 00 MM / DD / YYYY :move :sel. :enter Date/Time setup screen ETTING UP AND RUNNING After initially inserting a memory card and batteries, the camera’s clock and calendar must be set. -
Page 19: Setting The Menu Language
Setting the Menu language Drive m Image Drive mode Single Quality Image size 2272x1704 Auto D Quality Standard Digital Auto DSP Digital zoom LCDbrightness – Power save 1 min. Inst.Playback Lens acc. None Language English LCDbrightness Japanese Power save English Inst.Playback Deutsch Lens acc. -
Page 20: Basic Recording
BASIC RECORDING This section covers the basic operation of this camera. Thoroughly familiarize yourself with the operations in this section before moving on to the other sections in the manual. Turn on the camera. Set the mode switch to a recording position. Handling the camera While using the viewfinder or LCD monitor, grip the camera firmly with your right hand while supporting the body with your left. -
Page 21: Recording Images Automatically
Recording images automatically Turn the exposure-mode dial to the auto-recording position (1); all camera operations are now fully automatic. The autofocus, exposure, and imaging systems will work together to bring beautiful results effortlessly. While many of the camera’s systems in this mode are automatic. The flash mode (p. -
Page 22: Basic Recording Operation
Basic recording operation The example uses auto recording. Except for movie recording, the operation for other exposure modes is the same. Automatic Digital Subject Program Selection is only available in the auto recording mode. Place the subject anywhere within the focus frame. Make sure the subject is within the focus range of the lens (p. -
Page 23: Automatic Digital Subject Program Selection
Automatic Digital Subject Program Selection Automatic Digital Program Selection chooses between program autoexposure and one of five digital subject programs. The digital subject programs optimize camera setting for various conditions and subjects. Automatic Digital Subject Program Selection is only available in auto recording and can be disabled in the auto-recording menu. -
Page 24: Focus Lock
Focus lock Focus lock prevents the AF system from focusing. This can be used with off-center subjects or when a special focusing situation prevents the camera from focusing (p. 25). Focus range All distances are measured from the CCD. See page 35 for the marco focus range. -
Page 25: Focus Signals
Focus signals The focus signal in the lower right corner of the LCD monitor indicates the focus status. The shutter can be released even if the camera cannot focus on the subject. Focus locked. Focus confirmed (P, A, S, and M continuous AF focus mode and sports action digital subject program). -
Page 26: Flash Modes
Flash modes To use the built-in flash, simply raise it (1). Lower the flash unit to prevent it from firing. To change the flash mode, simply press the flash mode button (2) until the appropriate mode is indicat- Autoflash - the flash fires automatically in low-light and backlit conditions. -
Page 27: Flash Range - Auto-Recording Mode
Flash range - auto-recording mode The camera controls the flash output automatically. For well-exposed images, the subject must be within the flash range. Distance is given from the CCD plane. Because of the optical system, the flash range is not the same at the lens’... -
Page 28: Button
i+ button Pressing the information (i+) button changes the monitor display. The display cycles among the standard display, real-time histogram, and live image only. Standard display Real-time histogram Live image only The real-time histogram shows the approximate luminance distribution of the live image. This histogram cannot show the affect of flash illumination. -
Page 29: Digital Subject Programs
Digital subject programs Digital subject programs optimize the cam- era’s exposure, white-balance, and image- processing systems for specific conditions and subjects. Simply turn the exposure mode dial to select the appropriate subject program; the active subject program is dis- played in the bottom left corner of the mon- itor Portrait - optimized to reproduce warm, soft skin tones and a slight defocusing of the background. -
Page 30: Basic Playback
Single-frame playback and histogram display Mode indicator Time of capture Date of capture Lock indicator (p. 75) DPOF indicator (p. 78) Frame number/ total number of images To display the histogram display, press the up key of the controller. Press the down key to return to single-frame playback. -
Page 31: Viewing And Rotating Images
The histogram shows the luminance distribution of the image from black (left) to white (right). The 256 vertical lines indicates the relative proportion of that light value in the image. The histogram can be used to evaluate exposure, but displays no color information. Viewing and rotating images Quick View / Delete button Deleting single images... -
Page 32: I+ Button
i+ button The information (i+) button controls the display format. Each time the button is pressed, the display cycles through to the next format: full display, image only, index playback. Full display Image only Index playback Information button In index playback, the four-way keys of the controller will move the yellow border. When the image is highlighted with the border, the date of recording, the lock and printing status, and the frame number of the image are displayed at the bottom of the screen. -
Page 33: Enlarged Playback
Enlarged playback In single-frame playback in Quick View or the playback mode, a still image can be enlarged up to 6X in 0.2 increments for closer examination. Use the four-way keys of the controller to scroll the image. When scrolling, the arrows in the display will disappear when the edge of the image has been reached. -
Page 34: Advanced Recording
ADVANCED RECORDING This section cover the advanced recording features of this camera. Read the basic recording sec- tion before moving on to this section. Recording mode display A. Focus frame B. Spot metering area (p. 61) DVANCED RECORDING 1. Wide-angle converter indicator (p. 91) 2. -
Page 35: Macro
Super-macro indicator Approximate location of CCD plane Konica Minolta History Two macro modes are available: Super Macro and standard macro. Super Macro allows the camera to focus as close as 3 cm (1.7 in.) from the front of the lens or 10 cm (3.5 in.) from the CCD. -
Page 36: Program (P) Exposure Mode
Prrogram (P) Exposure mode The program exposure mode controls both the shutter speed and aperture to ensure correct exposures. This exposure mode allows photographers to shoot without worry about exposure settings. The shutter speed and aperture values of the exposure are displayed on the monitor when the shutter-release button is pressed partway down. -
Page 37: Shutter Priority (S) Exposure Mode
Shutter priority (S) Exposure mode The photographer selects the shutter speed and the camera sets the appropriate aperture to ensure correct exposure. When shutter priority is selected, the shutter speed on the monitor turns blue and a double arrow indicator appears next to it. The shutter speed can be set between 1/1000 and 15 seconds. -
Page 38: Manual (M) Exposure Mode
Manual (M) Exposure mode Manual exposure mode allows individual selection of shutter speeds and aper- tures. This mode overrides the exposure system giving the photographer total con- trol over the final exposure. The changes made to the exposure will be visible in the live image on the monitor. The monitor shutter-speed and aperture display will turn red if the image is significantly underexposed or overex- posed. -
Page 39: Time Exposures
Time exposures Time photographs can be taken in the manual-exposure mode. Exposures up to thirty seconds can be made. The use of a tripod is recommended. The camera’s exposure system cannot be used to calculate time exposures. A separate light meter can be used to determine the exposure. -
Page 40: Movie Recording
Movie recording This camera can record digital video with sound. Total recording time varies with the image size and frame rate, see page 66. Exposure compensation and the macro modes can be used. Other changes can be made with the movie recording menu (p. -
Page 41: Exposure Compensation
Exposure compensation The camera exposure can be adjusted to make the final picture lighter or darker by as much as ±2Ev in 1/3 increments. Exposure compensation can only be used with Digital Subject Programs, the P, A, and S exposure modes. With Digital Subject Programs, exposure compensation is reset when the exposure-mode dial is moved to another position or the camera is turned off. -
Page 42: Focus Area Selection
Focus area selection Individual focus areas can be selected when recording still images. With auto recording and Digital Subject Programs, focus area selection is reset when the exposure-mode dial is moved to another position or the camera is turned off. In P, A, S, and M exposure modes, the selected focus area remains active until reset. -
Page 43: Attaching An Accessory Flash
Slide the accessory-shoe cap off as shown. Mount the flash unit on the accessory shoe by sliding it forward until it stops. System Accessories The following Konica Minolta flash units are compatible with this cam- era: Maxxum/Program Flash 2500(D) Maxxum/Program Flash 3600HS(D) -
Page 44: Navigating The Recording Menus
Navigating the recording menus The recording menu displayed varies with the position of the exposure-mode dial. There are four menus depending on if auto recording, movie recording, Digital Subject Programs, or the P,A,S, and M exposure modes are selected. Pressing the menu button (1) turns the menu on and off. The four-way keys of the controller (2) move the cursor in the menu. - Page 45 Drive mode Single Image size 2272x1704 Quality Standard Auto DSP Digital zoom Auto-recording menu Drive mode Single Image size 2272x1704 Quality Standard White balance Auto Key func. Flash mode P, A, S, and M exposure-mode menu Index to menu functions Auto DSP, 56 Color mode, 63 Contrast, 63...
-
Page 46: Drive Modes
Drive modes Single-frame advance - to take a single image each time the shutter-release button is pressed (p. 22). Self-timer - to delay the release of the shutter. Used for self-portraits. Continuous advance - to take up to five images images when the shutter-release button is pressed and held. -
Page 47: Self-Timer
Self-timer Used for self-portraits, the self-timer will delay the release of the shutter for approximately ten sec- onds after the shutter-release button is pressed. The self-timer is set on section 1 of the recording menus (p. 44). With the camera on a tripod, compose the picture so the subject is within the focus frames. -
Page 48: Using The Continuous-Advance Modes
Using the Continuous-advance modes The continuous-advance drive modes allow a series of images to be captured while holding down the shutter- release button. These drive modes are set in section 1 of the recording menus. Immediately after selecting the continuous option on the menu, a selection screen is displayed to select between standard and UHS continuous advance. -
Page 49: Continuous-Advance Notes
Continuous-advance notes CONTINUOUS ADVANCE The continuous-advance drive mode can caputure up to five consectutive images. The maximum rate of capture is approximately 2.5 fps. The use of the built-in flash, the continuous-AF focus mode, or date imprinting (p. 93) will reduce the rate of capture. UHS CONTINUOUS ADVANCE UHS continuous-advance captures up to fifteen 1280x960 images at 10fps regardless of the image quality setting. -
Page 50: Using The Progressive-Capture Modes
Using the progressive-capture modes The Progressive-Capture drive modes continuously record images while holding down the shutter-release button. When the shutter button is released, the images stored in the cam- era’s buffer memory are saved. These drive modes are set in section 1 of the recording menus. -
Page 51: Progressive-Capture Notes
Progressive-CAPTURE notes The advantage of Progressive Capture over the continuous-advance drive mode is that it allows you to record events without the need to predict when the event will start. Simply hold the shutter- release button down to start saving images, and when the action happens, release the shutter but- ton to save the recorded series. -
Page 52: Bracketing
Bracketing This mode makes a three-image bracket of a scene. Bracketing is a method of taking a series of images of a sta- tic subject in which each image has a slight variation in exposure. The bracketing mode is set in section 1 of the recording menus. -
Page 53: What Is An Ev
Number of frames in bracketing series Frame counter The order of the bracket series is normal exposure, underexposure, and overexposure. The expo- sure bracket can be made in 0.3, 0.5, or 1.0 Ev increments. The larger the number, the greater the difference in exposure between the images in the bracketed series. -
Page 54: Image Size And Image Quality
Image size and image quality Changing image size affects the number of pixels in each image. The greater the image size, the larger the file size. Choose image size based on the final use of the image - smaller images will be more suitable for web sites whereas larger sizes will produce higher quality prints. - Page 55 Approximate file sizes. Size 2272 X 1704 Quality Fine Standard Economy Approximate number of images that can be stored on a 16MB memory card. Fine Standard Economy Camera Notes The frame counter indicates the approximate number of images that can be stored on the memory card at the camera’s image quality and size settings.
-
Page 56: Auto Dsp
Auto DSP Automatic Digital Subject Program Selection can be temporarily dis- abled in the auto-recording menu. When disabled, the program exposure mode is active. If the camera is turned off, Automatic Digital Subject Program Selection is activated. Digital zoom The digital zoom must be activated separately in the auto-recording, Digital Subject Program, and P, A, S, and M exposure-mode menus. -
Page 57: Focus Modes
Focus modes This camera has autofocus and manual focus control. The focus mode is selected separately in the Digital Subject Program, movie, and P, A, S, and M exposure-mode menus. When using Digital Subject Programs, the focus mode is reset when the camera is turned off. With the P, A, S, or M exposure modes or movie recording, the autofocus mode can be specified between single-shot AF and continuous AF in section 2 of the menu (p. -
Page 58: White Balance
White balance White balance is the camera’s ability to make different types of lighting appear neutral. The effect is similar to selecting daylight or tungsten film, or using color compensating filters in conventional photography. An indicator will be displayed on the monitor if a setting other than auto white-balance is chosen. -
Page 59: Custom White Balance
Custom White Balance Custom white-balance allows the camera to be calibrated to a specific lighting condition. The set- ting can be used repeatedly until reset. Custom white balance is especially useful with mixed-light- ing or when critical control over color is needed. The object used to make a calibration must be neutral. -
Page 60: Full-Time Af
Full-time AF With full-time AF active, the autofocus systems continually focuses to keep the monitor image sharp. This also reduces the autofocusing time when taking pictures. When the camera is set to manual focus, full-time AF is disabled. Turning the full-time AF function off can help conserve bat- tery power. -
Page 61: Metering Modes
Flash compensation changes the ratio between the ambient and flash exposures. When using fill- flash to reduce harsh shadows caused by direct sunlight, flash compensation changes the ratio between the highlights and shadows. The flash affects the darkness of the shadows without affect- ing the area illuminated by the sun. -
Page 62: Camera Sensitivity - Iso
Camera sensitivity - ISO Five camera sensitivity settings can be selected: Auto, 50, 100, 200, and 400; the numerical values are based on an ISO equiva- lent. ISO is the standard used to indicate film sensitivity: the higher the number, the more sensitive the film. Camera sensitivity is set in section 3 of the P, A, S, and M menus (p. -
Page 63: Color Mode
Color Mode The color mode controls whether a still image is color or black and white. This must be set before the image is recorded. The color mode is set in section 3 of the P, A, S, and M menus and section 2 of the movie menu (p. -
Page 64: Sharpness
Sharpness Sharpness accents or softens details in an image in three levels: hard (+), normal, and soft (–). This can be set in section 3 of the P, A, S, and M menus (p. 44). Any changes made are applied to the live image, but may be diffi- cult to see. -
Page 65: Custom Key Function
Custom Key function The function assigned to the flash mode button can be selected among the flash mode, drive mode, white balance, focus mode, and color mode. This can be set in section 1 of the P, A, S, and M menus (p. -
Page 66: Image Size (Movie)
The writing speed of the memory card may prematurely end the recording of a movie clip, especially with 800 X 600 images or 640 X 480 images at 30 fps. Test the card before important events. Check the Konica Minolta web site for the latest compatibility information: North America:... -
Page 67: Optical Zoom
Optical zoom The optical zoom can be used while a movie is being recorded. If the sound of the zoom is intrusive in the audio track, the zoom can be disabled in the movie menu (p. 44). A 4X digital zoom is avail- able during recording when the optical zoom is turned off. -
Page 68: A Short Guide To Photography
A SHORT GUIDE TO PHOTOGRAPHY Photography can be a rewarding pursuit. It is a broad and disciplined field that can take years to master. But the pleasure in making photographs and the joy of capturing a magical moment cannot be compared. The guide is an introduction to some basic photographic principles. The lens aperture controls not only expo- sure, but also depth of field;... - Page 69 The shutter controls not only exposure, but also the ability to stop motion. Fast shutter speeds are used in sport photography to stop action. Slow shutter speeds can be used to show the flow of motion such as water cascading over a waterfall. The use of a tripod is recommended with slow shutter speeds.
-
Page 70: Advanced Playback
ADVANCED PLAYBACK The basic functions in this mode are described in the basic playback section on pages 30 through 33. This section covers how to playback movie clips as well as the advanced function on the play- back menu. Movie clips can be played back in Quick View. Playing back movies Play Pause... -
Page 71: Capturing A Movie Frame
Capturing a movie frame A single frame from a movie clip can be copied and saved as a still image. The copied image has the same image size as the original movie. Pause Rew Fwd Vol Play Rew Fwd Saved as PICT0015.JPG. Play Rew Fwd During playback, press the center button of the con-... -
Page 72: Navigating The Playback Menu
Navigating the playback menu Pressing the menu button (1) turns the menu on and off. The four-way keys of the controller (2) move the cursor in the menu. Pressing the central button of the controller enters a setting. Activate the menu with the menu button. Use the left/right keys of the controller to highlight the appropriate menu tab;... - Page 73 Delete – Format – Lock – Edit movie – Copy – Slide show – Playback – Duration 5 sec. Repeat DPOF set – Date print Index print – E-mail copy – Image size 640x480 Refer to the following sections for descriptions of the menu options. To delete images on the memory card (p.
-
Page 74: Frame-Selection Screen
Frame-selection screen When a marked-frames setting is chosen on a menu, the frame selection screen will appear. This screen allows multiple images to be chosen. :move :sel. :enter The garbage can indicates the image is selected for deletion. The printer icon indicates the image is selected for DPOF printing. -
Page 75: Delete
Delete Deleting permanently erases the file. Once deleted, a file cannot be recovered. Care should be taken when deleting images. Single, multiple, or all files on the memory card can be deleted in section 1 of the playback menu (p. 72). The delete option has three settings: This frame The file displayed or highlighted in the playback mode is deleted. -
Page 76: Format
Format When a memory card is formatted, all data on the card is erased. The formatting function is used to erase all data on a memory card. Before formatting a memory card, copy the data to a com- puter or storage device. Locking images will not protect them from being deleted when the card is formatted. -
Page 77: Lock
Lock Single, multiple, or all files can be locked. A locked file cannot be deleted by either the playback menu functions or the QV/delete button. However, the formatting function (p. 76) will erase all files on a memory card whether locked or not. Important images should be locked. The lock function is in section 1 of the playback menu (p. -
Page 78: Movie Editing
Movie editing The edit-movie option in section 1 of the playback menu allows an unwanted section to be cut from a movie clip. The movie to be edit- ed must first be displayed in the playback mode before opening the playback menu. - Page 79 Preview edit. :function :play After playback, use the down key to continue if the edit is acceptable. To make changes to the edit, use the up key of the controller to return to the previous steps to adjust the start and end points. To cancel the edit operation, press the menu button.
-
Page 80: Copy And E-Mail Copy
Copy and E-mail Copy The copy function in section 1 of the playback menu (p. 72) makes exact copies of image or movie files and can store the copied data on another memory card. E-mail Copy in menu section 3 makes a standard 640 X 480 (VGA) or 160 X 120 (QVGA) JPEG copy of an original still image so that it may be easily transmitted by e-mail. - Page 81 Copy When the image(s) to be copied are selected, a screen with four messages is displayed. The mes- sages are highlighted during the copying procedure. Copy Copying to camera memory. Change card. Copying to card. Copying completed. Enter After the copy-completed message is highlighted, a screen indicates the Copied to 101KM_CP.
-
Page 82: Slide Show
Slide Show Section 2 of the playback menu controls the slide-show function. This function automatically dis- plays all still images and movie clips on the memory card in order. The menu has the following options: To start the slide-show presentation. Highlight “Enter” and press the Slide show Enter central button of the controller to start the slide show. - Page 83 The controller can be used to control the presentation during playback. Press the central button of the controller to pause and restart the slide show presenta- tion. The left/right keys advance to the next still image or return to the previous one. During a movie, the keys forward or rewind the clip Press the menu button to cancel the presen- tation.
-
Page 84: About Dpof
About DPOF This camera is supported by DPOF™ version 1.1. The DPOF (Digital Print Order Format) allows direct printing of still images from digital cameras. After the DPOF file is created, the memory card is simply taken to a photofinishing service or inserted into the memory-card slot of DPOF compati- ble printers. -
Page 85: Date Print
When the this-frame or all-frames setting is chosen, a screen appears requesting the number of copies of each image; a maximum of nine copies can be ordered. Use the up/down keys of the controller to set the required number of copies. If the all-frames setting was used to create a print order, any additional images recorded afterwards will not be included in the order. -
Page 86: Viewing Images On A Television
Viewing images on a television It is possible to view camera images on your television. The camera has a video-out terminal to make the connection using the supplied AV cable. The camera is compatible with the NTSC and PAL standards. The video-output setting can be checked and set in section 4 of the setup menu (p. 88). -
Page 87: Setup Menu
SETUP MENU The setup menu is used to control the camera’s functions and operation. The navigating the setup menu section covers the operation of the menu. The section is followed by detailed descriptions of the settings. Opening the setup menu The setup menu is opened from the other menus. -
Page 88: Navigating The Setup Menu
Navigating the setup menu See page 87 on how to open the menu. The four-way keys of the controller (1) move the cursor in the menu. Pressing the central button of the controller enters a setting. Use the left/right keys of the controller to highlight the appropriate menu tab; the menu changes as the tabs are highlighted. - Page 89 LCDbrightness – Power save 1 min. Inst.Playback Lens acc. None Language English File # memory Folder name Std. form Noise reductn Date/Time set – Date imprint Reset default – Audio signals Focus signal Shutter FX Volume Video output NTSC Transfer mode Data storage To set monitor brightness (p.
-
Page 90: Lcd Monitor Brightness
LCD monitor brightness Monitor brightness can be adjusted in 11 levels. Brightness can be set individually for viewfinder and direct viewing in the recording mode. Turn the mode switch to the appropriate position before opening the brightness option in section 1 of the setup menu (p. 88). Also see page 28. -
Page 91: Lens Accessory
Lens accessory This camera is compatible with the optional Wide Converter Kit ZCW-100. This kit contains a 0.75X wide- angle converter, which reduces the focal length of the zoom lens’ wide-angle position giving it the equivalent of a 28mm lens on a 35mm camera. When the converter is mounted, the lens accessory option in section 1 of the setup menu should be set to “WideConvertr.”... -
Page 92: Folder Name
The next two letters refer to Konica Minolta, and the last three numbers indicate the camera used; 004 indicates a DiMAGE Z2. A date folder name also starts with the three digit serial number and is followed by one register for the year, two register for the month, and two registers for the day: 101YMMDD. -
Page 93: Date And Time Setup
Date and time setup It is important to accurately set the clock. When a still image or a movie clip is recorded, the date and time of the recording are saved with the image and are displayed during playback or can be read with the supplied DiMAGE Viewer software. -
Page 94: Reset Default
Reset default This function affects all modes. When selected, a confirmation screen appears; choosing “Yes” resets the following functions and settings, “No” cancels the operation. Recording mode Focus area Monitor display Exposure compensation Flash mode Drive mode Image size Image quality Auto Digital Subject Selection Digital zoom Focus mode... -
Page 95: Audio Signals
Playback menu Playback (Slide Show) Duration (Slide Show) Repeat (Slide Show) Date print Index print Image size (E-mail copy) Setup menu LCD Brightness Auto-power-save period Instant playback Lens accessory File number (#) memory Folder name Noise reduction Date imprinting Audio signals Focus signals Shutter FX Volume... -
Page 96: Focus Signal
Focus signal When the shutter-release button is pressed partway down, an audio signal confirms the AF system has focused. The focus signals can be changed or turned off in section 3 of the setup menu (p. 88). Two tones are available. Shutter FX When the shutter is released, a shutter sound effect gives a positive confirmation a still image is recorded. -
Page 97: Data-Transfer Mode
The updated version of the driver software included on the supplied DiMAGE Viewer CD-ROM is required for the operation of the DiMAGE Z2 with a computer. The new software will have no affect on the performance of older DiMAGE cam- eras. -
Page 98: Connecting The Camera To A Computer
Connecting the camera to a computer Confirm the battery has sufficient power before connecting the camera to a computer; the full-bat- tery indicator should be displayed on the monitor. The use of the AC adapter (sold separately) is recommended over the use of the battery. For users with Windows 98 or 98 Second Edition, read the section on page 99 on how to install the necessary USB driver before connecting the camera to a computer. -
Page 99: Connecting To Windows 98 And 98Se
When the USB connection is completed, a drive icon, or volume, appears in My Computer or the desktop; the name varies with memory card. When using Windows XP or Mac OS X, a window opens requesting instructions on what to do with the image data; follow the directions in the window. Windows XP Windows Connecting to Windows 98 and 98 SE... -
Page 100: Manual Installation
Manual Installation TRANSFER MODE To install the Windows 98 driver manually, follow the instruc- tions in the connecting-the-camera-to-a-computer section on page 98. When the camera is plugged into the computer, the operat- ing system will detect the new device and the add-new- hardware-wizard window opens. - Page 101 The add new hardware wizard will confirm the location of the driver. The letter designating the CD-ROM drive will vary between computers. Click “Next” to install the driver in the system. One of three drivers may be located: MNLVENUM.inf, USBPDR.inf, or USBSTRG.inf. The last window confirms the driver has been installed.
-
Page 102: Memory Card Folder Organization
Memory card folder organization Drive Icon Dcim Misc 100KM004 10140801 102KM_CP 103KM_EM PICT0001.JPG PICT0002.MOV Still image Movie clip Image-file names begin with “PICT” followed by a four-digit file number and a jpg or mov extension. To copy- ing images, simply drag and drop the file icon into a location in the comput- TRANSFER MODE Once the camera is connected to the computer, image files can be... -
Page 103: Auto Power Save - Data-Transfer Mode
The number in the image file name may not correspond to the frame number of the image. As images are deleted in the camera, the frame counter will adjust itself to show the number of images on the card and reassign the frame numbers accordingly. The serial numbers used with image files will not change when an image is deleted. -
Page 104: Disconnecting The Camera
Disconnecting the camera Never disconnect the camera when the access lamp is red - the data or memory card may permanently be damaged. Windows 98 / 98 Second Edition Confirm that the access lamp is not lit. Turn off the camera and then disconnect the USB cable. Windows Me, 2000 Professional, and XP To disconnect the camera, click once on the unplug-or-eject-hardware icon located on the task bar. -
Page 105: Macintosh
The hardware devices to be stopped will be dis- played. Highlight the device by clicking on it then click “Stop.” A confirmation screen will appear to indi- cate the devices to be stopped. Clicking “OK” will stop the device. A third and final screen will appear to indicate the camera can be safely dis- connected from the computer. -
Page 106: Changing The Memory Card
Changing the memory card Never remove the card when the access lamp is red - the data or memory card may permanently be damaged. Windows 98 and 98 Second Edition 1. Turn off the camera. 2. Change the memory card. 3. -
Page 107: Uninstalling The Driver Software - Windows
Uninstalling the driver software - Windows 1. Insert a memory card in the camera and connect it to the computer with the USB cable. Other devices must not be connected to the computer during this procedure. 2. Right click on the My-computer icon. Select “properties” from the drop-down menu. Windows XP: from the start menu go to the control panel. -
Page 108: Pictbridge
PictBridge Confirm the transfer-mode option in section 4 of the setup menu is set to PictBridge. Connect the camera to a PictBridge compatible printer using the camera’s USB cable. The larger plug on the cable is connected to the printer. Open the AV out/ USB port cover and insert the smaller plug of the cable into the camera. -
Page 109: Notes On Printing Errors
No. of prints: Print size: Printer setup Layout: Printer setup Print quality: Printer setup Data print: Printer setup :start Once printing begins, the operation can be canceled by pressing the center of the controller. The printing-finished message indicates the end of the operation;... -
Page 110: Navigating The Pictbridge Menu
Navigating the PictBridge menu Pressing the menu button (1) turns the menu on and off. The four-way keys of the controller (2) move the cursor in the menu. Pressing the central button of the controller enters a setting. Activate the menu with the menu button. Use the left/right keys of the controller to highlight the appropriate menu tab;... -
Page 111: Batch Print
Batch print – Index print – Batch print Batch print in section 1 selects all still images on the memory card for printing. Two options are available: All-frames - to print all images on the card. A screen opens so the number of copies of each image can be specified. -
Page 112: Print Quality
Paper size Printer setup Sizes N. American Layout Printer setup Print quality Printer setup Data print Printer setup Sizes To set paper sizes depending on region. This changes the paper-size option to common sizes used in particular areas. Layout The layout of the print can be set. The printer-setup option uses the layout parameters of the print- er. -
Page 113: Dpof Print
DPOF print – DPOF print DPOF print in section 3 allows still images and an index print selected with the DPOF printing options in section 2 of the playback menu to be printed from a DPOF compatible PictBridge printer. Simply select the start option from the menu to begin the routine. No. -
Page 114: Appendix
APPENDIX Troubleshooting The section covers minor problems with basic camera operation. For major problems or damage, or if a problem continues to reoccur frequently, contact a Konica Minolta service facility. Problem Symptom Nothing dis- The camera played on the will not work. - Page 115 This manual contains information on products and accessories available at the time of printing. To obtain compatibility information on products not contained in this manual, contact a Konica Minolta service facility. Make sure the subject is within Subject is too close.
-
Page 116: Care And Storage
Care and storage Read this section in its entirety to get the best results from your camera. With proper care, your camera will provide years of service. Camera care • Do not subject the camera to shock or impact. • Turn off the camera when transporting. •... -
Page 117: Lcd Monitor Care
• A special built-in long-life battery supplies power to the clock and memory when the camera is off. If the camera resets each time it is turned off, the battery is exhausted. The battery must be replaced at a Konica Minolta service facility. Operating temperatures and conditions •... -
Page 118: Memory Cards
Memory cards should not be used to permanently store image data. Always make a copy of camera files on an appropriate storage device or recording media. Konica Minolta has no responsibility for any loss or damage to data. PPENDIX... -
Page 119: Before Important Events And Journeys
Questions and service • If you have questions about your camera, contact your local camera dealer or write to the Konica Minolta distributor in your area. • Before shipping your camera for repair, please contact a Konica Minolta Service Facility. -
Page 120: Quicktime System Requirements
QuickTime system requirements IBM PC / AT Compatible Pentium processor-based PC or compatible computer Windows 98, Me, 2000, or XP. 128MB or more of RAM Videoimpression system requirements To install ArcSoft VideoImpression, follow the instructions in the installer. Windows 98, Me, 2000, or XP. Pentium III 450 processor or equivalent. - Page 121 CE stands for Conformité Européenne (European Conformity). FCC Compliance Statement Declaration on Conformity Responsible Party: Konica Minolta Photo Imaging U.S.A. Inc. Address: 725 Darlington Avenue, Mahwah, NJ 07430 This device complies with Part 15 of the FCC Rules. Operation is subject to the following two condi- tions: (1) This device may not cause harmful interference, and (2) this device must accept any inter- ference received, including interference that may cause undesired operation.
-
Page 122: Technical Specifications
Technical specifications CCD: Number of effective pixels: Total number of pixels: Camera sensitivity (ISO): Aspect ratio: Lens construction: Maximum aperture: Focal length: Focusing range (from the CCD): Autofocusing system: Focus modes: Shutter: Shutter speeds: Built-in flash recycling time: Monitor LCD: Monitor field of view: Viewfinder field of view: A/D conversion:... - Page 123 You are in good hands. We offer support for our digital products 24 hours per day on www.konicaminoltasupport.com. Camera know-how, image composition, digital image editing: discover more about Konica Minolta’s new internet world and visit www.konicaminoltaphotoworld.com www.konicaminoltaphotoworld.com Curious? After free registration into Konica Minolta Photo World, the whole world of the Konica Minolta photography is open to you.
- Page 124 Konica Minolta Photoworld: www.konicaminoltaphotoworld.com Become a member of the Konica Minolta Photo World today. It is free for registered customers of Konica Minolta Werden Sie noch heute Mitglied der Konica Minolta Photo World. Die Mitgliedschaft ist für registrierte Konica Minolta-Kunden kostenlos! Devenez dès aujourd’hui, membre du Konica Minolta Photo World.
Need help?
Do you have a question about the DiMAGE Z2 and is the answer not in the manual?
Questions and answers