Table of Contents
Advertisement
Quick Links
Advertisement
Table of Contents

Related Manuals for Hangar 9 P-40B Warhawk 50 ARF


Summary of Contents for Hangar 9 P-40B Warhawk 50 ARF
- Page 1 P-40B Warhawk 50 ARF Assembly Manual...
-
Page 2: Table Of Contents
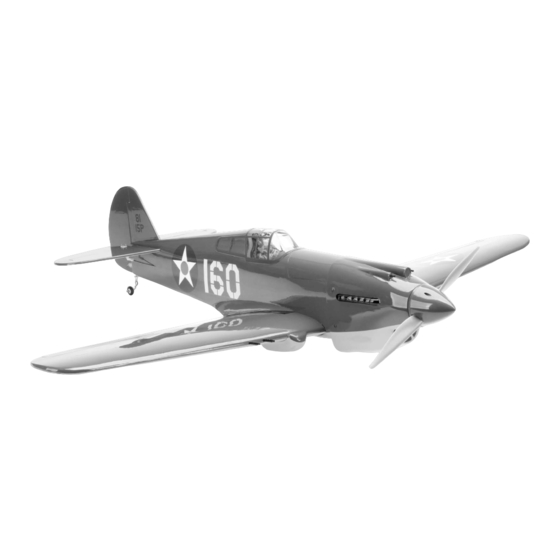
Table of Contents Introduction NOTICE Introduction ..............2 The Hangar 9 P-40B Warhawks 50 ARF is a unique take on All instructions, warranties and other collateral Product Support ...............2 this warbird icon. It’s modeled after the Warkhawks flown by documents are subject to change at the sole discretion Specifications ..............2... -
Page 3: Included Parts Listing
2mm assembled wire 20mm x 20mm plywood plate Fuel line holder with 1-inch wheel Tail wheel 62mm x 103mm plywood tray Optional battery tray Hardwood angled spacer Small (2), Large (2) Hangar 9 P-40B Warhawk 50 ARF... -
Page 4: Contents Of Kit And Parts Listing
This kit includes small parts and should not be left 9. HAN259509 Tail Wheel Assembly unattended near children as choking and serious injury 10. HAN259515 Spinner, 86mm could result. 11. HAN259516 Wheel Set, 3 -inch (89mm) Hangar 9 P-40B Warhawk 50 ARF... -
Page 5: Important Information Regarding Warranty
25–46 100 Deg Rotating Retracts EFLG320 etc. Remember to take your time and follow the directions. 6-inch (152mm) Servo Extension SPMA3051 Optional Pilot 1/9 Pilot, Military with Goggles HAN9108 Hangar 9 P-40B Warhawk 50 ARF... -
Page 6: Field Equipment Required
9 ounces (260cc) Ruler Sanding drum Scissors Side cutters Spray bottle Square Straight edge T-pins Tie-wraps Toothpicks Vise grips Needle nose pliers Hangar 9 P-40B Warhawk 50 ARF... -
Page 7: Aileron Servo Installation
This creates a tunnel for the CA to wick into, creating a better bond between the hinge and surrounding wood. Prepare both the slots in the aileron and wing at this time. Hangar 9 P-40B Warhawk 50 ARF... - Page 8 12. Use 30-minute epoxy to glue the 17mm x 19mm x 10mm hardwood blocks to the servo cover with the end grain contacting the servo cover. Allow the epoxy to fully cure before proceeding. Hangar 9 P-40B Warhawk 50 ARF...
- Page 9 14. Use a drill and 5/64-inch (2mm) drill bit to drill the holes for the four mounting screws. Do not use a CA accelerator. Using an accelerator will not allow the CA to soak into the fibers of the wood, hardening the blocks. Hangar 9 P-40B Warhawk 50 ARF...
- Page 10 CA in each of the holes that will accept the block located in the aileron. Use a felt-tipped pen to mark the servo cover mounting screws. locations for the three mounting screws on the aileron. Hangar 9 P-40B Warhawk 50 ARF...
-
Page 11: Joining The Wing Panels
28. Repeat Steps 2 though 27 to install the remaining aileron servo. Make sure you install the servo so you have a right and left servo installation. Hangar 9 P-40B Warhawk 50 ARF... - Page 12 Make sure the wing panels fit tightly together. Clean any epoxy using a paper towel and rubbing alcohol. Use low-tack tape to keep the panels tightly together while the epoxy cures. Hangar 9 P-40B Warhawk 50 ARF...
- Page 13 7. Use low-tack tape to hold both wing panels tightly together until the epoxy fully cures. Make sure the leading edge and trailing edges of the wing at the joint are aligned with each other. Hangar 9 P-40B Warhawk 50 ARF...
-
Page 14: Fixed Gear Installation
2. Test fit the main gear into the wing. There is a left and right, and the axle will point toward the wing tip when installed. Use a pencil to transfer the locations for the mounting screws onto the landing gear rails inside the wing. Hangar 9 P-40B Warhawk 50 ARF... - Page 15 Be careful not to heat the blister too much as you could distort the plastic. Hangar 9 P-40B Warhawk 50 ARF...
- Page 16 10 against the wheel, but not so tight as it prevents the wheel from rotating smoothly. Use a 1.5mm hex wrench (included) to tighten the setscrew. Remember to use threadlock on the setscrews to prevent these from vibrating loose. Hangar 9 P-40B Warhawk 50 ARF...
-
Page 17: Optional Retract Installation
5/64-inch (2mm) drill bit to drill the holes in the landing gear rails for the landing gear mounting screws. 2. Use a pencil to mark the template, locating the center of the template. Hangar 9 P-40B Warhawk 50 ARF... - Page 18 This will make the screws at an angle that will cause them to fail over time. more secure and help prevent them from vibrating loose. Hangar 9 P-40B Warhawk 50 ARF...
- Page 19 13. Use canopy glue to secure the wheel well to the wing. Use low-tack tape to hold the well in position until the glue fully cures. Hangar 9 P-40B Warhawk 50 ARF...
- Page 20 Be careful not to heat the blister too much as you could distort the plastic. Hangar 9 P-40B Warhawk 50 ARF...
-
Page 21: Wing And Belly Pan Installation
Use a small amount of 30-minute epoxy to each of the prongs to secure the blind nut in the wood. Use care not to get any epoxy into the threads of the blind nut. Hangar 9 P-40B Warhawk 50 ARF... -
Page 22: Stabilizer And Elevator Installation
Make sure to use a new #11 blade and use light pressure to trim only the covering. Avoid cutting into the underlying wood, which could weaken the structure of your model. Hangar 9 P-40B Warhawk 50 ARF... - Page 23 Make sure to mark the elevators and joiner wire so they can fuselage to correct any alignment issues. step. Remove the covering, exposing the wood at the be oriented later in this section of the manual. center of the stabilizer. Check Alignment Hangar 9 P-40B Warhawk 50 ARF...
- Page 24 14. Place a T-pin in the center of two hinges. Insert the using denatured alcohol and a paper towel. hinges into the elevator as shown. 15. Repeat steps 11 through 14 to prepare the remaining elevator. Hangar 9 P-40B Warhawk 50 ARF...
- Page 25 21. Once the stabilizer and elevators have been installed and the glue has fully cured, remove the wing from the fuselage and set it aside in a safe location. Hangar 9 P-40B Warhawk 50 ARF...
-
Page 26: Rudder And Fin Installation
Make sure to use a new #11 blade and use light pressure to trim only the covering. Avoid cutting into the underlying wood, which could weaken the structure of your model. Hangar 9 P-40B Warhawk 50 ARF... - Page 27 This will allow the epoxy to adhere to the wire when it is glued into position. 10. Place a T-pin in the center of three hinges. Insert the hinges into the rudder as shown. Hangar 9 P-40B Warhawk 50 ARF...
-
Page 28: Electric Motor And Speed Control Installation
Allow the CA to cure without the use of an accelerator for the best results. 2. Remove the hatch from the fuselage by sliding it forward, then lifting it at the rear. Set the hatch aside. Hangar 9 P-40B Warhawk 50 ARF... - Page 29 Once the shaft has been Make sure to use threadlock on the screws to prevent them repositioned, attach the propeller adapter on the motor using from vibrating loose. the hardware provided with the adapter. Hangar 9 P-40B Warhawk 50 ARF...
- Page 30 10. Connect the motor leads. Make sure they won’t interfere with the operation of the motor. Tie-wrap the motor leads to the motor box if necessary. Hangar 9 P-40B Warhawk 50 ARF...
-
Page 31: Electric-Powered Radio Tray, Receiver And Motor Battery Installation
Use a pencil to mark the location for the screws that will secure the servo to the servo tray. Hangar 9 P-40B Warhawk 50 ARF... -
Page 32: Glow Engine Installation
2. Use low-tack tape to secure the engine mounting template for the Saito/Evolution installation to the fuselage. Use a drill and 1/16-inch (1.5mm) drill bit to drill the pilot holes for the engine mount and throttle pushrod into the firewall. Hangar 9 P-40B Warhawk 50 ARF... - Page 33 (57mm) from the ends of the tube. If you are installing a four-stroke engine, cut the tube to a length of 6 inches (168mm). Sand the first 1/4 inch (6mm) and the opposite end 2 inches (57mm). Hangar 9 P-40B Warhawk 50 ARF...
- Page 34 8b. (Four-stroke) Slide the tube into the fuselage. Position the tube flush with the firewall. Use medium CA to glue the tube in the fuselage. Hangar 9 P-40B Warhawk 50 ARF...
-
Page 35: Glow-Powered Radio Tray And Fuel Tank Installation
6. Apply 1–2 drops of thin CA in each hole drilled. This pencil to mark the location for the screws that will secure the will harden the surrounding wood, making the screws more servo to the servo tray. secure when installed. Hangar 9 P-40B Warhawk 50 ARF... - Page 36 FG-14B. multiple locations for the switch, so choose the one that best aircraft will balance correctly. suits your application. Hangar 9 P-40B Warhawk 50 ARF...
-
Page 37: Rudder, Elevator And Throttle Pushrod Installation
2. Place the servo horns on the rudder and elevator control horn with the rudder hinge line. Use a felt-tipped pen servos. Remove any unused arms using side cutters to avoid to mark the locations for the control horn mounting screws. interference. Hangar 9 P-40B Warhawk 50 ARF... -
Page 38: Cowl Preparation And Installation
Two M2 washers have been provided with the connector. Use these to set the spacing between the clip and servo horn so the connector fits tightly without any excess movement. Hangar 9 P-40B Warhawk 50 ARF... - Page 39 We removed the engine from the fuselage to slide the cowling into position. Make sure to verify the cowling is positioned so the front of the cowling is 4 inch (124.5mm) from the firewall when marking the cowling. Hangar 9 P-40B Warhawk 50 ARF...
- Page 40 #1 Phillips screwdriver. When installing the fuel filler in the cowl, make sure to position it lower on the cowl so it will not interfere with the installation of the exhaust stacks. Hangar 9 P-40B Warhawk 50 ARF...
-
Page 41: Canopy And Machine Gun Installation
2. Use a hobby knife with a #11 blade to trim the instrument panel from the decal sheet. Apply the instrument panel decal in the cockpit as shown. Front Hangar 9 P-40B Warhawk 50 ARF... - Page 42 7. Use canopy glue to glue the canopy to the fuselage. Make sure the canopy does not overlap onto the fuselage hatch. Use low-tack tape to hold the canopy in position until the glue fully cures. Hangar 9 P-40B Warhawk 50 ARF...
-
Page 43: Decal Installation
2. (Fixed Gear CG) When flying your model with fixed gear, the recommended Center of Gravity (CG) location is inches to 2 inches (60mm to 73mm) back from the leading edge on the top of the wing against the fuselage. Hangar 9 P-40B Warhawk 50 ARF... -
Page 44: Control Throws
If the tail hangs low, add weight to the nose of the Right: inches 30 mm aircraft. Self-stick weights (HAN3626) are available at your Left: inches 30 mm local hobby store and work well for this purpose. Hangar 9 P-40B Warhawk 50 ARF... -
Page 45: Safety Do's And Don'ts For Pilots
If any critical switches are on without your knowledge, the transmitter alarm will sound a warning. • 6. Check that all trim levers are in the proper location. • 7 . All servo pigtails and switch harness plugs should be secured in the receiver. Make sure the switch harness moves freely in both directions. Hangar 9 P-40B Warhawk 50 ARF... -
Page 46: Warranty Services
For more information about where you can drop off your Champaign, Illinois horizon Product Support office. waste equipment for recycling, please contact your local city 61822 USA office, your household waste disposal service or where you productsupport@horizonhobby.com purchased the product. 877-504-0233 Hangar 9 P-40B Warhawk 50 ARF... -
Page 47: Academy Of Model Aeronautics National Model Aircraft Safety Code
5. RC model aircraft will not operate within three (3) miles of any pre-existing flying site without a frequency-management • F ree Flight fuses or devices that burn producing smoke and are agreement (AMA Documents #922- Testing for RF Interference; securely attached to the model aircraft during flight. #923- Frequency Management Agreement) Hangar 9 P-40B Warhawk 50 ARF... - Page 48 Hangar9.com Hangar 9, Evolution, JR, DSM2, PowerPro, EC3, UltraCote and the Horizon Hobby logo are trademarks or registered trademarks of Horizon Hobby, Inc. DSMX is a trademark of Horizon Hobby, Inc., registered in the US. The Spektrum trademark is used with permission of Bachmann Industries, Inc.
Need help?
Do you have a question about the P-40B Warhawk 50 ARF and is the answer not in the manual?
Questions and answers