
Related Manuals for Franke PURA PRONTO


Summary of Contents for Franke PURA PRONTO
- Page 1 PURA PRONTO & FRESCO Original Operating Instructions Read the operating instructions and the chapter on safety information before operating the machine. Keep the operating instructions near the machine.
- Page 3 Pura is a powerful and space-saving coffee machine. It adapts to your needs perfectly. Your customers will be impressed as you quickly prepare high- quality, customized coffee specialties. We hope you enjoy your coffee machine and that it will bring you consistently happy customers. Sincerely, FRANKE Kaffeemaschinen AG...
-
Page 4: Table Of Contents
Table of contents . . . . . . . . . . . . . . . . . . . . . . . . . . . . . . . . . 3 . -
Page 5: Explanation Of Symbols
Explanation of symbols So that you can get the most out of your Pura, we would like to familiarize you with the symbols used in the operating instructions and the software. For us, thorough information and open communica- tion go without saying. Symbols from the Operating instructions DANGER indicates potentially life- This symbol indicates tips, shortcuts... -
Page 6: Symbols Used In The Software
Symbols used in the software Products Navigation Symbol Designation Description Symbol Designation Description Cancel Press to cancel a product or setting. Product level Press to switch to the Product level to prepare drinks. Maintenance level Press to switch to Maintenance level to Product repetition Press to prepare two of the same product at perform maintenance tasks or adjust the... - Page 7 Configuration Symbol Designation Description Press to confirm values or input. Press to delete individual characters in the input field. CLEAR Press to clear all information in the input field. CLEAR EXIT Press to cancel input and exit the menu. Values that have been changed will not be saved.
-
Page 8: For Your Safety
Pura coffee machine. • Have the machine serviced at regular intervals. Regular mainte- Only use pre-cooled milk (2 - 5 °C or 36 - 41°F). Only use FRANKE nance will ensure the safe operation and high performance of cleaning solution. -
Page 9: Eneral Safety Concerns When Using The Ura
General safety concerns when using the Pura DANGER WARNING Risk of death by electrocution! Risk of injury, eye injury and damage to the machine! • Never operate a machine that has been damaged or has a dam- Objects in the bean hopper, powder container or grinder may splinter aged power supply cable. - Page 10 CAUTION NOTICE Illness due to bacteria build-up! Damage from foreign objects! Using a water filter for too long can lead to build-up of algae. Putting foreign objects into the brewing unit can cause dam- age to the machine. • Replace the water filter as per the maintenance instructions. •...
-
Page 11: Cope Of Delivery And Identification
Scope of delivery and identification The Pura is a powerful coffee machine. Its modern operating concept will help you keep your cool in any situation. Listed below are ways to identify your machine and what is included in the standard delivery. Scope of delivery Pura Cleaning tablets... -
Page 12: Operating Instructions
Additional accessories may be obtained directly from your retailer or For conveying milk. To lock the door. from FRANKE Kaffeemaschinen AG in Aarburg, Switzerland. For setting the degree of grind- (Grind coarseness may only be ad- justed by a service technician.) -
Page 13: Identification
Identification Type plate Chill & Cup type plate (Pura fresco as an example) (as an example for add-on units) Franke Kaffeemaschinen AG Typ 648 Franke-Strasse 9 Model CH-4663 Aarburg (for model codes, see below) Switzerland C 2M 1P H CE W... -
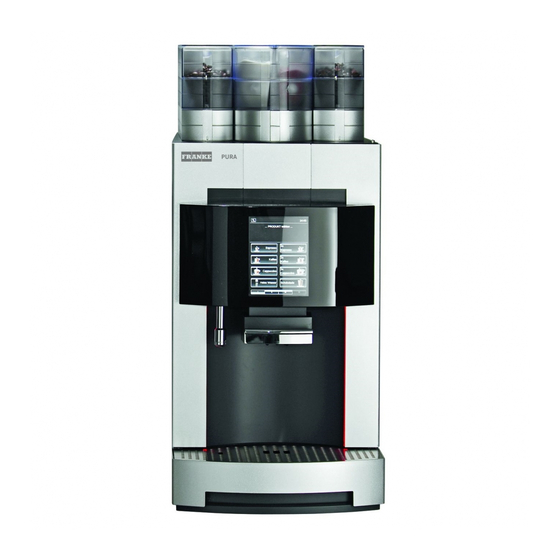
Page 14: Description Of The Machine
Description of the machine You have chosen enjoyment of every single coffee with the Pura. In this section you will learn more about the functions and options of your coffee machine and where the con- trols are located. Pura machine Coffee bean hopper Introduction The Pura is available in two models. -
Page 15: Pura Components
Pura components Powder drawer Powder drawer On/Off switch (behind door) Powder drawer grip Telescopic outlet Unlocking lever (coffee bean and powder container) Powder chute Outlet Mixing chamber insert Housing cover Housing base Water tank Dispenser head Handle Brewing unit Cover Grounds container Tablet insert Lever with red head... -
Page 16: Touch Display
Touch display Display structure Product preparation display (as an example) Change to Maintenance level Status display 16:04 16:04 See page 44. Coffee 16:04 16:04 Information area Time 16:04 16:04 Information/prompts Coffee Coffee Coffee small 16:04 16:04 Product cancel 2 Coffee Latte small Selection area... -
Page 17: Add-On Units
Add-on units Refrigeration unit (optional) In many regions, milk is part of a good cup of coffee. You can connect the milk cooler directly to the Pura to make sure the milk doesn't spoil. On/Off switch (located on the rear of the machine) Chill &... -
Page 18: Installation And Technical Data
Installation and technical data Your Pura must be properly installed so that you can operate it correctly—one of our service technicians will do that for you. You'll have to take care of a few things first. You'll find the preparations for problem-free enjoyment of your coffee machine here. - Page 19 Dimensions of the Pura Installation dimensions of the Pura Front view Side view min 50/75 Minimum distance 50 mm, with water connection 75 mm. Top view Cross-section from above (grommet hole) Prepare a stable, ergonomic surface . The control unit (min.
- Page 20 Technical data for the refrigeration unit Add-on unit installation dimensions Milk container 5 liters Electrical connection 220 - 240 V 1L N PE 88 W 50/60 Hz Fuse: 10 A Electric cable 1800 mm Ambient conditions Humidity: max. 80% Ambient temperature: 5 - 32 °C Weight approx.
-
Page 21: Start-Up, Filling And Emptying
Start-up, Filling and Emptying In this chapter you will learn how to start up your Pura coffee machine for the first time. In addition to the start- up procedure, you will learn about processes that take place automatically during start-up and about additional preparations. -
Page 22: Filling The Pura
Filling the Pura Filling the coffee bean hopper WARNING Risk of injury, eye injury and damage to the machine! Objects in the bean hopper or grinder may splinter and be ejected, leading to damage to the machine or injury. Never put any objects in the coffee bean hopper or grinder. Never poke around in the coffee bean hopper or grinder with any Open the coffee bean hopper. - Page 23 Filling the water tank (optional) WARNING Risk of injury! Reaching into the machine may result in abrasions or crushing inju- ries from interior components. Exercise care and caution when working in an open machine. Press the release button and Pull the water tank forward until open the door.
-
Page 24: Emptying The Pura
Emptying the Pura Empty grounds container NOTICE Formation of mildew due to coffee residue! Empty and clean the grounds container at least once daily. Press the release button and Remove grounds container. Empty, clean and dry the open the door. grounds container. - Page 25 Emptying the water tank (cont.) Fold open the handle. Empty, clean and dry the water Insert the water tank to the Push the water tank into the Close the door. Remove water tank. half-way point and seal with the tank. machine until it hits the stop.
- Page 26 Emptying the coffee bean hopper (cont.) The machine will only func- tion if both bean hoppers are installed correctly. Place the coffee bean hop- Slide the coffee bean hopper per on the machine (observe back to the limit stop. marking). Emptying the powder container NOTICE Powder may escape.
- Page 27 Empty powder container (cont.) If the powder container is not properly installed on the machine, the message Please Empty, clean and dry the pow- Seal powder container with Place the powder container on Slide powder container back to replace powder container! will der container.
- Page 28 Filling the milk container (optional) NOTICE The quality of the milk may be impaired! Only use pre-cooled milk. Only touch the intake hose after sanitizing your hands, or wear disposable gloves. Open the door. Remove the cover. Insert the milk container. Remove the intake hose and Fill the milk container with milk Insert the suction tube through...
- Page 29 Emptying the milk container (optional) NOTICE The refrigeration unit may not be used to store milk! Remove the milk when the machine is not in use. Open the door. Remove the cover. Remove the intake hose and Store the milk in a refrigerator pull the Milk container out to or dispose of it, if necessary.
-
Page 30: Preparing Drinks
Preparing drinks You chose the Pura because you love coffee and want to offer your customers something special. You will find information about preparing drinks and the variations possible for your specialty drinks here. Preparing a standard drink WARNING Risk of scalding or burning! The dispensers and drinks are hot. -
Page 31: Preparing Two Drinks At Once
16:04 16:04 Preparing two drinks at once WARNING Coffee Risk of scalding or burning! 2 Coffee The dispensers and drinks are hot. Latte small Do not touch the area under the outlets. Tea mug In case of scalding or burns, immediately cool the affected area Latte and, depending on the severity of the injury, consult a doctor. -
Page 32: Drink Preparation Using The Queue Function (If Enabled)
Drink preparation using the queue function (if enabled) You can start the preparation of up to 11 products using the queue function. Pay attention and work carefully to avoid scalds. Drink preparation with preselection must be enabled. Place an appropriate cup or Setting outlet height. -
Page 33: Drink Preparation With Preselection (If Enabled)
Drink preparation with preselection (if enabled) Example of use of preselection Select product The Pura makes the following preselection possibilities available: Powder Coffee Selected product is prepared twice. Serial preparation. Powder: Preselection of powder type. Ka ee Coffee Coffee small klein Coffee: Preselection of coffee type. -
Page 34: Hot Water Dispenser
Hot water dispenser If the simultaneous drink preparation function is not activated, all other products are blocked during hot water dispensing. Only an authorized service technician can enable preprogrammed settings. Place an appropriate cup or Contact your service technician. glass under the hot water 16:04 16:04 outlet. -
Page 35: Cleaning, Rinsing And Servicing
Overview of the separate instructions for cleaning and descaling Select the correct cleaning and descaling instructions for your system, taking the functions of your coffee machine into consideration. Pura pronto Pura fresco Cleaning Instructions 1N 330 014 1N 330 019/1N 330 587... -
Page 36: C Leaning The Water Tank
Cleaning the water tank (weekly and additionally as needed, if tank operation) WARNING Risk of injury! Reaching into the machine may result in abrasions or crushing inju- ries from interior components. Exercise care and caution when working in an open machine. Press the release button and Remove and empty the water open the door. -
Page 37: C Lean The Brewing Unit
Clean the brewing unit (weekly and additionally, as required). WARNING Risk of injury! Reaching into the machine may result in abrasions or crushing inju- ries from interior components. Exercise care and caution when working in an open machine. Press the release button and Remove water tank. -
Page 38: P Ura Fresco - C Lean The Mixing Chamber
Pura fresco - Clean the mixing chamber (weekly and additionally, as required). Mixing chamber components WARNING Milk foamer Health risks and damage to the machine! Steam nozzle Powder left in the mixing chamber can cause clogging and lead to the formation of germs. Frothing aid Clean the mixing chamber weekly and additionally, as required. - Page 39 Continued: Pura fresco - Clean the mixing chamber (weekly and additionally, as required). ( Ë ) ( Ë ) ( Ë ) Remove the frothing aid from Unlock the bayonet lock. Clean mixing chamber compo- Insert the frothing aid in the Insert the steam nozzle in the the mixer.
-
Page 40: Ctivate Wipe Protection
Activate wipe protection 16:04 16:04 Activate wipe protection Select product You may clean the display. Rinse 20 sec The wipe protection function Clean deactivates the touch display Espresso Coffee for 20 seconds so it can be Switch to the Maintenance Select Activate wipe protection. -
Page 41: Ater Filter
Water filter The water filter ensures for consistently optimal water quality. Using an upflow filtration design ensures a long service life. Inserting the adapter in the water tank Press the release button and Remove and empty the water Set the adapter on the channel Slide adapter into opening. -
Page 42: Inserting The Water Filter
Inserting the water filter NOTICE Damage to the machine may result from improper handling or installation. The water filter must be installed correctly. Press the release button and Remove and empty the water open the door. tank. Unpack the water filter. Twist the filter cap to dis- Fill the water filter with water. - Page 43 ... bitte WÄHLEN ... Inserting the water filter (cont.) Maintenance Maintenance Rinse water filter Select function (2/2) Are you sure you want to rinse the water filter? Rinse water filter Rinse water filter Empty drip tray Info Open door Select Rinse water filter.
- Page 44 Removing the water filter CAUTION Illness due to bacteria build-up! Using a water filter for too long can lead to build-up of algae. Replace the water filter as described in the maintenance list. Press the release button and Remove and empty the water open the door.
-
Page 45: Maintenance Plan
Frequency Task Information Completed Daily Clean machine See Cleaning Instructions ( 1N 330 014 Pura pronto, 1N 330 019/1N 330 587 Pura fresco) Daily Rinse the machine See page 38 Weekly and additionally, as required Clean water tank... -
Page 46: Configuration
Configuration Your Pura is completely and individually programmable — so that the Pura is just as flexible as you. We have kept the programming simple to make your job easier. Try it for yourself. Introduction to programming 16:04 16:04 Maintenance Maintenance Maintenance Customer menu... -
Page 47: Roducts
1 Products Before you can adjust the product setting, you must select a product Select product. Customer menu 16:04 16:04 Customer menu under the menu item 1.1 Select product key. Select product key Select menu item (1/2) 14 (Latte) 1 Products 1.1 Select product key Coffee Coffee... - Page 48 1 Products, continued Adjust the quantity using Customer menu Customer menu Powder quantity left • Correction of the powder and Select menu item (1/2) water quantity. • Max. adjustment +/- 20% of set 1 Products Basic product powder value. EXIT 2 Clock Basic product powder left Select parameter.
- Page 49 1 Products, continued Adjust quantity and tempera- Customer menu Customer menu ture using +/-. Milk quantity Select menu item (1/2) Pura fresco only • Boiler temperature and milk quantity correction. 1 Products Basic product milk • Max. adjustment +/- 20% of set EXIT value.
-
Page 50: Lock
2 Clock Set the date and time. Customer menu Customer menu Time • Set Daylight Saving Time/ hh:mm Select menu item (1/2) 2.1 Date/time Standard Time before setting 16:04 the time. 1 Products Time 2 Clock Date 4 Operating mode Daylight Saving Time/Standard Time 5 Counters CLEAR... -
Page 51: 3 Temperatures
3 Temperatures Adjust temperature with Customer menu Customer menu Correction milk pump 1 • Correction of the milk tempera- Select menu item (1/2) 3.1 Correction milk pump 1 ture for all products. • Max. adjustment +/- 20% of set 1 Products value. -
Page 52: Ounters
5 Counters Counter status of the product Customer menu Customer menu groups is displayed. Number of drinks prepared Counter: Select menu item (1/2) Number of coffee products Counter: 5.1 Product groups Number of milk products Counter: 1 Products Number of water products Counter: Number of powder products 2 Clock... -
Page 53: Ontrol Panel
8 Control panel Select parameter. Customer menu Customer menu Select Language for maintenance level • Set language for Maintenance Select menu item (2/2) and Product level. 8.1 Language English 8 Control panel Language for maintenance level Deutsch 9 PINs English Language for product level Nederlandse Français... - Page 54 8 Control panel, continued Set user-defined color of the Customer menu Customer menu If you select Custom in the Color menu, the following ad- edge lighting. Red component [%] ditional menu items are displayed. [0 .. 100] Select menu item (2/2) •...
- Page 55 8 Control panel, continued Select parameter. Customer menu Customer menu Select key tone • Select the type of key tone Select menu item (2/2) • Off: No tone. 8.5 Acoustic signals Tone 1 8 Control panel • Tone 1: Deep tone. Key tone Tone 2: •...
-
Page 56: Pin S
9 PINs Set or change PIN. Customer menu Customer menu User A PIN Change User A PIN • Max. 6 characters. Select menu item (2/2) Change User B PIN 8 Control panel 9 PINs Change maintenance PIN CLEAR EXIT Previous page Next page You can use Next page... -
Page 57: Shut Down And Disposal
Observe local disposal regulations when disposing of consumable materials and waste. Risk of damage to the machine! Contact your FRANKE service team for proper storage. Observe the storage conditions and drain your coffee machines. Disposing of the coffee machine Storage temperatures: -10 °C to +50 °C You can return your coffee machine directly to your retailer at no Humidity: max. -
Page 58: Troubleshooting
Troubleshooting If a problem occurs, your Pura coffee machine will give you instructions. Events and information are shown on the display. Should you be unable to resolve a problem despite all best efforts, please contact our service department. In the event of machine errors I - Event II - Information 16:04... -
Page 59: Help With Machine Errors
Help with Machine Errors Event no. Event text Solution Instructions 1-99 Various events and information Contact a service technician. Please close door. Close the door. Please replace bean hopper. Replace coffee bean hopper. see page 24 Please replace powder container. Replace powder container. -
Page 60: Help With Problems Concerning Product Quality
Help with problems concerning product quality Tasteless coffee Coffee tastes bitter Possible causes Solution Possible causes Solution Grind too coarse Select a finer grind Temperature too high Decrease coffee temperature Too little powder Increase amount of coffee Grind too fine Select a coarser grind Temperature too low Increase temperature... -
Page 61: Index
Index . . . . . . . . . . . . . . . . . . . . 27 . - Page 62 . . . . . . . . . . . . . 17 . . . . . . . . . . . . . . . . . . 58 .
- Page 64 Franke Kaffeemaschinen AG Franke-Strasse 9 4663 Aarburg – Switzerland Tel. +41 (0) 62 787 36 07 www.franke.com Your distribution partner: Issued: 05.11 / order number: 1N 330 004 / revision A...
Need help?
Do you have a question about the PURA PRONTO and is the answer not in the manual?
Questions and answers