SMA SUNNY WEBBOX Installation Manual
With bluetooth wireless technology
Hide thumbs
Also See for SUNNY WEBBOX:
- Technical description (100 pages) ,
- User manual (100 pages) ,
- Installation manual (64 pages)

Related Manuals for SMA SUNNY WEBBOX


Summary of Contents for SMA SUNNY WEBBOX
- Page 1 Device for Plant Monitoring ® SUNNY WEBBOX with Bluetooth Wireless Technology Installation Guide SWebBox20-IEN110711 | 98-0023211 | Version 1.1...
-
Page 3: Table Of Contents
Plants ..........18 Information on SMA Bluetooth ........18 5.2.1... - Page 4 Windows XP, Windows 2000 ........25 Logging into the Sunny WebBox ..... . . 27 Configuring Sunny WebBox for the Local Network .
- Page 5 Disassembling the Sunny WebBox ..... . 45 10.2 Packaging the Sunny WebBox ......46 10.3 Disposing of the Sunny WebBox .
- Page 6 Table of Contents SMA Solar Technology AG 14.2 Plug-in power supplies ....... 60 14.2.1...
-
Page 7: Notes On This Manual
Additional information about SMA Bluetooth Wireless Technology can be found in the download section at www.SMA.de/en. Also read the user manual of the Sunny WebBox with Bluetooth which you can call up via the help button in the user interface. -
Page 8: Symbols Used
Information provides tips that are valuable for the optimal installation and operation of your product. 1.4 Nomenclature The term photovoltaic system is abbreviated to PV system in this guide. Additionally, the product name Sunny WebBox with Bluetooth is shortened to Sunny WebBox in the running text. Formatting Meaning [Save] Buttons are displayed in square brackets [ ]. -
Page 9: Safety
The Sunny WebBox with Bluetooth is a data logger that records, logs and makes available the data of a PV plant via a user interface via the integrated web server. Additionally the Sunny WebBox with Bluetooth can be used for remote diagnostics and the configuration of connected devices in a PV plant via the computer. -
Page 10: Supported Products
• Sunny SensorBox with SMA Power Injector with Bluetooth 2.1.2 Target group The Sunny WebBox with Bluetooth is intended for private and industrial use. When you log in to the Sunny WebBox with Bluetooth there are 2 user groups at your disposal, "Installer" and "User". The "Installer"... -
Page 11: Safety Instructions
(ESD). Do not touch component connections and plug contacts unnecessarily. Ground yourself before working on the device. • With the help of the Sunny WebBox with Bluetooth you can change safety relevant parameters of the SMA inverters (e.g. SMA Grid Guard parameters). Incorrectly set parameters can damage or destroy the inverter. -
Page 12: Unpacking
Network Cable (blue) Screws (M6) Screw anchors (M6) Installation Guide (The user manual of the Sunny WebBox with Bluetooth can be called up directly via the user interface or downloaded from www.SMA.de/en) Drilling template Quick guide for Sunny WebBox commissioning... -
Page 13: Firmware Version
Unpacking 3.2 Identifying the Sunny WebBox with Bluetooth Type plate You can identify the Sunny WebBox using the type plate. The type plate can be found on the back of the enclosure. Firmware Version The current firmware version can be found on the status... -
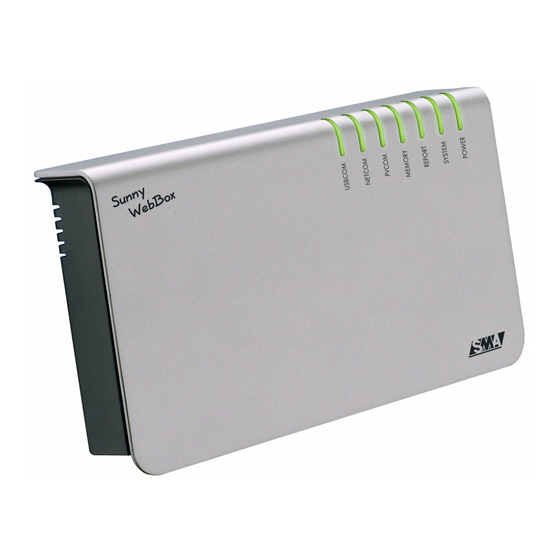
Page 14: Device Overview
Glows red At least 1 device in the PV plant has the "Fault" status. Flashes orange The Sunny WebBox sends update file to the devices in the PV plant. There is no device available in the PV plant. Glows green... -
Page 15: Connection Area Overview
Glows green The Sunny WebBox is operational. Flashes green The Sunny WebBox is starting. Flashes orange The Sunny WebBox is performing a firmware update. Flashes red A system error has occurred. "POWER" Glows green The Sunny WebBox is supplied with electricity. -
Page 16: Bluetooth Module Overview
4.4 Overview of the LEDs on the Network Connection Position LED Condition Meaning Speed 100 MBit connection speed 10 MBit connection speed Link / Activity On Connection (link) established Flashing The Sunny WebBox is currently transmitting or receiving data (activity). No connection established SWebBox20-IEN110711 Installation Guide... -
Page 17: Mounting
5 Mounting 5.1 Mounting / Installation Location Requirements Please note the following information on the mounting / installation location of the Sunny WebBox: • The Sunny WebBox is only suitable for installation in enclosed spaces. • The ambient temperature must remain between –20 °C and +65 °C. -
Page 18: Determining The Mounting / Installation Location For Bluetooth Pv
Before you mount the Sunny WebBox, you should determine the connection quality at the mounting / installation location of the Sunny WebBox to your PV plant. The connection quality can be checked using the Sunny Explorer or the Sunny Beam with Bluetooth. Refer to the user manual of the relevant device. -
Page 19: Mounting The Sunny Webbox Onto The Wall
1. Determine the mounting location taking into consideration the mounting / installation location requirements. 2. Use the drilling template to determine the position of the Sunny WebBox and to mark the drilling holes with a pen. 3. Drill holes with 6 mm diameter at the marked points and insert wall anchors. -
Page 20: Commissioning
Proceed as follows: • Configure the Bluetooth settings of the Sunny WebBox (see page 21). • Connect the Sunny WebBox directly to the computer (see page 22) or to the local network (see page 30). • Start Sunny WebBox Assistant on your computer. -
Page 21: Configuring Bluetooth Settings For The Sunny Webbox
SMA Solar Technology AG Commissioning 6.2 Configuring Bluetooth Settings for the Sunny WebBox The Bluetooth settings of the Sunny WebBox are to be made via the rotary switch of the Bluetooth module using a screwdriver (2.5 mm). NOTICE Changing the NetID during operation of the Sunny WebBox If the NetID of the Sunny WebBox is changed, the Sunny WebBox is restarted. -
Page 22: Connecting The Sunny Webbox Directly To The Computer
• Use a high quality, at least category 5 (FTP Cat 5) or higher shielded twisted pair cable. 2. Connect the plug-in power supply to the Sunny WebBox and plug it into the socket (see ➁ ). ☑ As soon as the "SYSTEM" and "POWER" LEDs glow green, the Sunny WebBox has started up and is ready for operation. -
Page 23: Configuring Network Settings On The Computer
Before you can commission the Sunny WebBox for the first time without the Sunny WebBox Assistant, you must set the computer to the network area of the Sunny WebBox in its delivered status. Read the section which relates to the operating system of your computer. If you use an operating system that is not described, refer to the manual of your operating system to find out how to set the computer IP address to 192.168.0.100 and the Subnet mask to 255.255.255.0. - Page 24 Commissioning SMA Solar Technology AG ☑ The window "Local Area Connection Properties" opens. 6. Mark "Internet protocol version 4 (TCP/IPv4)" and select [Properties]. ☑ The window "Internet Protocol Version 4 (TCP/IPv 4)" opens. 7. Make a note of the network settings in the window "Internet Protocol Version 4 (TCP/IPv4) Properties".
-
Page 25: Windows Xp, Windows 2000
– If Windows displays several LAN connections, there are probably several network connections installed in the computer. Ensure that you select the correct network connection, with which the computer is connected to the Sunny WebBox. If necessary, refer to the manual of your computer. - Page 26 Commissioning SMA Solar Technology AG 7. Enter the following static network settings in the "Internet Protocol (TCP/IP) Properties" window: – Activate the field "Use the following IP address". – Enter 192.168.0.100 in the "IP address" field. – Enter 255.255.255.0 in the "Subnet mask" field.
-
Page 27: Logging Into The Sunny Webbox
– If the page does not open, please refer to section 11.1 "General Troubleshooting for the Sunny WebBox" (page 47). 3. Log into the Sunny WebBox as the user or installer. Upon delivery, the password for the User is "0000" and upon delivery the password for the Installer is "1111". -
Page 28: Configuring Sunny Webbox For The Local Network
In rare cases, further network settings are necessary. Examples of further network settings include integrating the Sunny WebBox via DHCP into your network, using a proxy server in the network or making the Sunny WebBox accessible via the internet. If this is the case, contact your network administrator and refer to section 7 "Extended Configuration"... - Page 29 SMA Solar Technology AG Commissioning 6. In the "IP Address" field enter the static IP address, under which the Sunny WebBox is to be reachable in the local network (see section 13.7 "Allocating an IP Address in a Local Network"...
-
Page 30: Connecting The Sunny Webbox To The Local Network
• Use a high quality, at least category 5 (FTP Cat 5) or higher shielded twisted pair cable. 2. Connect the plug-in power supply to the Sunny WebBox and plug this into the socket (see ➁ ). ☑ As soon as the "SYSTEM" and "POWER" LEDs glow green, the Sunny WebBox has started up and is ready for operation. -
Page 31: Extended Configuration
Additionally, a proxy server can be used for the internet connection. If you would like to make the Sunny WebBox available in the internet, for example to allow direct access to the Sunny WebBox via Sunny Portal, you must configure port redirection in your router. It may be necessary to adjust the HTTP port and the NAT port. -
Page 32: Proxy Server
If there is a proxy server in your network, enter the proxy settings here. The Proxy settings of the Sunny WebBox are used for connection to the Sunny Portal and for firmware updates to the Sunny WebBox or the devices in your PV plant. -
Page 33: Setting The Http Port
Changing the ports is only necessary in rare cases. Before adjusting the ports, contact your network administrator. The HTTP port is the network port under which the Sunny WebBox user interface is available. The HTTP Port is set to 80 by default. Should another port be entered, this is to be explicitly specified during call up of the user interface. -
Page 34: Service Functions
You have the option of updating the Sunny WebBox firmware. The firmware update can be performed online via the internet or locally via the SD card. Existing settings of the Sunny WebBox and data from the PV plant remain available after the update procedure. In order to keep the Sunny WebBox firmware up to date at all time, automatic firmware updates via the internet are recommended. - Page 35 Otherwise, losses may occur during the recording of the plant data. You can also carry out manual updates when the automatic firmware update is activated. 1. Select the Sunny WebBox in the plant tree and select "Settings" in the device menu. Select "Settings" on the toolbar.
-
Page 36: Firmware Update Via The Sd Card
Use a separate SD card for firmware updates Use a separate SD card for firmware updates, which contains only the update files for the Sunny WebBox. If there are update files on the external SD card, exporting XML and CSV files is deactivated. -
Page 37: Updating A Device
8.2 Updating a Device 8.2.1 Notes You can update the firmware of the devices in your PV plant via Sunny WebBox. The Sunny WebBox can be used to update the firmware of the following devices: • SMA inverters with integrated Bluetooth: –... -
Page 38: Update Status
Update status The respective update status for the entire PV plant, for the individual devices and update files is shown on the user interface of the Sunny WebBox. PV plant update status The update status for the overall PV plant is displayed in both the status bar and the "Overview" tab in the plant view. -
Page 39: Device Update Via The Internet (Recommended)
SMA Solar Technology AG Service Functions 8.2.2 Device update via the internet (recommended) If the Sunny WebBox has internet access, you can update the firmware of the devices in your PV plant via the internet automatically or manually. Activating automatic device update If automatic device updates are activated, the Sunny WebBox checks whether a new device update is available once a day, between 10 pm and 3 am. -
Page 40: Device Update Via The Sd Card
4. Click [Send] when the Sunny WebBox has downloaded the selected update file. ☑ The Sunny WebBox checks the saved files and sends the update file to the devices in the PV plant once daily on up to 5 consecutive days. - Page 41 5. Remove the SD card when the "SD CARD" LED stops flashing. ☑ The Sunny WebBox checks the saved files and sends the update file once a day to the devices in the PV plant on up to 5 consecutive days.
-
Page 42: Restarting The Sunny Webbox Via The User Interface
7. Click [Send] when the Sunny WebBox has loaded the selected update file. ☑ The Sunny WebBox checks the saved files and sends the update file once a day to the devices in the PV plant on up to 5 consecutive days. -
Page 43: Resetting The Sunny Webbox Using The Reset Button
8.4 Resetting the Sunny WebBox Using the Reset Button You can reset the Sunny WebBox via a small hole in the rear side of the Sunny WebBox with the reset button hidden behind this. For this the Sunny WebBox must be supplied with electricity. -
Page 44: Determining Current Settings Of The Sunny Webbox Via The Sd
"config.xml" file there. The writing process is complete when the "SD CARD" LED is permanently lit. Example: WEBBOX_0155000123\config.xml 2. When the "SD CARD" LED is permanently lit, remove the SD card from the Sunny WebBox SD card slot. -
Page 45: Decommissioning
10.1 Disassembling the Sunny WebBox NOTICE Loss of plant data possible! Only disconnect the Sunny WebBox from the power grid when the PV plant is not in operation (e.g. at night). Otherwise, losses during the recording of the plant data may occur. -
Page 46: Packaging The Sunny Webbox
10.3 Disposing of the Sunny WebBox Dispose of the Sunny WebBox at the end of its service life in accordance with the disposal regulations for electronic waste which apply at the installation site at that time. Alternatively, send it back to SMA with shipping paid by sender, and labeled "ZUR ENTSORGUNG"... -
Page 47: Troubleshooting
SMA Solar Technology AG Troubleshooting 11 Troubleshooting 11.1 General Troubleshooting for the Sunny WebBox No. Problem Cause Rectification The Sunny WebBox The Sunny WebBox is not • Connect the Sunny WebBox with the is not available via connected to the network or network cable directly to the the user interface. - Page 48 • Use a proxy server that supports support IPv6. IPv6. The "SYSTEM" LED A system error has occurred. • Remove the Sunny WebBox plug-in is flashing red: power supply from the plug socket and plug it back in after a short time in order to restart the Sunny WebBox.
- Page 49 Sunny WebBox The data transfer is • Check the settings of Sunny Portal or does not send any incorrectly configured. FTP Push (see the Sunny WebBox data to the Sunny user manual). Portal or the • Perform a connection test.
- Page 50 Troubleshooting SMA Solar Technology AG No. Problem Cause Rectification The firmware There is no internet • Reestablish Internet access. If update for connection. necessary, contact your internet connected devices service provider. failed. ☑ If you have set automatic device update, the automatic device update starts again the following day.
- Page 51 SMA Solar Technology AG Troubleshooting No. Problem Cause Rectification After a Sunny Double Sunny Portal The Sunny WebBox supplied as a WebBox is registration replacement device logs into the Sunny replaced, Sunny Portal with a new plant ID. Sunny Portal Portal contains two...
-
Page 52: Bluetooth Connection
Bluetooth plant. plant. Further information on SMA Bluetooth can be found in the download section at www.SMA.de/en. The Bluetooth connection Inverter is not • Wait until the Sunny WebBox has accessible. was interrupted. automatically re-established the connection. SWebBox20-IEN110711 Installation Guide... - Page 53 SMA Solar Technology AG Troubleshooting No. Problem Cause Rectification Parameters for the Bluetooth Inverter is not When setting parameters that regulate the accessible. communication were Bluetooth connection (e.g. parameters for changed. the transmitting power and country parameters), the communication via...
-
Page 54: Accessories
Accessories SMA Solar Technology AG 12 Accessories SMA Bluetooth Repeater SMA order number Description SMA Bluetooth repeater to increase the range of SMA Bluetooth products BTREP for use indoors SD Cards SMA order number Description SD-Card 128 MB 128 MB Secure Digital Memory Card for Sunny WebBox, I-Grade... -
Page 55: Appendix
SD card using the computer. The Sunny WebBox converts the SD card's file system to TFAT in order to increase data security. If you wish to delete the SD card, you must format the SD card on the computer with the FAT32 file system. -
Page 56: Structure Of An Xml Data File
SMA Solar Technology AG Setting Meaning DHCP Displays whether the network settings are acquired via DHCP. IP address The current IP address of the Sunny WebBox SubNetMask The current Subnet mask of the Sunny WebBox Gateway The set Gateway IP address DNS server... -
Page 57: Information On Your Web Browser
Time stamp, at which the average was calculated 13.4 Information on your Web Browser In order to be able to call up the Sunny WebBox user interface, you need a current web browser. You can use the standard settings of your web browser. -
Page 58: Activating Ipv6 In Windows Xp Sp2
13.6 Activating IPv6 in Windows XP SP2 In order to be able to locate the Sunny WebBox with the Sunny WebBox Assistant, IPv6 is required. IPv6 stands for Internet Protocol Version 6 and specifies the procedures that are necessary for data transfer via a package-switching data network. -
Page 59: Technical Data
SMA Solar Technology AG Technical data 14 Technical data 14.1 Sunny WebBox with Bluetooth Mechanical data Width x height x depth 255 mm x 130 mm x 57 mm Weight 750 g Power supply Typical power consumption Maximum power consumption... - Page 60 Technical data SMA Solar Technology AG 14.2 Plug-in power supplies 14.2.1 CINCON, TRG30R 120 Mechanical data Width x height x depth 107.8 mm x 57.5 mm x 33.5 mm Weight 300 g Power supply Voltage 100 V − 240 V AC, 50 / 60 Hz Nominal current 0.8 A...
- Page 61 SMA Solar Technology AG Contact 15 Contact If you have technical problems concerning our products, contact the SMA Serviceline. We need the following information in order to provide you with the necessary assistance: • The current firmware version of the Sunny WebBox •...
- Page 63 The use of supplied software produced by SMA Solar Technology AG is subject to the following conditions: • SMA Solar Technology AG rejects any liability for direct or indirect damages arising from the use of software developed by SMA Solar Technology AG. This also applies to the provision or non-provision of support activities.
Need help?
Do you have a question about the SUNNY WEBBOX and is the answer not in the manual?
Questions and answers