
Related Manuals for Bullet Barbecue 98110

Summary of Contents for Bullet Barbecue 98110
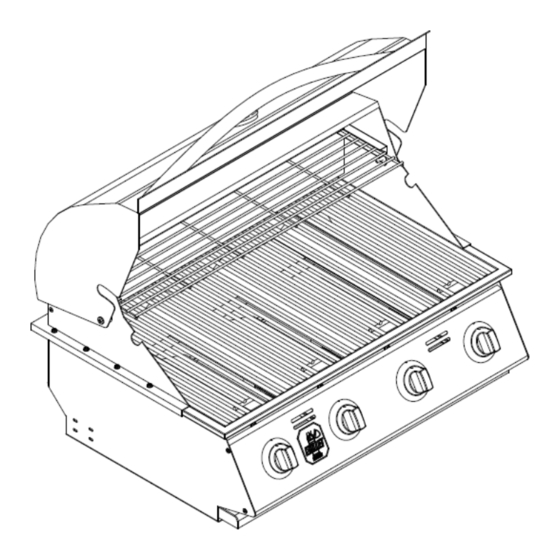
- Page 1 ASSEMBLY & OPERATING INSTRUCTIONS MODEL #98110 BULLET 4 BURNER STAINLESS STEEL, BUILT-IN, L.P. (PROPANE) MODEL #98111 BULLET 4 BURNER STAINLESS STEEL, BUILT-IN, N.G. (NATURAL GAS)
-
Page 2: Table Of Contents
TABLE OF CONTENTS PAGE # SAFETY INSTRUCTIONS……………………...…………………………………………………….………………………..………………………...2 THE LOCATION FOR YOUR GRILL…………..……………………………………………………………..……….…………………..2 CHECKING FOR GAS LEAKS………………………………………………………………………………………...…..……………………..2 NATURAL GAS SAFETY…………………………………….……………………….……..………………….……………….…..…….……...3 PROPANE GAS SAFETY…………………………………………………………………………………………………….….………………..4 INSTALLATION INSTRUCTIONS…………………………………………………………………………………………..………………….……..5 SPECIFICATIONS FOR BARBECUE STRUCTURE…………………………….……………………………...………..……………………5 CONNECTING TO GAS SOURCE…………………………………………………..………………...……………………………………..5 NATURAL GAS CONNECTIONS……………………………………………..….………….….….….……….…….……………………….….5 PROPANE GAS CONNECTIONS………………………………………...….……..…..….…….………….…….…...…….…….…….…..5 OUTDOOR NATURAL GAS BBQ INSTALLATION SPECIFICATIONS………………………………….….….…..…………………..……6 OUTDOOR PROPANE GAS BBQ INSTALLATION SPECIFICATIONS…….….….….…….………………………………..…..………….7 INSPECTING / CLEANING BURNERS AND GAS VALVE ORIFICES…………….….…….…….………………..……….……..….……….…8 BURNER CLEANING....................................8... -
Page 3: Safety Instructions
SAFETY INSTRUCTIONS READ CAREFULLY BEFORE ASSEMBLY AND OPERATION OF YOUR GRILL This gas grill must be installed in accordance with local codes or, if in an area without local codes, with the latest edition of the National Fuel Gas Code ANSI Z223.1. In Canada, installation must conform to the standard CAN/ CGA 1-b149.1 and/or .2 (Installation Code for Gas Burning Appliances and Equipment) and any local codes. -
Page 4: Natural Gas Safety
SAFETY INSTRUCTIONS (CONT.) NATURAL GAS SAFETY Your Natural Gas grill is designed to operate on natural gas ONLY, at a pressure of 4” water column (W.C.) regulated at the natural gas regulator attached at the back of the grill. Check with your gas utility for local gas pressure and with your local municipality for building code requirements. Check with your gas utility or with local building codes for instructions to install gas supply line, or call a licensed and knowledgeable installer. -
Page 5: Propane Gas Safety
SAFETY INSTRUCTIONS (CONT.) PROPANE GAS SAFETY Your Propane gas grill is designed to operate on propane gas ONLY, at a pressure regulated at 11” water column (W.C.) when equipped with the correct propane orifices on the valves and a propane regulator on the supply line regulated at the residential meter. Your propane gas grill is designed to be used with a standard 20 lb gas cylinder. -
Page 6: Installation Instructions
INSTALLATION INSTRUCTIONS PLEASE READ THESE INSTRUCTIONS BEFORE INSTALLING YOUR GAS GRILL Your Built-in Gas Grill comes to you fully assembled. We strongly recommend professional installation and hookup of the Gas BBQ grill. These instructions will provide you with the measurements necessary for you or your builder to construct a masonry structure to house your outdoor gas grill. -
Page 7: Outdoor Natural Gas Bbq Installation Specifications
INSTALLATION INSTRUCTIONS (CONT.) OUTDOOR NATURAL GAS BBQ INSTALLATION SPECIFICATIONS NOTE: - Vents must be provided for combustion air and ventilation on both sides of built-in cabinet. - When choosing a location for your gas grill keep in mind that it should never be located under any overhead combustible construction. - The sides and back of the grill should not be any closer than 21 inches to combustible construction. -
Page 8: Outdoor Propane Gas Bbq Installation Specifications
INSTALLATION INSTRUCTIONS (CONT.) OUTDOOR PROPANE GAS BBQ INSTALLATION SPECIFICATIONS NOTE: - Vents must be provided for combustion air and ventilation on both sides of built-in cabinet. - When choosing a location for your gas grill keep in mind that it should never be located under any overhead combustible construction. - The sides and back of the grill should not be any closer than 21 inches to combustible construction. -
Page 9: Inspecting / Cleaning Burners And Gas Valve Orifices
INSPECTING I CLEANING BURNERS AND GAS VALVE ORIFICES By following these cleaning procedures on a timely basis, your grill will be kept clean and working properly with minimum effort. CAUTION – Always turn off the gas supply prior to clearing your grill. BURNER CLEANING 1. -
Page 10: Burner Replacement Into Insert
INSPECTING / CLEANING BURNERS AND GAS VALVE ORIFICES (CONT.) BURNER REPLACEMENT INTO INSERT CAUTION – Always turn off the gas supply prior to clearing your grill. 1. Replace burner back into the grill insert. There is no need to replace the cotter pin back into the cast peg, it is for shipping purposes only. 2. - Page 11 INSPECTING / CLEANING BURNERS AND GAS VALVE ORIFICES (CONT.) 2. Light any burner by pushing its control knob in fully and slowly (3 to 4 seconds) turning it about 1/4 turn to the left (counter-clockwise) until a click is heard. The 3 to 4 second duration should provide enough gas to light the burner. If the burner does not light, immediately return the control knob to “OFF”, wait several minutes for the gas to disperse, and repeat the process.
-
Page 12: Cooking Component Installation
COOKING COMPONENT INSTALLATION IMPORTANT: Before first use: wash flame tamers, cooking grids, and warming rack with warm, soapy water. Rinse and dry thoroughly. Season metal surfaces with cooking oil occasionally. (After cooking is completed, turn grill to high setting for NO MORE THAN five minutes to burn off excess grease or food residue) CAUTION: DO NOT LEAVE GRILL UNATTENDED WHILE GRILL IS IN USE 1. -
Page 13: Lighting & Operating Instructions
LIGHTING & OPERATING INSTRUCTIONS LIGHTING PROCEDURES Lighting Main Burner(s): 1. Become familiar with the safety guidelines at the front of the manual. DO NOT SMOKE WHILE LIGHTING GRILL OR CHECKING GAS SUPPLY CONNECTIONS! 2. If your grill fuel source is a LP gas cylinder, check to see that cylinder is filled. 3. - Page 14 LIGHTING & OPERATING INSTRUCTIONS (CONT.) Cooking With Indirect Heat: You can cook poultry and large cuts of meat slowly to perfection on one side of the grill by indirect heat from the next burner. The heat from the lighted burner circulates gently throughout the grill, cooking the meat or poultry without any direct flame beneath or below the food you are preparing.
-
Page 15: Cleaning & Maintenance
CLEANING & MAINTENANCE CLEANING THE COOKING GRIDS After cooking, turn control knobs to “OFF” and let grill cool before attempting to clean your cooking grids. Before first use and periodically it is suggested that you wash the cooking grids in a mild soap and warm water solution. You can use a washcloth or a vegetable brush to clean your cooking grids. -
Page 16: Troubleshooting
TROUBLESHOOTING IF GRILL FAILS TO OPERATE PROPERLY 1. Turn off gas at source, turn control knobs to “OFF”, and wait five minutes before trying again. 2. Check gas supply/connections. 3. Repeat lighting procedure. If grill still fails to operate properly, TURN “OFF” GAS AT SOURCE, TURN CONTROL KNOBS TO “OFF”, wait for grill to cool, and check the following: a. -
Page 17: Yellow Flame
TROUBLESHOOTING (CONT.) YELLOW FLAME Once the entire burner is operating, check the flame color to be sure it is mostly blue (some yellow color will be present because of impurities in the fuel). If the flame is golden or yellow in color the reason could be seasoning salts, oil film, or other foreign matter on burner. CORRECTION: Either wash burner with mild detergent, or operate burner at “HIGH”... -
Page 18: Parts List
PARTS LIST MODEL #98110 BULLET 4 BURNER STAINLESS STEEL, BUILT-IN, L.P. (PROPANE) MODEL #98111 BULLET 4 BURNER STAINLESS STEEL, BUILT-IN, N.G. (NATURAL GAS) REF # PARTS # DESCRIPTION WARRANTY PERIOD 44300 LID - FRONT 1 yr 44301 LID - REAR... -
Page 19: Exploded Illustration
EXPLODED ILLUSTRATION... -
Page 20: Limited Warranty
LIMITED WARRANTY Bull Outdoor Products, Inc. warrants to the original purchaser at the original site of delivery with proof of purchase of each Outdoor Gas Grill that when subject to normal residential use, it is free from defects in workmanship and materials for the periods specified below. This warranty excludes grills used in rental or commercial applications.
Need help?
Do you have a question about the 98110 and is the answer not in the manual?
Questions and answers