Table of Contents
Advertisement
Advertisement
Table of Contents

Related Manuals for Gericom Phantom-Series


Summary of Contents for Gericom Phantom-Series
- Page 3 Preface © Copyright 2005 © All Rights Reserved. The information in this document is subject to change without prior notice in order to improve reliability, design and function and does not represent a commitment on the part of the manufacturer. In no event will the manufacturer be liable for direct, indirect, special, incidental, or consequential damages arising out of the use or inability to use the product or documentation, even if advised of the possibility of...
- Page 4 Notices Federal Communications Commission Radio Frequency Interference Statement This equipment has been tested and found to comply with the limits for a Class B digital device, pursuant to Part 15 of the FCC Rules. These limits are designed to provide reasonable protection against harmful interference in a residential installation.
-
Page 5: Table Of Contents
Table of Content Before you Start------------------------------------------------------------- 1 Conventions of This Manual ............. 1 Regulatory Statement Sample ............1 Safety Precautions................3 Wichtige Sicherheitshinweise ............5 Things you must remember before working on your computer..8 Introduction ------------------------------------------------------------------ 11 Welcome to the Notebook PC ............11 Getting Started -------------------------------------------------------------- 17 Connecting to a Power Source ............ - Page 6 Specification ----------------------------------------------------------------- 67 Detailed Notebook Specifications ............. 67...
- Page 7 Canadian DOC Notice For Class B Computing Devices This Class B digital apparatus meets all requirements of the Canadian Interference - Causing Equipment Regulations. Cet appareil numerique de la classe B repecte toutes les exigences du Règlement sur le matèriel brouilleur du Canada. Personal Inventory This Notebook computer system is designed for years of productive and pleasurable computing.
-
Page 9: Before You Start
EFORE YOU TART Conventions of This Manual Use this manual will help you get the most from your notebook computer. • If you are an experienced user of computers and/or Microsoft’s Windows operating systems, you might find it useful to read the Quick Start Guide that comes along with your accessories. - Page 10 This device may be operated indoors or outdoors in all countries of the European Community using the 2.4GHz band: Channels 1 – 13, except where noted below. • In Italy the end-user must apply for a license from the national spectrum authority to operate this device outdoors.
-
Page 11: Safety Precautions
• The 5GHz Turbo mode feature is not allowed for operation in any European Community country • This device must not be operated in ad-hoc mode using channels in the 5GHz bands in the European Community. Ad-hoc mode provides a direct communication between two client devices without a Wireless LAN Access Point. - Page 12 11. Never pour any liquid into the opening, this could cause fire or electrical shock. 12. Never open the equipment. For safety reason, the equipment should only be opened by a qualified service personnel. 13. If on the following situations arises, get the equipment checked by a service personnel: The Power cord or plug is damaged.
-
Page 13: Wichtige Sicherheitshinweise
The cord set fittings must bear the certification mark of the agency responsible for evaluation in a specific country. The flexible cord must be of a HAR (harmonized) type H03VV-F. The cord set must have a current capacity of a least 2.5 Amperes and voltage rating of 125 or 250 Vac. - Page 14 Beachten Sie beim Anschluß an das Stromnet die Anschlußwerte. Verlegen Sie die Netzanschlußleitung so, daß niemand darüber fallen kann. Es sollte auch nichts auf der Leitun abgestellt werden. Alle Hinweise und Warnungen, die sich am Gerät befinden, sind zu beachten. 10.
- Page 15 Für die USA und Kanada: Das Kabel-Set muss UL-gelistet und CSA zertifiziert sein. Die Minimalanforderungen für das Kabel entsprechen No. 18 AWG. Für Japan: Alle Teile des Kabel-Sets müssen entsprechend dem japanischen Dentori Law mit einem „PSE“ or „T”- Symbol markiert sein Die Minimalanforderungen für das Kabel sind .75m ㎡...
-
Page 16: Things You Must Remember Before Working On Your Computer
21. Es besteht Explosionsgefahr, wenn der Akku nicht ordnungsgemäß ersetzt wird. Ersetzen Sie den Akku nur durch einen Akku gleichen oder äquivalenten Typs, der vom Hersteller empfohlen wird. Entsorgen Sie Akkus entsprechend den Anweisungen des Herstellers. Entfernen Sie den Akku auf keinen Fall bei eingeschaltetem Notebook, da hierdurch Daten verloren gehen könnten. - Page 17 A lithium-ion battery pack will be available when you are traveling. If you are running your system for the first time on battery power, remove the battery from the package, install it into the system and recharge the battery to fully prepare for service.
-
Page 19: Introduction
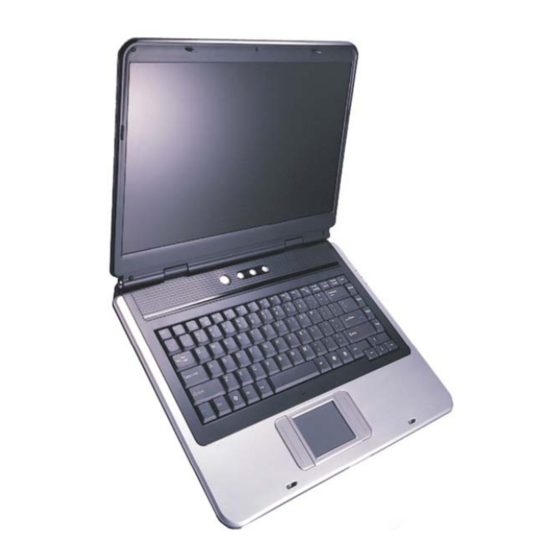
NTRODUCTION Welcome to the Notebook PC Congratulations on your purchase of the Notebook PC. Your Notebook features the latest advances in portable computing technology. The Notebook’s modular design provides maximum expandability without compromising portability. The high-performance CPU and enhanced IDE hard drive provides you with extra processing power for handling complex graphics and running large programs. - Page 20 With the LCD screen open, you will see several features important for operating your Notebook computer. Each of these features is briefly described below. LCD Display This LCD panel can only support up to a maximum opening of 130 degrees, please do not push it forcibly. Power/Resume Button Wireless LAN Button Internet Explorer Button...
- Page 21 Outlook Express Button System Status Indicator Panel Wireless Connection Indicates when the system LAN is functioning LED ON – Ready to transfer and receive Fast Blink – Transferring and receiving, it will return to normal light after the operation Indicates that the computer is accessing the hard disk drive.
- Page 22 The Left Side Ventilation Opening Speaker The Right Side Speaker CardReader (Optional) USB Ports LED Indicators These three LED indicators are separately program for the following functions: Power On, Suspend Mode and Battery Charge. Battery Charge This indicator will lit green when the battery is in charging status.
- Page 23 The Rear Cable TV Input (Option) Before connecting the cable into the connector, be sure to remove first the cover on the TV connector (internal TV card) at the rear of the computer with the aid of a screw driver. The LAN Port When using a LAN, please use an EMI Shielding Cable to minimize inteference when transmitting.
- Page 24 The Bottom Panel Hard Disk Drive Battery Battery Release Latch Expansion Compartment...
-
Page 25: Getting Started
ETTING TARTED Connecting to a Power Source Connecting the AC Adapter A universal AC adapter is provided to supply your computer with power and also charge the computer’s battery pack. The adapter’s AC input voltage can range anywhere from 100 to 240 volts, covering the standard voltages available in almost every country. - Page 26 Whenever possible, keep the AC adapter plugged into the Notebook and an electrical outlet to recharge the battery. Never turn off or reset your Notebook while the hard disk is in use and the CD-ROM status icon is lit; doing so can result in loss or destruction of your data.
- Page 27 Inserting and Removing the Battery Pack The battery pack should already be inserted in your Notebook computer when you unpack it. If not inserted, follow these directions: Turn over the notebook with the front of the unit facing you and place it on a solid, flat surface.
- Page 28 Hold the battery at the finger grip and lift it out of the compartment. Charging the Battery Pack The installed battery pack charges automatically any time the computer is connected to the AC adapter and an external power source. It is a good idea to occasionally discharge the battery pack fully to preserve its operating performance.
-
Page 29: Using The Notebook Computer
SING THE OTEBOOK OMPUTER Adjusting the LCD Screen Display The LCD screen display can be adjusted by the following key combinations. KEYS FUNCTIONS [Fn] + [F7] Decreases the brightness level. [Fn] + [F8] Increases the brightness level. [Fn] + [F10] Use this key combination to expand your video screen or reset to its original size. - Page 30 display, please refer to Chapter Four. A Tour of the Notebook’s Keyboard The Notebook’s keyboard uses a standard QWERTY layout with the addition of special function keys and an embedded numeric keypad for number intensive data entry. Your keyboard supports Windows by incorporating the two Windows specific keys.
- Page 31 [Fn] + [F1] This key combination turns on/off the battery beeping sound [Fn] + [F2] This key combination turns on/off the volume. [Fn] + [F3] Decreases the speaker volume. [Fn] + [F4] Increases the speaker volume. [Fn] + [F5] Enable/Disable the system Touchpad function [Fn] + [F7] Decreases the brightness level.
-
Page 32: The Cd-Rom/Dvd-Rom/Combo
• Do not rest heavy objects on the TouchPad or the TouchPad buttons. You can use the TouchPad with Microsoft Windows as well as non- Windows applications. The CD-ROM/DVD-ROM/Combo/DVD-Dual/Super Multi Features of the CD-ROM/DVD-ROM/Combo/DVD-Dual/Super Multi The features of the CD-ROM/DVD-ROM/Combo/DVD-Dual/Super Multi drive are listed below. - Page 33 To remove a CD disc , do the following: Check the LED display and make sure that the computer is not accessing the CD-ROM/DVD-ROM/Combo/DVD-Dual/Super Multi drive. Push the eject button and pull the tray all the way out. Carefully pick up the CD disc by the edges and – while pressing down on the center ring –...
-
Page 34: Power Saving Modes
Power Saving Modes This section contains information on the Notebook’s power system, including the AC Adapter, the battery system, recharging the battery, and tips for conserving battery power. The power system is comprised of two parts, the AC Adapter and the battery system. The AC Adapter converts AC power from a wall outlet to the DC power required by the computer. - Page 35 Turn the Notebook off. Connect the AC adapter and let the battery fully recharge. When the battery charge indicator turns off, the battery is fully charged. Turn On the notebook, let the battery run down until the battery is in low-low state and you hear a warning beeps.
- Page 36 Sound Meaning Continuous Battery Low: Indicates that there is 7 to 10 beeping every 5 minutes charge remaining. seconds Beeping Battery Low Low: Indicates that there is 1 to 2 accelerates minutes of battery charge remaining. Save your work and turn off the Notebook, or connect the AC adapter.
- Page 37 When the battery charge LED turns off will indicate the system is fully charged. Repeat step 1 to 4 once again. The battery is now fully calibrated. Resetting the System After installing a software application package, you may be prompted to reset the system to load the changed operating environment.
- Page 38 Page intentionally left blank...
-
Page 39: Desktop Operation
ESKTOP PERATION Your notebook is capable of providing you with efficient and productive mobile computing, it also has the speed and capacity to service as a desktop system. This chapter discusses those functions of your notebook that are typical of desktop systems. - Page 40 Audio Software Your notebook comes equipped with an integrated sound system capable of providing you with quality audio sound through the built-in speakers or through external speakers connected via the system ports. Sound Recording Your system allows you to record sounds and store them as files using the microphone via the microphone jack on the rear of the notebook computer.
-
Page 41: Connecting Peripheral Devices
Connecting Peripheral Devices To expand your computing capabilities, you can add a variety of external devices to your computer. - Page 42 Page intentionally left blank...
-
Page 43: Internet Connection (Optional)
NTERNET ONNECTION PTIONAL There are numerous ways to connect to the Internet. This may vary from the user’s working environment as well as system specifications. • Using a modem and a telephone line • Using a wired LAN • Using a wireless LAN (Optional) Using a modem for Connection to Internet •... - Page 44 Select “Properties” from the popup menu that appears In the “This connection uses the following items” field, select “Internet Protocol (TCP/IP), and click “Properties”.
- Page 45 Enter the system’s IP and DNS server addresses on the General tab of the “Internet Protocol (TCP/IP) Properties” window. If DHCP is used, click “Obtain an IP address automatically” and “Obtain DNS server address automatically” on the General tab.
-
Page 46: Using Both Dhcp And Static Ip For Connection To Internet
After all the all the information are correctly entered in the “Internet Protocol (TCP/IP) Properties” window, click “OK” to finish. Using Both DHCP and Static IP for Connection to Internet When you are alternatively using networks with either DHCP or static IP addressing, you can use alternative settings that enable simultaneous configurations of DHCP and static IP to use both of the network connects without reconfiguring. - Page 47 When you have completed the entire configuration, click “OK”.
-
Page 48: Using Wireless Lan Network For Connection To Internet (Microsoft's Service Pack 2) (Optional)
Using Wireless LAN Network for Connection to Internet (Microsoft’s Service Pack 2) (Optional) -
Page 49: Running Bios Setup
BIOS S UNNING ETUP Introduction The BIOS (Basic Input and Output System) Setup program is a menu driven utility that enables you to make changes to the system configuration and tailor your system to reflect installed hardware or alter system performance. When the Notebook is turned back on, the system is configured with the values stored in CMOS. - Page 50 • Advanced - Use this menu to enable and make changes to the advanced features available on your system. • Security - Use this menu to set a password. The password allows boot up and controls access to the BIOS setup menu. •...
- Page 51 PgDn Moves the cursor to the field at the bottom of the window. Sets the parameters for the current menu to their default values. Save and Exit. Enter Will select a sub menu or show a range of options for a field. Launching Submenus Note that a right pointer symbol appears to the left of certain fields.
- Page 52 The Main Menu When the Setup program is accessed, the following screen appears:...
- Page 53 The Advanced Menu Selecting Advanced from the menu bar displays the advanced menu:...
- Page 54 The Security Menu The Notebook’s advanced system of security allows you to set a password to prevent unauthorized access to system resources, data, and the BIOS Setup Program.
- Page 55 The Boot Menu The Boot menu allows the user to specify the order in which the Notebook is to check for a device to boot the system. You can also configure the way that the system will boot up. To make changes, select Boot from the menu bar.
- Page 56 The Exit Menu Once you have made all of your selections from the various menus in the Setup program, you should save your changes and exit Setup. Select Exit from the menu bar to display the following menu:...
-
Page 57: Vga Utilities
VGA U TILITIES After you have restarted Windows, open the “Control Panel” and double click on the “Display” icon. From the “Display Properties” window, select the “Settings” tab and click on the “Advanced” tab to enter the “Plug and Play Monitor on Mobile Intel® 945GM Express Chipset Family”. -
Page 59: Overlay Settings
Overlay Settings... -
Page 60: Launch Zoom
Launch Zoom... -
Page 61: Display Devices
Display Devices You can adjust the right resolution for your screen display. -
Page 62: Display Settings
Display Settings... -
Page 63: Color Correction
Color Correction... -
Page 64: Hot Keys
Hot Keys... - Page 66 Page intentionally left blank...
-
Page 67: Troubleshooting
ROUBLESHOOTING This chapter describes locating and solving problems that you may encounter while using your computer. Locating a Problem Problems with your computer can be caused by something as minor as an unplugged power cord – or as major as a damaged hard disk. The information in this chapter is designed to help you find and solve minor problems. - Page 68 If you are using the Notebook with the AC adapter, check the power outlet, the power cord, and any power switches that may affect your computer. Check the wall outlet or power strip with an item that you know is functioning properly.
- Page 69 Two classifications of malfunctions can be detected during the POST: • Error messages that indicate a failure with either the hardware, the software, or the Basic Input/Output System (BIOS). These critical malfunctions prevent the computer from operating at all or could cause incorrect and apparent results.
- Page 70 Solution: The problem is beyond the scope of this manual. Contact technical support. Problem: An unidentified message is displayed. Solution: Reboot the computer and run the BIOS system setup. Confirm the Setup parameters. If the same message is displayed after booting up again, contact technical support for assistance. Problem: The system cannot access the CD-ROM/DVD- ROM/Combo/DVD-Dual/Super Multi drive.
-
Page 71: Upgrading Your System
PGRADING YOUR YSTEM... -
Page 72: Upgrading Your System Cpu
Upgrading your System CPU Refer to the following illustration on upgrading your notebook's CPU Be sure to loosen all the screws first before removing it totally to release the heatsink. Failure to do so will cause a major damage to the heatsink. -
Page 73: Upgrading Your Memory (1)
Upgrading your Memory (1) Upgrading your Memory (2) -
Page 74: The Easy To Upgrade Hdd Module
The Easy to Upgrade HDD Module The hard drive in your notebook computer is made to be easily swapped out for upgrading. To upgrade your Hard Drive... - Page 75 PECIFICATION Detailed Notebook Specifications Processor • ® ® Intel Yonah Dual core Processor, 2MB L2 cache on die, 667 MHz FSB) • ® ® Intel Yonah Single core Processor, 2MB L2 cache on die, 667 MHz FSB) Operating System Compliance •...
- Page 76 • Digital Terrestrial TV Receiver Remote • Friendly user interface to enjoy AV function, includes TV, DVD, Music Pointing Device • Touchpad Application Launch Key • Power On/Off, WWW, E-mail, WLAN On/Off LED Status Indicator • Power, Suspend/Resume, Battery Charging Staus, Hard Disk Access, NumLock mode, CapsLock mode, ScrollLock mode, WLAN status Keyboard...
- Page 77 Size • 355 x 273 x 40 (mm) Weight • Approximately 2.85kg with 15.4" WXGA panel, 6 cell battery and optical drive installed • Battery life will vary depending on your specific hardware and software configuration • Spec subject to be changed without notice...
Need help?
Do you have a question about the Phantom-Series and is the answer not in the manual?
Questions and answers