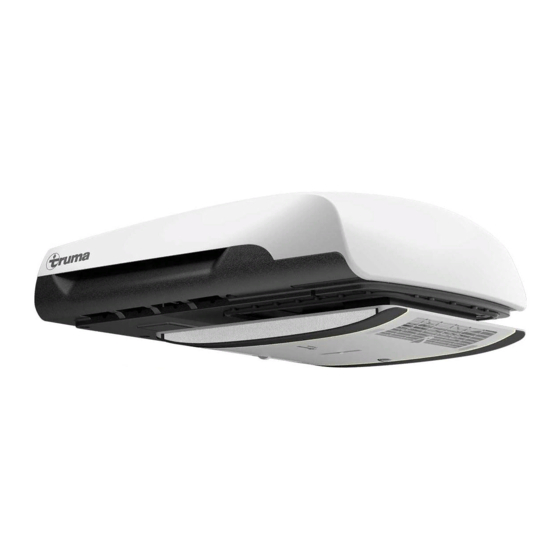
Truma Aventa comfort Operating Instructions & Installation Instructions
Transport ac
Hide thumbs
Also See for Aventa comfort:
- Operating and installtion instructions (88 pages) ,
- Operating and installation instructions (80 pages) ,
- Installation instructions manual (48 pages)

Related Manuals for Truma Aventa comfort


Summary of Contents for Truma Aventa comfort
- Page 1 Aventa comfort (Australia) Operating instructions Page 2 Installation instructions Page 10 To be kept in the vehicle!
-
Page 2: Table Of Contents
Clearance around the air conditioning system ...... 8 Air inlets / outlets ..............8 Condensation traps ............... 8 Declaration of conformity ..........9 Truma warranty policy ............. 9 Installation instructions Scope of delivery ..............10 Accessories for installation (optional) ......10 Intended use ................ -
Page 3: Symbols Used
– Set floor / ceiling air distribution to ceiling. will be ruled out in the event of the following: – changes to the device (including accessories), – failure to use original Truma parts as replacement parts and accessories, – failure to follow the installation and operating instructions. -
Page 4: Operating Instructions
Operating instructions Remote control The symbols in the display are visible depending on the settings. Setup Resend / data transmission Sleep function Cooling Fan level Heating Automatic Temperature mode Circulated air Time Timer On / Off time Mode Operating mode selection button –... -
Page 5: Start-Up
Start-up In automatic mode, cooling or heating mode and fan level are selected automatically according to the room Before switching on, be sure to check that the camp site temperature. power supply fusing is sufficient (230 V). In circulated air mode the interior air is recirculated and In order to prevent the power cable of the recreational cleaned by the filter. -
Page 6: Reset
Maintenance short time and switch on again. If the red LED continues to illuminate, please contact the Truma Service Centre. Carry out filter changes depending on the amount of use, but at least every 12 months. Never operate the air conditioning Air Distribution system without a filter. -
Page 7: Accessories
Accessories Technical data Filter set, 2 pieces (part no. 40091-16800). Determined on the basis of EN 14511 or Truma test conditions. Power supply 230 V – 240 V ~, 50 Hz Power consumption Cooling: 4.2 A Heating: 3.7 A Starting current 28 A (150 ms) Fig. -
Page 8: Installation Dimensions (In Mm)
Condensation traps the front and 100 mm at the side. At least 30 mm of clearance must be left at the rear. Truma recommends clearance of 200 mm so that the exhaust air can blow out freely. The condensation is led away via the roof of the vehicle. -
Page 9: Declaration Of Conformity
– The company will only provide service on presentation of EC directives proof of purchase, on either the Truma product, or the Cara- van / RV / Pleasure Craft in which the Truma product has 3.1 Electromagnetic compatibility 2004/108/EC been installed, to any authorised service agent. The purcha- 3.2 Low voltage directive (2006/95/EC) -
Page 10: Installation Instructions
Truma. Scope of delivery Selecting a location External unit: – 1 Aventa comfort – 2 brackets Once the roof-mounted air conditioning system has – 4 screws M6 x 70 coated with screw sealant been installed, any nearby exhaust cowl must extend –... -
Page 11: Cut-Out Installation 400 X 400
Cut-out installation 400 x 400 Installation with new cut-out For optimum sealing we recommend the use of the sealing For vehicles without an existing cut-out: frame that is available as accessory (part no. 40091-19000). required cut-out 350 x 380 mm. For installation with a sealing frame, please refer to the instal- Place template on installation location on vehicle, mark cutout lation instructions provided with the sealing frame. -
Page 12: Preparation For Power Cable Connection
Preparation for power cable connection Securing the device Provide leadthrough for mains cable to connection point, e.g. Screw the two brackets (marked with an arrow in the direction in the false ceiling. of travel) to the device using the 4 provided M6 x 70 screws (with screw sealant). -
Page 13: Securing The Air Distributor
Securing the air distributor Inserting the filters Connect the cable from the air distributor to the electronics Insert filters into panels and attach to the air distributor. unit. Fig. 26 Fig. 24 Screw air distributor (arrow in direction of travel) to bracket with 6 screws M6 x 12 mm. - Page 16 In Australia, always notify the Dometic Service Centre if problems are encountered; in other countries the relevant service partners should be contacted (see Service Booklet or www.truma.com). Having the equipment model and the serial number ready (see type plate) will speed up processing.
Need help?
Do you have a question about the Aventa comfort and is the answer not in the manual?
Questions and answers