Table of Contents
Advertisement
Installation and Servicing
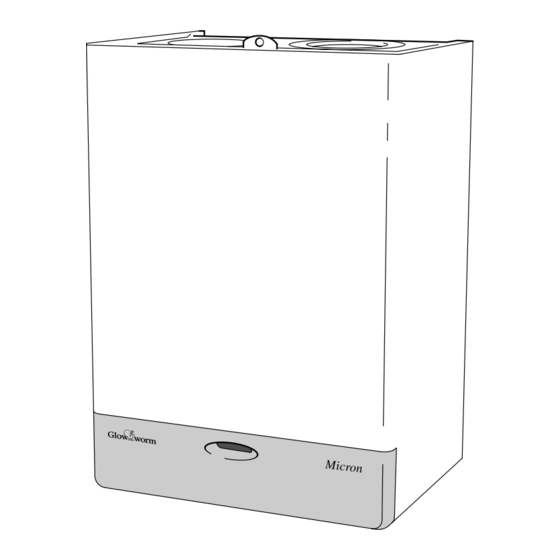
Micron
50FF
G.C. No. 41-047-48
Fanned Flue Boiler
This is a Cat I
Reference in these instructions to British Standards and Statutory
Regulations/Requirements apply only to the United Kingdom.
For Ireland the current edition of I.S.813
"Domestic Gas Installations" must be used.
The instructions consist of three parts, User, Installation and Servicing Instructions.
The instructions are an integral part of the appliance and must, to comply with the current issue of the
Gas Safety (Installation and Use) Regulations, be handed to the user on completion of the installation.
Thank you for installing a new Glow-worm appliance in your home.
Glow-worm appliances' are manufactured to the very highest standard so we are pleased
We recommend you complete and return your Guarantee Registration Card as soon as possible.
If this card is missing you can obtain a copy or record your registration by telephoning Glow-worm's own service
Our Guarantee gives you peace of mind plus valuable protection against breakdown by covering the cost of:
❏
✔
All replacement parts
❏
✔
All labour charges
❏
✔
All call-out charges
Instructions for Use
T o b e l e f t w i t h t h e u s e r
Appliance
2H
Guarantee Registration
to offer our customers' a Comprehensive First Year Guarantee.
organisation on 01773 828100.
REGISTER YOUR GLOW-WORM APPLIANCE
FOR 1ST YEAR GUARANTEE PROTECTION
CALL 0800 073 2142
Tel: (01773) 828100
Fax: (01773) 828070
Glow-worm
Nottingham Road, Belper, Derbyshire. DE56 1JT
General/Sales enquiries:
Tel: (01773) 824141 Fax: (01773) 820569
www.glow-worm.co.uk
2000225227C.04.05
Advertisement
Table of Contents

Related Manuals for Glow-worm Micron 50FF


Summary of Contents for Glow-worm Micron 50FF
-
Page 1: Instructions For Use
Comprehensive First Year Guarantee. We recommend you complete and return your Guarantee Registration Card as soon as possible. If this card is missing you can obtain a copy or record your registration by telephoning Glow-worm's own service organisation on 01773 828100. -
Page 2: Table Of Contents
This boiler is tested and certificated to EN483 for safety and performance. It is therefore important that no alteration is made to the boiler, without permission, in writing, from Glow-worm. Any alteration not approved by Glow-worm, could invalidate the certification, boiler warranty and may also infringe the current issue of the Statutory Requirements. -
Page 3: Electrical Supply Failure
To obtain service, please call your installer or Glow-worm’s own Service Organisation using the telephone number given on the front cover of these instructions. -
Page 4: Important Notice
Installation - 1 General TOP / SIDE FLUE OPTION WATER CONNECTIONS REAR 22mm COPPER PIPE FLUE OPTION GAS CONNECTION in. ( in. BSPT) MODEL 50FF 262 75 102 360 139 500 68 100 104 23 40 35 108 STD/EXD. EASYFIT STD/EXD. - Page 5 1 General 1.4 Gas Supply The gas installation shall be in accordance with the relevant standards. In GB this is BS6891. In IE this is the current edition of I.S.813 “Domestic Gas Installations”. The supply from the governed meter must be of adequate size to provide a steady inlet working pressure of 20mbar (8in wg) at the boiler.
- Page 6 Institute of Gas Engineers The boiler may be fitted to a wall made of combustible material. document IGE/UP/7/1998. If in doubt seek advice from the local gas undertaking or Glow-worm. 1.11 Boiler Clearances 1.15 Anti-theft Kits Refer to diagram 1.3.
-
Page 7: Flue And Ventilation
D BELOW A BALCONY OR CAR PORT A Flue Bend Kit or Vertical Flue Kit up to 4 metres can be E FROM VERTICAL DRAIN PIPES AND supplied, see Glow-worm "Flue Options Guide" for configurations SOIL PIPES available. F FROM INTERNAL/EXTERNAL CORNERS Flue Bend Pack - Pt. -
Page 8: Water Systems
2 Flue and Ventilation 2.3 Terminal Guard A terminal guard is required if persons could come into contact with the terminal or the terminal could be subject to damage. If a terminal guard is required, it must be positioned to provide a minimum of 50mm clearance from any part of the terminal and be central over the terminal, see diagram 2.2. - Page 9 3 Water Systems 3.8 Inhibitor 3.15 Filling a Sealed Water System Attention is drawn to the current issue of BS5449 and BS7593 Provision for filling the system at low level must be made. on the use of inhibitors in central heating systems. The installation should comply with the appropriate requirements When installing in an existing system take special care to drain of the current issue of BS 5449.
-
Page 10: Flue And Appliance Preparation
4 Flue and Appliance Preparation Diagram 4.1 2000225227C... - Page 11 4 Flue and Appliance Preparation NOTE: Make sure that the ductings do not slope down towards the boiler. 4.1 Flue Position and Length Determine flue application, length and terminal position before OPTIONAL starting. FLUE COLLAR Refer to diagram 4.1. If you are using a Flue Bend or a Vertical Flue Kit, please follow the instructions supplied with the kit.
- Page 12 4 Flue and Appliance Preparation Carefully drill though air duct pilot hole and secure with self WITH WALL LINER KIT ONLY tapping screw provided in fittings pack, see diagram 4.1. Seal the joint with the tape provided. WALL THICKNESS- UP TO 300mm If the flue system requires the addition of flue extension kits, drill, seal and secure them with the self tapping screw and tape FOAM SEAL...
-
Page 13: Boiler Installation
5 Boiler Installation 5.1 Unpacking VIEW ON Open the carton, check the items supplied against the boiler COVER TOP pack contents list on the carton flap. 5.2 Boiler Preparation CASE With the boiler still in the bottom tray, remove the casing front SECURING cover. - Page 14 5 Boiler Installation Rear Flue fixing. MOUNTING Fit the fan elbow and secure with jubilee clip to the fan outlet, do BRACKET not tighten yet, see diagram 5.7. Fit the retaining clamp of the fan elbow, bending the straps around the fan elbow raised clamping surfaces but do not fasten the clasp, see diagram 5.7.
-
Page 15: Electrical Connection
5 Boiler Installation 5.5 Gas Connection REAR FLUE FIXING Make the gas connection to the Rc in gas service cock, see diagram 6.2. The whole of the gas installation, including the meter, should be inspected, tested for soundness and purged in accordance with the current issue of BS6891 and in IE the current edition of SCREWS I.S.813 "Domestic Gas Installations". - Page 16 5 Boiler Installation 5.8 Pump Connection 1. Test insulation resistance to earth. 2. Test earth continuity and short circuit of all cables. The pump must be connected to the external controls. 3. Test the polarity of the mains. 5.9 Testing The installer is requested to advise and give guidance to the user of the controls scheme used with the boiler.
-
Page 17: Commissioning
6 Commissioning IMPORTANT NOTE: The warning notice attached to FASCIA the front of the boiler casing must only be removed by the user. Please ensure the “Benchmark” logbook is completed and left with the user. 6.1 All Systems Commissioning should be carried out by a competent person in accordance with the current issue of BS6798. - Page 18 6 Commissioning 6.4 Testing - Electrical Table 2 Turn the boiler temperature control knob fully clockwise to the maximum setting, which is approx. 82 C (180 50FF MIN. MED. MAX. The lighting sequence is automatic as follows: m 3 /h APPROX.
-
Page 19: Instructions To The User
7 Instructions to the User Instruct and demonstrate the safe and efficient operation of the boiler, heating system and domestic hot water system. Advise the user, that to ensure the continued efficient and safe operation of the boiler it is recommended that it is checked and serviced at regular intervals. -
Page 20: Servicing
POINT and performance specification that we require. Do not use reconditioned or copy parts that have not been clearly authorised by Glow-worm. Products of Combustion Check RED AIR PRESSURE... -
Page 21: Fault Finding
8 Servicing Clean the heat exchanger flueways with a suitable stiff brush. Remove the paper together with any debris. SCREW 8.4 Injector With the burner removed the injector can be inspected and cleaned as necessary, see diagram 8.5. For cleaning do not use a wire or sharp instrument on the hole. If removed, use a little suitable sealant on the external thread when refitting to make sure a gas tight seal is made. - Page 22 9 Fault Finding Diagram 9.2 2000225227C...
- Page 23 9 Fault Finding Diagram 9.3 2000225227C...
- Page 24 9 Fault Finding PRESSURE SWITCH BROWN BLUE GREEN/YELLOW GREY BLACK PURPLE YELLOW CONTROL VALVE SAFETY TEMPERATURE LIMITER ELECTRODE THERMISTOR P.C.B (CONTROL BOARD) JUMPER POSITION BURNER RESET T3.15A FUSE LIT LED MAINS SUPPLY 230V~50Hz KEY TO TERMINAL BLOCK BLOCK CONNECTOR = LIVE (Switched) = NEUTRAL = EARTH MAIN Diagram 9.4...
-
Page 25: Replacement Of Parts
10 Replacement of Parts IMPORTANT NOTES Replacement of parts must only be carried out by a competent person. Before replacing any parts isolate the boiler from the electrical supply and turn the gas supply off at the gas service cock, see diagram 6.2. - Page 26 10 Replacement of Parts Sides boiler by removing the hinge pins, see diagram 5.10. Carefully pull the control knob and extension piece away from Slide the insulation out. Make note of position of chamfer on the PCB. insulation pieces i.e. Left hand: chamfer bottom front. Right hand: chamfer top rear, see diagram 10.5.
- Page 27 10 Replacement of Parts 10.11 Air Pressure Switch, Part No. 227127 - diagram 10.6 SECURING Gain Access as Section 5.2. SCREW (2) Remove the air pressure tubes and electrical connections from the switch, release the screws and remove the switch. When fitting the replacement make sure that the plastic tubes are fitted as shown in diagram 10.6 and the electrical connections are made, as diagram 9.4.
-
Page 28: Spare Parts
11 Spare Parts 11.1 Part Identification The part number and the diagram location will help to identify the part. 11.2 Ordering When ordering any spare parts please quote the number and description from the list together with the model name and serial number. If ordering from the local gas undertaking also quote the GC number of the appliance.
Need help?
Do you have a question about the Micron 50FF and is the answer not in the manual?
Questions and answers