Table of Contents
Advertisement
Advertisement
Table of Contents

Related Manuals for RDM EC7000i


Summary of Contents for RDM EC7000i
- Page 1 EC7000i and EC7500i Series Scanners User Guide July 2014...
- Page 2 In no event shall RDM Corporation be held liable for special, direct, indirect, or consequential damages, losses, cost, charges, claims, demands, or claim for lost profits, fees, or expenses of any nature or kind.
-
Page 3: Compliance Statements
Warning: Changes or modifications not expressly approved by RDM could void the user’s authority to operate the equipment. -
Page 4: Table Of Contents
Introduction ..............................6 About this guide ............................6 Requirements ............................6 Recommendations ............................ 6 EC7000i and EC7500i models and features ..................... 7 EC7000i ..............................7 EC7500i ..............................7 Model and serial number ........................... 8 Setting up the EC7000i or EC7500i ......................9 Choose a location ............................. - Page 5 EC7000i and EC7500i User Guide Contents EC7500i light signals and beeps ......................17 Start up ..............................17 Document scanning and processing ....................17 A Typical Document Processing / LED Cycle ..................17 Maintaining your scanner ..........................18 Cleaning the scanner ..........................18 Cleaning the imaging camera glass ......................
-
Page 6: Introduction
Requirements The EC7000i and the EC7500i scanners are for indoor use only. Keep the scanners dry and avoid areas of high humidity. Do not remove any parts other than the areas specified in this guide. Removing parts other than the areas specified in this guide will void the warranty. -
Page 7: Ec7000I And Ec7500I Models And Features
Introduction EC7000i and EC7500i models and features The EC7000i and EC7500i series scanners are available in several optional model configurations. All models ship with a franker cartridge. All scanner models can also be licensed to perform optical character recognition (OCR) on documents with machine printed text (remittances, pay stubs). -
Page 8: Model And Serial Number
Note: this guide is for EC series scanners with serial numbers beginning with 24 and higher. If your scanner’s serial number begins with 23 or lower, you should download the appropriate guide from RDM’s website, www.rdmcorp.com/support ©2014 RDM Corporation... -
Page 9: Setting Up The Ec7000I Or Ec7500I
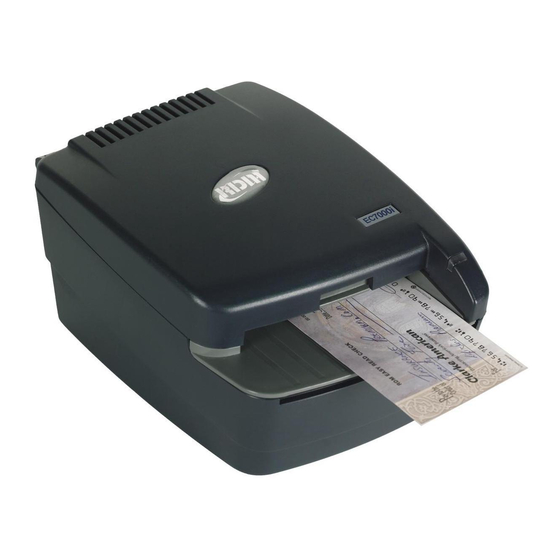
Thermal receipt paper roll (if the scanner includes a printer) Inspect the scanner’s features EC7000i and EC7500i scanners look very similar, but some scanners include a magnetic stripe reader (MSR) and the EC7504f includes a receipt printer. The illustrations below show the basic scanner (type A), and a scanner with a magnetic stripe reader and printer (type B). - Page 10 EC7000i and EC7500i User Guide Setting up the EC7000i or EC7500i Type A Type B Printer Document Document Magnetic insertion slot insertion slot stripe reader (MSR) Scanner status Scanner status LED light LED light ©2014 RDM Corporation Page 10...
-
Page 11: Inside Ec7000I And Ec7500I Series Scanners
Connection ports The EC7000i and EC7500i have different configurations of connection ports based on optional features. These configurations are set and programmed by the distributor (reseller) to suit your unique needs. The following diagrams show the possible ports for EC7000i and EC7500i scanners: ©2014 RDM Corporation... -
Page 12: Insert The Franker Cartridge
EC7000i and EC7500i User Guide Setting up the EC7000i or EC7500i EC7000i ports The following table describes the scanner ports, from left to right: Power Connect the power adaptor to this port. (Red) Use this port to connect to a PC. -
Page 13: Connect To A Telephone Line
EC7000i and EC7500i User Guide Setting up the EC7000i or EC7500i Access the printer assembly 1. Press the cover latch and lift the cover to access the imaging frame. 2. Lift the imaging frame to access the feed plate. 3. Locate the blue tab on the right side of the plate. Note the black tab in the same place on the left side of the plate. -
Page 14: Connect The Power Cord
Drivers and software The drivers for your scanner are installed on your computer when you install the check scanning application. There are many applications that support EC7000i and EC7500i scanners; most are available from third-party vendors. If you are not sure where to acquire your check scanning application, check with whoever provided your scanner. -
Page 15: Operating The Scanner
EC7000i and EC7500i User Guide Operating the scanner Operating the scanner Preparing checks To reduce the possibility of errors and damage to the unit, you should: • Remove all folds and creases in the check. • Remove any paper clips and staples from the check. -
Page 16: Status Signals For Ec7000I And Ec7500I
The tables below describe typical status signals and their meanings. EC7000i light signals and beeps The following tables are for EC7000i scanners with serial number 24x and higher. Your scanner’s serial Model number is listed on the bottom of the unit. For more information on finding your serial number, see... -
Page 17: Ec7500I Light Signals And Beeps
EC7000i and EC7500i User Guide Status signals for EC7000i and EC7500i EC7500i light signals and beeps Start up Signals Meaning / What to do Red-green flashing cycle The scanner is being configured by the application. Or, red-red-green-green flashing cycle Green solid The scanner is configured but idle. -
Page 18: Maintaining Your Scanner
EC7000i and EC7500i User Guide Maintaining your scanner Maintaining your scanner Your scanner performs best when all working surfaces are clean and free of foreign material. Cleaning the scanner CAUTION: • Always disconnect the power to the scanner before cleaning it. -
Page 19: Cleaning The Imaging Camera Glass
EC7000i and EC7500i User Guide Maintaining your scanner Cleaning the imaging camera glass If there are horizontal lines in the image of the scanned document, you should clean the imaging camera glass. To locate and access the imaging camera glass: 1. -
Page 20: Troubleshooting
EC7000i and EC7500i User Guide Troubleshooting Troubleshooting In the course of everyday operations, you may encounter minor malfunctions in your scanner. Before calling for service, review the troubleshooting steps below. Scanner does not respond Ensure that the scanner’s cable is still properly connected to the correct port on the back of the unit (according to instructions provided by your distributor or reseller). -
Page 21: The Check Feeder Does Not Function Properly
EC7000i and EC7500i User Guide Troubleshooting The check feeder does not function properly Ensure that you are inserting the check properly: flush to the right side of the scanner, information-side facing up, with the MICR line to the right. If the problem persists, contact your distributor. -
Page 22: Specifications
11.8” long x 6.1” wide x 5.3” high 30.1 cm long x 15.4 cm wide x 13.5 cm high Unit weight EC7000i: 3.4 lbs. / 1.5 Kg EC7504f with printer: 6.0 lbs / 2.7 Kg with power supply Unit orientation For proper operation, place unit on a level, horizontal surface. -
Page 23: Part Numbers
Supported operating Windows XP, Windows 7 (32/64-bit), Windows 8 (32/64-bit), Windows 8.1 systems (32/64-bit) Development software RDM EC Scanner Application Development Kit (ADK) includes API components, USB driver, Redistributable Installation Packages and Sample Applications Modem Specifications (Optional) Supports V.34bis, V.34 V.F.C, V.32bis, V.32, V.22bis, V.22A/B, V.23, V.21,... -
Page 24: Additional Parts
302843 EC7500i) Optional Aux to PC serial cable, mini-DIN9 to 5000-40012 DB9 – (EC7000i models) USB Cable, Type A to A (EC7000i models) 5000-40091 USB 2.0 cable, A to B male, shielded 6000-6106 (EC7500i models) Modem cable, RJ11 to RJ11 (EC7014f) 5000-40063 ©2014 RDM Corporation... -
Page 25: Startup
EC7000i and EC7500i User Guide Appendix A Appendix A This appendix describes the EC7000i series scanners’ LED and beep signal patterns for serial numbers 23x and lower. Startup Signals Meaning / What to do Red/Green/Amber flashing The scanner is starting up and performing diagnostics. Wait for the cycle scanner to finish. -
Page 26: Warranty Information
EC7000i or EC7500i, even if the Corporation, such distributors and/or such manufacturers have been advised of the possibility of such damages. -
Page 27: Warranty Specifics
RDM, or damage that is attributable to acts of nature including but not limited Flood, lightning, power surges or static electricity, water damage, falls, theft, or...
Need help?
Do you have a question about the EC7000i and is the answer not in the manual?
Questions and answers