Table of Contents
Advertisement
Advertisement
Table of Contents

Related Manuals for Central Machinery 60564


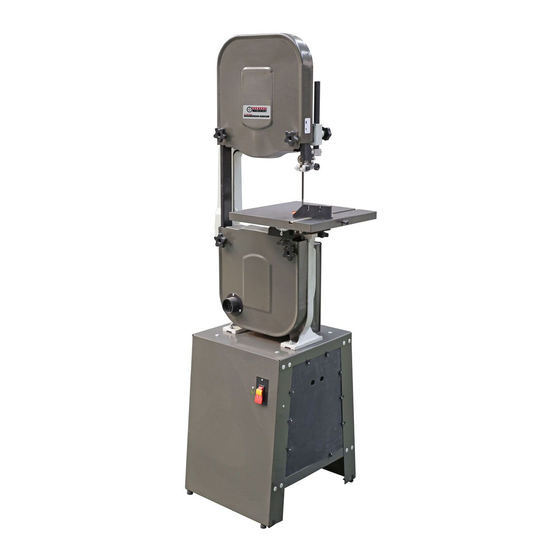
Summary of Contents for Central Machinery 60564
-
Page 2: Table Of Contents
4. DON’T USE IN DANGEROUS ENVIRONMENT. to do a job for which it was not designed. Don’t use power tools in damp or wet locations, or expose them to rain. Keep work area well lighted. Page 2 For technical questions, please call 1-800-444-3353. Item 60564... - Page 3 This tool is equipped with an electric cord having an equipment-grounding conductor and a grounding plug. The plug must be plugged into a matching outlet that is properly installed and grounded in accordance with all local codes and ordinances. Item 60564 For technical questions, please call 1-800-444-3353. Page 3...
-
Page 4: Band Saw Safety Warnings
16. People with pacemakers should consult their physician(s) before use. Electromagnetic fields in close proximity to heart pacemaker could cause pacemaker interference or pacemaker failure. Page 4 For technical questions, please call 1-800-444-3353. Item 60564... -
Page 5: Specifications
568, 1080, 1582, and 2529 FPM Speeds (4) (Feet Per Minute) Table Size 14″ x 14″ 4000909 Table Tilt 0-45° Blade Size 93-1/2″ L x 3/8″ W x 0.02″ T Table Height From Floor 42-1/2″ Item 60564 For technical questions, please call 1-800-444-3353. Page 5... -
Page 6: Setup
Supporting Plate. Then fasten second Supporting Plate on the other sides of the Front and Rear Legs. See Figure 3, right. Supporting Plate (4) Front Leg (2) Page 6 For technical questions, please call 1-800-444-3353. Item 60564... -
Page 7: Stand Assembly
Fixed Plates together. See Figure 7, right. Fixed Plate (64) Washer (58) Pad (65) Feet (65-1) 8. Make sure Stand is level. Hex Bolt (53) If level, tighten all hardware connections now. Item 60564 For technical questions, please call 1-800-444-3353. Page 7... -
Page 8: Pulley Mounting
Set Screw (13) in the side of the Pulley to secure it to the shaft. See Figure 10, right. The Pulley will no longer need to be held in place. Page 8 For technical questions, please call 1-800-444-3353. Item 60564... - Page 9 Nut (60). See Figure 12, right. NOTE: Leave the Nuts snug, but do not tighten them completely yet. 4. Remove the nylon cable tie that secured Motor Plate (7) the Power Cord (20) during shipment. Item 60564 For technical questions, please call 1-800-444-3353. Page 9...
- Page 10 Black 5. After the wiring is properly connected, carefully hold the Switch Cover in place and secure in place with the Screws. Power Cord (20) Page 10 For technical questions, please call 1-800-444-3353. Item 60564...
- Page 11 Trunnions (42A). Insert those two Bolts through the holes in the Table Bracket and secure the Bolts in place using Knobs (46A). See Figure 17, right. Trunnion (42A) Table Bracket (45A) Bolt (40-1A) Knob (46A) Item 60564 For technical questions, please call 1-800-444-3353. Page 11...
- Page 12 Note: The unnumbered innermost position on the Saw Pulley should ONLY be used to drive the Top Pulley (63A), and should not be used to change speeds. Page 12 For technical questions, please call 1-800-444-3353. Item 60564...
- Page 13 (3A) Guard (2A) onto the end of the Guide Post (4A). Align the Bracket Post and tighten the Hex Bolt to secure it. See Figure 21, right. Bracket Post (5-1A) Item 60564 For technical questions, please call 1-800-444-3353. Page 13...
-
Page 14: Operation
Then insert one side of the Saw Blade (36A) back side first and through the slot in the Table (39A). See Figure 24, right. Blade Table (36A) (39A) Page 14 For technical questions, please call 1-800-444-3353. Item 60564... - Page 15 2. Adjust Upper and Lower Blade Guides so that they Blade Tracking do not contact the blade during tracking adjustment. Knob (18A) 3. Loosen the nut on the shaft of the Blade Tracking Knob (18A). Item 60564 For technical questions, please call 1-800-444-3353. Page 15...
- Page 16 Blade Guides as close as possible to (55A) the side of the Saw Blade without touching it. Bolt Then, tighten the Bolts (53A). 9. Return Table to its normal position and secure with Knobs. Page 16 For technical questions, please call 1-800-444-3353. Item 60564...
- Page 17 Pulley Box to allow access. Pulley Box after changing the speed setting. 2. Use the Belt Installation instructions on page 16 to change the Belt’s position to the desired speed setting. Item 60564 For technical questions, please call 1-800-444-3353. Page 17...
-
Page 18: Work Piece And Work Area Set Up
The power cord must reach the work area with enough extra length to allow free movement while working. Page 18 For technical questions, please call 1-800-444-3353. Item 60564... -
Page 19: General Operating Instructions
Open the Lower Wheel Guard (69A). c. Clean the sawdust out with a brush or vacuum. d. Close the Lower Wheel Guard. Note: A dust collector may reduce the need for this cleaning if used. Item 60564 For technical questions, please call 1-800-444-3353. Page 19... -
Page 20: Maintenance
2. DO NOT INTRODUcE WATER INTO tool is damaged, it must be replaced only THE ELEcTRIc MOTOR THROUGH by a qualified service technician. THE MOTOR VENTS. 8. Store the Bandsaw covered with a cloth cover. Page 20 For technical questions, please call 1-800-444-3353. Item 60564... -
Page 21: Troubleshooting
1. Slow down the speed at which you are appear rough. Saw Blade to fast. feeding material through the blade. 2. Blade is too coarse for 2. Use a blade with a finer pitch. material being cut. Item 60564 For technical questions, please call 1-800-444-3353. Page 21... -
Page 22: Parts Lists And Diagrams
10-1 Key Flat Washer Pulley Box Motor Pulley Screw Set Screw Knob Power Cord Fixed Plate Wire Screw 65-1 Feet Grounding Label Side Panel Washer Press Block Lock Washer Screw Page 22 For technical questions, please call 1-800-444-3353. Item 60564... - Page 23 Item 60564 For technical questions, please call 1-800-444-3353. Page 23...
- Page 24 38A Table pin 100A Screw 39A Table 101A Belt 40-1A Bolt 102A Belt 41A Trunnion clamp 103A Saw pulley 42A Trunnion 104A Retaining ring 43A Flat washer 105A Shaft 44A Hex Bolt Page 24 For technical questions, please call 1-800-444-3353. Item 60564...
- Page 25 Item 60564 For technical questions, please call 1-800-444-3353. Page 25...
- Page 26 Note: If product has no serial number, record month and year of purchase instead. Note: Some parts are listed and shown for illustration purposes only, and are not available individually as replacement parts. Page 26 For technical questions, please call 1-800-444-3353. Item 60564...
-
Page 27: Warranty
This warranty gives you specific legal rights and you may also have other rights which vary from state to state. Item 60564 For technical questions, please call 1-800-444-3353. - Page 28 3491 Mission Oaks Blvd. • PO Box 6009 • Camarillo, CA 93011 • (800) 444-3353...
Need help?
Do you have a question about the 60564 and is the answer not in the manual?
Questions and answers
How to purchase a part
You can purchase Central Machinery part number 60564 from an online parts store. The provided context mentions an online store that sells replacement parts, including those for Central Machinery. You can visit the store’s website and search for the specific part number. Additionally, if you need technical support, you can call 1-800-444-3353.
This answer is automatically generated