
Subscribe to Our Youtube Channel
Related Manuals for Russell Hobbs Reflections RHRSP1


Summary of Contents for Russell Hobbs Reflections RHRSP1
- Page 1 RECHARGEABLE SALT & PEPPER GRINDER MODEL RHRSP1 Instructions & Warranty RHRSP1_IB02_141209...
-
Page 2: Important Safeguards
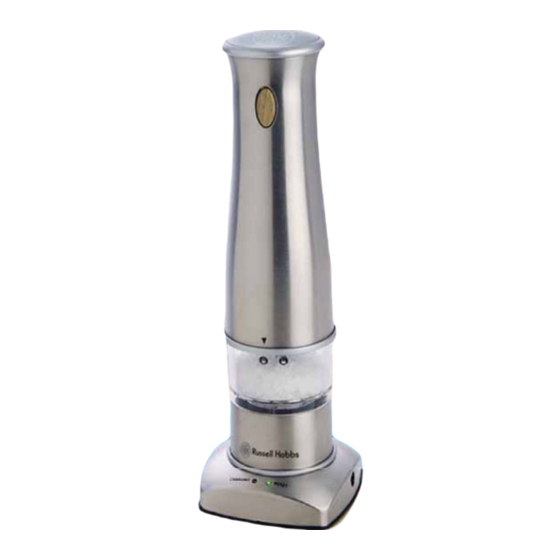
Do not clean the grinder while it is charging in it’s base. Please clean it while it is unplugged. Do not plug or unplug the power source with wet hands. Only use a genuine charger from Russell Hobbs. Contact customer service if replacement is required. - Page 3 PARTS AND ACCESSORIES TO THIS PRODUCT a. Stainless Steel Casing b. Control Switch i. Bulb c. Rechargeable Battery j. Charging Jack d. Battery Holder (irremovable) k. Charging Pilot Light (red) e. Transparent Container l. Control Pilot Light (green) f. Base m.
- Page 4 ASSEMBLING THE GRINDER (Figure 1 & 2) 1. Align the pointers on the bottom of the motor unit with the padlocks on the top of the grinder and lower the motor unit on to the grinder. 2. The spindle should slide easily into the centre of the motor unit. 3.
-
Page 5: Care And Maintenance
ADJUST THE GRIND (Figure 5) 1. Turn the whole mill upside down and turn the knob right (-) until it won’t go any further. 2. Now turn it left (+) a little. 3. Turn the mill right way up press and release the switch. 4. -
Page 6: General Troubleshooting
GENERAL TROUBLE-SHOOTING Problem Possible Causes Trouble-shooting Control Pilot Light “l” on No power. Check wall socket has the charging base does been switched on. not illuminate. Check plugs are properly inserted into charging base and wall socket. Charging Pilot Light “k” Grinder not properly Re-position grinder in the charging base does... - Page 7 Ease of operation In store demo Prior experience with Salton Product features Seen in store Special offer Prior experience with Russell Hobbs Salton reputation Seen on television Recommendation of family/friend Russell Hobbs reputation Seen in newspaper/magazine (email address must be supplied)
Need help?
Do you have a question about the Reflections RHRSP1 and is the answer not in the manual?
Questions and answers