Table of Contents

Related Manuals for Russell Hobbs RHBI7WC1SS


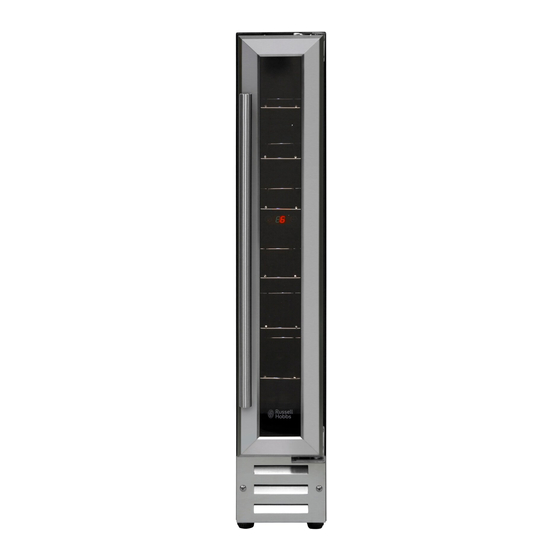
Summary of Contents for Russell Hobbs RHBI7WC1SS
- Page 1 7 Bottle Built in Wine Cooler Instruction Manual Model number(s): RHBI7WC1 (SS) For Customer Services & Spare Parts please call 0345 208 8750 or visit us at https://mda.russellhobbs.com IMPORTANT: RETAIN FOR FUTURE REFERENCE...
-
Page 2: Table Of Contents
Contents Safety Instructions ………………………………………. Electrical Safety ………………………………………. Transportation & Handling ………………………………………. Installing & Switch on your Appliance ………………………………………. Before Switching On ………………………………………. Product Overview ………………………………………. Unit & Spare Parts ………………………………………. Positioning & Installation ………………………………………. 9-10 Handle Installation ………………………………………. Usage ………………………………………. 11-17 Door Reversal ………………………………………. -
Page 3: Safety Instructions
Safety Instructions Important note: Please read this booklet before installing and switching on this appliance. The manufacturer assumes no responsibility for incorrect installation and usage as described in this booklet. Warning: When positioning the appliance, ensure the supply cord is not trapped or damaged. - Page 4 • Do not pull, twist or damage the power cable. • Do not plug-in or un-plug the appliance with wet hands to prevent electrical shock. • This appliance can be used by children aged from 8 years and above and persons with reduced physical, sensory or mental capabilities or lack of experience and knowledge if they have been given supervision or instruction concerning use of the appliance in a safe way and understand the hazards...
-
Page 5: Electrical Safety
• One-, two- and three -star compartments (if they are presented in the appliance) are not suitable for the freezing of fresh food. • If the appliance is left empty for long periods, switch off, defrost, clean, dry and leave the door open to prevent mount developing within the appliance. -
Page 6: Installing & Switch On Your Appliance
Installing and Switching on Your Appliance • Operating voltage for your appliance is 220-240V at 50Hz. • Before plugging in the power supply, ensure that the voltage on the rating label corresponds to the working voltage of your electrical system in your home. •... -
Page 7: Before Switching On
Before Switching On • Before using your appliance, add a teaspoon of bicarbonate of soda to warm water and with a damp cloth wipe down all parts of the new appliance, then repeat the process with a clean damp cloth and dry (ensure the appliance is not connected to the power when performing this task). -
Page 8: Product Overview
Product Overview 1. Upper hinge 7. Adjustable feet 2. Handle 8. Vents 3. Controls & display 9. Door reversal left top 4. Glass door hinge 5. Bottle racks 10. Door reversal left bottom 6. Lower hinge hinge Unit Parts & Spare Parts Before installation, check that all parts detailed in the product overview are present. -
Page 9: Positioning & Installation
Positioning & Installation • This appliance can be installed as a freestanding or a built in unit. The clearances shown in the below drawing should be followed for both types of installation. • Avoid damaging the product during installation, positioning of the appliance requires two people in order to avoid injuries or damage to the appliance. -
Page 10: Handle Installation
• A decorative plinth can be fitted to the front of the base vent as long as the cut out shown in the diagram below is made in the plinth. This cut out is required whether the vent is removed or not. Handle installation To install the door handle follow the below steps: 1. -
Page 11: Usage
Usage Control panel The control panel is situated in the middle of the appliances cavity and has a power, light, temperature up and temperature down touch controls, these are explained below: 1. Power on/off – press to turn the appliance on and off 2. - Page 12 Usage Allow to stand for a minimum of 3 hours before plugging in to the mains During first use Important: When you use the wine cooler for the first time or restart the appliance after it has been turned off for a long time, there could be a few degrees variance between the temperature you select and the one indicated on the display.
- Page 13 Usage 5. The temperature will increase by 1°C or 1°F if you touch the temperature up control once and will decrease by the same amount if you press the temperature down control once. 6. When you set a new temperature, the display will show the previous temperature for 5 seconds, before showing the actual temperature.
- Page 14 Usage Loading the wine cooler Important: Your appliance is ideally suited to store 0.75 litre Bordeaux style wine bottles. While the cabinet can store larger bottles, you must make sure that they do not prevent the door from shutting properly. •...
- Page 15 Usage • Temperature stability is the most important factor when it comes to storing wine. • Exposure to light, vibrations or fluctuations in temperature and humidity can all cause wine to spoil. When properly stored, wines not only maintain their quality but many will actually improve in aroma, flavour and complexity as they mature.
- Page 16 Usage Wine storage problems Corking - a tiny percentage of bottled wine (about 1%) will suffer from this. The cork reacts with the wine and gives it a musty, unpleasant taste. It is the most common wine storage problem and is caused by harmless bacteria growing on the cork.
- Page 17 Usage A good way to get around sediment (if it is a problem) is to stand the bottle upright, the day before opening, so that the sediment can settle to the bottom of the bottle. You can also decant your wine; decanting will “open up” the flavour of both young and old wines, but younger wines in particular.
-
Page 18: Door Reversal
Door Reversal This appliance has the capability of the door opening from either the left or right hand side. Any parts that you remove from the appliance whilst reversing the door, should be retained for later use. You will need to tilt the cooler backward to access the lower hinge which holds screws. - Page 19 Door Reversal 2. Be careful to support the glass door with both hands to prevent it dropping after removing the screws. Pull down to remove the glass door and place it on a padded surface to prevent scratching it. 3. Remove the 3 screws from the right top hinge and right lower hinge. Screws Screws 4.
- Page 20 Door Reversal 5. Take the left top hinge and left bottom hinge from the plastic bag that contained the instructional manual then install them in the designated positions on the left side of the cabinet 6. Turn the glass door around 180°, put the door shaft assembly from step 1 into the hole on the bottom of the door and reinstall it.
- Page 21 Door Reversal 7. Replace the plastic screw covers from step 4 on the holes on the right hand side. Check that the door opens and shuts correctly after you have completed the door reversal process. The appliance must now be upright for a minimum of 3 hours before turning it on.
-
Page 22: Energy Saving Advice
Energy Saving Advice • Do not install the appliance close to sources of heat, such as a cooker, dishwasher or radiator. • Locate the appliance in a cool well-ventilated room and make sure that the air vents are clear. • Try to avoid keeping the doors open for a long time, warm air will enter the cabinet and may cause a build-up of ice as well as affecting the energy consumption. -
Page 23: Maintenance & Cleaning
Maintenance & Cleaning Disconnect the appliance from the power supply before cleaning. Internal Cleaning • Do not pour water over the appliance. • The cavity should be cleaned periodically using a solution of bicarbonate of soda and lukewarm water (5ml to 0.5 litre of water) •... -
Page 24: Defrosting
Maintenance & Cleaning Defrosting • Defrosting occurs automatically inside of the wine cabinet during operation. The defrost water is collected by the evaporating tray and evaporates automatically. • The evaporating tray and defrost water drain hole should be cleaned periodically. This will prevent water from collecting in the bottom of the wine cabinet, instead of flowing down the defrost drainage channel and drain hole. -
Page 25: Trouble Shooting
Trouble shooting Problem Solution Check that the appliance is switched on. Check that there has not been a power cut. Check that the plug is not faulty. Check that the fuse has not blown. The cooler doesn't work Check that the voltage is correct for the appliance. Are there any faults with the socket? For this purpose, try the plug of your appliance by connecting it to a socket which you are sure is working. - Page 26 Trouble shooting Problem Solution Check to ensure that the appliance is on a level surface. The appliance is touching the back wall behind it. Reposition the appliance and move it from the wall. Vibration If vibration continues to occur, then turn off the appliance and unplug it from your mains supply.
- Page 27 Trouble shooting Problem Solution Ensure there are no obstructions preventing door closure. Check the door compartments and shelves are The doors do not close correctly in place. properly Check the door seal is not warped or torn. Check the appliance is level. Moisture is forming on the The door is slightly open.
-
Page 28: Connection To The Mains Supply
Connection to the Mains Supply WARNING- THIS APPLIANCE MUST BE EARTHED This appliance is designed to operate from a mains supply of AC220V - 240V; 50HZ. Check that the voltage marked on the product corresponds with your supply voltage. For UK use only – Plug fitting details (where applicable): As the colours of the wires in the mains lead of this appliance may not correspond with the coloured markings identifying the terminals in your plug, proceed as follows: The GREEN/YELLOW wire is the EARTH and must be connected to the terminal which... -
Page 29: Guarantee
Guarantee This product is guaranteed for 12 months from the date of the original purchase. If any defect arises due to faulty materials or workmanship you must contact Product Care with the original proof of purchase so a replacement or refund can be arranged. Refund or replacement is at the discretion of Product Care. -
Page 30: Technical Specification
Technical Specification Model number RHBI7WC1 (SS) Rated Voltage 220V – 240V ~ 50Hz Capacity 7 bottles External Dimensions(HxWxD) 872 - 890 x 148 x 525mm... -
Page 31: Notes
Notes... - Page 32 For Customer Services & Spare Parts please call 0345 208 8750 or visit us at https://mda.russellhobbs.com This symbol is known as the 'Crossed-out wheelie bin Symbol'. When this symbol is marked on a product/batteries, it means that the product/batteries should not be disposed of with your general household waste. Only discard electrical/electronic/battery items in separate collection schemes, which cater for the recovery and recycling of materials contained within.
Need help?
Do you have a question about the RHBI7WC1SS and is the answer not in the manual?
Questions and answers