Advertisement
Usermanual
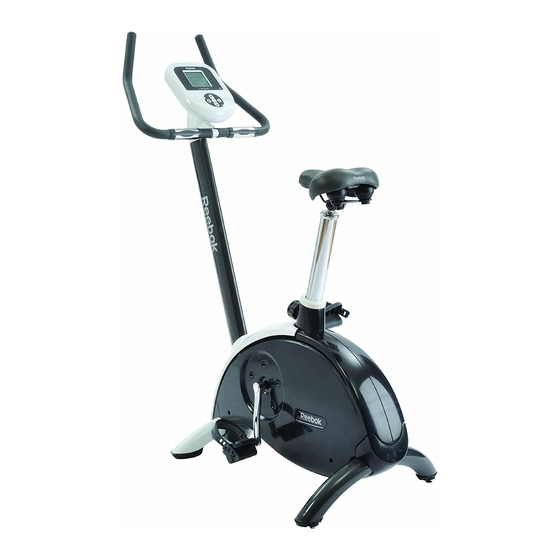
i-Bike.SE
RFE International Ltd
The Performance Centre
Maidstone Road, Kingston
Milton Keynes MK10 0BD
+44 (0) 1908 793 020
info@rfeinternational.com
Customer Support
0800 440 2459
techsupport@rfeinternational.com
reebokfitness.info
RFE4489_RE014101_iBikeSE_UMFINAL.indd 1-1
25/06/2010 15:14
Advertisement
Table of Contents

Related Manuals for Reebok i-bike.se


Summary of Contents for Reebok i-bike.se
- Page 1 Usermanual i-Bike.SE RFE International Ltd The Performance Centre Maidstone Road, Kingston Milton Keynes MK10 0BD +44 (0) 1908 793 020 info@rfeinternational.com Customer Support 0800 440 2459 techsupport@rfeinternational.com reebokfitness.info RFE4489_RE014101_iBikeSE_UMFINAL.indd 1-1 25/06/2010 15:14...
-
Page 2: Table Of Contents
Reebok Fitness Thank you for choosing Reebok. Before you get Parts ............02 Assembly. -
Page 3: Parts
Parts Reebok i-Bike.SE Customer Support 0800 440 2459 Reebok i-Bike.SE reebokfitness.info Checking The Parts Before you begin, please check all parts are present and undamaged. If you are missing any parts, please call our Technical Support team on the number at the top of this page. -
Page 4: Assembly
Assembly Reebok i-Bike.SE Customer Support 0800 440 2459 Reebok i-Bike.SE reebokfitness.info Stabiliser Remove the bike from the box. 5. Once complete, clip the plastic cover (419) over the stabiliser. 2. Remove the transport stabiliser, located at the back of the product. These bolts are 2 x 854 . - Page 5 Assembly Reebok i-Bike.SE Customer Support 0800 440 2459 Reebok i-Bike.SE reebokfitness.info Saddle/Pedals Upright 6. Attach the saddle (316) to the saddle stem (312) using the bolt which is already 10. Clip the wires at the bottom of the upright (285), to the pre assembled wires in place.
- Page 6 Assembly Reebok i-Bike.SE Customer Support 0800 440 2459 Reebok i-Bike.SE reebokfitness.info Upright Covers Handlebars 12. Clip the upright covers onto the base of the uprights as shown. 13. Insert the two wires from the back of the handlebars (255) to the pre mounted wires in the upright (fig.1).
- Page 7 Assembly Reebok i-Bike.SE Customer Support 0800 440 2459 Reebok i-Bike.SE reebokfitness.info Console & Console Covers Adjustable Feet 17. Connect the console (842) wires to the wires in the top of the upright (fig.1). 20. There are adjustable feet in the rear stabiliser. These can be screwed in or out to accommodate minor level imbalances.
-
Page 8: Precautions
• This product is designed for physical exercise by adults. This product is not • Only use original Reebok parts as delivered (see checklist). suitable for use by persons under 14 years of age. • Never allow more than one person on the equipment at a time. -
Page 9: Functions
Functions Correct Use Reebok i-Bike.SE Customer Support 0800 440 2459 Reebok i-Bike.SE reebokfitness.info Transport We recommend you use your bike in the following way: Tilt the bike forward, onto the front stabiliser. 2. Wheel the bike into position. 3. Lower the bike until all feet are flat on the floor. -
Page 10: Warm Up
Warm Up Computer Reebok i-Bike.SE Customer Support 0800 440 2459 Reebok i-Bike.SE reebokfitness.info Warming Up Computer Functions: It is important to warm up before exercising to prepare your body for the workout it is about to do. The first phase of a warm up is to increase your heart rate and get blood pumping around your body faster. - Page 11 Customer Support 0800 440 2459 Reebok i-Bike.SE reebokfitness.info Preset Programmes Target Time Programme Your i-Bike.SE has 6 preset programmes: Having turned the power on, press once. 2. The time will be flashing on the screen • Target Time Programme (the default is 30.00 minutes).
-
Page 12: Computer
Computer Reebok i-Bike.SE Customer Support 0800 440 2459 Reebok i-Bike.SE reebokfitness.info Interval Programme 20 Minute Fitness Test Programme The fitness test programme assesses your ability Having turned the power on, press to work to a target heart rate. At the end of the select P4, and press enter into program. - Page 13 Computer Reebok i-Bike.SE Customer Support 0800 440 2459 Reebok i-Bike.SE reebokfitness.info 20 Minute Fitness Test Programme continued When the programme is underway, the computer will guide you to work within your At the end of the programme, a 1 minute recovery programme will begin. It is required training zone.
-
Page 14: Maintenance
5. Check the pedals/footplates are fully tightened before each use. 6. Keep the equipment out of direct sunlight at all times. The Reebok i-Series line is designed to be smart and easy with compact structures, simple assembly and easy-to-use controls. -
Page 15: Troubleshooting
Troubleshooting Reebok i-Bike.SE Customer Support 0800 440 2459 Reebok i-Bike.SE reebokfitness.info Q My equipment is out of the warranty can you still help me? Q My new bike squeaks, is this normal? A Yes we can still help, we have a large network of engineers that cover 98% of A This is not normal there are some basic checks that we would advise you the British Isles and can provide replacement parts. -
Page 16: Parts Id
Parts ID Reebok i-Bike.SE Customer Support 0800 440 2459 Reebok i-Bike.SE reebokfitness.info Diagram 1 IB SE-842 Console Housing Cover – Upper x 1 IB SE-524 M5x14 Screw x 1 IB SE-808 Console Housing Cover – Lower x 1 IB SE-541 M5x29 Screw x 1 IB SE-804 Upright Upper Cover –... - Page 17 Parts ID Reebok i-Bike.SE Customer Support 0800 440 2459 Reebok i-Bike.SE reebokfitness.info Diagram 2 IB SE-558 6004 Bearing x 2 IB SE-422 M10 Nut x 1 608 618 IB SE-501 M18 Nut x 2 IB SE-526 Aluminum Disc OD75x11.5 x 2...
-
Page 18: Limited Warranty
PLEASE RETAIN YOUR RECEIPT AS PROOF OF PURCHASE. Your statutory rights remain unaffected. iRun.SE Music Treadmill cycle Reebok products are recyclable. At the end of its useful life please dispose of this Reebok product correctly and safely at a local refuse site. For more information visit www.reebokfitness.info RFE4489_RE014101_iBikeSE_UMFINAL.indd 32-33...
Need help?
Do you have a question about the i-bike.se and is the answer not in the manual?
Questions and answers
Hello. There is no power in our Reebok i-bike SE. I think cable which connects nuke to mains is disconnected and I don't know how to reconnect, I don't know how to remove sides of the bike, how to open it to reconnect the mains cable.
To reconnect the mains cable on a Reebok i-Bike SE, you need to check the wiring connections located at the rear of the computer and halfway down the inside of the handlebar tube. These connections can be completely disconnected and reconnected to reset the function. The manual does not provide specific instructions for opening the sides, but accessing these areas typically involves removing the console housing cover and possibly the upright tube cover to reach and reconnect the internal wiring.
This answer is automatically generated