Table of Contents
Advertisement
Advertisement
Table of Contents

Related Manuals for Kenmore 1240


Summary of Contents for Kenmore 1240
- Page 1 Kenmope INSTRUCTIONS MODEL 1230/1240/1250 - ZIG o ZAG SEWING MACHINE #52917...
-
Page 2: Table Of Contents
TABLE OF CONTENTS Section Section Section Section ] Knowing Your Sewing Machine Identifying Parts ... Installing and Connecting Machine ... Bobbin ... Threading-Top Thread ... Using the Controls Top Tension Control ... Bobbin Tension Adjusting ... Checking Tensions ... Stitch Length Control ... Stitch Width Control ... -
Page 3: Stitch Width Control
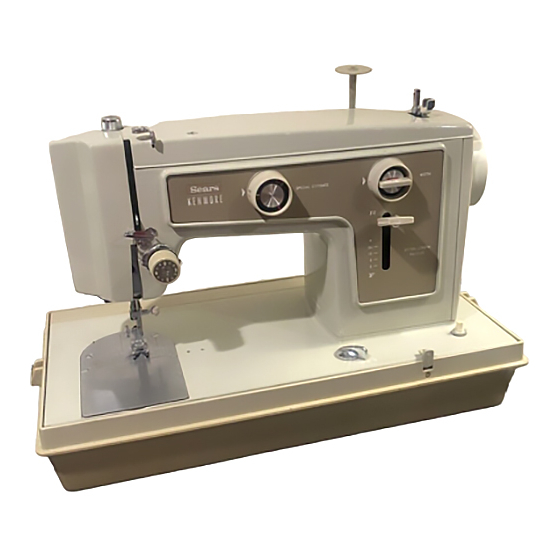
Face Cover Plate Take-up Lever Upper Thread Guide ewing Machine Special Stitch (Model 1250 only) Stitch Width Control Special Stitch (Models 1240, 1250 only) Stitch Length Reverse Stitch Light and Power Feed Dog Control Nomenclature Dial Variegator Control Switch Plate... -
Page 4: Pressure Regulator
!!i _i i _iiiiiiii ii!!iii_ii!ii!iii,liiiiiiiiiiii!i_i Clutch Knob Hand Wheel Bobbin Winder Thread Spool Pins Bobbin Winder Tension Disc Pressure Regulator Presser Foot Lever Thread Cutter Feed Dogs... - Page 5 INSTALLING MACHINE Loosen the two hinge screws holes in the rear edge of the machine bed. Raise hinge pins in the cabinet Slip machine head onto the pins and tighten hinge screws securely. Push speed control plug three-prong connector under plate.
- Page 6 REMOVING BOBBIN CASE Turn hand wheel to raise needle its highest position. Lift hand cover plate. Pull open latch of bobbin case. FROM SHUTTLE 3. Pull bobbin case hole shuttle. To thread bobbin page 7. • / iilE• • .• •...
- Page 7 WINDING BOBBIN Release clutch by turning clutch toward you. Draw thread from spool bobbin winder tension discs as shown. Pull end of thread through bobbin as shown. Place bobbin onto bobbin winder with end of thread coming from the top of the bobbin.
- Page 8 THREADING BOBBIN Insert bobbin into bobbin making sure thread is coming bobbin as shown. Pull thread through slot of case as shown. Pull thread under tension spring. 4. Turn hand wheel to raise needle to CASE case highest position. from open, position case into shuttle,...
- Page 9 THREADING Fig 2 Fig3 1. Place thread with the thread coming of the spool through 1-_or Holding pull the discs. The spring pulled beyond OF TOP THREAD _if,,,,,_ _i_,i ¸ • " '" "i,,,, __ on spool pin as shown, from the back (Fig.
-
Page 10: Top Tension Control
CONTROLS TOP TENSION CONTROL Probably the most important control on your machine is this one that regulates your top thread tension. It consists of discs between which the thread passes. The pressure on these discs is regulated by turning the dial. The higher the number, the tighter the tension. - Page 11 ADJUSTING TENSIONS Upper thread too tight Upper thread too loose Decrease Tension Increase Tension...
- Page 12 ADJUSTING BOBBIN TENSIONS Bobbin tension requires adjusting If the stitch is satisfactory but the seam is puckered, the tension on both the top and bottom indicated on page 10. When adjusting the tension on the bobbin case, make slight adjustments with a screwdriver.
- Page 14 The stitch length contro HIGHER The ! . most Commonly u_ed. _ longest iengthand same setting; T ¸'¸ iiii!iiiiiiiiilili_i_ili!iii!iliiiiil _;i_i!i!iiiii!i_;iiiiii!;;;;;;!i!;_i iiiiii:iiiiii!iiii_ii_iiiiiii_i_iiil...
- Page 15 select. HIGHER_HE NUMBER, You_may vary your zigzag stitch width by adjusting this control to the settin_...
-
Page 16: Stitch Length Control
• _ii_ prevents When Stitch Length Control The center portion Special Stitch Variegator... - Page 17 Imp: ortant ":: uTru"e'o _ :"'rnin "_tke control, make sure needle is above fabric and Stitch Width._:_ Controlis at reddot: illustrated above is the one used for most of your stitching. At this The setting strai htst=tch, stretch st=tch and make a simple setting you may ...
- Page 18 ... ::You will find that much"_f youil sewing:is in :_,e _endlng ::reason have been provicied With a stitch for: the repair of Stitch setting shown is given in more detail in the next Maxi Stitch Stretch and Feathel...
- Page 19 OTHER ADJUSTMENTS In addition to the obvious controls and controls to aid you in using PRESSER FOOT PRESSURE Push down outer ring of presser foot pressure will release pressure of presser foot. suitable pressure is obtained. For ordinary down. Insufficient pressure cause difficulty...
-
Page 20: Feed Dog Control
FEED CONTROL The feed dog control right front There are a few times when control feeding yourself. When the control left, feed dogs move the fabric. For most of your sewing control is turned to "U". Fig. 1 SEWING LIGHT light power left provides... -
Page 21: Seam Guide
i ¸ SEAM GUIDES Seam guides are printed on either side of the needle plate to aid you in guiding your fabric. GUIDE EXTENDING ABOVE THE RIGHT SIDE OF THE NEEDLE PLATE IS THE "ALL IMPORTANT" 5/8" SEAM LINE. PRESSER FOOT LEVER To aid you in the placement of heavy fabrics under the presser foot, the lever... -
Page 22: Accessories
NEEDLES ¸ ii Us'e KENMORE needles. The size of the needle should conform with the size of the thread and both should be suitable to the fabric (See next page). Never use a bent needle or one with a blunt po!nt. - Page 23 NEEDLE, THREAD _::_- .: ..:. i!i iii _HREAD SIZE:Y:_::, _IIIi!_:_ii:: Fine::Me_cerJ_e_:_:co_n :':_:::_:!::_i/-:! ;_y_ter :SYnthetic!.:f:::_ :::::::::::::::::::::: ... :_: i :: _ :::_ I:,,,!,U'I_!:}• •i:,_ i:!;:_V::!I! :_!_:!iii:i_,i::il;:}i: •_:•i}:%i_::,::i::;:i:i: •'•i::!_:i_;:,-_:_:f :: _,• 4',:i!:_ • .::.: ::-::: : :: i ::-::: ::i_:h.:;: !;:_:_::::: _ :-.: .:::_ .-:r!::: "...
-
Page 24: Presser Feet
B. Satin Stitch Foot C. Straight Stitch Foot D. Zipper Foot PRESSER FEET The various presser feet that your Kenmore Sewing Machine designed to help you to do every sewing easily and perfectly. To change the presser foot: Raise needle position... - Page 25 Starting to Sew that familiar with accessories provided for the machine, Kenmore sewing machine. Below down to sew: Check the needle-it should It should b_ the correct size for the fabric needle frequently. Many of the new fabrics the needles...
-
Page 26: Straight Stitching
1250 only, Red mark on top (Model 1250) Red dot to the left (Model 1240) in the straight stitch. dial have setting turn hand that needle types of sewing- done... - Page 27 Permanent stitching-This is the actual stitching that holds the garment together. Much of this stitching is visible on the outside of the garment and therefore must be good looking. The best length stitch to use for medium weight fabrics is 10-12 stitches per inch. This is in the middle range of the Stitch Length Control.
-
Page 28: Zigzag Stitching
Fig. 2 illustrates the folded edge stitch- Stitch so the needle pierces the fabric just short of the outside edge. worn edges of older garments overcast to prevent further raveling. 1250) 1240) except expands is the overcast in the Follow uses. used... -
Page 29: Stretch Stitching
RICK- RACK STRETCH STITCHING (Models 1240, 1250) SETTINGS: Special Stitch Dial - _o_,ll ( Model 1250 only) Special Stitch Variegator-Black mark on top (Model 1250) White the left... -
Page 30: Special Finishing Stitches
FINISHING After the basic construction of your garment is finished, there are still many finishing touches to be done. To aid your completion of your garment, the Kenmore has been designed to do the following tasks that formerly had to be done by hand. -
Page 31: Satin Stitching
It is well to use a piece of fabric under tear ment. Red mark on top (Model 1250) Red dot to the left ( Model 1240) 2 to 5 Between 24 and white stitch the'tension tension should of tissue paper or... -
Page 32: Appliqueing
APPLIQUEING SETTINGS: Same as with Satin Stitching Select an applique design to be applied to your garment and baste it in place. Satin stitch around the raw edge of the applique completely covering tlie edge. want this contrasting color thread or same color. -
Page 33: Buttonholing
Lower• presser foot take stitch left. Point B to See Fig. 3 1250) 1240) Length: at both line. be to side material :: Control Fig. 1 Fig. 2 Fig. 3... - Page 34 ::_ :' ..:_::: :; Fig_=4 If there is too much space between Depending upon the fabric on which buttonholes, you may increase or decrease the center by varying the original Remember, an incerase in the number the sides. fabric Raise presser turn foot...
- Page 35 SETTINGS: Special Stitch Dial - _oa, l: (Model 1250 only) Special Stitch Variegator- Red mark on top (Model Red dot to the left ( Model 1240) Feed Dog - Down Zigzag Stitch Foot Align holes of button with of presser...
- Page 36 " !i NIAXi -STITCH STRETCH STITCHING. (Model 1250 only) SETTINGS: Special Stitch Dial - ,,_v_ Special Stitch Variegator- Red mark on top Stitch Width Control - 2 to 5 Stitch Length Control - Any setting white dot Zigzag Stitch Foot The elastic used in lingerie, swimwear and sportswear may be sewn into place with this stitch.
- Page 37 Using a medium speed, marked outline, guiding by hands. 1250 only) Red mark on top (Model 1250) Red dot to the left (Model 1240) Red Dot hoops with hole start darning. to be sewn into embroidery with either Remove stitch width as desired.
- Page 38 Fig. 3. Fig. 3 I, (Model 1250 only) Red mark on top (Model 1250) Red dot to the left(Model 1240) - Red Dot - 10 to 12 is sewing See Fig. 2. Folle_, instructions. been inserted, finish foot side side notch.
-
Page 39: Maxi Stitch Stretch
GUIDANCE For Your Selection Stitch For Your Stretch Fabrics, STRAIGHT STRETCH (Models 1240, 1250) RICK-RACK STRETCH (Models 1240, 1250) FEATHER STRETCH (Model 1250) ;'VVVV MAXI STITCH STRETCH (Model 1250) WVVv PLAIN ZIGZAG 'VV_f BLIND STITCH (Model 1250) of the Best Kind of... -
Page 40: Feather Stretch
Straight stretch or Rick-Rack Nylon Tricot stretch. (Model 1240, 1250) Feather stretch. (Model 1250) Blind hem. (Model Straight or simple zigzag. Terry Cloth Straight stretch or Rick-Rack Regular stretch. (Model Corduroy Feather stretch. Maxi stitch stretch. Straight stretch or Rick-Rack Terry Cloth stretch. - Page 41 Checking Performance Problems WHAT TODO PROBLEM PROBABLE Incorrect size needle. improper threading; |rregular Light pressure on presser foot. Stitches Loose presser foot, Unevenly wound bobbin, Nicks or burrs on shuttle, Nicks or burrs at hole of needle plate, Pulling fabric. Breaking Incorrect size needle.
- Page 42 PROBLEM PROBABLE Certain; knits and synthetics; Bent or blunt needle ... Skipping: i: , SIitches Incorrect :setting of needle. Tight upper thread tension: Light pressure on presser foo_. : ... Starting to stitch too:fast. improper: :threading. Tight upperithread tension. Breaking Upper incorrect size needle Thread...
-
Page 43: Section Iv"Caring For The Machine
Caring for the Machine i ¸ hook CLEANING Fig. 1 Cleaning To insure your machine, essential small accumulates Fig. 1 around Fig. 2 Parts of the Shuttle To Clean the Shuttle 1. This area must To Replace Shuttle Race Fig, 2 OILING the feed dogs... -
Page 44: Oiling Underside
OILING UNDER COVER PLATE Remove cover plate indicated. To remove top cover plate, unscrew plate. OILING UNDERSIDE Tilt machine head back to oil points .indicated PLATE IN FACE swing face cover plate open two bolts on the top cover plate and lift cover below. -
Page 45: Parts List
PARTS LIST... - Page 46 PARTS LIST parts listed herein be ordered Simpsons-Sears Limited store or service WHEN ORDERING REPAIR INFORMATION: PART NUMBER MODEL NUMBER shown on the nomenclature plate. (See Section 1, page 3 for location.) If the parts need are not transmitted to a Sears Repair Parts Distribution Ref.
- Page 47 SEWING MACHINE that you have purchased need ever exist repair parts Sears Service Center Simpsons-Sears Limited Stores. facts when you call or visit. The model number of your your nomenclature plate on the front Sewing Machine. See Section WHEN ORDERING REPAIR FOLLOWING INFORMATION...