Table of Contents
Advertisement
Quick Links
Ambient Weather WS-2080A Wireless Home Weather
Table of Contents
1.
Introduction ..................................................................................................................................... 3
2.
Warnings and Cautions ................................................................................................................... 3
3.
Quick Start Guide ............................................................................................................................ 3
4.
Getting Started ................................................................................................................................ 3
4.1
Parts List ................................................................................................................................. 4
4.2
Recommend Tools .................................................................................................................. 5
4.3
Sensor Assembly Set Up ........................................................................................................ 5
4.4
Display Console ................................................................................................................... 14
4.4.1
Display Console Layout ................................................................................................... 14
4.4.1
Initial Display Console Set Up ......................................................................................... 16
4.4.2
Radio Controlled Clock (RCC) ........................................................................................ 16
4.4.3
Sensor Operation Verification .......................................................................................... 16
5.
Weather Station Installation .......................................................................................................... 17
5.1
Pre Installation Checkout ..................................................................................................... 17
5.2
Site Survey ........................................................................................................................... 17
5.3
Final Installation of Sensor Array......................................................................................... 17
6.
Console Operation......................................................................................................................... 17
6.1
Time ..................................................................................................................................... 18
6.2
Date ...................................................................................................................................... 19
6.3
Wind ..................................................................................................................................... 20
6.4
Rain ...................................................................................................................................... 21
6.5
Barometric Pressure ............................................................................................................. 22
6.6
Pressure Graph ..................................................................................................................... 23
6.7
Weather Forecast (Tendency) ............................................................................................... 23
6.8
Indoor Temperature .............................................................................................................. 24
6.9
Indoor Humidity ................................................................................................................... 25
6.10
Outdoor Temperature, Wind Chill and Dew Point ............................................................... 26
6.11
Outdoor Humidity ................................................................................................................ 27
6.12
Memory ................................................................................................................................ 27
6.13
Calibration Mode .................................................................................................................. 27
6.13.1
Temperature Calibration............................................................................................... 28
6.13.2
Humidity Calibration ................................................................................................... 28
6.13.3
Wind Speed Calibration ............................................................................................... 28
6.13.4
Calibration Mode ......................................................................................................... 29
6.14
Lost Sensor Resynchronization ............................................................................................ 29
6.15
Restoring to Factory Default ................................................................................................ 29
7.
PC Software .................................................................................................................................. 30
7.1
EasyWeather Overview ........................................................................................................ 30
7.2
Connect PC Connection ....................................................................................................... 30
7.3
EasyWeather Software Installation ....................................................................................... 30
7.4
Run EasyWeather ................................................................................................................. 30
7.5
EasyWeather Features .......................................................................................................... 31
7.5.1
Main Display .................................................................................................................... 31
Version 2.4
Station User Manual
©Copyright 2015, Ambient LLC. All Rights Reserved.
Page 1
Advertisement
Table of Contents

Subscribe to Our Youtube Channel
Related Manuals for Ambient Weather WS-2080A


Summary of Contents for Ambient Weather WS-2080A
-
Page 1: Table Of Contents
Ambient Weather WS-2080A Wireless Home Weather Station User Manual Table of Contents Introduction ............................. 3 Warnings and Cautions ........................3 Quick Start Guide ..........................3 Getting Started ..........................3 Parts List ..........................4 Recommend Tools ........................5 Sensor Assembly Set Up ......................5 Display Console ........................ - Page 2 7.5.2 Set-up and Alarms ......................31 7.5.3 Alarms ..........................32 7.5.4 Max/Min Values ....................... 33 7.5.5 Historical Data ......................... 34 7.5.6 Graph Data ........................34 7.5.7 Clearing Rainfall from EasyWeather................35 7.5.8 Uploading to Websites including Wunderground.com ............. 35 7.5.9 EasyWeather Legal Notes ....................
-
Page 3: Introduction
1. Introduction Thank you for your purchase of the Ambient Weather WS-2080 wireless weather station. The following user guide provides step by step instructions for installation, operation and troubleshooting. To download the latest manual and additional troubleshooting tips, please visit: http://ambientweather.wikispaces.com/ws2080... -
Page 4: Parts List
4.1 Parts List Item Image Display Console Frame Dimensions (LxWxH): 6.75” x 4.5” x 1.25” LCD Dimensions (LxW): 4.5” x 3.5” Thermo-hygrometer transmitter Important Note: the thermo-hygrometer transmitter shipped inside Thermo-hygrometer transmitter rain shield. Thermo-hygrometer transmitter mounting bracket Thermo-hygrometer transmitter rain shield Wind direction sensor (wind vane) Wind speed sensor (wind cups) Anemometer mounting arm (L: 12”) -
Page 5: Recommend Tools
Item Image ½” set screw (long) 3/8”set screw (short) (Optional) Upper pole (L: 12”) Lower pole (L: 12”) Pole mounting U-bolt Pole mounting clamps Pole mounting U-bolt nuts 4.2 Recommend Tools Precision screwdriver (for small Phillips screws) Pliers ... - Page 6 Figure 1 2. Connect the wind vane assembly to the other end of the anemometer mounting arm. Align the holes, and fasten with long bolt and nut. Tighten with precision screwdriver while securing the nut with pliers, as shown in Figure 2. Figure 2 Version 2.4 ©Copyright 2015, Ambient LLC.
- Page 7 3. Connect the anemometer assembly to the top mounting pole, align the holes, and fasten with short set screw (optional, we recommend NOT connecting this) and long bolt and nut. Tighten with precision screwdriver while securing the nut with pliers, as shown in Figure 3. Note: This may be a tight fit –...
- Page 8 4. Connect the rain gauge with long set screw. Tighten with precision screwdriver, as shown in Figure 4. Note: There may be a slight “play” in the rain gauge and the screw may not be flush. Do not force the screw. Attach the rain gauge mounting arm to the upper mounting pole, at right angles to the wind speed and wind direction assembly to avoid obstruction of rainfall.
- Page 9 5. Connect the thermo-hygrometer with short bolt and nut. Tighten with precision screwdriver, as shown in Figure 5. Slide the rain shield over the thermo-hygrometer after connecting the cables from the anemometer and rain gauge (step 7). Attach to the thermo-hygrometer mounting arm to the upper mounting pole.
- Page 10 6. Fasten the lower mounting pole (which is swaged on the top end) to your mounting pole or bracket (purchased separately) with the two U-Bolts, clamps and nuts as shown in Figure 6. Tighten the lower mounting pole to your mounting pole with the mounting clamp assembly with a wrench, as shown in Figure 6.
- Page 11 Figure 6 Version 2.4 ©Copyright 2015, Ambient LLC. All Rights Reserved. Page 11...
- Page 12 Connect the wind speed cable to the wind direction phone jack, as shown in Figure 7. Connect the wind direction cable to the thermo-hygrometer phone jack (reference the label on the thermo-hygrometer). Connect the rain gauge cable to the thermo-hygrometer phone jack (reference the label on the thermo-hygrometer).
- Page 13 Figure 8 Version 2.4 ©Copyright 2015, Ambient LLC. All Rights Reserved. Page 13...
-
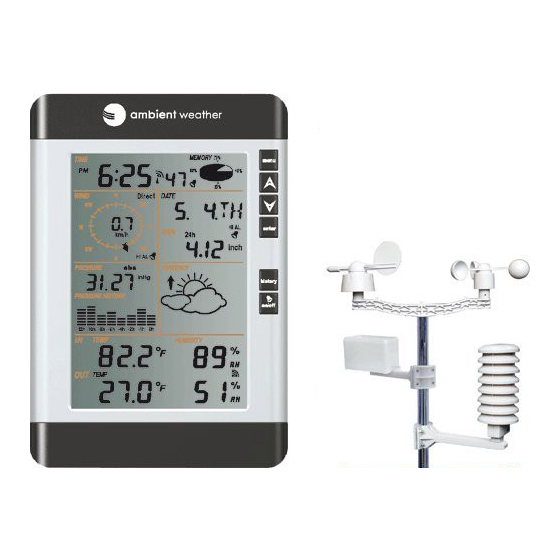
Page 14: Display Console
Install the rain shield over the thermo-hygrometer/transmitter, as shown in Figure 9, and use the enclosed zip ties to clean up the cables. Figure 9 4.4 Display Console 4.4.1 Display Console Layout The display console layout is shown in Figure 10. Version 2.4 ©Copyright 2015, Ambient LLC. - Page 15 Figure 10 1. Time 2. Wind direction 3. Barometric Pressure 4. Barometric trend 5. Indoor Temperature 6. Outdoor Temperature 7. Memory 8. Radio Controlled Clock (RCC) 9. Date 10. Rainfall 11. Weather Forecast 12. Indoor Humidity 13. Outdoor reception signal 14.
-
Page 16: Initial Display Console Set Up
4.4.1 Initial Display Console Set Up Note: The sensor array must be powered and updating before powering up the console, or the console will timeout searching for the sensors. Perform this step last. Make certain the weather station sensor array is at least 10’ away from the console and within 300’ of the console. -
Page 17: Weather Station Installation
5. Radio interference such as PCs, radios or TV sets can, in the worst case, entirely cut off radio communication. Please take this into consideration when choosing console or mounting locations. 6. Visit Ambient Weather Mounting Solutions for assistance and ideas for mounting your weather station: http://www.ambientweather.com/amwemoso.html 5.3 Final Installation of Sensor Array... -
Page 18: Time
pressing the key or waiting for the 30-second time-out to take effect. You can skip over any history setting by pressing the menu key again. Holding the key when in the Set mode will increase/decrease values rapidly. down 6.1 Time Press the menu key to enter the TIME Set Mode. -
Page 19: Date
Hours from Time Zone Cities 8 CCT: China Coast Bejing 9 JST: Japan Standard Tokyo 10 GST: Guam Standard Sydney 11 --- Magadan 12 IDLE: International Date Line East Wellington, New Zealand NZST: New Zealand Standard 3. 12/24 Hour Format. Press the enter key to change the 12/24 hour format. Press the up key or down key to alternate the display unit between 12 hour format and 24 hour format. -
Page 20: Wind
key or down key to change the day setting. 6. Change Alarm Hour. Press the enter key to set the alarm hour. The alarm hour and ALARM will begin flashing. Press the up key or down key to change the alarm hour setting. 7. -
Page 21: Rain
Press the up key or down key to adjust the wind direction alarm. Press the ON/OFF key to select the alarm on or off (if the alarm is enabled, the alarm icon will be turned on). 5. Wind Speed Record High. Press the enter key to display maximum wind speed record since the last reset. -
Page 22: Barometric Pressure
6.5 Barometric Pressure Note: The weather station console displays two different pressures: absolute (measured) and relative (corrected to sea-level). To compare pressure conditions from one location to another, meteorologists correct pressure to sea-level conditions. Because the air pressure decreases as you rise in altitude, the sea-level corrected pressure (the pressure your location would be at if located at sea-level) is generally higher than your measured pressure. -
Page 23: Pressure Graph
Press the up key or down key to change the value. 4. Pressure High Alarm. Press the enter key to set the pressure high alarm function. Pressure and HI AL (high alarm) icon will flash. Press the up key or down key to change the value. Press the ON/OFF key to select the alarm on or off (if the alarm is enabled, the alarm icon will be turned on). -
Page 24: Indoor Temperature
Note: This is a continuation of the previous section. To enter this mode, you must begin at Section 6.1 and proceed to this section. Press the key to enter the TENDANCY Set Mode. You can skip over any setting by selecting menu key. -
Page 25: Indoor Humidity
2. Indoor Temperature High Alarm. Press the enter key to set the indoor temperature high alarm function. The indoor temperature and HI AL (high alarm) will begin flashing. Press the up key or down key to change the value. Press the ON/OFF key to select the alarm on or off (if the alarm is enabled, the alarm icon will be turned on). -
Page 26: Outdoor Temperature, Wind Chill And Dew Point
Press the ON/OFF key to select the alarm on or off (if the alarm is enabled, the alarm icon will be turned on). 2. Indoor Humidity Low Alarm. Press the enter key to set the indoor humidity low alarm function. The indoor humidity and LO AL (high alarm) will begin flashing. Press the up key or down key to change the value. -
Page 27: Outdoor Humidity
4. Outdoor Temperature Low Alarm. Press the enter key to set the outdoor temperature low alarm function. The outdoor temperature and LO AL (high alarm) will begin flashing. Press the up key or down key to change the value. Press the ON/OFF key to select the alarm on or off (if the alarm is enabled, the alarm icon will be turned on). -
Page 28: Temperature Calibration
To calibrate humidity, you will need an accurate source, such as a sling psychrometer or Humidipaks One Step Calibration kit, available from Ambient Weather. 6.13.3 Wind Speed Calibration Wind speed is the most sensitive to installation constraints. -
Page 29: Calibration Mode
(available from Ambient Weather) and a constant speed, high speed fan. 6.13.4 Calibration Mode While in the Normal Mode, press the ON/OFF key for 8 seconds to enter the calibration mode, and the ADJ icon will be displayed. You can skip over any setting by selecting the key. -
Page 30: Pc Software
7. PC Software Note: EasyWeather software is included with this weather station package. Easy Weather runs on most PC operating systems. Cumulus is free internet publishing PC software application by Sandaysoft. WeatherSnoop is a paid software and internet publishing application for Macs by Tee-Boy. -
Page 31: Easyweather Features
When there is large amount of archived data to be uploaded, it may take a few minutes before the system will respond to your requests. Otherwise, it will display the “read weather data fail” error message, since the USB port is reading the data from the memory and the system is not able to respond to requests. -
Page 32: Alarms
4. Pressure. Changes the sea-level pressure calibration, as referenced in Section 6.5. 5. Display. Formats the default display console configuration. Figure 21 7.5.3 Alarms Select System | Alarm from the menu bar to program general to set the alarm ranges. If a given high or low alarm is exceeded, the console will sound an audible and visual alert. -
Page 33: Max/Min Values
Figure 22 7.5.4 Max/Min Values Select System | Max/Min from the menu bar to view the historical highs and lows. Figure 23 Version 2.4 ©Copyright 2015, Ambient LLC. All Rights Reserved. Page 33... -
Page 34: Historical Data
7.5.5 Historical Data Select Record | History from the menu bar to view the historical data,. This window displays the recorded history data in a spread sheet format. If you want to see all history data in a specified time period, enter the time duration and press Search to reload the historical data. You can export the selected historical data into a text format file by selecting the Export button. -
Page 35: Clearing Rainfall From Easyweather
Figure 25 7.5.7 Clearing Rainfall from EasyWeather To clear rainfall from EasyWeather, select Record | History from the menu bar and select Clear Data to clear all rainfall totals. 7.5.8 Uploading to Websites including Wunderground.com Note: This feature is only available in EasyWeather Version 8.3 or greater. To upload weather data to the internet, from EasyWeather, select Upload from the menu bar. -
Page 36: Easyweather Legal Notes
number 11: KAZPHOEN11, not KAZPH0EN11 K = USA station designation AZ = Arizona PHOEN = Phoenix 11= station 11 in Phoenix, AZ 7.5.9 EasyWeather Legal Notes We reserve the right to delete or change any image whether or not purposely uploaded onto the server by a user of the EasyWeather software products. -
Page 37: Specifications
9. Specifications 9.1 Wireless Specifications Line of sight wireless transmission (in open air): 300 feet Update Rate: 48 seconds Frequency: 433 MHz 9.2 Measurement Specifications The following table provides the specifications for the measured parameters. Measurement Range Accuracy Resolution Indoor Temperature... - Page 38 2. Technical Support: 480-346-3398 (M-F 8am to 3pm Arizona Time) Problem Solution Wireless remote (thermo-hygrometer) Check the thermo-hygrometer-transmitter LED for flashing. not reporting in to console. You must remove the radiation shield to view the LED. There are dashes on the display If easier to view (the LED may be difficult to view in direct console.
- Page 39 Problem Solution sensor array and console. For cold weather environments, install lithium batteries. 5. The maximum line of sight communication range is 300’ but most users will get 100’ or less due to environmental conditions. Move the sensor and remote closer together. 6.
-
Page 40: Accessories
Problem Solution different USB connection. Avoid USB hubs. Barometer graph flashes. Can I turn No, this feature prevents burn in of the display monitor. this off? Wind speed appears low Average wind speed may have the appearance of low wind. Try switching the display to wind gust. - Page 41 Ethernet cable or WiFi. Within minutes, you'll see your weather data live on the Internet. WS-2080 Weather Station Ambient Weather provides all replacement Replacement Parts and and warranty parts for the WS-2080 weather Accessories station.
-
Page 42: Liability Disclaimer
Accessory Image Description will receive power from the computer. 13. Liability Disclaimer Please help in the preservation of the environment and return used batteries to an authorized depot. The electrical and electronic wastes contain hazardous substances. Disposal of electronic waste in wild country and/or in unauthorized grounds strongly damages the environment. -
Page 43: Warranty Information
• Reorient or relocate the receiving antenna. • Increase the separation between the equipment and receiver. • Connect the equipment into an outlet on a circuit different from that to which the receiver is connected. • Consult the dealer or an experienced radio/TV technician for help. 15.
Need help?
Do you have a question about the WS-2080A and is the answer not in the manual?
Questions and answers