Table of Contents
Advertisement
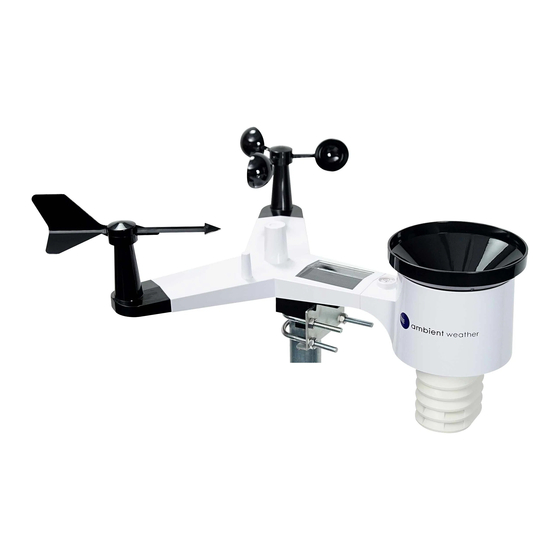
Ambient Weather WS-2902 WiFi OSPREY Solar Powered
Wireless Weather Station User Manual
Table of Contents
1.
Introduction ..................................................................................................................................... 2
2.
Warnings and Cautions ................................................................................................................... 2
3.
Quick Start Guide ............................................................................................................................ 3
4.
Pre-Installation Checkout and Site Survey...................................................................................... 3
4.1
Pre Installation Checkout ....................................................................................................... 3
4.2
Site Survey ............................................................................................................................. 3
5.
Getting Started ................................................................................................................................ 4
5.1
Parts List ................................................................................................................................. 4
5.2
Recommend Tools .................................................................................................................. 4
5.3
Sensor Array Set Up ............................................................................................................... 5
5.3.1
Install Wind Vane ............................................................................................................... 5
5.3.2
Install Wind Cups ............................................................................................................... 6
5.3.3
Install U-Bolts .................................................................................................................... 6
5.3.4
Install the Rain Gauge Funnel ............................................................................................ 7
5.3.5
Install Batteries................................................................................................................... 8
5.3.6
Install Mounting Pole ......................................................................................................... 9
5.5 Best Practices for Wireless Communication ................................................................................. 9
5.6
Display Console ................................................................................................................... 10
5.6.1
Vertical Desk Stand .......................................................................................................... 12
6.
Display Console Operation ........................................................................................................... 13
6.1
Screen Display ...................................................................................................................... 13
6.2
Console Initialization ........................................................................................................... 14
6.2.1
Button Operation .............................................................................................................. 15
6.3
Set Mode .............................................................................................................................. 16
6.3.1
Time Zones ....................................................................................................................... 18
6.4
Barometric Pressure Display ................................................................................................ 19
6.4.1
Viewing Absolute vs. Relative Pressure ........................................................................... 19
6.4.2
Rate of Change of Pressure Graph ................................................................................... 19
6.4.3
Viewing Pressure History ................................................................................................. 20
6.4.4
Relative Pressure Calibration Discussion......................................................................... 20
6.5
Rain Display ......................................................................................................................... 20
6.5.1
Rain Increments of Measure ............................................................................................ 20
6.5.2
Resetting Rain .................................................................................................................. 20
6.5.3
Increments of Rain Definitions ........................................................................................ 21
6.6
Wind Display ........................................................................................................................ 21
6.7
Temperature Display ............................................................................................................ 21
6.7.1
Wind Chill, Dew Point and Heat Index Display .............................................................. 21
6.8
Alarms .................................................................................................................................. 21
6.8.1
Viewing High and Low Alarms ........................................................................................ 21
6.8.2
Setting High and Low Alarms .......................................................................................... 22
6.9
Max/Min Mode .................................................................................................................... 25
6.9.1
Viewing Max/Min Values ................................................................................................. 25
6.10
Calibration ............................................................................................................................ 26
Version 2.1
©Copyright 2018, Ambient LLC. All Rights Reserved.
Page 1
Advertisement
Table of Contents

Related Manuals for Ambient Weather WS-2902


Summary of Contents for Ambient Weather WS-2902
-
Page 1: Table Of Contents
Ambient Weather WS-2902 WiFi OSPREY Solar Powered Wireless Weather Station User Manual Table of Contents Introduction ............................. 2 Warnings and Cautions ........................2 Quick Start Guide ..........................3 Pre-Installation Checkout and Site Survey..................3 Pre Installation Checkout ....................... 3 Site Survey ..........................3 Getting Started .......................... -
Page 2: Introduction
Warranty Information ....................... 52 1. Introduction Thank you for your purchase of the Ambient Weather WS-2902 WiFi OSPREY Solar Powered Wireless Weather Station. The following user guide provides step by step instructions for installation, operation and troubleshooting. To download the latest manual and additional troubleshooting tips, please visit: http://ambientweather.wikispaces.com/ws2902... -
Page 3: Quick Start Guide
electrician for proper grounding. A direct lightning strike to a metal pole can damage or destroy your home. Warning: Installing your weather station in a high location may result in injury or death. Perform as much of the initial check out and operation on the ground and inside a building or home. Only install the weather station on a clear, dry, day. -
Page 4: Getting Started
8. Visit Ambient Weather Mounting Solutions for assistance and ideas for mounting your weather station: http://www.ambientweather.com/amwemoso.html 5. Getting Started The Ambient Weather WS-2902 OSPREY WiFi Personal Weather Station consists of an indoor display console (receiver + WiFi transmitter) and an all-in-one outdoor weather sensor array. 5.1 Parts List Item Display Console Frame Dimensions (LxWxH): 7.50 x 4.50 x 0.75”... -
Page 5: Sensor Array Set Up
5.3 Sensor Array Set Up Figure 1 Description Description Wind Vane (measures wind direction) Solar panel Wind Speed Sensor (measures wind speed) U-Bolt UV sensor/ Light sensor Battery compartment Thermometer-hygrometer sensor (measures Reset button temperature and humidity) Rain collector LED transmitter Indicator Bubble level 5.3.1 Install Wind Vane Reference Figure 2. -
Page 6: Install Wind Cups
Figure 2 5.3.2 Install Wind Cups Reference Figure 3. (a) push the wind cups on to the shaft. (b) tighten the set screw with a precision screw driver and make sure the wind cups spin freely. Note: You may need to back out the set screw first before sliding the cups onto the shaft. Figure 3 5.3.3 Install U-Bolts Note: Your U-bolts may have come preassembled at the factory. -
Page 7: Install The Rain Gauge Funnel
Figure 4 5.3.4 Install the Rain Gauge Funnel Reference Figure 5. Install the rain gauge funnel. Rotate clockwise to attach the funnel to the sensor array. Version 2.1 ©Copyright 2018, Ambient LLC. All Rights Reserved. Page 7... -
Page 8: Install Batteries
Figure 5 5.3.5 Install Batteries Reference Figure 6. Insert 2 x AA non-rechargeable batteries (not included) into the battery compartment. The LED indicator on the back of the transmitter will turn on for four seconds, and then flash once every 16 seconds (the sensor transmission update period). Figure 6 Note: If the LED does not light up, or stays on permanently, make sure the battery polarity is correct, or the batteries are fresh. -
Page 9: Install Mounting Pole
5.3.6 Install Mounting Pole Reference Figure 7. The mounting assembly includes two U-Bolts and a bracket that tightens around a 1 to 2” diameter pole (not included) using the four U-Bolt nuts. Figure 7 Use the bubble level next to the rain sensor to make sure the sensor array is completely level. If the sensor array is not level, the rain gauge, UV and solar radiation sensors will not measure properly. -
Page 10: Display Console
siding. If you have metal siding, align the remote and console through a window to get a clear line of sight. The following is a table of reception loss vs. the transmission medium. Each “wall” or obstruction decreases the transmission range by the factor shown below. Medium RF Signal Strength Reduction Glass (untreated) - Page 11 Figure 9 Reference Figure 9. (1) Connect the display console power jack to AC power adapter with the included power adapter. (2) Unfold the desk stand and place 5 to 10 feet away from the sensor array. Remove the battery door on the back of the console, and insert 3xAAA batteries per Figure 10. (3) Wait several minutes for the remote sensors to synchronize with the display console.
-
Page 12: Vertical Desk Stand
Figure 10 5.6.1 Vertical Desk Stand The console is best viewed above from a 20 to 30 degree angle. In addition to the fold out desk stand on the back of the display, console, the console also includes a vertical desk stand to improve the viewing able on a desk, as shown in Figure 11. Version 2.1 ©Copyright 2018, Ambient LLC. -
Page 13: Display Console Operation
Figure 11 6. Display Console Operation 6.1 Screen Display The display console home screen layout is shown in Figure 12. Figure 12 Version 2.1 ©Copyright 2018, Ambient LLC. All Rights Reserved. Page 13... -
Page 14: Console Initialization
Description Description Time Rainfall Moon phase Outdoor temperature Barometric Pressure Outdoor humidity Weather forecast RF icon UV index Indoor humidity Solar Radiation Indoor temperature Wind speed Date Wind direction WIFI icon MAX/MIN Daily 6.2 Console Initialization After the console is connected to AC power, the console will display the software version number two seconds after power up. -
Page 15: Button Operation
6.2.1 Button Operation Figure 15 The console has 8 buttons at the bottom for easy operation: Description Press and hold to enter the SET mode. TEMP Press to switch between Outdoor Temperature, Wind Chill, Heat Index, Dew Point. To bypass RF reception, press and hold while powering up the console (connecting the AC adapter with batteries removed). -
Page 16: Set Mode
6.3 Set Mode Press and hold the SET button for two seconds to enter the SET Mode. To proceed to the next setting, press (do not hold) the SET button. To exit the SET mode at any time, press the LIGHT / SNOOZE button. Figure 16 summarizes the set mode sequence and commands. - Page 17 Command Mode Settings Image Enter Set Press [WIND +] to switch OFF and [SET] + 2 Mode, Beep seconds On or Off This will prevent the beep from sounding when pressing any button. Clear Max/Min Press [WIND +] to switch OFF and [SET] When set to ON, the minimum and maximum values reset every day at...
-
Page 18: Time Zones
[SET] Pressure Units Press [WIND +] to change units of of Measure measure between hpa, mmHg or inHg. Relative Press [WIND +] or [PRESSURE -] to [SET] Pressure adjust relative pressure up or down Calibration Reference Section 6.4.4 for details on calibration of relative pressure. -
Page 19: Barometric Pressure Display
Hours from Time Zone Cities -3 --- São Paulo, Brazil -2 AT: Azores Azores, Cape Verde Islands -1 WAT: West Africa 0 GMT: Greenwich Mean London, England WET: Western European 1 CET: Central European Paris, France 2 EET: Eastern European Athens, Greece 3 BT: Baghdad Moscow, Russia... -
Page 20: Viewing Pressure History
Figure 18 6.4.3 Viewing Pressure History Press the [PRESSURE -] button to view the 12 hour, 24 hour, 48 hour and 72 hour pressure average. 6.4.4 Relative Pressure Calibration Discussion To compare pressure conditions from one location to another, meteorologists correct pressure to sea-level conditions. -
Page 21: Increments Of Rain Definitions
Resetting the total rain also resets the monthly, weekly and daily rain. 6.5.3 Increments of Rain Definitions Rain rate or hourly rain is defined as the last 10 minutes of rainfall, multiplied by six (10 minutes x 6 = 1 hour). This is also referred to as instantaneous rain per hour. ... -
Page 22: Setting High And Low Alarms
6.8.1.1 Rain Alarm While the High Alarm is displayed (reference Section 6.8.1), press the RAIN button to display the rain rate and daily rain alarm values. 6.8.1.2 Wind Alarm While the High Alarm is displayed (reference Section 6.8.1), press the WIND button to display the wind speed and wind gust alarm values. - Page 23 Command Mode Settings Enter Alarm Set Mode, Alarm Press [WIND +] or [PRESSURE -] to adjust alarm [ALARM] Hour hour up or down. seconds Press [ALARM] to turn the time alarm on or off. When the alarm is on, the alarm time icon will appear.
- Page 24 [SET] Alarm Low Indoor Humidity Press [WIND +] or [PRESSURE -] to adjust alarm value up or down. Press [ALARM] to turn the alarm on. The alarm icon will appear. Press [ALARM] to turn the alarm off. The alarm icon will disappear. Alarm High Outdoor Press [WIND +] or [PRESSURE -] to adjust alarm [SET]...
-
Page 25: Max/Min Mode
[SET] Alarm High Wind Speed Press [WIND +] or [PRESSURE -] to adjust alarm value up or down. Press [ALARM] to turn the alarm on. The alarm icon will appear. Press [ALARM] to turn the alarm off. The alarm icon will disappear. [SET] Alarm High Wind Gust Press [WIND +] or [PRESSURE -] to adjust alarm... -
Page 26: Calibration
while the min values are displayed. To return to normal mode, press the MAX/MIN button again. Figure 21 6.9.1.1 Display Wind Chill, Heat Index vs. Dew Point Max/Min Values While the max values are displayed as outlined in Section 6.9.1, press the TEMP button once to view the heat index, twice to view the dew point, and a third time to return to outdoor temperature. - Page 27 To proceed to the next calibration setting, press (do not hold) the SET button. To exit and save the calibration setting, press the LIGHT / SNOOZE button. Figure 22 Figure 23 summarizes the set mode sequence and commands. Version 2.1 ©Copyright 2018, Ambient LLC.
-
Page 28: Calibration Ranges
Command Mode Settings TEMP. and Enter Calibration Press [WIND +] or [PRESSURE -] to adjust the indoor Mode, Indoor temperature up or down. MAX/MIN + 5 seconds Temperature To restore to factory default, press [ALARM]. Indoor Humidity Press [WIND +] or [PRESSURE -] to adjust the indoor [SET] humidity up or down. -
Page 29: Calibration Discussion
Parameter Range Indoor Temperature ± 9 °F Indoor Humidity ± 9% Outdoor Temperature ± 9 °F Outdoor Humidity ± 9% Absolute Pressure ± 10 hpa (± 2.95 inHg) Wind Direction ± 180 ° Wind Speed Factor 0.5 to 1.5 Rain Factor 0.5 to 1.5 Figure 24 6.10.3 Calibration Discussion... - Page 30 Without a calibrated source, wind speed can be difficult to measure. We recommend using a calibrated wind meter (available from Ambient Weather) and a constant speed, high speed fan. (6) The rain collector is calibrated at the factory based on the funnel diameter. The bucket tips every 0.01”...
-
Page 31: Restoring The Console To Factory Default
http://www.ambientweather.com/stprraga.html Make sure you periodically clean the rain gauge funnel. 6.11 Restoring the Console to Factory Default To restore the console to factory default, perform the following steps: 1. Remove the power from the console by removing the batteries and disconnecting the AC adapter. -
Page 32: Wireless Signal Strength Indicator
6.15 Wireless Signal Strength Indicator The wireless signal strength displays reception quality. If no signal is lost, the signal strength indicator will display 5 bars. If the signal is lost once, four bars will be displayed, a shown in Figure 27. Five Bars Four Bars No signal loss... -
Page 33: Live Internet Publishing
Weathercloud is a real-time weather social network formed by observers from around the world. The WS-2902 weather station sends data to the Internet using your WiFi connection. 7.1 Connecting the Weather Station Console to WiFi Note: The WiFi feature only works when plugged into AC power due to higher energy requirements. - Page 34 “AmbientTool” application with the Ambient Weather Logo . Download this application to your mobile device. Version 2.1 ©Copyright 2018, Ambient LLC. All Rights Reserved. Page 34...
-
Page 35: Wifi And Server Connection Wizard
ALARM buttons at the same time for four seconds. (2) The WiFi icon will begin flashing rapidly, indicating the console is searching for your WiFi network. Figure 29 7.2 WiFi and Server Connection Wizard Run the Ambient Weather Osprey application, and following instructions below. Version 2.1 ©Copyright 2018, Ambient LLC. All Rights Reserved. Page 35... - Page 36 Click Add Device to connect Make sure the WiFi icon is If your mobile device is not your mobile device to the flashing rapidly (reference connected to your 2.4 GHz display console. Figure 29). If not, press and WiFi network, launch Settings hold the RAIN and ALARM on your mobile device and buttons for four seconds.
- Page 37 Your router’s name will be Confirm you are connected to Once connected to WiFi, your the 2.4 GHz band of your listed in the Router SSID field if console will now be listed. The wireless router network. If you your phone is connected to WiFi icon on your console will own a dual band router, WiFi.
- Page 38 Click on the device to enter the AmbientWeather.net, Upload your weather data Wunderground.com and WeatherCloud.net server AmbientWeather.net. Select an upgrade settings. schedule and turn Auto Upload on. Reference Section 8.1 for registering on AmbientWeather.net with the MAC address listed. Select Next. Figure 32 Version 2.1 ©Copyright 2018, Ambient LLC.
-
Page 39: Registering With Internet Cloud Services
Upload your weather data to Wunderground.com. Upload your weather data to WeatherCloud.net. Register an account and station at Register an account and station at WeatherCloud Wunderground.com per Section 8.2. Section per 8.3 Enter the Station ID and Station Key into this Enter the ID and Key into this panel and select panel and select Save. - Page 40 Figure 34 Next, enter the MAC address found on Ambient Tools (Figure 32). Note that this is an example only and your MAC address will be different. Figure 35 Register an account on AmbientWeather.net (email address and password). Once registered, select the dashboard to view your data, as shown in Figure 36. Version 2.1 ©Copyright 2018, Ambient LLC.
-
Page 41: Ifttt
AmbientWeather.net is a responsive design and mobile friendly, so there is no need for a mobile app. Simply open your mobile devices web browser, browse to AmbientWeather.net, and bookmark your dashboard. If you save the bookmark to your desktop, it will automatically save the Ambient Weather icon, as shown in Figure 37. -
Page 42: Amazon Alexa
AmbientWeather.net. Enable the skill and get started: say "Alexa, ask Ambient Weather for a weather report.". This will provide you with your outdoor weather report, but you can ask for your indoor weather report as well by saying, "Alexa, ask Ambient Weather about the indoor conditions."... -
Page 43: Weatherunderground.com
8.2 WeatherUnderground.com 8.2.1 Registering through the PC or Mac Website Note: The Weather Underground website is subject to change. 1. Visit Wunderground.com, and select the Join link in the upper right and corner and create a Free Account. 2. From the menu, Select More | Add a Weather Station, or visit: https://www.wunderground.com/personal-weather-station/signup 3. - Page 44 1. Select the Register link from the app, as shown in Figure 39. Figure 39 1. Create a Wunderground.com account. Enter your email address and password, as shown in Figure 40. 2. Create a Weather Station Name. This is a unique description that identifies your station location or neighborhood to users.
-
Page 45: Weathercloud
5. Enter the Station ID (ID), Station Key (Password) and Station Number (StationNum) into the Ambient Tool. Leave the StationNum field blank. Figure 41 8.3 WeatherCloud 1. Visit WeatherCloud.net and enter a Username, Email and Password. Figure 42 2. Respond to the validation email from WeatherCloud (it may take a few minutes). Version 2.1 ©Copyright 2018, Ambient LLC. -
Page 46: Glossary Of Terms
Figure 43 3. Select Create Device and enter your weather station information. After registering your station, make a note of the following: Weathercloud ID Enter the Weathercloud ID (ID), Key (password) into the Ambient Tool. Leave the Station Number (StationNum) blank. - Page 47 Term Definition Also, strong winds, particularly with very hot, dry air, can be extremely hazardous. The Heat Index Chart shaded zone above 105°F shows a level that may cause increasingly severe heat disorders with continued exposure or physical activity. Heat Index is not calculated below 80°F. HectoPascals Pressure units in SI (international system) units of measurement.
-
Page 48: Specifications
Term Definition Thermometer A thermometer is a device that measures temperature. Most digital thermometers are resistive thermal devices (RTD). RTDs measure changes in temperature as a function of electrical resistance. Wind Vane A wind vane is a device that measures the direction of the wind. The wind vane is usually combined with the anemometer. -
Page 49: Maintenance
11. Maintenance 1. Clean the rain gauge once every 3 months. Rotate the funnel counter-clockwise and lift to expose the rain gauge mechanism, and clean with a damp cloth. Remove any dirt, debris and insects. If bug infestation is an issue, spray the array lightly with insecticide. Figure 46 2. - Page 50 Problem Solution Put batteries back in and resync the console (Section 6.12) with the sensor array about 10 feet away. The LED next to the battery compartment will flash every 16 seconds. If the LED is not flashing every 16 seconds… Replace the batteries in the outside sensor array.
-
Page 51: Accessories
The following software and hardware accessories are available for this weather station at www.AmbientWeather.com Accessory Description Ambient Weather Mounting Ambient Weather provides the most comprehensive mounting solutions Solutions for weather stations, including tripods, pole extensions, pole mounting kits, guy wires, ground stakes and more. WS-2902-C Display Add as many display consoles as you like to your weather station. -
Page 52: Fcc Statement
Ambient, LLC WILL NOT ASSUME LIABILITY FOR INCIDENTAL, CONSEQUENTIAL, PUNITIVE, OR OTHER SIMILAR DAMAGES ASSOCIATED WITH THE OPERATION OR MALFUNCTION OF THIS PRODUCT. 15. FCC Statement Statement according to FCC part 15.19: This device complies with part 15 of the FCC rules. Operation is subject to the following two conditions: 1. - Page 53 lightning strikes or floods. This warranty covers only actual defects within the product itself, and does not cover the cost of installation or removal from a fixed installation, normal set-up or adjustments, claims based on misrepresentation by the seller or performance variations resulting from installation-related circumstances.
Need help?
Do you have a question about the WS-2902 and is the answer not in the manual?
Questions and answers