
Related Manuals for Andrew James 12L Digital Halogen Oven


Summary of Contents for Andrew James 12L Digital Halogen Oven
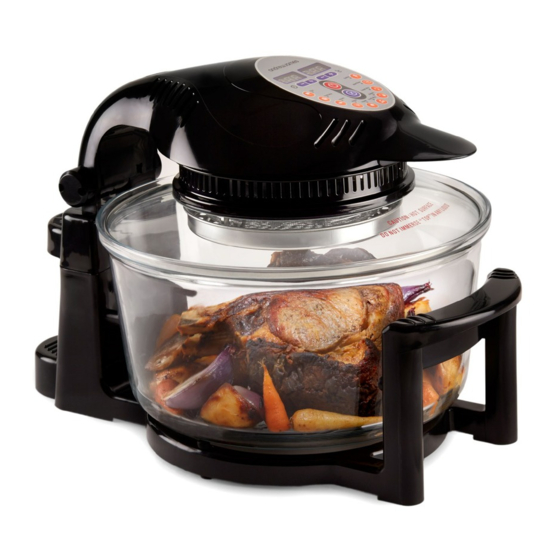
- Page 1 12L Digital Halogen Oven Please read the manual fully before using the appliance and keep the manual safe for future reference.
-
Page 2: Table Of Contents
Contents page Safety instructions Page 2 Additional specific safety instructions Page 4 Components diagram illustration Page 6 Digital control pad Page 7 Assembly & Preparation Page 8–9 Starting Operation Functions Mode Table Page 10 Functions Page 11—14 Attachment Recipes Page 16 Cooking times and temperatures Page 22 Cleaning... -
Page 3: Safety Instructions
Safety Instructions When using any electrical appliance, basic safety precautions should always be followed, including: This appliance can be used by children aged from 8 years and above and persons with reduced physical, sensory or mental capabilities or lack of experience and knowledge if they have been given supervision or instruction concerning use of the appliance in a safe way and understand the hazards involved. -
Page 4: Additional Specific Safety Instructions
However if it is necessary to use an extension cord, ensure that the extension cord is equal to or greater than the power consumption of the appliance to avoid overheating of the appliance and extension cord. Do not use any other appliance on the extension cord. Do not place the extension cord in a position where it can be pulled on by children or animals or be tripped over. - Page 5 Damage to the appliance If the appliance is defective, do not attempt to carry out repairs yourself. In the event of damage, contact customer services. If water gets into the appliance or if it is damaged in any other way, it will need to be checked by a qualified electrician or service agent.
-
Page 6: Components Diagram Illustration
Components Diagram illustration 1. Low rack 2. High rack 3. Tongs 4. Skewers 5. Steamer Tray 6. Baking Tray 7. Bread rack 8. Extender ring 9. Replacement Halogen Bulb 10. Glass oven bowl 11. Lid/ hinge/ base 12. Rice/Cake cooker pan... -
Page 7: Digital Control Pad
Digital control pad 1-10 Function keys 11-12 “Up” and “Down” for time 13-14 “Up” and “Down” for temperature “Start” “Cancel”... -
Page 8: Assembly & Preparation
Assembly and preparation of Halogen Oven Place the base of the appliance (11) on a level, sturdy, heat resistant surface. Remove the extender ring (8) from the base of the Halogen Oven bowl. Place the glass dish (10) into the base (11) of the appliance. Place one of the food racks, high or low (1/2), into the glass oven bowl(10). - Page 9 Choose the desired cooking function key, the display lights will show the corresponding time and temperature. If you want to increase or decrease the time and temperature press “+” or “-”. Press the “start” button. Once the cooking process has finished it will be signalled by a beep and flashing lights.
-
Page 10: Functions Mode Table
Function mode table mode Time Temp. Function (mins) Roast Chicken, Steam Rice with Rice pot (supplied) 30ˊ 250℃ Cupcake 11ˊ 190℃ Please note additional time may be added depending on the size of the cup cakes. Steam Seafood/Vegetables 13′ 250℃ Please see additional instruction on how to steam vegetables. -
Page 11: Functions
Functions: - For foods like steamed rice and roast chicken Rice Preheat the halogen oven on Measure 1 cup of rice. Wash the rice in a sieve before placing into the rice/cake tin. Add two and a half cups of water. Place the rice/cake tin in the Halogen Oven, replace the lid and reset for 30 minutes. - Page 12 Functions: - For steaming fish and vegetables Root vegetables Cut the root vegetables (e.g. parsnips, carrots & turnip) into chunks. Take a piece of tin foil large enough to hold the vegetables. Place the vegetables in the middle of the tin foil and fold the sides of the tin foil up creating a parcel.
- Page 13 Functions: - Bake Pizza Press the button and preheat the oven at the temperature recommended on the pizza packaging by adjusting the temperature using “+” or “-”. Place the pizza on the steamer tray, onto the low rack in the Halogen Oven bowl.
- Page 14 (to taste). Knead together with your hands, until it is well combined. Form burgers using Andrew James Mini Burger Press or by hand. Place the high rack in the oven with the baking tray underneath to catch any...
- Page 15 Cake/Rice tin Vanilla sponge cake 125g caster sugar 125g butter or baking margarine 125g self raising flour 2 eggs 1 tsp vanilla extract Cream together the butter and the sugar until light and fluffy. Add two eggs and vanilla extract and mix well. Sieve flour into the bowl and mix well, until all ingredients are combined.
-
Page 16: Attachment Recipes
The following attachments can also be purchased separately from our website, www.andrewjamesworldwide.com: Airfryer Attachment Breakfast Rack Airfryer Attachment Recipes Roasted Vegetables 2 Sweet potatoes 1 red pepper 1 yellow pepper 1 red onion Olive oil Mixed herbs Place the airfryer attachment in the rim of the Halogen Oven bowl. Extend the hinge until it can be easily placed on top of the airfryer. - Page 17 Chips Potatoes Olive oil Seasoning Place the airfryer attachment in the rim of the Halogen Oven bowl. Extend the hinge until it can easily place on top of the airfryer. Pre- heat the Halogen Oven at 200°C. Peel and cut the chips to the required thickness. Drizzle in olive oil and mix until all coated.
- Page 18 Sticky Honey Chicken Wings 12 chicken wings 3 tbsp. honey 3 cloves of garlic 25ml soy sauce 50g brown sugar 3 tbsp. cornflour Sesame seeds Place the airfryer attachment in the rim of the Halogen Oven bowl. Extend the hinge until it can easily place on top of the airfryer. Halve the chicken wings at the joint.
- Page 19 Pork chops with Apricot Stuffing 2 red eating apples 3 ready to eat dried apricots 1 clove of garlic 2 tbsp. fresh breadcrumbs 2 tbsp. apple juice Salt and pepper 2 pork chops, on the bone Olive oil Place the airfryer attachment in the rim of the Halogen Oven bowl. Extend the hinge until it can easily place on top of the airfryer.
- Page 20 Herby fish fingers 2 fillets of white fish e.g. cod, pollock 1 egg 3 stale slices of bread Mixed herbs Place the high rack into the Halogen Oven. Cut the fish fillets into strips. Grate the bread on a box grater or alternatively cut into chunks and pulse in a food processor.
- Page 21 Breakfast Rack Attachment Place the breakfast rack in the Halogen Oven according to what you want to cook. High side is suitable for bacon, sausage, hash browns, eggs. Low side is suitable for toast and eggs. Preheat the Halogen Oven to 200°C for 3 minutes. Lie bacon rashers on the breakfast rack.
-
Page 22: Cooking Times And Temperatures
Cooking times and Temperatures Food Temperature in ˚c Cooking time in minutes Chicken (1.6kg/3 lbs. 7 190—200°C 60-75 minutes oz.) Chicken breast (175g/ 6 190—200°C 15-20 minutes Cod fillet (150g/ 5 oz) 200°C 12-18 minutes Potatoes (fried, small, 200°C 30-40 minutes halves) Potatoes (baked, 200°C... -
Page 23: Cleaning
Cleaning and storing the appliance No liquids should enter the top of the halogen lid as this could cause the electrics to short circuit resulting in a fire. If liquid enters the halogen lid it must be checked over by a qualified electrician before It can be used. -
Page 24: Storing
Storing the appliance There is a risk of fire from hot components. Always allow the appliance time to cool down thoroughly before cleaning and storing. The appliance and accessories must be left to dry out thoroughly before storing. ... -
Page 25: Using Extender Ring
Increasing the size of the Glass Bowl With the use of the extender ring you can increase the volume of the glass bowl from 12 L to 17 L. Please ensure that the oven is not hot and is fully unplugged before performing this operation. -
Page 26: Replacing The Halogen Bulb
Replacing the Halogen bulb Figure 1 Remove the 3 bulb cover screws with a Phillips head screwdriver, and turn all the screws anticlockwise. Figure 2 When the bulb cover has been removed, use a Phillips screwdriver turn the bulb connector housing plate screw anti clockwise. - Page 27 Figure 3 With the bulb connector housing plate removed unclip the halogen bulb connector by pressing down on the clip. Figure 4 This picture shows the halogen bulb completely removed from the unit. Note: Please insert the bulb and follow the diagrams in reverse to reassemble the appliance...
-
Page 28: Disposal Of The Appliance
UK and EU Guarantee Your new Andrew James product comes with a 24 month guarantee and a 2 year fixed warranty, effective from receipt confirmation. Your receipt or order number is required as proof of purchase date so it is imperative that you keep it safe. - Page 29 customer. If you wish to return your item for a full refund, you have the right to do so within the first 7 days. For our returns policy please go to www.andrewjamesworldwide.com Customers are responsible for any taxes applied to our products when they are shipped outside of the EU.
-
Page 30: Electrical Information
Electrical information Please note: It is extremely important that the wires or cores in the flex are connected to the correct terminals in the plug. If the colour of the mains lead of the appli- ance does not correspond with the coloured markings identifying the termi- nals in your plug proceed as follows: ... - Page 31 identical rating as the original. If you are unsure about which plug or fuse to use, always refer to a qualified electrician. Please note after replacing the fuse, ensure that the cover is correctly fitted back onto the plug. Never attempt to run the appliance if the plug does not have a cover.
-
Page 32: Contact Details
Contact details Andrew James UK LTD Unit 1 P C Henderson Premises Bowburn North Industrial Estate Bowburn Co Durham DH6 5NG Customer Service / Technical Support- Telephone 0844 335 8464 Customer Service/ Technical Support Email: customerservices@andrewjamesworldwide.com Website: www.andrewjamesworldwide.com Copyright Andrew James...
Need help?
Do you have a question about the 12L Digital Halogen Oven and is the answer not in the manual?
Questions and answers