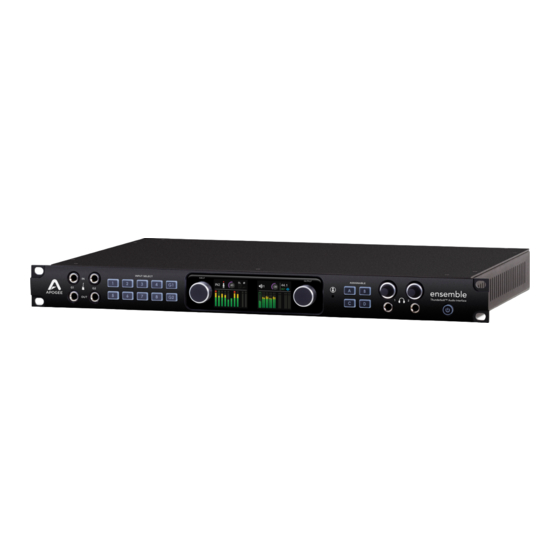
Apogee Ensemble User Manual
Thunderbolt audio interface
Hide thumbs
Also See for Ensemble:
- User manual (42 pages) ,
- Quick start manual (28 pages) ,
- Supplementary manual (2 pages)
Table of Contents
Advertisement
Quick Links
Advertisement
Table of Contents

Related Manuals for Apogee Ensemble


Summary of Contents for Apogee Ensemble
- Page 1 Apogee Ensemble Thunderbolt Audio Interface User’s Guide Fall 2014...
-
Page 2: Table Of Contents
Adjust Output Volume! ..................... Assignable Buttons! ....................Getting Started with Audio Software! ..............Select Ensemble for Mac System Sound Output! ..........Route Mac System Sound to Different Outputs! ............ Select Ensemble in your DAW! ................Select Ensemble in Logic Pro X! ................ - Page 3 Monitoring as you Record! ..................Stage 2, Part 1: Playback Through Your Guitar Rig! ..........Stage 2, Part 2: Record the amp onto a separate DAW track! ....... Notes about re-amping with Ensemble:! ..............Unity Gain! ........................Guitar I/O Circuit Diagram! ..................
- Page 4 Setup Multiple Headphone/Speaker Mixes via Maestro Mixer! ......Clocking with External Equipment! ................ Configure Ensemble as Clock Master! ..............Configure Ensemble as Clock Slave! ..............Termination! ....................... Maestro! ......................Maestro Features! ..................... Devices Sidebar! ....................... Device Icon and ID Button! ..................
-
Page 5: Overview
Overview Introduction The new Apogee Ensemble is the first Thunderbolt™ 2 audio interface to offer superior sound quality, the lowest latency performance and the most comprehensive studio functionality all in one box. Ensemble includes 8 Advanced Stepped Gain mic preamps, monitor controller functionality including talkback, front panel Guitar I/O, two headphone outputs and digital connectivity for a total of 30 x 34 I/ O. -
Page 6: Package Contents
• QuickStart Guide • Rubber Feet • Warranty Booklet Register your product • Access Apogee’s expert Technical Support for free • Receive important product update information by email • Take the Customer Satisfaction Survey for a chance to win Apogee gear! www.apogeedigital.com/register... -
Page 7: Ensemble Thunderbolt Panel Tour
Ensemble Thunderbolt Panel Tour Front Panel 1. Guitar I/O (see 5. Built-In Mic (see page 22): page 29): a. Inputs ch 11/12: Connect high a. The built-in mic can be recorded, impedance (Hi-Z) instruments or used for the talkback function. -
Page 8: Rear Panel
44.1 - 192k. b. Return (bottom) - can use balanced TRS or unbalanced TS 1/4” cables. 7. BNC Word Clock: Used to transmit or receive word clock signal between Ensemble and other digital devices (page 37). 4. Monitor Out: 8. -
Page 9: Display
Display Input Settings Display Screen This screen appears when an Input Select button is held for 1 second. The parameters available will change depending on the channel being viewed, and the settings made. For navigation instructions, see page 1. Input Source a. -
Page 10: Getting Started
A Mac is compatible with Ensemble if it has the Thunderbolt logo. The Mini DisplayPort, featured on many pre- Thunderbolt Macs, is the exact same size as the Thunderbolt port but does NOT support Thunderbolt devices. -
Page 11: Ensemble Software
OS X 10.9.3 or greater Thunderbolt Cable Download and Install Software Before Ensemble will work with the computer, special software must be installed. The latest version of the software can be downloaded from the Apogee website at: www.apogeedigital.com/support/ensemble-thunderbolt The download comes in the form of a dmg image file. Open it to view the contents. -
Page 12: Update Ensemble Firmware
Update Ensemble Firmware The first time Ensemble is used after the software installation, you will likely need to update the firmware. Warning: Do not disconnect power or interrupt the firmware update process before it is complete as this may damage the unit. -
Page 13: Connection Examples Diagram
Connection Examples Diagram... -
Page 14: Front Panel Controls
Front Panel Controls Many Ensemble settings can be controlled from the front panel. For full control over all settings, use the Maestro software (page 39). Adjust the Input Gain 1. Turn the Input Controller knob to adjust the input gain for the selected channel. -
Page 15: Adjust Output Volume
Adjust Output Volume 1. Turn the Output Controller, Headphone 1, or Headphone 2 knob to adjust the respective output level. 2. Press the Output Controller, Headphone 1, or Headphone 2 knob to toggle mute on/off. Assignable Buttons Assignable buttons A, B, C, & D can be programmed to perform different functions. Press an Assignable button to perform it’s programmed function. -
Page 16: Getting Started With Audio Software
Getting Started with Audio Software Select Ensemble for Mac System Sound Output To get sound from general audio applications such as iTunes and Safari to play out of Ensemble, it must be selected as the output device in Mac System Preferences. -
Page 17: Route Mac System Sound To Different Outputs
5. Select the desired Ensemble output channel for each speaker assignment. For example, if you want iTunes to play out of Ensemble channels 3 & 4, set Left Front to “3” and Right Front to “4”. 6. Select the Apply button. -
Page 18: Select Ensemble In Your Daw
Most professional applications have their own audio preferences that are separate from the Mac System Preferences. Basic steps for setting up Ensemble are provided. For more detail on this topic, refer to the documentation that comes with your recording program. -
Page 19: Select Ensemble In Ableton
1. Go to Live > Preferences. Select the Audio tab. 2. In Driver Type, select “CoreAudio”. 3. In Audio Input & Audio Output Device, select “Ensemble Thunderbolt”. 4. Start by setting the buffer size to “64 samples”. This setting may need to be adjusted based on your computer’s... -
Page 20: Monitoring The Input Signal
Using your DAW to Monitor By default, Ensemble is configured for your recording software or DAW to perform the monitoring duty of passing your input signal on to your output. For instructions on configuring some of the major DAW programs... -
Page 21: Using Ensemble's Hardware Direct Monitor
(see “Understanding Latency” on page 51), then you can use one of the Low-Latency Maestro Mixers built into Ensemble to monitor your signal instead. 1. Open Maestro and select the Output 2. To monitor using speakers connected Routing tab (or use the keyboard to Ensemble’s Monitor Out 1&2:... -
Page 22: Guitar I/O
• Assigned to software output channels 11 and 12. Re-Amping Ensemble provides a powerful way to get your best guitar tracks in a two-stage process. The first stage focuses on capturing your performance in a recording track of your DAW. The second stage routes that performance through your amps and effect pedals, allowing you to tweak settings until it’s perfect so it can be recorded into... -
Page 23: Stage 1: Record The Performance
To do this on Ensemble: 1. Connect a guitar to a front panel guitar input on Ensemble. 2. Setup an audio track in your DAW to record from the guitar input (G1 = In 11, G2 = In 12). To keep things simple, leave Ensemble’s input gain at 0dB... -
Page 24: Stage 2, Part 1: Playback Through Your Guitar Rig
The sound of the amplifier is recorded, usually with a microphone, onto another track in the DAW. 1. Place a microphone in front of the amp and connect the mic to an input on Ensemble’s rear panel. 2. Make the appropriate settings to get the mic input working using Ensemble’s Front Panel controls... -
Page 25: Notes About Re-Amping With Ensemble
Ensemble’s guitar output. • If the intention is to keep the signal coming out of Ensemble at the same level as the original input, use the “Unity Gain” checkbox in Maestro’s Output tab window to restore the output level to match the original input. -
Page 26: Inserting Effects Pedals
2. Using a regular unbalanced 1/4” instrument cable, connect from the G1 or G2 Output to the Input of your first pedal. 3. Connect another 1/4” cable from the output of your last pedal to Ensemble’s G1 or G2 Input. NOTE: If sending from Ensemble’s G1 output, use Ensemble’s G1 input to return the signal. -
Page 27: Main Features
Main Features Analog Audio Inputs Ensemble’s 12 analog audio inputs provide a multitude of connectors and options coupled with Apogee’s dynamically optimized preamps and premium circuit design that provide for all the interconnections you need with your external gear. Guitar Inputs... -
Page 28: Channel 1 & 2 Analog Insert Send/Return Jacks
Connect a 1/4” cable from Insert Send jack to the external hardware’s Input jack. Connect another 1/4” cable from the output of the external gear to Ensemble’s Insert Return jack. In Maestro, select the “Input” tab (or use keyboard combination [⌘+1]). -
Page 29: Built In Mic
Built In Mic Ensemble features a built-in mic on the front panel that can be recorded, or used for the Talkback function (page 31). Recording the Built-In Mic Ensemble’s Built-In Mic can be recorded into your computer in the same way as the other inputs on the Ensemble. -
Page 30: Guitar Outputs
See the Guitar I/O section on page Digital I/O Ensemble provides multiple ports of digital inputs and outputs, providing up to 18 channels of digital I/O for connectivity to your digital gear. Optical Two pairs of optical (Toslink) in and out ports are provided. These ports can be... -
Page 31: Monitor Control Center
[⌘+1]). 5. On Input 8, activate phantom power if necessary, and adjust the Gain and other settings to adjust the external Talkback Mic’s level. (page Note: Mic settings for input 8 can also be made from Ensemble’s front panel. -
Page 32: Choosing The Talkback Mic Destination
Choosing the Talkback Mic Destination 1. Open Maestro and select the “Device Settings” 2. Sound from the Talkback Mic can be sent to one or tab at the top (or use the keyboard combination more of the following destinations: [⌘+3]). •... -
Page 33: How To Set The Monitor Outputs As A Fixed Line-Out
This setting changes the Monitor Outputs from a variable volume controlled by the Output Controller knob to a fixed output at the full +4dBu or -10dBV reference level. This setting is convenient for connecting Ensemble to an external monitor control device such as a mixer or control center. -
Page 34: Using The Assignable Buttons To Change Speaker Sets
How to connect and configure a Surround Speaker Setup When using Ensemble with a surround speaker setup, the first six outputs can be configured as speaker outputs suitable for connection to a 5.1 speaker system. With this configuration, turning the Output Controller knob will adjust all six line-outputs simultaneously. -
Page 35: Adjust For Volume Differences Between Speakers
Adjust for Volume Differences Between Speakers There may be cases where the perceived volume of one of two or three speaker sets, or a speaker in a surround setup, is slightly different from the others. The output Trim controls in Maestro can be used to compensate for this so all speakers produce the same perceived volume levels. -
Page 36: Setup Multiple Headphone/Speaker Mixes Via Maestro Mixer
Setup Multiple Headphone/Speaker Mixes via Maestro Mixer Since there are four low-latency mixers in Maestro, these can send different mixes to the various Ensemble audio outputs. For example, send one mix to the Headphone 1 output and a different mix to the Headphone 2 output, as well as different mixes to the rear-panel Monitor Outputs and Analog Outputs. -
Page 37: Clocking With External Equipment
4. Connect a digital audio cable (optical or coaxial) out of Ensemble and into the external equipment. Or connect a BNC Word Clock cable from the OUT of Ensemble to the IN of the external equipment. NOTE: When connecting via BNC cable, make sure you follow appropriate termination practices (page 49). -
Page 38: Configure Ensemble As Clock Slave
1. Set the external device as the clock master. 2. Connect a digital audio cable (optical or coaxial) out of the external device and into Ensemble. Or connect a BNC Word Clock* cable out of the external gear to Ensemble’s BNC IN port. -
Page 39: Maestro
Maestro Features While only basic settings may be made from the front panel controls, all Ensemble features are available and can be controlled from Apogee Maestro software. -
Page 40: Input Tab Window
Input Tab Window Settings for Ensemble’s analog and digital inputs are found in the input tab. 1. Analog Level - Use this drop down menu to choose the analog level for each A/D conversion channel. Option+click any channel to set the reference for all channels... -
Page 41: Output Tab Window
Output Tab Window Settings and controls for Ensemble’s analog and digital outputs are found in the Output tab. - Use this drop down menu to choose the analog level for each D/A conversion channel. 1. Analog Level Option+Select any channel to set the reference for all channels. - Page 42 This function is useful to check mono compatibility of a stereo signal. Show Trims This button reveals output attenuation controls. Use these trims to compensate for variations in the perceived output level of individual speakers or speaker sets connected to Ensemble’s analog outputs.
-
Page 43: Device Settings Tab Window
Output source between THRU operation and FROM SOFTWARE operation. • • Clear Meters: Removes any peak and over indicators in Maestro and on Ensemble’s front panel display. Clear Meters: Removes any peak and over indicators in Maestro and on Ensemble’s front panel display. •... -
Page 44: Input Routing Tab Window
Input Routing Tab Window The number of input channels that are available to a computer recording program is determined by Ensemble’s Core Audio driver. The Input Routing window determines how Ensemble’s physical hardware inputs are routed to these software inputs. -
Page 45: Output Routing Tab Window
Output Routing Tab Window The number of output channels that appear to audio programs in the computer is determined by Ensemble’s Core Audio driver. The Output Routing tab window determines how these software outputs are routed to Ensemble’s physical hardware outputs. -
Page 46: Mixer Tab Window
Mixer Tab Window The Maestro Mixer provides a low latency patch from Ensemble’s inputs to its outputs. This is useful for when latency through software audio applications are too long, but also when wanting to monitor your input signal without needing to have an audio software application open at all. -
Page 47: Mixer Tab Window (Continued)
Internal: Ensemble is clocked from its internal crystal. • • Word Clock: Ensemble is clocked from an external word clock signal connected to the rear panel BNC input. Word Clock: Ensemble is clocked from an external word clock signal connected to the rear panel BNC input. •... -
Page 48: Menu Bar Menus
Menu Bar Menus About Apogee Maestro - Choose this menu item to display version information for all the hardware connected and software elements installed on your Mac. Preferences - Choose this menu item to display Maestro’s Preference panel. • Launch Maestro automatically when connecting a device - This launches Maestro when an Apogee device is connected to the computer. -
Page 49: Reference
Reference BNC Termination Best Practices Ensemble provides an internal termination mechanism for the BNC input. This mechanism is manipulated by the Word Clock (WC) Input Termination checkbox located in the Maestro software’s Device Settings window 43). In general, leave Ensemble’s WC Input Termination checked at all times. This applies even when Ensemble is being used as the master clock for other devices. - Page 50 Clock signal hits a pliable gate that absorbs some of the signal and prevents any “backwash” or “reflection” from happening, keeping things clean and accurate. For more in-depth information on this topic, see the “Big Ben Termination: How and Why” pdf document located on the Apogee website at http://www.apogeedigital.com/pdf/ bigben_termination.pdf...
-
Page 51: Understanding Latency
Understanding Latency What is latency? When recording with most computer-based digital audio applications, a delay between the input and output of the recording system often disturbs the timing of the musicians who are performing. This delay, known at latency, means that the musician hears the notes he produces a few milliseconds after having produced them. As anyone who has spoken on a phone call with echo knows, relatively short delays can confuse the timing of any conversation, spoken or musical. - Page 52 The Maestro mixer serves to provide a low latency listening mix while recording. Therefore if you’re using Ensemble to listen to iTunes or audio from another program, there’s no need to use the mixer. It’s also possible that the latency of your particular recording system is low enough to be unnoticeable by you or other performers, especially since Ensemble uses the very efficient Thunderbolt™...
-
Page 53: Soft Limit
Buffer setting. Soft Limit Soft Limit is Apogeeʼs proprietary analog process for taming transients before A/D conversion. By gently rounding transients in a transparent manner, itʼs possible to maximize level BEFORE the A/D conversion stage and prevent unwanted distortion from clipping. -
Page 54: Specifications
2. Hold down the Output Controller knob. 3. Turn Ensemble on. 4. When the Apogee Splash screen clears and the Display shows the Level Meter screens, let go of the Output Controller knob. This completes the hardware reset of Ensemble. - Page 55 Inputs, preamps, and outputs Inputs, preamps, and outputs 4 Combi mic/line/instrument inputs - 2 1/4” balanced analog inserts Analog Inputs 4 XLR mic/line inputs 2 1/4” hi-z guitar/instrument inputs with Class-A JFET input stage Optical IN: Supports ADAT, SMUX & S/PDIF - ADAT: 16 channels 44.1-48 kHz on 2 Toslink connectors - SMUX: 8 channels 88.2-96 kHz on 2 Toslink connectors Digital Inputs...
-
Page 56: Additional Support
Warranty Information and Legal Notices Registration and Warranty Information Be sure to register your Ensemble, either by filling in the enclosed Registration Card or by completing the on-line registration form at our Web site: www.apogeedigital.com/support/contact-support If you do so, Apogee can contact you with any update information. As enhancements and upgrades are developed, you will be contacted at the registration address. -
Page 57: Service Information
Apogee. In the event your Ensemble needs to be upgraded or repaired, it is necessary to contact Apogee prior to shipping, and a Return Materials Authorization (RMA) number will be assigned. This number will serve as a reference for you and helps facilitate and expedite the return process. -
Page 58: Declarations Of Conformity
NOTE: The use of non-shielded cable with this equipment is prohibited. CAUTION: Changes or modifications not expressly approved by the manufacturer responsible for compliance could void the user’s authority to operate the equipment. Apogee Electronics Corp. 1715 Berkeley Street Santa Monica,CA 90404, USA... - Page 59 • 73/23/EEC – Low Voltage Directive 89/336/EEC – EMC Directive Declaration of Conformity – Japan Apogee Electronics Corporation hereby declares that Ensemble, to which this declaration relates, is in material conformity with the VCCI Class A standard. Declaration of Conformity – Australia Apogee Electronics Corporation hereby declares that Ensemble is in material conformity with AN/NZS standard requirements.
Need help?
Do you have a question about the Ensemble and is the answer not in the manual?
Questions and answers