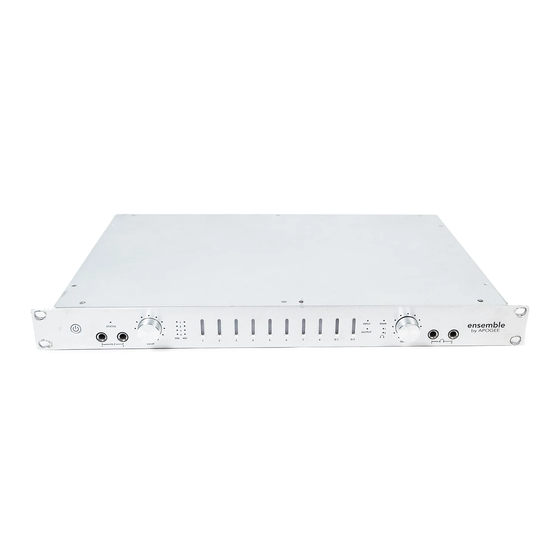
Apogee ensemble User Manual
Multi–channel, 24bit/192khz audio interface for the macintosh
Hide thumbs
Also See for ensemble:
- User manual (59 pages) ,
- Quick start manual (28 pages) ,
- Supplementary manual (2 pages)

Related Manuals for Apogee ensemble


Summary of Contents for Apogee ensemble
- Page 1 Multi–Channel, 24bit/192kHz Audio Interface for the Macintosh User’s Guide - OSX LION V2.0 - January 2012...
-
Page 3: Table Of Contents
Getting Started Quickly 5. DAW configuration Getting Started Quickly 6. Recording General Operation Making Settings with Software Control Panels Making Settings with Ensemble’s Front Panel Encoder Knobs Setting Sample Rate Using 176.4–192 kHz Sampling Rates Setting Clock Source Digital I/O Stand-Alone Mode... -
Page 4: Owner's Record
The serial number is located on the rear panel of the unit. We suggest you record the serial number in the space provided below. Refer to it whenever you call an authorized Apogee Electronics repair facility or the manufacturer. Please be sure to return your completed warranty card immediately! Ensemble Serial No._________________________________________________... -
Page 5: Introduction
Ensemble’s sample rate conversion may be applied to a digital input (to convert an input stream to Ensemble’s sample rate) or to a digital output (to provide an output stream at a user selected sample rate different than Ensemble’s rate). -
Page 6: Getting Started Quickly
Mac (figure 2). figure 2 Connect Ensemble’s AC input to an AC outlet of 90 to 250 volts; Ensemble’s power switch will illuminate to indicate the presence of AC. Press the power switch to turn the unit on (figure 3). -
Page 7: Getting Started Quickly
System Preferences window, then click on the sound icon (figure 5). figure 5 In the Sound Preferences window click on the Output tab and select Ensemble (figure 6). figure 6 iTunes playback Open iTunes, select an audio file and initiate playback (figure 7). -
Page 8: Getting Started Quickly
Devices tab. In the Devices window, click on the Core Audio tab (figure 9). figure 9 Check the Enabled box, select Ensemble in the Device field, and verify that the 24 Bit Record- ing box is checked. Click on Apply Changes when compete (figure 10). -
Page 9: Getting Started Quickly
Ensemble – User’s Guide APOGEE ELECTRONICS Getting Started Quickly Recording Connect a mic to the MIC 1 rear panel connnec- tion (figure 13). figure 13 or an instrument to the HI–Z 1 front panel con- nection (figure 14). figure 14 In Logic, set a track’s input to Analog 1 and... -
Page 10: General Operation
Panel. Certain settings can be also be made from OS X audio control panels. It’s possible to open multiple control panels simultaneously, as settings made on one control panel are mirrored on all others. Additionally, Mic Pre gain and Ouput level may be controlled from Ensemble’s front panel encoders, as described on the lower half of this page. -
Page 11: Setting Sample Rate
Thus, the sample rate of the external source must be manually set to match the software sample rate. For example, if you want to open a session at 88.2 kHz but lock Ensemble to word clock from an Apogee Big Ben, you must manually set the Big Ben to 88.2 kHz. -
Page 12: General Operation
Ensemble – User’s Guide APOGEE ELECTRONICS General Operation Input Routing Diagram 18 Hardware Inputs 18 DAW Inputs MIC 1 or Hi-Z Analog 1 Analog 2 MIC 2 or Hi-Z Analog 3 Analog 4 Analog 5 MIC 3 or Hi-Z Analog 6... -
Page 13: General Operation
Ensemble – User’s Guide APOGEE ELECTRONICS General Operation Output Routing Diagram 18 DAW Outputs 18 Hardware Outputs ANALOG 1 Analog 1 Analog 2 ANALOG 2 Analog 3 Analog 4 ANALOG 3 Analog 5 Analog 6 ANALOG 4 Analog 7 Analog 8... -
Page 14: Maestro 2
Devices Sidebar Any Maestro-compatible Apogee interfaces connected to the host computer are displayed in the Devices sidebar, regardless of whether the connection is made via Symphony PCI card, USB or FireWire. -
Page 15: Input Tab Window
The choices are +4dBu, -10dBV, and Mic for Channels 1-4, and +4dBu, -10dBV for Channels 5-8. Soft Limit - Use this menu to engage Soft Limit. Soft Limit is Apogeeʼs proprietary analog process for taming transients before A/D conversion. By gently rounding transients in a transparent manner, itʼs possible to maxi- mize level BEFORE the A/D conversion stage. -
Page 16: Output Tab Window
Speaker Output Level - This knob controls the Main Output level. The setting is mirrored by the front panel Output knob (when set to Main) and by the Toolbar (speaker icon) knob (when Ensemble is selected in the Toolbar Monitor drop down). -
Page 17: Device Settings Tab Window
SRC Select – Sample rate conversion is applied to the stereo audio path selected in this drop down list. When converting a digital input (at any sample rate) to the sample rate of Ensemble (and thus the DAW session), ap- ply sample rate conversion to the digital input. - Page 18 Thus, once a hardware output is assigned in either the Standalone or Output Routing grid, it is removed from the other grid. Each pair of Ensemble hardware outputs may be freely routed in either the Standalone or Output Rout- ing grid.
- Page 19 The Input Routing tab window determines how Ensemble hardware inputs are routed to audio software inputs. Hardware Inputs Columns - The hardware analog and digital inputs of the Ensemble are displayed in these columns. Software Inputs Rows - Available audio software inputs are displayed in these rows in pairs (1-2, 3-4, etc).
- Page 20 Output Routing The Output Routing tab window determines how audio software outputs are routed to Ensemble hardware outputs. Hardware Outputs Columns - The hardware analog and digital outputs of the Ensemble are displayed in these columns. Software Output Rows - Available audio software outputs are listed in these rows in pairs (1-2, 3-4, etc).
- Page 21 Hardware Output Columns - The hardware analog and digital outputs of the Ensemble are displayed in these columns. Hardware Input Rows - The hardware analog and digital inputs of the Ensemble are displayed in these rows. Mixer Output Rows - The two low latency mixer outputs appear at the bottom of the Hardware Inputs list, and may be assigned to one or more hardware output pairs.
-
Page 22: Mixer Tab Window
Mixer Tab Window This mixer provides a low latency path from Ensemble’s inputs to its outputs, for the case where latency through your software audio application is too long. For more information about what latency is and how to manage it, see Low Latency Mixing. -
Page 23: System Setup Window
The following sources may be selected: Internal - Ensemble is clocked from its internal crystal. Word Clock - Ensemble is clocked from an external word clock signal connected to the rear panel WC input. Optical - Ensemble is clocked from the Optical digital audio input. -
Page 24: Menu Bar Menus
Check the box next to “Launch Maestro automatically when connecting a device” to launch Maestro when the Mac is started. Check the box next to “Display Pop-ups” to display the Ensemble Pop-up on the Mac Desktop to show Speaker and Headphone Level adjustments. -
Page 25: Maestro Low Latency Mixing
Ensemble – User’s Guide APOGEE ELECTRONICS Maestro 2 Maestro Low Latency mixing While recording, if you notice a delay between the moment you play or sing a note and when you hear it in your headphones you are experiencing latency. Maestro’s low latency mixer may help and can be configured by clicking the Mixer tab in Maestro. - Page 26 Do I need the Maestro Mixer? The Maestro mixer serves to provide a low latency listening mix while recording. Therefore if you’re using Ensemble to listen to iTunes or audio from another program, there’s no need to use the mixer.
- Page 27 In Logic Pro, for example, the software monitoring option is found in the same Audio preferences window used to select Ensemble as the hardware device (Logic Pro menu > Preferences > Audio). Uncheck the Software Monitoring box.
- Page 28 Ensemble – User’s Guide APOGEE ELECTRONICS Maestro 2 Step by Step instructions to record with the low latency mixer Set the software application’s mixer output to Out 1-2 (Stereo Output). Set the software application’s mixer output to Out 1-2 (Stereo Output).
-
Page 29: Maestro 2
HP 2 outputs. Ensure the desired tracks are in “record ready” in your DAW. Connect the signal(s) to be recorded to Ensemble’s hardware inputs - the signal levels will appear on the Maestro Mixers’ meters. Raise the faders to create a suitable monitor mix of the input and playback signals. -
Page 30: Navigating The Front Panel
STATUS LED – This multi–color LED provides a quick visual indication of the status of various param- eters. • A solid blue LED indicates that Ensemble is locked to the clock source chosen in software control and that the Firewire connection is valid. -
Page 31: Connections On The Rear Panel
Firewire connection). In Stand-Alone mode, all routing, mixing and control settings made when the unit was last connected to a Mac are saved in Ensemble flash memory, thus allowing the use of the unit when not connected to a computer. Thus, it’s possible to use Ensemble as a Stand-Alone mixer or AD-DA converter. -
Page 32: Connecting Your Studio
Ensemble – User’s Guide APOGEE ELECTRONICS Connecting Your Studio Basic studio configuration: 2 Instruments 2 Headphones DVD/CD Powered Monitors Synthesizer Microphones... -
Page 33: Connecting Your Studio
Ensemble – User’s Guide APOGEE ELECTRONICS Connecting Your Studio 5.1 surround configuration: 5.1 Surround Speaker Set–up... -
Page 34: Configuring Audio Software Apps
Configuring Audio Software Apps Configuring Ensemble for use with audio software apps When configuring Ensemble for use with Core Audio applications it’s necessary to: 1) select Ensemble in the hardware drivers menu; 2) open a software control panel to control Ensemble’s settings. -
Page 35: Configuring Audio Software Apps
1.In Nuendo, open Devices > Device Setup and select VST Audiobay in the Devices column. (figure 30) 2. Set Master ASIO Driver to Ensemble. (figure 31) 3. When queried “Do you want to select another figure 30 MASTER ASIO driver?”, click “Switch”. -
Page 36: Troubleshooting
– When Format Select is set to None (in Maestro), the front panel OUTPUT encoder does not attenuate output level. Set Format Select to Stereo. The meters aren’t working at all. – Verify the METER setting in the Apogee Control Panel in Logic, it might be set to OFF. -
Page 37: Troubleshooting
I want to run Ensemble at 176.4 –192 kHz, but I only see 44.1–96 kHz in AMS. – Ensemble can operate at sample rates of 44.1 to 96 kHz or 176.4 to 192 kHz, as determined by the Sample Rate Range setting in the Apogee Maestro Settings panel. To change the sample rate range, open the Maestro>Window>Settings panel and set Sample Rate Range to the desired... -
Page 38: Warnings & Copyrights
Copyright Notice The Apogee Ensemble is a computer–based device, and as such contains and uses software in ROMs. This software, and all related documentation, including this User’s Guide contain proprietary information which is protected by copy- right laws. -
Page 39: Declarations Of Conformity
B respecte toutes les exigences du Règlement sur le matérial brouilleur du Canada. Declaration of Conformity – CE Apogee Electronics Corporation hereby declares that the product, the Ensemble, to which this declaration relates, is in material conformity with the following standards or other normative documents: •... -
Page 40: Registration And Warranty Information
Apogee. In the event your Ensemble needs to be upgraded or repaired, it is necessary to contact Apogee prior to shipping, and a Return Materials Authorization (RMA) number will be assigned. This number will serve as a reference for you and helps facilitate and expedite the return process. - Page 42 User’s Guide - OSX LION V2.0 - January 2012...
Need help?
Do you have a question about the ensemble and is the answer not in the manual?
Questions and answers