Table of Contents
Advertisement
Advertisement
Table of Contents

Related Manuals for Matrix C7xi


Summary of Contents for Matrix C7xi
- Page 1 C7xi C7xe CLIMBMILL OWNER’S MANUAL...
- Page 2 IMPORTANT PRECAUTIONS CLIMBMILL ASSEMBLY LOCATION & SETUP TROUBLESHOOTING & MAINTENANCE CLIMBMILL OPERATION CLIMBMILL WORKOUTS PRODUCT SPECIFICATIONS...
-
Page 3: Important Precautions
IMPORTANT PRECAUTIONS SAVE THESE INSTRUCTIONS When using a Climbmill, basic precautions should always be followed, including the following: Read all instructions before using this product. It is the responsibility of the owner to ensure that all users of this product are adequately informed of all warnings and precautions. - Page 4 DANGER TO REDUCE THE RISK OF ELECTRICAL SHOCK: Always unplug the unit from the electrical outlet immediately after using, before cleaning, performing maintenance and putting on or taking off parts. WARNING TO REDUCE THE RISK OF BURNS, FIRE, ELECTRICAL SHOCK OR INJURY TO PERSONS: •...
- Page 5 WARNING • Use the unit only as described in the unit guide and owner’s manual. • Incorrect or excessive exercise may cause injury. If you experience any kind of pain, including but not limited to chest pains, nausea, dizziness, or shortness of breath, stop exercising immediately and consult your physician before continuing. •...
-
Page 6: Electrical Requirements
CAUTION CONSULT A PHYSICIAN BEFORE USING THIS EQUIPMENT. READ OWNER’S MANUAL BEFORE USE. It is essential that your unit is used only indoors, in a climate controlled room. If your unit has been exposed to colder temperatures or high moisture climates, it is strongly recommended that the unit is warmed up to room temperature before first time use. -
Page 7: Grounding Instructions
110 V UNITS GROUNDING INSTRUCTIONS All Matrix 3x, 5x, 7xe and 7xi 110 V Climbmills require the use The unit must be grounded. If it should malfunction or of a 100-125 V, 60 Hz and a 15 A “Dedicated Circuit”, with a breakdown, grounding provides a path of least resistance non-looped (isolated) neutral/ground for power. - Page 8 ADD-ON PCTV (3X & 5X) A 15 A or 20 A “Dedicated Circuit” with a non-looped (isolated) neutral/ground is required. Each PCTV requires at least 1.2 A of current (either from 110 V or 220 V). No more than 12 PCTVs should be used for each 15 A circuit and no more than 16 PCTVs should be used for each 20 A circuit.
- Page 9 ENTER YOUR SERIAL NUMBERS AND MODEL NAME IN THE BOXES BELOW: CONSOLE SERIAL NUMBER LOCATION FRAME SERIAL NUMBER: CONSOLE SERIAL NUMBER: MODEL NAME: MATRIX » Use the information above for initial setup and when calling for service.
-
Page 10: Before You Begin
SOCKET HEAD BOLT Black are present. Review the contents of the hardware (M8x25L) package for completeness. Contact Matrix Customer Service at 1(866) 693-4863 to SOCKET HEAD BOLT Blue report any missing items. (M8x20L) SOCKET HEAD BOLT... -
Page 11: Assembly Step
ASSEMBLY STEP 1 BLACK HARDWARE BAG CONTENTS : SOCKET HEAD BOLT(M8x25L) BLACK Open BLACK HARDWARE BAG Carefully route the wires up console mast. Attach the console mast to the frame using the provided bolts. Securely tightly, being careful not to pinch any wires. - Page 12 ASSEMBLY STEP 2 BLUE & GREEN HARDWARE BAG CONTENTS SOCKET HEAD BOLT(M8x20L) BLUE UPPER HANDLEBAR SOCKET HEAD BOLT(M8x16L) GREEN GREEN BAG SOCKET HEAD BOLT(M8x35L) GREEN BOTTLE HOLDER CURVED WASHER BLUE FLAT WASHER BLUE FLAT WASHER GREEN SOCKET HEAD BOLT(M8x16L) BLUE Open BLUE HARDWARE BAG Attach Lower Handlebar using provided bolts.
- Page 13 ASSEMBLY STEP 3 CONTENTS ARE PRE-ATTACHED: SOCKET HEAD BOLT(M5x12L) Remove the five pre-attached console screws from back of console. Carefully connect all wires coming from the mast to the inside of the console. Note: Depending on the console, not all cables coming from the mast will need to be connected.
- Page 14 C5x, C7xe, C7xi ASSEMBLY STEP 4 A Connect the wires from the frame to the Base Step. B Lift the Control Zone over the caster LEVELERS wheels. Push down firmly on both sides until it seats firmly. CASTER WHEELS C Slide the Sweat Collector Tray under the Climbmill, latching the handle to the base.
- Page 15 C3x ASSEMBLY STEP 4 To attach end caps, slide (1) over (2) and then slide (3) into (4). C3X ASSEMBLY COMPLETE! END CAPS LEVELERS...
-
Page 17: Location & Setup
LOCATION & SETUP... -
Page 18: Location Of The Unit
(C3X) or CONTROL ZONE (C5X, C7XE and C7XI). CAUTION: There is an electrical plug Contact Customer Tech Support located under the CONTROL ZONE and will need to be unplugged for examination and repair. -
Page 19: Troubleshooting And Maintenance
TROUBLESHOOTING & MAINTENANCE... -
Page 20: Recommended Cleaning Tips
CAUTION: Be sure to have proper assistance to install and move the unit in order to avoid injury or damage. CHECK FOR DAMAGED PARTS DO NOT use any equipment that is damaged or has worn or broken parts. Use only replacement parts supplied by Matrix Fitness. -
Page 21: Care And Maintenance
For this reason, Customer Tech Support recommends that the following preventive maintenance schedule be followed. DAILY • Unplug the unit. Clean entire machine using water and a mild soap or other Matrix approved solution (cleaning agents should be alcohol and ammonia free). MONTHLY (C3x only) Unplug the Climbmill and remove the access panel. - Page 22 The site provides information including serial numbers, time/distance totals, software versions, and a history of any error codes that the unit has shown. The system will send email notifications for any error messages that occur on the equipment, notifying both Matrix Fitness customer support and the facility.
- Page 23 CLIMBMILL OPERATION...
-
Page 24: Proper Usage
Maintain a constant distance from CONTROL ZONE the console and remote handlebar controls. Keep your knees slightly (C5X, C7XE, C7XI) bent at all times. USING THE HEART RATE FUNCTION The heart rate function on this product is not a medical device. While heart rate grips can provide a relative estimation of your actual heart rate, they should not be relied on when accurate readings are necessary. -
Page 25: Wireless Heart Rate Receiver
WIRELESS HEART RATE RECEIVER When used in conjunction with a wireless chest transmitter, your heart rate can be transmitted wirelessly to the unit and displayed on the console. Prior to wearing the wireless chest transmitter on your chest, moisten the two rubber electrodes with water. Center the chest strap just below the breast or pectoral muscles, directly over your sternum, with the logo facing out. -
Page 27: Console Description
3X CONSOLE DESCRIPTION The Matrix machine is inspected before it is packaged. It is shipped in two pieces: the base and the console. Carefully unpack the unit and dispose of the box material. Note: There is a thin protective sheet of clear plastic on the overlay of the console that should be removed before use. - Page 29 5X CONSOLE DESCRIPTION The Matrix machine is inspected before it is packaged. It is shipped in two pieces: the base and the console. Carefully unpack the unit and dispose of the box material. Note: There is a thin protective sheet of clear plastic on the overlay of the console that should be removed before use.
- Page 31 7XE CONSOLE DESCRIPTION The Matrix machine is inspected before it is packaged. It is shipped in two pieces: the base and the console. Carefully unpack the unit and dispose of the box material. Note: There is a thin protective sheet of clear plastic on the overlay of the console that should be removed before use.
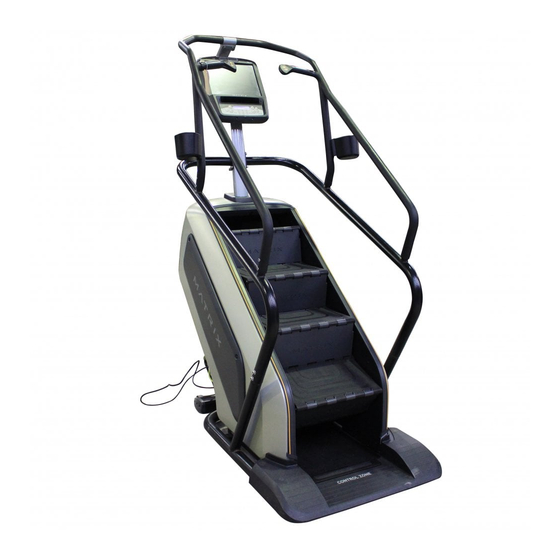
- Page 33 7XI CONSOLE DESCRIPTION The Matrix machine is inspected before it is packaged. It is shipped in two pieces: the base and the console. Carefully unpack the unit and dispose of the box material. Note: There is a thin protective sheet of clear plastic on the overlay of the console that should be removed before use.
- Page 34 7XI CONSOLE OPERATION GETTING STARTED (For help or more information, touch ?.) WELCOME SCREEN • Touch the USER button to sign-in with your XID. • Touch the GUEST button to workout anonymously. • Touch the REGISTER button to create a new XID. USER SIGN-IN 1) Enter your XID and touch 2) Enter your PASSCODE and touch...
-
Page 35: Home Screen
HOMESCREEN: FEATURED CONTENT • When the workout starts, featured content is displayed. Touch to access homescreen. HOMESCREEN • The USERNAME or GUEST is shown in the upper right-hand corner. • Touch to change WORKOUT STATISTICS displayed at the bottom of the screen. • Touch a FLAG to change the language. - Page 36 7XI APPS AND ENTERTAINMENT PROFILE / VIRTUAL ACTIVE SCREEN: • FEATURED CONTENT - Displays featured videos, music and • MEDIA PLAYER - Connect and control audio and workouts according to frequently-accessed content. video files on-screen via USB port. • ON DEMAND TV - Watch On Demand video content •...
-
Page 37: Getting Started
NIKE + IPOD INSTRUCTIONS (7XE CONSOLES ONLY) REQUIREMENTS Nike + iPod – compatible iPod or iPhone (See www.apple.com/nikeplus for more information). Before syncing your Apple device, you must first create a free Nike + iPod account at www.nikerunning.com and have the Nike + iPod App turned on in the settings of your device. GETTING STARTED 1) Before connecting your Apple device, you must first turn on Nike + iPod within the settings of the device. - Page 38 MANAGER MODE AND ENGINEERING MODE 3X & 5X CONSOLES: These sections allow users to manipulate default settings for the machines. It may be accessed by pressing the Level Up/ Level Down keys simultaneously for 5 seconds. To change a setting, press “Enter” on the keypad under ‘Manager Mode’ or ‘Engineering Mode’...
- Page 39 7XE - MANAGER AND ENGINEERING MODE 7XI - MANAGER AND ENGINEERING MODE...
- Page 41 CLIMBMILL WORKOUTS NOTE: The individual human power required to perform an exercise may be different than the mechanical power displayed. These exercise devices are Class A products. These products display the power input into the exercise device in watts. These products have been tested to ensure that the watts displayed on the console is accurate to within +/- 10 %.
-
Page 42: Workout Descriptions
WORKOUT DESCRIPTIONS QUICK START OPERATION RANDOM (3X ONLY) Press the GO button and the machine will enter into a manual There are 20 workout profiles in random mode. Profile mode of operation. All energy expenditure values will be will change each time random button is pressed. calculated using the default weight measurement. -
Page 43: Rolling Hills
TRAINING WORKOUTS Your Matrix machine offers a variety of level-based workouts to challenge users of all fitness levels. The following information will briefly explain the workout and how to program the machine for each workout selection. A) ROLLING HILLS B) INTERVAL TRAINING... - Page 44 WORKOUT DESCRIPTIONS C) CALORIE TRAINING D) GOAL TRAINING Calorie Training is a target-based workout that is designed to Goal Training is a goal-based workout that is designed to help users burn a target number of calories. help users burn a target number of calories. To enter into this workout on the 3x and 5x, use the following To enter into this workout on the 3x and 5x, use the guidelines.
-
Page 45: Heart Rate
HEART RATE CONSTANT WATTS Your Matrix machine offers a heart rate control workout This program allows you to vary your cadence or SPM and mode. The heart rate control workout mode allows the the machine’s resistance will adjust accordingly to your user to program their desired heart rate zone and the selected goal. -
Page 46: Fitness Tests
WORKOUT DESCRIPTIONS FITNESS TESTS FAT BURN WORKOUT OPERATION Fat burn is a level-based workout that is designed to help users burn fat through various resistance changes. The WFI (Wellness Fitness Initiative) protocol is a test used To enter into this workout on the 3x and 5x, use the following guidelines. - Page 47 SUBMAXIMAL FITNESS RATING NORMS (VO 2 MAX) This test measures cardiovascular fitness and provides 20-29 30-39 40-49 50-59 an estimated Sub-maximal VO2max result. This assessment is a 4 stage test lasting 3-5 minutes, where the speed HIGH 51.4 + 50.4 + 48.2 + 45.3 + 42.5 +...
-
Page 49: Product Specifications
PRODUCT SPECIFICATIONS... - Page 50 PRODUCT SPECIFICATIONS C7xi CLIMBMILL C7xe CLIMBMILL C5x CLIMBMILL FEATURES STEP HEIGHT 10” / 25.4 CM 10” / 25.4 CM 10” / 25.4 CM CONTACT & WIRELESS HR ULTRA NON-SLIP PEDALS HANDLEBAR DESIGN ERGONOMICALLY DESIGNED HANDRAILS AND HORN ERGONOMICALLY DESIGNED HANDRAILS AND HORN...
- Page 51 C3x CLIMBMILL FEATURES STEP HEIGHT 10” / 25.4 CM CONTACT & WIRELESS HR ULTRA NON-SLIP PEDALS HANDLEBAR DESIGN ERGONOMICALLY DESIGNED HANDRAILS AND HORN THUMB SWITCH CONTROLS RESISTANCE SYSTEM TECHNOLOGY ECB W/ FLYWHEEL POWER REQUIREMENTS POWERED 100-125 V, 60 HZ OR 216-250 V, 50 HZ MINIMUM WATTS CONSOLE DISPLAY TYPE...
- Page 54 Matrix Fitness 1-866-693-4863 1600 Landmark Drive, www.matrixfitness.com Cottage Grove, WI 53527 Matrix Climbmill 1.8 | © 2014 Matrix Fitness...
Need help?
Do you have a question about the C7xi and is the answer not in the manual?
Questions and answers
How to pause a workout
Touch the screen to temporarily stop your workout, then touch it again to resume.
This answer is automatically generated