
Related Manuals for EVS Multicam LSM


Summary of Contents for EVS Multicam LSM
-
Page 1: Operating Manual
Operating Manual Version 10.01 - July 2009 Live Slow Motion & Super Slow Motion Instant Replay & Highlights Production... - Page 2 While every effort has been made to ensure that the information contained in this user manual is accurate, up-to- date and reliable, EVS Broadcast Equipm ent cannot be held responsible for inaccuracies or errors that may appear in this publication.
-
Page 3: Table Of Contents
Issue EVS Multicam Version 10.01 – Operating Manual 10.01.F EVS Broadcast Equipment SA – July 2009 Table of Contents INITIAL CONFIGURATION ................... 3 1.1 Application Selection ....................... 3 1.2 Configuration on LSM Remote ..................4 REMOTE CONTROLLER ..................5 ... - Page 4 9.1.1 Clip Structure ........................36 9.1.2 Clip Availability on Disks ...................... 37 9.2 Using the EVS Remote Panel ..................37 9.2.1 How to Create a Clip ......................37 9.2.2 Storing a Clip ........................38 ...
- Page 5 Issue EVS Multicam Version 10.01 – Operating Manual 10.01.F EVS Broadcast Equipment SA – July 2009 10.1.2 Selecting the Current Keyword File ..................71 10.1.3 Editing the keyword file from the multicam application ............71 10.2 Assigning Keywords using the VGA Screen ..............73 ...
- Page 6 EVS Multicam Version 10.01 – Operating Manual Issue 10.01.F EVS Broadcast Equipment SA – July 2009 11.9.3 Functions Available on the Remote in Playlist Diffusion Mode ..........102 11.10 G eneral Edit Functions Available for Playlists ............. 103 ...
- Page 7 Issue EVS Multicam Version 10.01 – Operating Manual 10.01.F EVS Broadcast Equipment SA – July 2009 12.5.3 How to Add a Clip to a Timeline ..................138 OPERATING ON XNET NETWORK ..............139 13.1 Introduction ......................... 139 ...
- Page 8 EVS Multicam Version 10.01 – Operating Manual Issue 10.01.F EVS Broadcast Equipment SA – July 2009 18.3 controlling the Hypermotion Camera from the Remote ..........169 18.3.1 Defining the Number of Memory Blocks ................169 18.3.2 General Process with Single-Block Memory ..............169 ...
- Page 10 EVS Multicam Version 10.01 – Operating Manual Issue 10.01.F EVS Broadcast Equipment SA – July 2009 What’s New? Some sections have been reviewed even if no specific changes related to these sections have been brought on Multicam version 10.00. The changes linked to new features on Multicam version 10.00 appear with the ‘New’...
- Page 11 Overview The aim of this manual is to familiarize the operator with the Multicam software for EVS High Definition and Standard Definition servers, and its Remote Panel, so as to learn as quickly and efficiently as possible the basic operations.
-
Page 12: Initial Configuration
AVCFG module, you can also specify the channel configuration you want to use and several audio and video parameters. When turning on the EVS mainfram e, the first step is the PC boot sequence, then the EVS software is started: •... -
Page 13: Configuration On Lsm Remote
EVS Broadcast Equipment SA – July 2009 CONFIGURATION ON LSM REMOTE Before you start using the Multicam application in Multicam LSM mode, you need to ensure that the param eters are properly defined in the Setup menu of the Remote Panel, and in the Setup Configuration module of the Multicam application. -
Page 14: Remote Controller
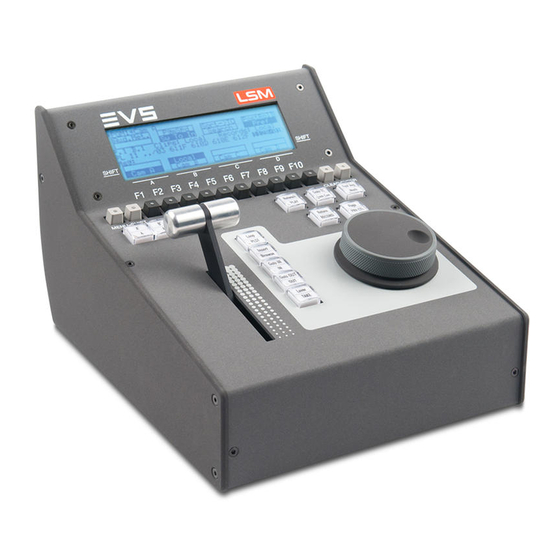
EVS Multicam Version 10.01 – Operating Manual Issue 10.01.F EVS Broadcast Equipment SA – July 2009 2. Remote Controller GENERAL LAYOUT The following diagram show s the Remote Panel along with a brief description of each area. Note The operational buttons have PRIMARY and SECONDARY functions and are divided into upper and lower sections. - Page 15 Issue EVS Multicam Version 10.01 – Operating Manual 10.01.F EVS Broadcast Equipment SA – July 2009 F-keys & small Multi-purpose keys buttons Soft keys With LCD display, allows the operator to enter the Multicam MENU system Lever Initiates slow motion and playlist replay...
-
Page 16: Led Colours
EVS Multicam Version 10.01 – Operating Manual Issue 10.01.F EVS Broadcast Equipment SA – July 2009 same picture inside the record train, if it still exists. PRV CTL Enables/disables the Preview Control mode. PAGE Selects current clip page, from 1 to 10. -
Page 17: Soft Keys
Issue EVS Multicam Version 10.01 – Operating Manual 10.01.F EVS Broadcast Equipment SA – July 2009 SOFT KEYS The soft keys have PRIMARY and SECONDARY functions and are divided into upper and lower sections. The LCD display is divided in two menus. -
Page 18: Transport Controls
EVS Multicam Version 10.01 – Operating Manual Issue 10.01.F EVS Broadcast Equipment SA – July 2009 TRANSPORT CONTROLS 2.5.1 JOG DIAL The JOG DIAL allows the operator to pass into Search mode and thus to choose exactly the Short OUT or Short IN image. Move the jog dial clockwise to search forward and move it counter-clockwise to search backwards. -
Page 19: Main Menu
F1 to F4 If desired, the Multicam system can be run using 1, 2, 3 or 4 EVS Remote Panels. Depending on the num ber of play channels available in the current configuration, 1-, 2-, 3- or 4- Remote modes will be available from the Main menu. - Page 20 Enables or disables the on-screen display (Timecode, Clip On/Off ID,…) on the output monitors. F6: Exit Exits the Multicam software and returns to the EVS Menu. Clear Clears all clips. All clips will be lost. A confirmation of this clips command is required.
-
Page 21: Remote Panel Operations
Issue EVS Multicam Version 10.01 – Operating Manual 10.01.F EVS Broadcast Equipment SA – July 2009 4. Remote Panel Operations OPERATIONS 4.1.1 RECORD This key lights red when the system is recording. Pressing this key brings the system in E/E (“live”) mode, and starts the record if necessary (depending on the settings of the Setup menu). -
Page 22: Out
EVS Multicam Version 10.01 – Operating Manual Issue 10.01.F EVS Broadcast Equipment SA – July 2009 4.1.5 This function defines the IN point of a clip. The key will light differently depending in the follow ing situations: Green key The key lights green if an IN point exists but is not the image you see. -
Page 23: Fast Jog
Issue EVS Multicam Version 10.01 – Operating Manual 10.01.F EVS Broadcast Equipment SA – July 2009 4.1.8 FAST JOG When selected, this option enables fast picture search: the actual speed of this fast jog is adjustable in the Setup menu. Starting a play or returning to E2E mode resets the Fast Jog mode. -
Page 24: Insert
EVS Multicam Version 10.01 – Operating Manual Issue 10.01.F EVS Broadcast Equipment SA – July 2009 When a cue point exists for the current picture on the primary channel (the CUE button lights red), pressing the BROWSE key allows the operator to browse through all existing cue points by turning the jog dial. -
Page 25: Goto Tc
Issue EVS Multicam Version 10.01 – Operating Manual 10.01.F EVS Broadcast Equipment SA – July 2009 4.1.17 GOTO TC The Goto TC option allows the user to jump to a given timecode in the loaded train or clip. OW TO... -
Page 26: Goto In / Goto Out
EVS Multicam Version 10.01 – Operating Manual Issue 10.01.F EVS Broadcast Equipment SA – July 2009 If nothing happens after confirming the TC entry with ENTER, this means that the field corresponding to the selected Timecode does not exist on disk any longer. -
Page 27: Rebooting The System From The Lsm Remote
It is also possible to run a «soft reboot» which will exit the softw are and return the user to the EVS Menu. Here, the software can be selected and entered again without having to reboot the entire system. When running the following procedure, the system will automatically save all recorded material (record trains, clips, playlists) upon exit. -
Page 28: Selection Of Clip Banks And Playlists
“1” refers to the playlist number (1 to 10) Note • The playlist bank of page 10 is not available from the EVS remote, since it is actually reserved for the EVS AVSP protocol (for Air Box and Air Edit). -
Page 29: Clip Numbering Hierarchy
Issue EVS Multicam Version 10.01 – Operating Manual 10.01.F EVS Broadcast Equipment SA – July 2009 CLIP NUMBERING HIERARCHY Multicam can store up to 900 (multiplied by the number of cameras) clips and 100 playlists in its libraries. 900 clips with up to 6 camera angles per clip results in 5400 clips on a server. -
Page 30: Control Mode
EVS Multicam Version 10.01 – Operating Manual Issue 10.01.F EVS Broadcast Equipment SA – July 2009 5. Control Mode Multicam can be set in three different basic modes, depending on commands used. LIVE (E2E) MODE This mode selected at start-up can also be selected by pushing the RECORD key. -
Page 31: Synchronisation Mode (Switch To In)
Issue EVS Multicam Version 10.01 – Operating Manual 10.01.F EVS Broadcast Equipment SA – July 2009 SYNCHRONISATION MODE (SWITCH TO IN) If the synchronisation mode is OFF, a request for camera change will produce a jump at the same timecode on the requested camera. This mode allows synchronous change of camera angle. -
Page 32: Definition Of Controlled And Primary Channels
EVS Multicam Version 10.01 – Operating Manual Issue 10.01.F EVS Broadcast Equipment SA – July 2009 DEFINITION OF CONTROLLED AND PRIMARY CHANNELS Important The notions of Primary Channel and Controlled Channel are very important and will be constantly referred to in this manual. -
Page 33: Pgm-Prv Mode
Issue EVS Multicam Version 10.01 – Operating Manual 10.01.F EVS Broadcast Equipment SA – July 2009 6. PGM-PRV Mode 1PGM+PRV (PRESS A FROM MAIN MENU) PGM1 CAM A *PRV1* CAM B Aud.Met. PgmSpd Sort->TC PostRoll Mix. Sw to IN Search... - Page 34 EVS Multicam Version 10.01 – Operating Manual Issue 10.01.F EVS Broadcast Equipment SA – July 2009 Pressing PgmSpd once enables the Program Speed mode and highlights this function on the LCD. Pressing the key once more enables the Var Max mode and highlights this function on the LCD.
- Page 35 Issue EVS Multicam Version 10.01 – Operating Manual 10.01.F EVS Broadcast Equipment SA – July 2009 Audio level Display Level 4 Level 5 When the Post-Roll mode is enabled, that function is highlighted on the LCD and a “P” appears on the OSD of the output monitors.
-
Page 36: Operational Menu
EVS Multicam Version 10.01 – Operating Manual Issue 10.01.F EVS Broadcast Equipment SA – July 2009 6.1.2 PERATIONAL Rst Cam Local Sync Prv 2nd CTRL Cam A Cam B Cam C Cam D CAM A/ B /C /D This parameter allows selecting the camera on the PGM output if PRV CTL is OFF and on PRV output if PRV CTL is ON. - Page 37 CTRL This function allows the operator to swap the control of one or several play channels between the EVS Remote Panel and a third-party controller using the Sony BVW75 or XtenDD35 protocol. Both controllers receive permanently the status of the channel(s), but only one controller at a time is able to actually control a channel.
-
Page 38: Full Control And Lever Control
EVS Multicam Version 10.01 – Operating Manual Issue 10.01.F EVS Broadcast Equipment SA – July 2009 FULL CONTROL AND LEVER CONTROL Controlling both PGM and PR V is done when PR V CTL (direct access key from the remote) is not activated. -
Page 39: Multi Pgm Mode
Issue EVS Multicam Version 10.01 – Operating Manual 10.01.F EVS Broadcast Equipment SA – July 2009 7. Multi PGM Mode 1/2/3 PGM MODES (PRESS A OR B FROM MAIN MENU) Multicam has two modes for its basic operation, 1 PRV/PGM mode or Multi PGM mode: •... -
Page 40: Operational Menu
CTRL This function allows the operator to swap the control of one or several play channels between the EVS remote and a third-party controller using the Sony BVW75 or XtenDD35 protocol. Both controllers receive permanently the status of the channel(s), but only one controller at a time is able to actually control a channel. - Page 41 A, B or C key, then press D (DONE) to validate your selection. Do the same to bring the control of a channel back to the EVS remote. ELECTING A CAMERA ON A CHANNEL This function makes it possible to select first the channel where you want to change the current camera.
- Page 42 EVS Multicam Version 10.01 – Operating Manual Issue 10.01.F EVS Broadcast Equipment SA – July 2009 Practical example The operator builds a playlist with Fills and another playlist with Keys. He sets the “Playlist Load” parameter to “Conditional” in the setup menu, then...
-
Page 43: Video Delay
Issue EVS Multicam Version 10.01 – Operating Manual 10.01.F EVS Broadcast Equipment SA – July 2009 8. Video Delay When the Multicam software has been configured with a base configuration = Video Delay in the Channel Parameters menu, the Delay Screen will appear autom atically when the application is started. - Page 44 EVS Multicam Version 10.01 – Operating Manual Issue 10.01.F EVS Broadcast Equipment SA – July 2009 OW TO ONFIGURE THE IDEO ELAY ARAMETERS OF HANNEL 1. Select the play channel to configure by pressing ALT+ the corresponding F_ key on the PC keyboard (ex: ALT+F1 for PGM1, ALT+F2 for PGM2/PRV, etc) 2.
-
Page 45: Clip Management
Issue EVS Multicam Version 10.01 – Operating Manual 10.01.F EVS Broadcast Equipment SA – July 2009 9. Clip Management INTRODUCTION 9.1.1 TRUCTURE A clip is defined by Short IN and Short OUT points. When referring to Short IN and Short OUT points, the operators usually use the terms IN point and OUT point. -
Page 46: Clip Availability On Disks
EVS Multicam Version 10.01 – Operating Manual Issue 10.01.F EVS Broadcast Equipment SA – July 2009 • The guardband beyond the Short OUT point is created with the material available when the operator saves the clip by pressing the selected F_ key. Therefore, this guardband can sometimes be shorter than the value defined in the Setup menu. -
Page 47: Storing A Clip
Issue EVS Multicam Version 10.01 – Operating Manual 10.01.F EVS Broadcast Equipment SA – July 2009 9.2.2 TORING A 9.2.2.1 OW TO TORE A To store a clip on a given location, proceed as follows: Define a clip by marking the IN and/or OUT points Select the page where the clip will be stored by pressing SHIFT + PAGE + F_ key corresponding to the page. -
Page 48: Recalling A Clip
EVS Multicam Version 10.01 – Operating Manual Issue 10.01.F EVS Broadcast Equipment SA – July 2009 9.2.3 ECALLING A 9.2.3.1 OW TO ECALL A To recall a clip, proceed as follows: Select the Clip page 1, 2, 3, … to 10 (PAGE key). -
Page 49: Playing Back A Clip
Issue EVS Multicam Version 10.01 – Operating Manual 10.01.F EVS Broadcast Equipment SA – July 2009 9.2.4 LAYING ACK A 9.2.4.1 LAYBACK PEED EATURES You can play back a clip using several playback speed features explained above in this user manual. This section summarizes the various playback speed features and refers to more detailed sections on these features: •... -
Page 50: Clearing A Clip
EVS Multicam Version 10.01 – Operating Manual Issue 10.01.F EVS Broadcast Equipment SA – July 2009 9.2.6 LEARING A 9.2.6.1 HICH LIPS AN BE ELETED Clips that are available on disks, or for which the record is in progress, can be deleted. - Page 51 Issue EVS Multicam Version 10.01 – Operating Manual 10.01.F EVS Broadcast Equipment SA – July 2009 Select the COPY or MOVE function by pressing the A or B key. The corresponding function will be highlighted on the LCD and the message on the OSD will be updated accordingly.
-
Page 52: Cancelling A Network Copy
EVS Multicam Version 10.01 – Operating Manual Issue 10.01.F EVS Broadcast Equipment SA – July 2009 the video drives, it simply creates a separate reference to the same video material. This means that the capacity will not decrease when making copies of clips on the same machine. -
Page 53: Restriping The Time Code Of A Clip
Issue EVS Multicam Version 10.01 – Operating Manual 10.01.F EVS Broadcast Equipment SA – July 2009 9.2.10 ESTRIPING THE ODE OF A 9.2.10.1 ESTRICTIONS ON THE EMOTE ANEL The function to restripe the time code of a clip via the Remote Panel is more restricted than via Multicam on the VGA: •... -
Page 54: Secondary Menu In Clip Mode
EVS Multicam Version 10.01 – Operating Manual Issue 10.01.F EVS Broadcast Equipment SA – July 2009 9.2.11 ECONDARY ENU IN 9.2.11.1 VERVIEW In Clip mode, the secondary menu of the Remote Panel is different from the Record Train mode: PGM1 112A... - Page 55 Refer to the Chapter 11 ‘Playlist Management’, on page 86 for more details. The EVS Xfile is a 2U device with 2 removable hard drives, that can be connected to the XNet SDTI network. Clips can be archived to/restored from the removable medias.
- Page 56 EVS Multicam Version 10.01 – Operating Manual Issue 10.01.F EVS Broadcast Equipment SA – July 2009 9.2.11.5 (***) ANKING The Ranking function allows assigning a ranking to the current clip. Pressing several times this key will scroll through the different values: 0 (***, not...
- Page 57 Issue EVS Multicam Version 10.01 – Operating Manual 10.01.F EVS Broadcast Equipment SA – July 2009 If requested, press SHIFT+D to define a date to which the search should be applied: 1. Type the date in dd/mm/yy format with the F1 to F10 keys.
-
Page 58: How To Clear All Non Protected Clips
A message on the video monitor will notify the operator when the operation is complete. Important The Clear All Clips command is different from the Clear Video Disks command available from Maintenance menu in EVS software. • The Clear All Clips command only deletes non-protected clips. -
Page 59: How To Save All Clips/Playlists
EVS Multicam Version 10.01 – Operating Manual 10.01.F EVS Broadcast Equipment SA – July 2009 • The Clear Video Disks command from EVS’ Maintenance menu is more radical and definitely erases all video and audio data from disks. Clips stored in protected pages are also deleted. -
Page 60: The Title Bar
EVS Multicam Version 10.01 – Operating Manual Issue 10.01.F EVS Broadcast Equipment SA – July 2009 9.3.2 ITLE The Title bar contains the status information: • Number and name of the server currently selected for clips and for record trains (*). The name is blinking red if it is a network machine. - Page 61 Issue EVS Multicam Version 10.01 – Operating Manual 10.01.F EVS Broadcast Equipment SA – July 2009 change the primary camera of a clip, refer to the section xxx F5: V This option changes the standard display to the extended display and vice versa.
- Page 62 EVS Multicam Version 10.01 – Operating Manual Issue 10.01.F EVS Broadcast Equipment SA – July 2009 F9:C ONNECT This option calls the CONNECT window. This window allows the operator to connect to the clips and record trains of other machine on the network.
-
Page 63: The Clip Information Area
Issue EVS Multicam Version 10.01 – Operating Manual 10.01.F EVS Broadcast Equipment SA – July 2009 9.3.4 NFORMATION The next area is the Clip Information Area which displays the clips of the selected page and bank(s). Two clips’ banks are displayed at a time. -
Page 64: The Clip Management Area
+ F2 for PGM2/PRV, ALT + F3 for PGM3, etc. This The EVS Xfile is a 2U device with 2 removable hard drives, that can be connected to the XNet SDTI network. Clips can be archived to/restored from the removable media. -
Page 65: How To Name A Clip
Description function is useful to load clips on channels that can not be controlled by an EVS Remote Panel, or to allow an AP to browse clips on a play channel not used by the main operator. Note that if that channel is in PLST EDIT mode with a PRV, the clip will automatically cue up on the PRV. -
Page 66: Selecting A Clip With The Keyboard
EVS Multicam Version 10.01 – Operating Manual Issue 10.01.F EVS Broadcast Equipment SA – July 2009 PRV channel. 9.3.8 ELECTING A LIP WITH THE EYBOARD The keyboard can also be used to operate within the clip screen. The green arrows surrounding a clip shows the current cursor position. The arrow keys (↑... -
Page 67: How To Cancel A Network Copy On The Vga
Issue EVS Multicam Version 10.01 – Operating Manual 10.01.F EVS Broadcast Equipment SA – July 2009 If only 3 digits are entered, the primary camera is selected If 4 digits are entered, the clip is selected according to the given camera angle. - Page 68 EVS Multicam Version 10.01 – Operating Manual Issue 10.01.F EVS Broadcast Equipment SA – July 2009 If you want to modify the LTC time code and date, type in the new time code for the Short IN point and date of the clip in the Set TC field below the LTC field.
-
Page 69: Moving And Copying Clips And Playlists
If the operator wishes to create a local copy of all network clips contained in the playlist, the copy of the playlist must be performed from the EVS Remote Panel. Refer to the Chapter 11 ‘Playlist Management’, on page 86 for further details. - Page 70 EVS Multicam Version 10.01 – Operating Manual Issue 10.01.F EVS Broadcast Equipment SA – July 2009 9.3.13.4 CTL+C: COPY 1. Move the cursor to the clip/playlist to copy 2. Press CTRL + C on the keyboard or click on the corresponding area on the screen.
-
Page 71: Clip Screen - Extended View
Issue EVS Multicam Version 10.01 – Operating Manual 10.01.F EVS Broadcast Equipment SA – July 2009 9.3.14 – E CREEN XTENDED The extended view shows cameras A to F instead of A to D. Only 1 bank can be viewed at a time. The switch between standard and extended view is done by pressing F5 on the keyboard or by clicking on the “F5:VIEW”... -
Page 72: Using The Vdr Panel
EVS Multicam Version 10.01 – Operating Manual Issue 10.01.F EVS Broadcast Equipment SA – July 2009 USING THE VDR PANEL The VGA VDR Panel is accessed from any VGA screen by pressing SHIFT+F9 on the keyboard. The lower section of the VDR Panel is similar to the clip screen, with the same functions. -
Page 73: Vdr Panel - Player Window
Important The control of a channel from the VDR Panel is concurrent to any other controller that m ight be assigned to that channel: EVS Remote Panel or external protocol. A command sent from the VDR Panel to a channel will overwrite whatever the channel was doing at that time. - Page 74 EVS Multicam Version 10.01 – Operating Manual Issue 10.01.F EVS Broadcast Equipment SA – July 2009 9.4.3.2 OW TO OAD A Use the arrow keys to move the cursor inside the lower section of the VDR Panel to the desired clip and press ENTER, or click on the desired clip with the stylus, or type the desired clip ID and press F3.
- Page 75 Issue EVS Multicam Version 10.01 – Operating Manual 10.01.F EVS Broadcast Equipment SA – July 2009 different page and bank, and even connect to another machine on the network using the CONNECT window. Pressing ALT+U will save the clip to the first available clip location in the current server.
-
Page 76: Vdr Panel - Recorder Window
EVS Multicam Version 10.01 – Operating Manual Issue 10.01.F EVS Broadcast Equipment SA – July 2009 9.4.4 VDR P – R WINDOW ANEL ECORDER The VDR Panel Recorder can be used to start/stop the record, and to create clips from the local record trains. For example, it allows the creation of clips on a server that has no Play channel. - Page 77 Issue EVS Multicam Version 10.01 – Operating Manual 10.01.F EVS Broadcast Equipment SA – July 2009 time code of the Short IN point. 6. Press ALT+S to save the clip(s). The operator still has the opportunity to rename the clip during this operation. He can then save the clip to the current cursor location by pressing ENTER, or to the first available clip location on the current server by pressing ALT+U.
-
Page 78: 10. Keyword Management
The keyword and ranking assignment, and the search functions, can be performed using the EVS Remote Panel or the VGA screen and PC keyboard. This functions are only available if licence codes 124 (database search functions) and 125 (keyword assignment functions) are installed on the server. -
Page 79: Creating The Keyword File From Apc
.KWD extension. The file can then be imported from a floppy disk onto the server, either manually from the DOS, or by using the Import/Export Keywords Files from the EVS Maintenance menu (refer to the “XT Technical Reference” for more details... -
Page 80: Selecting The Current Keyword File
EYWORD In the Multicam application, the keyword file can be selected either from the VGA Setup screen, or from the Setup menu of the EVS Remote Panel (p.3.2 F1). The operator can select any file from all the .KWD files present in the Multicam\DIRECTORY . - Page 81 Issue EVS Multicam Version 10.01 – Operating Manual 10.01.F EVS Broadcast Equipment SA – July 2009 Select a local keywords file from the Setup. If you select “ SERVER” as keywords file in the setup, i.e. the file distributed by the network server, you will not be allowed to edit it.
-
Page 82: Assigning Keywords Using The Vga Screen
EVS Multicam Version 10.01 – Operating Manual Issue 10.01.F EVS Broadcast Equipment SA – July 2009 10.2 ASSIGNING KEYWORDS USING THE VGA SCREEN 10.2.1 EYWORD INDOWS Keywords can be assigned to clips using the On-Air Keyword screen (F6:KW1 ), or the Off-Air Keyword screen ( F7:KW2 ). -
Page 83: How To Assign A Keyword To A Clip
Issue EVS Multicam Version 10.01 – Operating Manual 10.01.F EVS Broadcast Equipment SA – July 2009 10.2.2 OW TO SSIGN A EYWORD TO A Move the cursor to the desired keyword and press ENTER, or click on the keyword with the stylus. The keyw ord will be assigned to the first available keyword location on the last line of the screen. -
Page 84: How To Clear All Keywords And The Ranking Of A Clip
EVS Multicam Version 10.01 – Operating Manual Issue 10.01.F EVS Broadcast Equipment SA – July 2009 10.2.7 OW TO LEAR EYWORDS AND THE ANKING OF A Press ALT+DEL or click on ALT+DEL:CLR ALL: all keywords assigned to the clip will be removed, and the ranking will be reset to the lowest level (“ - “). -
Page 85: Search Criteria And Search Options
Issue EVS Multicam Version 10.01 – Operating Manual 10.01.F EVS Broadcast Equipment SA – July 2009 10.3.2 EARCH RITERIA AND EARCH PTIONS 10.3.2.1 EARCH RITERIA Different criteria can be combined to search the database. They can be defined in the Search Criteria are a available at the bottom of the screen. - Page 86 EVS Multicam Version 10.01 – Operating Manual Issue 10.01.F EVS Broadcast Equipment SA – July 2009 Criteria Description Time code This restricts the search to the clips containing the time code specified in this field. The time code search is not applied on “Record in progress”...
-
Page 87: Clearing Keywords In The Search Criteria
Issue EVS Multicam Version 10.01 – Operating Manual 10.01.F EVS Broadcast Equipment SA – July 2009 10.3.2.2 EARCH PTIONS In addition to the search criteria available at the bottom of the screen, two search options are accessible from the Function keys F2 and F4:... -
Page 88: Search Results
EVS Multicam Version 10.01 – Operating Manual Issue 10.01.F EVS Broadcast Equipment SA – July 2009 10.3.4 EARCH ESULTS The results of the database search are displayed in the Search Results screen. If new clips are created after the search, which match the search criteria, they will be automatically added to the list. - Page 89 Issue EVS Multicam Version 10.01 – Operating Manual 10.01.F EVS Broadcast Equipment SA – July 2009 10.3.4.2 ROWSING HROUGH ESULTS AND OADING A The operator can browse this list with the ↑/↓ arrow keys, PgUp, PgDn , Home and End keys.
-
Page 90: Assigning Keywords Using The Remote Panel
EVS Multicam Version 10.01 – Operating Manual Issue 10.01.F EVS Broadcast Equipment SA – July 2009 10.4 ASSIGNING KEYWORDS USING THE REMOTE PANEL 10.4.1 EYWORD ETTINGS A keywords file must be selected in the Setup to enable the keyword assignment functions on the EVS Remote Panel. - Page 91 Issue EVS Multicam Version 10.01 – Operating Manual 10.01.F EVS Broadcast Equipment SA – July 2009 Info parameter of the Setup is set to “Yes”, it will also appear on the OSD of the corresponding output monitors if the current picture is the Short IN point of the clip.
-
Page 92: Assigning Keywords In Numeric Mode
EVS Multicam Version 10.01 – Operating Manual Issue 10.01.F EVS Broadcast Equipment SA – July 2009 10.4.3 SSIGNING EYWORDS IN UMERIC To assign keywords to a clip in numeric mode, recall the clip, then press MENU to access the secondary clip menu on the Remote Panel. - Page 93 Issue EVS Multicam Version 10.01 – Operating Manual 10.01.F EVS Broadcast Equipment SA – July 2009 keyword89012 2 keyword89012 keyword89012 F1:action_1 F6:action_6 F2:action_2 F7:action_7 F3:action_3 F8:action_8 F4:action_4 F9:Prev.page p.01 F5:action_5 F0:Next page Reset Archive FromDate ToDate Return Srch Loc Srch Net...
- Page 94 EVS Multicam Version 10.01 – Operating Manual Issue 10.01.F EVS Broadcast Equipment SA – July 2009 RESET The RESET key: resets the default values of the search criteria (no from/to date) and set the default TC to the TC of loaded on the PGM.
-
Page 95: 11. Playlist Management
All playlists created are automatically stored on the banks dedicated to playlists and timelines on the server, i.e. the bank 10 of each page. Playlists on page 10 are not available from the EVS Remote Panel. These playlists are reserved for external protocols (Odetics, Louth VDCP, EVS AVSP). -
Page 96: Playlist Modes On The Remote Panel
EVS Multicam Version 10.01 – Operating Manual Issue 10.01.F EVS Broadcast Equipment SA – July 2009 11.2 PLAYLIST MODES ON THE REMOTE PANEL 11.2.1 NTRODUCTION Two modes are available on the Remote Panel to access and manipulate the playlists: The Playlist Edit mode and the Playlist Diffusion mode: •... -
Page 97: Playlist Display On The Vga
Issue EVS Multicam Version 10.01 – Operating Manual 10.01.F EVS Broadcast Equipment SA – July 2009 The menu available from the Playlist Diffusion mode on the Remote Panel display is the following: 2nd CTRL FilmFX NEXT SKIP EDIT Note A third selection of the PLST button cues the playlist to the beginning, displaying the first playlist element on the PGM side and the following clip on the PRV. -
Page 98: Vga Playlist Screen
EVS Multicam Version 10.01 – Operating Manual Issue 10.01.F EVS Broadcast Equipment SA – July 2009 11.3.2 VGA P LAYLIST CREEN NTRODUCTION Pressing F10 on the keyboard calls the VGA Playlist screen. The Playlist screen displays inform ation on the clips included in the current or loaded playlist. -
Page 99: Activating & Loading A Playlist
Issue EVS Multicam Version 10.01 – Operating Manual 10.01.F EVS Broadcast Equipment SA – July 2009 If no playlist is loaded on the PGM1: • The inform ation displayed on the Playlist Screen refers to the current playlist, except the remaining time, which is not displayed. -
Page 100: How To Recall And Load A Playlist
EVS Multicam Version 10.01 – Operating Manual Issue 10.01.F EVS Broadcast Equipment SA – July 2009 11.4.2.2 VGA C IA THE CREEN To activate a playlist via the VGA clip screen, proceed as follows: 1. From the clip screen, press END to access the playlist bank. -
Page 101: Adding Clips To A Playlist
Issue EVS Multicam Version 10.01 – Operating Manual 10.01.F EVS Broadcast Equipment SA – July 2009 11.5 ADDING CLIPS TO A PLAYLIST 11.5.1 OSSIBLE ETHODS You can add clips to a playlist in different ways: • Adding clips at the end of the current playlist without entering the Playlist Edit mode. -
Page 102: How To Insert Clips Into A Playlist
EVS Multicam Version 10.01 – Operating Manual Issue 10.01.F EVS Broadcast Equipment SA – July 2009 11.5.4 OW TO NSERT LIPS INTO A LAYLIST The following rules apply to the procedure below: • You need to be in PGM/PRV mode to be able to use the TAKE key on the Remote Panel to insert a clip. - Page 103 Issue EVS Multicam Version 10.01 – Operating Manual 10.01.F EVS Broadcast Equipment SA – July 2009 PGM1 CAM A *PRV1* CAM B Aud.Met. PgmSpd Sort->TC PostRoll Mix. Sw to IN Search Pref Clips: LOCAL Records: LOCAL PL 11: < Msg:...
-
Page 104: Inserting "Record In Progress" Clips Into Playlists
EVS Multicam Version 10.01 – Operating Manual Issue 10.01.F EVS Broadcast Equipment SA – July 2009 11.5.6 “R ” C NSERTING ECORD IN ROGRESS LIPS INTO LAYLISTS “Record in progress” clips can be inserted in playlists in the same way as other clips. -
Page 105: How To Name The Current Playlist On The Vga Playlist Screen
This function is only available when the playlist is active in Playlist Edit mode (PLST EDIT) or Playlist Diffusion mode (PLST DIFF) on the EVS Remote Panel. To nam e the current element in the loaded playlist from the VGA Playlist screen, proceed as follows: 1. -
Page 106: Browsing Within A Playlist
EVS Multicam Version 10.01 – Operating Manual Issue 10.01.F EVS Broadcast Equipment SA – July 2009 11.7 BROWSING WITHIN A PLAYLIST 11.7.1 OSSIBLE ROWSING ETHODS You can browse within a playlist in different ways: • Browse quickly by jumping to the first field of each clip in the playlist: For more inform ation, see the section 11.7.2 ‘Browsing Quickly Through... -
Page 107: Copying A Playlist
Issue EVS Multicam Version 10.01 – Operating Manual 10.01.F EVS Broadcast Equipment SA – July 2009 11.8 COPYING A PLAYLIST 11.8.1 OSSIBLE PTIONS When you copy a playlist, you have different options: EDL only or EDL+Clips copy • The EDL copy copies only the playlist definition, and the playlist elements themselves remain at the original location. -
Page 108: How To Copy A Playlist From The Vga Clip Screen
EVS Multicam Version 10.01 – Operating Manual Issue 10.01.F EVS Broadcast Equipment SA – July 2009 Press COPY (A key) to select the copy option. The menu becomes: Copy Playlist 11/03 to Playlist 13 ? [Menu]: Cancel [Enter]: Confirm COPY... - Page 109 Issue EVS Multicam Version 10.01 – Operating Manual 10.01.F EVS Broadcast Equipment SA – July 2009 11.8.3.1 OW TO OPY A OCAL LAYLIST To copy a local playlist from the VGA Clip Screen, proceed as follow s: From the VGA Clip Screen, open the playlist bank by pressing END on the keyboard.
-
Page 110: Copying Playlists With On-Air Clips
EVS Multicam Version 10.01 – Operating Manual Issue 10.01.F EVS Broadcast Equipment SA – July 2009 11.8.4 OPYING LAYLISTS WITH LIPS EAMLESS ROCESS Long or short copies of a playlist are performed as a background process, which is seam less to the user. If the destination playlist is recalled and the on-air playlist element has not yet been transferred to the local machine, the on-air element played out is the original one. -
Page 111: Functions Available From The Vga Playlist Screen
To use the following commands, you must be in Playlist Edit or Playlist Diffusion mode: • To enter the Playlist Edit mode, press the PLST key on the EVS Remote. The LCD screen of the Remote displays the information about the previous, current and next 3 clips of the playlist. -
Page 112: General Edit Functions Available For Playlists
EVS Multicam Version 10.01 – Operating Manual Issue 10.01.F EVS Broadcast Equipment SA – July 2009 11.9.3.1 Selecting this function will create a film style effect during the playout of the playlist by repeating one field every two fields. Please note that the audio is also affected by this effect, making it unusable and therefore, muted. - Page 113 Issue EVS Multicam Version 10.01 – Operating Manual 10.01.F EVS Broadcast Equipment SA – July 2009 then press ENTER to validate. Values are ‘Unknown’ and from 0 to 100%. Operators have access to the secondary lever control like when clips are replayed.
-
Page 114: How To Trim Clips Into A Playlist
EVS Multicam Version 10.01 – Operating Manual Issue 10.01.F EVS Broadcast Equipment SA – July 2009 11.10.2 OW TO LIPS INTO A LAYLIST Every playlist element can be trimmed independently of all other instances of the same clip number. Browse to the desired element in the playlist. -
Page 115: How To Merge Playlists
Issue EVS Multicam Version 10.01 – Operating Manual 10.01.F EVS Broadcast Equipment SA – July 2009 11.10.5 OW TO ERGE LAYLISTS From the VGA, it is possible to merge two playlists by copying a playlist and pasting it to an existing playlist. The copied playlist will be added at the end of the destination playlist. - Page 116 EVS Multicam Version 10.01 – Operating Manual Issue 10.01.F EVS Broadcast Equipment SA – July 2009 11.10.7.2 ROCESS To regenerate the timecode in a given playlist, you will perform the following actions: Activate the TC Regeneration and define the related settings on the Playlist page (F10), in the blue-highlighted area at the bottom of the page.
-
Page 117: The Auxiliary Audio Clip
Issue EVS Multicam Version 10.01 – Operating Manual 10.01.F EVS Broadcast Equipment SA – July 2009 11.11 THE AUXILIARY AUDIO CLIP This option allows adding a new stereo audio track (e.g. sport comments, music, jingles, ambient sound) to the original video clips. This stereo audio track is available on the PVW output and on analogue outputs 7/8 or on digital outputs 15/16. -
Page 118: Transition Effects And Split Audio
EVS Multicam Version 10.01 – Operating Manual Issue 10.01.F EVS Broadcast Equipment SA – July 2009 11.12 TRANSITION EFFECTS AND SPLIT AUDIO 11.12.1 NTRODUCTION EFINITION AND ICENCE ODES You can apply effects on the audio and video transitions of a clip in a playlist. -
Page 119: Playlist Display
Issue EVS Multicam Version 10.01 – Operating Manual 10.01.F EVS Broadcast Equipment SA – July 2009 In Playlist Edit mode the LCD screen will now display additional functions: PL11 LSM01 Paola LOC TDUR=00:00:02:22 111A/04 Clipname0123 00:00:29 W00:10 112B Clipname4567 00:53:29... -
Page 120: Example Of Transition Effects
EVS Multicam Version 10.01 – Operating Manual Issue 10.01.F EVS Broadcast Equipment SA – July 2009 SE WITH PLIT AUDIO The simplest type of Split Audio edit that can be performed on an LSM is to make the video and audio transitions at the beginning of the clip have different durations, such as a 12 Frame Video Mix with a 2 sec Audio crossfade. -
Page 121: How To Change The Video Effect Duration
Issue EVS Multicam Version 10.01 – Operating Manual 10.01.F EVS Broadcast Equipment SA – July 2009 1:00 LAYLIST WITH FFECT URATION In an LSM playlist, the video and audio effects end at the OUT point of a clip, so the duration of clips is shortened by the length of the effect. -
Page 122: Setting The Default Mode For Extending A Transition
EVS Multicam Version 10.01 – Operating Manual Issue 10.01.F EVS Broadcast Equipment SA – July 2009 11.12.7 ETTING THE EFAULT ODE FOR XTENDING A RANSITION Whenever you make a video or audio split, the transition originally set is changed, which means extended on either or both sides of the transition boundaries. - Page 123 Issue EVS Multicam Version 10.01 – Operating Manual 10.01.F EVS Broadcast Equipment SA – July 2009 Center On Cut PL 10 Vx 2 – Ax 2 PL 11 Vx 2 – Ax 4 PL 12 Vx 4 – Ax 2...
-
Page 124: How To Perform A 'V Base' Edit
EVS Multicam Version 10.01 – Operating Manual Issue 10.01.F EVS Broadcast Equipment SA – July 2009 End On Cut PL 16 Vx 2 – Ax 2 PL 17 Vx 2 – Ax 4 PL 18 Vx 4 – Ax 2 11.12.8... - Page 125 Issue EVS Multicam Version 10.01 – Operating Manual 10.01.F EVS Broadcast Equipment SA – July 2009 Edit Point (V BASE) Audio is extended from the end of the previous clip and the audio on the clip being edited is shortened.
-
Page 126: How To Perform An 'A Base' Edit
EVS Multicam Version 10.01 – Operating Manual Issue 10.01.F EVS Broadcast Equipment SA – July 2009 3. Press to highlight V Base (SH IFT+A). 4. Press to highlight A Split (D). 5. Jog to the point where you want to set your transition. - Page 127 Issue EVS Multicam Version 10.01 – Operating Manual 10.01.F EVS Broadcast Equipment SA – July 2009 4. Press to highlight V DELAY (SHIFT + B) 5. At the on screen prompt, enter a value on the F_ keys including leading zeros (0+2+1+2= 2:12), OR move the lever and press ENTER.
-
Page 128: How To Insert A Clip Into A Playlist With Split Audio
EVS Multicam Version 10.01 – Operating Manual Issue 10.01.F EVS Broadcast Equipment SA – July 2009 If the Playlist is in a position where the Audio and Video IN points have been split, the IN key will FLASH GREEN. 11.12.9.5 ‘OUT’... -
Page 129: Swap Audio Tracks
Issue EVS Multicam Version 10.01 – Operating Manual 10.01.F EVS Broadcast Equipment SA – July 2009 11.13 SWAP AUDIO TRACKS 11.13.1 NTRODUCTION The swap audio tracks mode allows swapping audio tracks between two points in a playlist. In four tracks mode, the “auto” mode replaces audio tracks 1&2 by audio tracks 3&4 in four audio mode. - Page 130 EVS Multicam Version 10.01 – Operating Manual Issue 10.01.F EVS Broadcast Equipment SA – July 2009 In dual stereo mode *PL11/03* LEFT 06:42:22 V Mix 02:25 Spd.Unk A Mix 02:25 A.Del. 00:00 IN-00:00:00 OUT+00:00:27 00:10 ■■■ ■■ 1→3 3→3 ■■...
- Page 131 Issue EVS Multicam Version 10.01 – Operating Manual 10.01.F EVS Broadcast Equipment SA – July 2009 In dual stereo mode *PL11/03* LEFT 06:42:22 V Mix 02:25 Spd.Unk A Mix 02:25 A.Del. 00:00 IN-00:00:00 OUT+00:00:27 00:10 ■■■ ■■ 3→1 3→3 ■■...
-
Page 132: How To Perform A Swap Audio Track In Manual Mode
EVS Multicam Version 10.01 – Operating Manual Issue 10.01.F EVS Broadcast Equipment SA – July 2009 LOOP 12:23:45:13 00:07:13 100 112B/04 ClipName 999/999 11.13.4 OW TO ERFORM A UDIO RACK IN ANUAL If the manual mode is selected in the Setup menu (page 4.2, F3), the swap functions in a similar way but asks the operator which track to swap when setting the swap points. -
Page 133: Navigating Among Swap Points
Issue EVS Multicam Version 10.01 – Operating Manual 10.01.F EVS Broadcast Equipment SA – July 2009 When the operator is not on a swap point, pressing CLEAR + IN/OUT brings up a confirmation message to delete all swap points for the current clip. -
Page 134: Replace With In/Out Points Or With In Point Only
EVS Multicam Version 10.01 – Operating Manual Issue 10.01.F EVS Broadcast Equipment SA – July 2009 • IN point and OUT point, for the section to replace in the playlist. The OUT point can also be defined during the Replace itself. - Page 135 Issue EVS Multicam Version 10.01 – Operating Manual 10.01.F EVS Broadcast Equipment SA – July 2009 In Playlist Edit mode, press Menu on the Remote Panel to access the secondary menu. Press the A key to enter the Replace Edit mode.
-
Page 136: Loop Mode In The Replace Function
EVS Multicam Version 10.01 – Operating Manual Issue 10.01.F EVS Broadcast Equipment SA – July 2009 11.14.6 ODE IN THE EPLACE UNCTION When the IN point has been marked, the display switches to: Cam A +2fields Replace Int.Loop Ext.Loop The Int. Loop and Ext. Loop keys are blinking. -
Page 137: 12. Timeline Management
Issue EVS Multicam Version 10.01 – Operating Manual 10.01.F EVS Broadcast Equipment SA – July 2009 12. Timeline Management 12.1 INTRODUCTION 12.1.1 IMELINE REATION Note The timeline feature is a software option, which requires the licence code 112 being installed. For more information on the required licence key, contact the Support or Sales team. -
Page 138: Timeline Playout
EVS Multicam Version 10.01 – Operating Manual Issue 10.01.F EVS Broadcast Equipment SA – July 2009 DITING IMELINES IN ULTICAM The users can create and edit more advanced timelines in IPEdit. For more information, refer to the IPEdit user manual. -
Page 139: Creating A Timeline
Issue EVS Multicam Version 10.01 – Operating Manual 10.01.F EVS Broadcast Equipment SA – July 2009 12.2 CREATING A TIMELINE In Multicam , the timelines have to be created from an existing playlist or copied from an existing timeline. After the transformation, the duration of the timeline can not be changed. -
Page 140: How To Copy A Timeline
EVS Multicam Version 10.01 – Operating Manual Issue 10.01.F EVS Broadcast Equipment SA – July 2009 12.2.3 OW TO OPY A IMELINE From the Remote Panel, you can copy timelines from local or distant servers to local or distant servers. -
Page 141: Timeline Edit Mode
Issue EVS Multicam Version 10.01 – Operating Manual 10.01.F EVS Broadcast Equipment SA – July 2009 To specify whether to perform a Short or Long copy, select the desired value (SHORT or LONG) pressing the C key. • SHORT mode (default): only the section of the elements between... -
Page 142: Osd Display
EVS Multicam Version 10.01 – Operating Manual Issue 10.01.F EVS Broadcast Equipment SA – July 2009 12.3.3 OSD D ISPLAY The following inform ation is displayed on the OSD when the timeline is loaded in Timeline Edit mode: For each track: •... -
Page 143: Timeline Diffusion Mode
Issue EVS Multicam Version 10.01 – Operating Manual 10.01.F EVS Broadcast Equipment SA – July 2009 12.4 TIMELINE DIFFUSION MODE 12.4.1 CCESSING THE IMELINE IFFUSION When you load a timeline pressing the PLST key on the Remote Panel, you need to press PLST a second time to enter the Timeline diffusion mode. -
Page 144: Editing Operations
EVS Multicam Version 10.01 – Operating Manual Issue 10.01.F EVS Broadcast Equipment SA – July 2009 12.5 EDITING OPERATIONS The timeline editing operations on the remote require marking IN and OUT points on the recorder before performing the extend or insert actions. These IN and OUT points can be marked anywhere on the timeline as in the Replace mode since the timeline is equivalent to a record train. - Page 145 Issue EVS Multicam Version 10.01 – Operating Manual 10.01.F EVS Broadcast Equipment SA – July 2009 12.5.1.3 OW TO ERFORM AN XTEND To perform an Extend on the Remote Panel, proceed as follows: Recall the requested timeline by selecting its page (SHIFT + Page + F_ key) and bank (SHIFT + F10) and the timeline position (F_ key).
-
Page 146: Insert Overwrite
EVS Multicam Version 10.01 – Operating Manual Issue 10.01.F EVS Broadcast Equipment SA – July 2009 12.5.2 NSERT VERWRITE 12.5.2.1 EFINITION The Insert feature in Multicam consists of inserting new material within the timeline. The timeline is loaded on the recorder and the new clip to insert is loaded on the player. -
Page 147: How To Add A Clip To A Timeline
Issue EVS Multicam Version 10.01 – Operating Manual 10.01.F EVS Broadcast Equipment SA – July 2009 12.5.3 OW TO DD A LIP TO A IMELINE From the Remote Panel, you can add a clip at the end of a timeline created either with IPEdit or with Multicam. -
Page 148: 13. Operating On Xnet Network
13.1 INTRODUCTION The XNet Network is set up in the EVS application. For more information, on how to set up the XNet Network and connect to the XNet network, refer to the section XNet SDTI Network in the Multicam Configuration manual and to the XT Tech Ref Software manual. - Page 149 Issue EVS Multicam Version 10.01 – Operating Manual 10.01.F EVS Broadcast Equipment SA – July 2009 The PREVIOUS and NEXT keys appear only when some machines are not visible on the current page. OCAL MODE The local system is identified with the Local sign after the name of the system.
-
Page 150: Operations
EVS Multicam Version 10.01 – Operating Manual Issue 10.01.F EVS Broadcast Equipment SA – July 2009 The names of the remote systems are now displayed after the Page and Bank information and in the Title bar of the Clip screen. -
Page 151: How To Name A Remote Clip
Issue EVS Multicam Version 10.01 – Operating Manual 10.01.F EVS Broadcast Equipment SA – July 2009 The label of a remote clip is different in order to identify it easily among other clips: 13.4.2 OW TO AME A EMOTE 1. Select the Clip mode in the Network menu. -
Page 152: How To Insert Remote Clips Into A Playlist
EVS Multicam Version 10.01 – Operating Manual Issue 10.01.F EVS Broadcast Equipment SA – July 2009 13.4.4 OW TO NSERT EMOTE LIPS NTO A LAYLIST 1. Select the Remote LSM via the Network menu. 2. Select a remote clip in the banks. The corresponding F_ key lights red. -
Page 153: How To Create Local Clips With Remote Record Trains
Issue EVS Multicam Version 10.01 – Operating Manual 10.01.F EVS Broadcast Equipment SA – July 2009 13.4.6 OW TO REATE OCAL LIPS EMOTE ECORD RAINS 1. Select the Records mode in the Network menu. 2. Select the Remote LSM in the list. -
Page 154: Working With Mapped Network Cameras
EVS Multicam Version 10.01 – Operating Manual Issue 10.01.F EVS Broadcast Equipment SA – July 2009 13.5 WORKING WITH MAPPED NETWORK CAMERAS If you have activated the Mapped Network Cameras option and defined mapped network cameras in the Setup menu of the Remote Panel (Page 6.3), you can use other network cameras as if there were local cameras. -
Page 155: 14. Paint Mode
Issue EVS Multicam Version 10.01 – Operating Manual 10.01.F EVS Broadcast Equipment SA – July 2009 14. Paint Mode 14.1 INTRODUCTION Note The Paint mode is a software option, which requires the licence code 114 being installed. For more information on the required licence key, contact the Support or Sales team . -
Page 156: Paint Mode Monitor Display
EVS Multicam Version 10.01 – Operating Manual Issue 10.01.F EVS Broadcast Equipment SA – July 2009 14.2 PAINT MODE MONITOR DISPLAY This section presents the available functions on the Paint Mode monitor display. For more information, refer to the subsections below. -
Page 157: Function Description
Issue EVS Multicam Version 10.01 – Operating Manual 10.01.F EVS Broadcast Equipment SA – July 2009 Displayed letter Function marks CUE OUT point on current clip plays back the clip at slow motion speed. The speed of slow motion is predefined in the PGM Speed item from the Setup Menu (Page2 –... - Page 158 EVS Multicam Version 10.01 – Operating Manual Issue 10.01.F EVS Broadcast Equipment SA – July 2009 LLIPSE RAWING Select this menu to draw ellipses. A menu allows you to choose between the following options: • Set centre (default): a pointer appears on the screen to let you choose the centre of the ellipse.
- Page 159 Issue EVS Multicam Version 10.01 – Operating Manual 10.01.F EVS Broadcast Equipment SA – July 2009 This feature will cause the drawing to dissolve on and off using the dissolve duration defined in the Setup menu (Page 1, F6) IBRARY Selecting L allows entering into a library where the user can load or save entire drawings and logos.
-
Page 160: 15. Target Mode
EVS Multicam Version 10.01 – Operating Manual Issue 10.01.F EVS Broadcast Equipment SA – July 2009 15. Target Mode 15.1 INTRODUCTION Note The Target Mode is a software option, which requires the licence code 114 being installed. For more information on the required licence key, contact the Support or Sales team . -
Page 161: Creating A Target Track
Issue EVS Multicam Version 10.01 – Operating Manual 10.01.F EVS Broadcast Equipment SA – July 2009 15.2 CREATING A TARGET TRACK Begin by selecting all the appropriate types of tracking object, their size, colour, etc. 15.2.1 ELECTING THE TYPE OF TRACKING OBJECT The character on the left of the “T”... -
Page 162: How To Highlight Video Material
EVS Multicam Version 10.01 – Operating Manual Issue 10.01.F EVS Broadcast Equipment SA – July 2009 15.2.3 OW TO IGHLIGHT IDEO ATERIAL 1. Select the material that you wish to highlight (this may be a clip, or simply a cued replay). -
Page 163: Target Mode Monitor Display
Issue EVS Multicam Version 10.01 – Operating Manual 10.01.F EVS Broadcast Equipment SA – July 2009 15.3 TARGET MODE MONITOR DISPLAY Choose highlight tool Erase Single Background Thickness Keyframe Erase all Color Circle Size Keyframe(s) Keyframes To go to Next KF... - Page 164 EVS Multicam Version 10.01 – Operating Manual Issue 10.01.F EVS Broadcast Equipment SA – July 2009 Displayed Function letter <<< >>> Searches the material (clip or live recording). A single click with the stylus move one frame forward or one frame back...
- Page 165 Issue EVS Multicam Version 10.01 – Operating Manual 10.01.F EVS Broadcast Equipment SA – July 2009 EYFRAME NFORMATION ISPLAY On the OSD, a second line is added to indicate the number of keyframes marked and the position of the current keyframe.
-
Page 166: 16. Offside Line Mode
EVS Multicam Version 10.01 – Operating Manual Issue 10.01.F EVS Broadcast Equipment SA – July 2009 16. Offside Line Mode 16.1 INTRODUCTION 16.1.1 EFINITION AND ICENCE Note The offside line mode is a software option, which requires the licence code 114 being installed. For more information on the required licence key, contact the Support or Sales team. -
Page 167: Overview On The Offside Line Commands
Issue EVS Multicam Version 10.01 – Operating Manual 10.01.F EVS Broadcast Equipment SA – July 2009 16.1.4 VERVIEW ON THE FFSIDE OMMANDS When you access the offside line menu, this is as follows and the Mark key is blinking: TRANSP... -
Page 168: How To Mark An Offside Line
EVS Multicam Version 10.01 – Operating Manual Issue 10.01.F EVS Broadcast Equipment SA – July 2009 16.2 HOW TO MARK AN OFFSIDE LINE To mark an offside line on a clip or record train, proceed as follows: Load the clip or train on the PGM1 and jog to the position where the offside line should be marked. -
Page 169: How To Edit An Offside Line
Issue EVS Multicam Version 10.01 – Operating Manual 10.01.F EVS Broadcast Equipment SA – July 2009 16.3 HOW TO EDIT AN OFFSIDE LINE Once the offside line has already been created, you can still load the sequence and edit it. -
Page 170: Cue Points Related To Offside Sequence
EVS Multicam Version 10.01 – Operating Manual Issue 10.01.F EVS Broadcast Equipment SA – July 2009 16.5 CUE POINTS RELATED TO OFFSIDE SEQUENCE When an offside sequence is created, a cue point is automatically defined on two positions: • The position where the offside line is defined. -
Page 171: 17. Split Screen Mode
Issue EVS Multicam Version 10.01 – Operating Manual 10.01.F EVS Broadcast Equipment SA – July 2009 17. Split Screen mode The Split Screen mode, which is a software option, allows a simple split screen effect on PGM 1. This mode operates very similar to the 2PGM mode,... - Page 172 EVS Multicam Version 10.01 – Operating Manual Issue 10.01.F EVS Broadcast Equipment SA – July 2009 C ommand Description SYNC To synchronize the selected PGM with the other one. Press this button and select the PGM to use as a reference.
-
Page 173: Horizontal Split
Issue EVS Multicam Version 10.01 – Operating Manual 10.01.F EVS Broadcast Equipment SA – July 2009 17.1.2 ORIZONTAL PLIT PGM1 CAM A *PGM2* CAM B Aud.Met. PgmSpd Sort->TC PostRoll Sw to IN Search Pref Clips: LOCAL Records: LOCAL PL 11: <... -
Page 174: Splitmix
EVS Multicam Version 10.01 – Operating Manual Issue 10.01.F EVS Broadcast Equipment SA – July 2009 17.1.3 PLIT PGM1 CAM A *PGM2* CAM B Aud.Met. PgmSpd Sort->TC PostRoll Sw to IN Search Pref Clips: LOCAL Records: LOCAL PL 11: <... -
Page 175: 18. Hypermotion Mode
Issue EVS Multicam Version 10.01 – Operating Manual 10.01.F EVS Broadcast Equipment SA – July 2009 18. Hypermotion Mode 18.1 INTRODUCTION 18.1.1 EFINITION AND ICENCE Note The hypermotion mode is a software option, which requires the licence code 20 being installed. For more information on the required licence key, contact the Support or Sales team. -
Page 176: Overview On Commands
EVS Multicam Version 10.01 – Operating Manual Issue 10.01.F EVS Broadcast Equipment SA – July 2009 18.2 OVERVIEW ON COMMANDS 18.2.1 The Hypermotion menu includes the following main and a secondary menu. Hyper Motion Camera Mode # Blocks Pre-Roll PGMSpeed... -
Page 177: Key Commands
Issue EVS Multicam Version 10.01 – Operating Manual 10.01.F EVS Broadcast Equipment SA – July 2009 Setting Description Values (default: 100) Lever Secondary lever range to be applied for 0-1000, +- 1000 playing back material recorded on the (default) hypermotion camera. -
Page 178: Controlling The Hypermotion Camera From The Remote
EVS Multicam Version 10.01 – Operating Manual Issue 10.01.F EVS Broadcast Equipment SA – July 2009 18.3 CONTROLLING THE HYPERMOTION CAMERA FROM THE REMOTE 18.3.1 EFINING THE UMBER OF EMORY LOCKS 18.3.1.1 NTRODUCTION Some cameras allow the users to split the memory into several blocks. -
Page 179: General Process With Multiple-Block Memory
YPERMOTION AMERA When the camera is replaying its content onto the EVS server, it is possible to clip it automatically directly from the LSM Remote controlling the camera. Using the IN and OUT keys and the F_ Keys, the operator can clip the record train corresponding to the hypermotion camera and store it on a clip position. -
Page 180: Sony, Xtendd35, Odetics & Vdcp Protocols
EVS Multicam Version 10.01 – Operating Manual Issue 10.01.F EVS Broadcast Equipment SA – July 2009 19. Sony, XtenDD35, Odetics & VDCP Protocols 19.1 PROTOCOL OVERVIEW These protocols allow the server to be controlled by external devices. BVW75 PROTOCOL This protocol allows the server to be seen as a VTR by the controlling device. - Page 181 Issue EVS Multicam Version 10.01 – Operating Manual 10.01.F EVS Broadcast Equipment SA – July 2009 sent, it will return to E2E mode on its default record train (sim ilar to receiving a REC command). If the play channel is already in E2E mode, it will switch to the next record channel available (A …...
- Page 182 EVS Multicam Version 10.01 – Operating Manual Issue 10.01.F EVS Broadcast Equipment SA – July 2009 Glossary HANC LTC Horizontal Ancillary timecode LTC as defined in the XMPTE 259M and RP188 standards. HANC VITC Horizontal Ancillary timecode VITC as defined in the XMPTE 259M and RP188 standards.
- Page 183 Issue EVS Multicam Version 10.01 – Operating Manual 10.01.F EVS Broadcast Equipment SA – July 2009 Regional Contacts AM ERICA (NORTH & LATIN) EVS Americas Tel: 7811 usa@evs.tv Fax: 7812 Tech. line: +1 973 575 7813 USAsupport@evs.tv EVS Canada Tel: 7544 usa@evs.tv...
- Page 184 EVS Multicam Version 10.01 – Operating Manual Issue 10.01.F EVS Broadcast Equipment SA – July 2009 EVS UK Tel: 1372 uk@evs.tv Fax: 1372 Tech. line: +44 1372 387 266...
- Page 185 16, rue Bois St Jean B-4102 Ougrée Belgium Corporate North & Latin America Asia & Pacific Other regional offices Headquarters Headquarters Headquarters available on +32 4 361 7000 +1 973 575 7811 +852 2914 2501 www.evs.tv/contact To learn more about EVS go to www.evs.tv...
Need help?
Do you have a question about the Multicam LSM and is the answer not in the manual?
Questions and answers