Table of Contents
Advertisement
Quick Links
Advertisement
Table of Contents

Related Manuals for ZMODO DVR


Summary of Contents for ZMODO DVR
-
Page 2: Table Of Contents
3.2 C ..........................7 AMERA AND ONITOR ONNECTION 3.3 P ............................. 7 OWER UPPLY CONNECTION CHAPTER 4: DVR BOOT UP ..............................8 4.1 S ..............................8 YSTEM NITIALIZATION 4.2 M ................................8 NTERFACE CHAPTER 5: DVR MENU............................... 8 5.1 M ............................... - Page 3 5.2.7.3 Video Setup................................... 27 5.2.7.4 Language ....................................27 5.2.7.5 Info......................................27 5.2.7.6 System Maintenance ................................27 5.3 M ..................................27 5.4 V ................................. 28 IDEO EARCH 5.5 PTZ C ................................. 28 ONTROL 5.6 R ................................... 28 ECORD 5.7 S ................................28 TOP RECORDING CHAPTER 6: NET-VIEWER PROGRAM ...........................
-
Page 4: User Manual
The standard lithium cell 3v battery located on the mother board should be replaced if the time clock does not hold its time after the power is turned off. Warning: unplug the DVR before replacing battery or you may be subjected to severe electrical shock. Properly dispose of old batteries. -
Page 5: Chapter 1: Dvr Features
DVR saves real-time recording image to HDD Backup Recordings Supports DVR backup via USB flash drive and hard drive. 4CH Supports DVR single CH and multiple CH playback of recorded files Playback Recordings 8CH Supports DVR single CH playback of recorded files... -
Page 6: Chapter 2:Layout
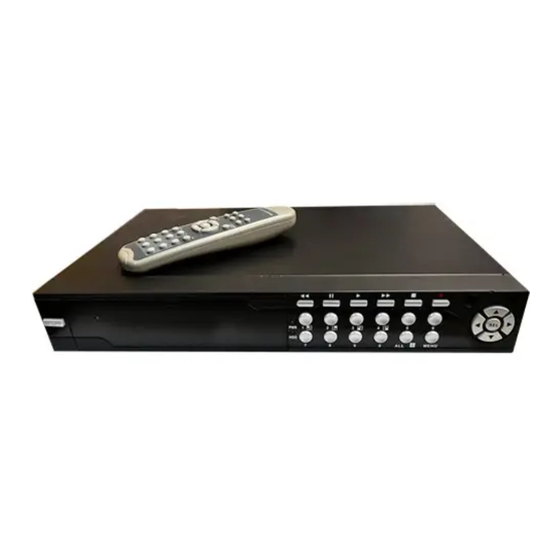
User Manual Chapter 2:Layout 2.1 Front Panel 2.1.1 4-CH Front Panel (Details please refer to the real product) Power switch Number 7 :CH4 :Rewind Number 8 Number 5 :Pause Number 9 Number 6 :Play 0: Mute Audio : Up Arrow :Fast Forward ALL :Display All Cameras : Left Arrow... -
Page 7: Rear Panel
User Manual 2.2 Rear Panel 2.2.1 4-CH Rear Panel (Details please refer to the real product) Item Physical port Connection method Video input Connect CH1-4 ( BNC interface) Video output Connect monitor output ( BNC interface) Audio inpout Connect CH1-4 audio signal input (RCA interface) Audio output Connect signal output (RCA interface) Ethernet Port... -
Page 8: 8-Ch Rear Panel (Details Please Refer To The Real Product)
User Manual 2.2.2 8-CH Rear Panel (Details please refer to the real product) Item Physical port Connection method Video input Connect CH1-8 ( BNC interface) Video output Connect monitor output ( BNC interface) Audio inpout Connect CH1 audio signal input (RCA interface) Ethernet Port Connect intranet, internet (RJ45 interface) VGA Port(Optional) - Page 9 User Manual Mouse Operation You can use a mouse instead of front panel buttons or remote control. In menu lock mode, Enter into pop-up menu and clicking any sub menu to pop up Log-in window; on menu unlock mode, enter into pop-up menu, and then clicking left key to enter into any sub menu directly.
-
Page 10: Chapter 3: Dvr Installation
Connect camera cable to video input of DVR, and from video output of DVR to Monitor via BNC connector (Refer to section2.2-Rear Panel); or If the camera is a PTZ speed dome, you could connect RS485 A & B to the according port of DVR respectively (refer to system figuration on Chapter 8). -
Page 11: Chapter 4: Dvr Boot Up
User Manual Chapter 4: DVR Boot up 4.1 System Initialization After connecting the power adapter and turning on the power button, the system will boot-up and start initializing. Picture 4-1 4.2 Main Interface After finishing system initialization, the system will enter into main interface. -
Page 12: Main Menu Preview
User Manual 5.1 Main Menu Preview Color set Camera Dwell time display Recording Search Network Setup Playback Rec. Search File backup File List Detail File HDD Management Alarm Setting E-mail setting Device PTZ Setting Management Mobile Area setting Motion Time Setting User password Video Setting System... -
Page 13: Camera Setup
User Manual 5.2.1 Camera setup Go to [Main Menu Camera] to set up the name display and position display of each channel (Shown as Picture 5-3), You can also adjust image brightness, saturation, contrast and hue settings of each channel after entering into [Color] Menu and set up whether each channel can be previewed or not under Live display and/or Recording mode. -
Page 14: Network Setup
Picture 5-7 5.2.3.1 DHCP When selecting DHCP the router will allocate DVR IP address automatically After you exit the menu. You might want to write down the addresses assigned and then switch to static and re-inter the addresses so the... -
Page 15: Pppoe
When selecting static allocation, You will need to setup the network settings on the DVR to match the settings of the router that you attach the DVR to. To get the router settings you would go to the Run option on a computer attached to the same router as the DVR and type cmd and hit OK to bring up a command prompt (Picture 5-9), then type ipconfig to access the router settings. -
Page 16: Port Forwarding
To access the DVR from a remote computer over the internet you would then need to forward port 80 and port 9000 on the router the DVR is attached to, to the IP address of the DVR. You can get instructions on how to do this for most popular routers by going to the www.portforward.com website. -
Page 17: Recording Search
If you do so then you need to forward the IP address of the router to the other port, change the port in the DVR NETWORK settings, and you need to add the port number after the IP address. For example, if you set the HTTP port as 82, you need to enter the IP address as 192.168.0.25:82. -
Page 18: Multi Player
Explanation: Backup file will be in H264 format, you can convert it to AVI format using the Multimedia Player program that comes with the DVR or through the net-viewer program, so you can use any player which supports AVI format. - Page 19 User Manual Note: the file type you have selected should be *.264 format. Picture 5-24 Picture 5-25 3、Open backup file: (1) 、Click [Play] menu (P) on the top of multimedia player interface to select playing the backup file; Picture 5-26 (2)...
-
Page 20: Device Management
User Manual 4、Please refer to the below [Video on] setting procedure (System default - video for every channel is on) Setting Video play setting Normal video Bar Select the channel you want to display Select to play the video Apply OK Picture 5-27 Picture 5-27A 5、Refer to the below for [Audio on] setting procedure. -
Page 21: Alarm Set
30s, 1minute,2minute,5minute) 。 Alarm Type Function Sends alarm when DVR can’t receive video signal (such as camera damage, cable broken or damaged Video Loss or power supply malfunction). When an object moves into motion detection area, alarm will be triggered. You can adjust Motion Detection sensitivity level to suit the needs of your actual application environment. -
Page 22: Email Alarm Notification
Receiver address: indicates receiver’s email address. The email address is used to receive image transmitted from motion detection alarm of DVR. Please clear the images you have received as soon as possible to avoid overloading your email account. For detailed SMTP protocols settings... -
Page 23: Ptz Setup
Before you can access the DVR from a mobile phone you need to setup the Network Configuration on the DVR. Go to section 5.2.3 Network Setup on page 14 of the product manual for instructions on how to do this. You also need to go to the Main Menu then Devices then Mobile and enter your user name and password, and set the Server Port to 18600. - Page 24 1. Webcam installation First you need to install the webcam program that is included on the CD that comes with the DVR by copying the “QQeye.CAB” file to the mobile phone. You can do this by attaching the mobile phone to a computer and copying the file from the CD to the memory card on the phone, or by copying the file from the computer to the phone’s memory card through a memory card reader or through a Bluetooth connection.
- Page 25 User Manual Web port: Same as the Server Port you setup in the DVR, it needs to be forwarded to the IP address of the DVR, setting range is between 1024 and 65535, the default setting is 18600. Note: this port is in addition to the ports used for standard remote access.
- Page 26 Network Setup on page 14 of the product manual). Server Port:Web port: Same as the web port setting on the DVR, you need to forward this port from the Router to the DVR. Setting range is between 1024 and 65535, the default setting is 18600. Note: this port is in addition to the ports used for standard remote access.
-
Page 27: Iphone Software Download
User Manual Iphone software Download 1: Get into the Itune Website, you have to get the iTunes on PC first, and the link as below: http://www.apple.com/itunes/ 2: click on the Ituns as the images shows to get into the to download the iTunes to your PC. -
Page 28: Motion Detect
User Manual 3:After your installation, pls kindly find the Itunes Store as the red Arrow shows, click on it, and you will find the images as Image 1, kindly enter the “aplayer” in the search iTunes Store as the Blue arrow shows, you will find the Aplayer easily : the image 2 Image 1... -
Page 29: System Function
DST (day saving time) status and mode. Picture 5-41 5.2.7.2 Password This option allows you set the device ID for the DVR and set the system password if you want to use one. The new passwords will be available after clicking [APPLY] button. -
Page 30: Video Setup
5.3 Menu Lock As a system safety feature you can click [Menu Lock] menu to lock menu when leaving the DVR. If you want to login to the DVR, you would input device code and password (refer to the Menu Locking interface- Picture 5-48). -
Page 31: Video Search
Set again and click [Set] and [Save] to make sure your setting is setup successfully. Clean: remove settings. Note: this DVR model supports up to 100 pre-set points. But actual quantities may be restricted by the PTZ camera you are using. -
Page 32: Chapter 6: Net-Viewer Program
Chapter 6 Net-Viewer Program 6.1 Plug-ins download and installation Open IE browser and input IP address and web port of DVR, such as http://172.18.6.202:80/ and confirm to download and install webcam. If your computer is connected to internet, computer will auto download and install the webcam. -
Page 33: Main Interface Of Net-Viewer
User Manual 6.3 Main Interface of Net-viewer Picture 6.3 Log in Net-viewer and show the interface as follows 6.3.1 Menu column (Section 1 on Picture 6-3) 6.3.2 PTZ Control (Numbers 2, 3, 4 on Picture 6-3) 6.3.3 Live Play Control (Numbers 6 through 10 on Picture 6-3) 6.3.1 Menu column (Section 1 on Picture 6-3) Menu column include [Live] menu, [Replay] menu and [Setup] menu and [Logout] menu. -
Page 34: Setup
[PTZ Control] Menu, [Network Setting] menu, [System Setting] menu and [Host Info] menu. Explanation: Only when DVR is on the status of live display, you could modify and save its parameters remotely at this moment, the settings are available. The modification method to DVR via Net-viewer is the same as local adjustment of DVR. -
Page 35: Host Info
DVR remotely (shown as Picture 6-8) Picture 6-8 ③ PTZ Control Click [PTZ control] to setup PTZ cameras. Remote setup methods are the same as local DVR setup. Please refer to Section 5.2.5.3 (shown as Picture 6-9). Picture 6-9 ④... -
Page 36: Log Out
⑥.Capture [ ]:Capture Screen image and save to PC as *bmp image. ⑦.Recording [ ]:Operate DVR recording remotely ⑧Channel display [ ]: The icons stand for Single Channel display, Quad Channel display, 3x3 Channel display and 4x4 Channel display respectively. -
Page 37: Chapter 7: Specifications
Supports TCP/IP, DHCP, UDP, DDNS, PPPOE network Protocol Support preview live display remotely via mobile phone and real time monitoring via IE-based Network Function browser and/or network, and support parameter setting of DVR remotely 10~15W (exclude HDD) Power consumption Power Adapter... -
Page 38: Chapter 8: Windows Vista User
User Manual Chapter 8 Windows Vista User 1、Open IE browse firstly, then enter into Tool bar- and select appear the below picture: 2、Second, select icon tick the settings of “ActiveX controls and plug-ins”to Enable, details as follows: Lastly after tick all the “Enable”, please click to exit. - Page 39 User Manual Open IE browser and input IP address and web port of DVR…computer will auto downloadand install the widget. We suggest Visita user set user access authority in order to make your PC safer. Setting processing as follows: Click [Start Set Control panel User account] to set user access authority shown as below picture.
-
Page 40: Chapter 9: Appendix
DDNS parameters. Live display Real time video input remotely Remote recording Setting recording mode and status of DVR remotely Remote playback Check local recording history via network Network PTZ control Remotely control PTZ camera, position, focus, zoom and iris etc. -
Page 41: Recording Alarm Setting
Q: Can I use the hard drive from my PC in the DVR? A: You can if the hard drive is the same type and the size is supported by the DVR. If you install it in the DVR it will be formatted for use in the DVR and the PC will not be able to read it. -
Page 42: Usage Maintenance
1. Please make sure DVR keep away from heating source. 2. Clean the internal dust regularly, keep DVR aeration well and be easy to heat dissipate. 3. Please not plug in RS-232 and RS-485 when power is on to avoid any damage to the port. -
Page 43: System Connection Configuration
User Manual 9.5 System connection Configuration (Diagram is for reference only to show where to attach various devices to the DVR, the cameras, external alarms, USB flash drives, monitors and computers are not included with the standard DVR package) 4-CH...
Need help?
Do you have a question about the DVR and is the answer not in the manual?
Questions and answers