Table of Contents
Advertisement
Quick Links
- 1 The 888/24 I/O Interface
- 2 Using the 888/24 I/O
- 3 Changing Operating Levels of Individual 888/24 I/O Channels
- 4 Making Signal Connections to the 888/24 I/O
- 5 Using the 888/24 I/O Interface as Stand-Alone Audio Converter
- 6 Changing the Default Sample Rate of the 888/24 I/O in A/D Stand-Alone Mode
- 7 Appendix A. Technical Specifications
- Download this manual
888|24 I/O Audio Interface
Digidesign
Installation Guide
Digidesign Inc.
3401-A Hillview Avenue
Palo Alto, CA 94304 USA
tel: 650·842·7900
fax: 650·842·7999
Technical Support (USA)
650·842·6699
650·856·4275
Product Information
650·842·6602
800·333·2137
Fax on Demand
1-888-USE-DIGI (873-3444)
World Wide Web
www.digidesign.com
Digidesign FTP Site
ftp.digidesign.com
Advertisement
Table of Contents

Related Manuals for DigiDesign 888/24 I/O


Summary of Contents for DigiDesign 888/24 I/O
- Page 1 888|24 I/O Audio Interface Installation Guide Digidesign Inc. 3401-A Hillview Avenue Palo Alto, CA 94304 USA tel: 650·842·7900 fax: 650·842·7999 Technical Support (USA) 650·842·6699 650·856·4275 Product Information 650·842·6602 800·333·2137 Fax on Demand 1-888-USE-DIGI (873-3444) World Wide Web www.digidesign.com Digidesign FTP Site ftp.digidesign.com...
- Page 2 This User’s Guide is copyrighted ©1999 by Digidesign, a Compliance Statement division of Avid Technology, Inc. (hereafter “Digidesign”), with The model 888/24 I/O complies with the following standards all rights reserved. Under copyright laws, this manual may not regulating interference and EMC: be duplicated in whole or in part without the written consent of •...
-
Page 3: Table Of Contents
Making Signal Connections to the 888/24 I/O ........ - Page 4 888/24 I/O...
-
Page 5: Using The 888/24 I/O
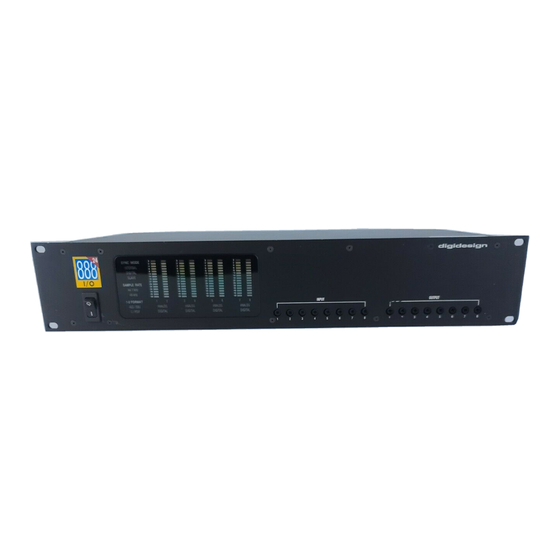
Pro Tools. connecting the 888/24 I/O to your studio. The 888/24 I/O can be used in two ways: As a 24-bit Audio Interface for Pro Tools 888/24 I/O Front Panel... - Page 6 Digital This setting indicates that an Slave This LED is lit when the 888/24 I/O AES/EBU or S/PDIF word clock signal is cur- sample rate is synchronized to another rently the source for the 888/24 I/O sample Digidesign Audio Interface or synchroniza- rate.
- Page 7 3. Sample Rate and 1–2 Format The 888/24 I/O is factory calibrated so that Indicators a meter reading of –18 dB corresponds to the 888/24 I/O nominal operating level These LEDs indicate the sample rate of the (which can be set to either +4 dBu or 888/24 I/O internal crystal oscillator and –10 dBV).
- Page 8 To calibrate the input and output levels of pair is disabled when digital input format is the 888/24 I/O to match your mixing con- chosen for that channel. sole or other devices in your studio, use The 888/24 I/O analog audio connectors Calibration Tool (for Pro Tools 4.3.1 and...
- Page 9 This 50-pin Computer connector is used to The Slave Clock Out jack is a standard BNC connect the 888/24 I/O to a MIX card, d24 type connector that outputs a 256 times audio card, Disk I/O card, or a DSP Farm sample rate Super Clock signal for slaving card.
-
Page 10: Changing Operating Levels Of Individual 888/24 I/O Channels
Channels that you desire. For +4 dBu levels, it should The 888/24 I/O is factory set to +4 dBu op- be placed over the rear two prongs. For erating levels for input and output. How- –10 dBV levels, it should be placed over the... -
Page 11: Making Signal Connections To The 888/24 I/O
Replace the top screws with a Phillips 1.5V (RMS) inputs at +4 dBu, then you screwdriver. should set the 888/24 I/O to run at –10 dBV line level. If your mixer can handle up to 8.5V (RMS) inputs, or has pads or attenuators on its inputs, then you can use the +4 dBu set- ting on the 888/24 I/O. -
Page 12: Using The 888/24 I/O Interface As Stand-Alone Audio Converter
888/24 I/O is in stand-alone mode. If you do, the 888/24 I/O will stop functioning in stand-alone mode. Instruments Power Amp To use the 888/24 I/O as a stand alone A/D Connected to Console and Speakers converter: A typical studio configuration... -
Page 13: Changing The Default Sample Rate Of The 888/24 I/O In A/D Stand-Alone Mode
To use the 888/24 I/O as a stand alone D/A Changing the Default converter: Sample Rate of the Make sure that a digital device providing 888/24 I/O in A/D Stand- a word clock signal is connected to AES/EBU inputs 1–2 of the 888/24 I/O and Alone Mode turned on. -
Page 14: Changing The Default Word Clock Lock Port Of The 888/24 I/O In D/A Stand-Alone Mode
44.1 kHz or 48 kHz of its S/PDIF digital input ports are used in- Figure 1. jumper switch location in the 888/24 I/O stead. Refer to Figure 1 and 2 for details on jumper remove jumper and place it in desired position switches and their default positions. -
Page 15: Muting The Dac Outputs Of The 888/24 I/O In A/D Stand-Alone Mode
888/24 I/O. ternal analog feedback through a console. Replace the four front panel screws using To do this, you must open the 888/24 I/O the hex wrench. and move an internal jumper switch so Replace the top screws with a Phillips that the DACs are muted during stand- screwdriver. - Page 16 888/24 I/O...
-
Page 17: Appendix A. Technical Specifications
44.1 kHz or 48 kHz, ±10ppm < 40pS RMS 22Hz-22kHz BW Clock Reference: Super Clock (256x) sample clock In/Out; BNC connectors; additional clock refer- ences supported via Digidesign's Universal Slave Driver, SMPTE Slave Driver, Video Slave Driver and other optional synchro- nizers Nominal Operating Level: +4dBu;... - Page 18 ±1dB, 20 Hz–20 kHz Physical Specifications Power requirements: 90–260 VAC, 47 63 Hz; 30 VA; auto-switching Weight: 7.6 lbs (4.1 kg) Dimensions: 2U external rackmount device 19" x 3.5" x 9.75" (48.26 cm x 8.89 cm x 24.77 cm) 888/24 I/O...
-
Page 19: Appendix B. Calibrating The 888/24 I/O (Pro Tools 5.0)
Instead, with an interface such as the level, then you may want to calibrate the 888/24 I/O, the meters are calibrated in 888/24 I/O to have 15 dB of headroom. decibels below peak (digital clipping) level. Appendix B: Calibrating the 888/24 I/O (Pro Tools 5.0) 15... -
Page 20: Calibrating The 888/24 I/O
0 VU. Digital With a digital recording device such During calibration, set all Pro Tools track as the 888/24 I/O, however, in order to al- faders to their default of 0 dB by Option-Shift- clicking (Macintosh) or Alt-Shift-clicking (Win- low for headroom, you must align a 0 VU dows) on any fader in the session. - Page 21 Connect an external VU meter to each lit (red). In this case, trim the 888/24 I/O of the 888/24 I/O outputs in turn. (One at a input level up. time as you calibrate.)
- Page 22 888/24 I/O...
-
Page 23: Appendix C. Calibrating The 888/24 I/O (Pro Tools 4.X)
Instead, with an interface such as the level, then you may want to calibrate the 888/24 I/O, the meters are calibrated in 888/24 I/O to have 15 dB of headroom. decibels below peak (digital clipping) level. Appendix C: Calibrating the 888/24 I/O (Pro Tools 4.x) 19... -
Page 24: Calibrating The 888/24 I/O
0 VU. Digital With a digital recording device such as the 888/24 I/O, however, in order to al- low for headroom, you must align a 0 VU The Calibration Tool software... - Page 25 0 VU 1 kHz tone, use the follow- Repeat this procedure for each Audio In- ing calibration procedure: terface output. To calibrate the 888/24 I/O with Calibration Tool using an external source: Start the Calibration Tool application. Appendix C: Calibrating the 888/24 I/O (Pro Tools 4.x) 21...
- Page 26 If you don't have a sine wave generator or another way to send a 1 kHz tone into the 888/24 I/O at 0 VU, a second alternative is to measure the output level of the 888/24 I/O with a VU meter, such as the kind found on a professional-quality mix- ing console.
Need help?
Do you have a question about the 888/24 I/O and is the answer not in the manual?
Questions and answers