Sunny Health & Fitness SF-E905 User Manual
Magnetic elliptical trainer
Hide thumbs
Also See for SF-E905:
- User manual (49 pages) ,
- Owner's manual (9 pages) ,
- User manual (15 pages)
Advertisement
Table of Contents
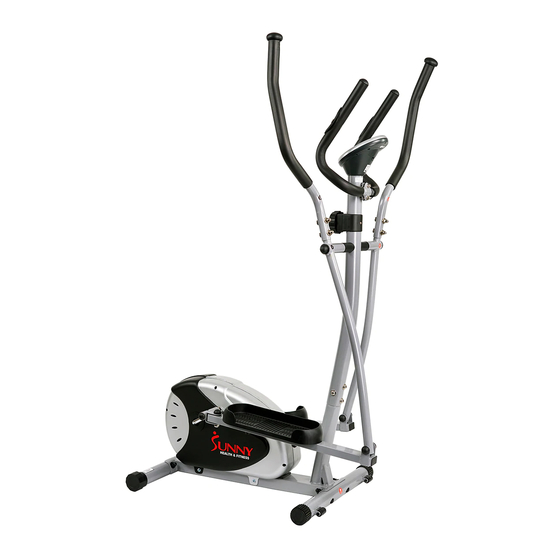
MAGNETIC ELLIPTICAL TRAINER
SF-E905
IMPORTANT!
Please read all instructions carefully before using this product.
Retain this manual for future reference.
The specifications of this product may vary slightly from the illustrations and are
subject to change without notice.
For Customer Service, please contact: support@sunnyhealthfitness.com
1
Advertisement
Table of Contents

Related Manuals for Sunny Health & Fitness SF-E905


Summary of Contents for Sunny Health & Fitness SF-E905
- Page 1 MAGNETIC ELLIPTICAL TRAINER SF-E905 IMPORTANT! Please read all instructions carefully before using this product. Retain this manual for future reference. The specifications of this product may vary slightly from the illustrations and are subject to change without notice. For Customer Service, please contact: support@sunnyhealthfitness.com...
-
Page 2: Important Safety Information
IMPORTANT SAFETY INFORMATION We thank you for choosing our product. To ensure your safety and health, please use this equipment correctly. Please read the information below carefully before using this equipment. It is important to read this entire manual before assembling and using the equipment. Safe and effective use can only be achieved if the equipment is assembled, maintained and used properly. 1. Before starting any exercise program you should consult your doctor to determine if you have any medical or physical conditions that could put your health and safety at risk, or prevent you from using the equipment properly. 2. Your doctor’s advice is essential if you are taking medication that affects your heart rate, blood pressure or cholesterol level. 3. Be aware of your body’s signals. Incorrect or excessive exercise can damage your health. Stop exercising if you experience any of the following symptoms: pain, tightness in your chest, irregular heartbeat, extreme shortness of breath, lightheadedness, dizziness or feelings of nausea. If you do experience any of these conditions, you should consult your doctor before continuing with your exercise program. 4. Keep children and pets away from the equipment. The equipment is designed for adult use only. 5. Use the equipment on a solid, flat, level surface with a protective cover for your floor or carpet to ensure safety, the equipment should have at least 0.5 meters of free space all around it. 6. Before using the equipment, please make sure all the nuts and bolts are securely tightened. 7. Always use the equipment as indicated. If you find any defective components while assembling or checking the equipment, or if you hear any unusual noises coming from the equipment during use, stop immediately. Do not use the equipment until the problem has been rectified. 8. Wear suitable clothing while using the equipment. Avoid wearing loose clothing that may get caught in the equipment or that may restrict or prevent movement. 9. This equipment is designed for indoor and home use only. It is not intended for commercial use. 10. The maximum weight of user: 220LBS. 11. Care must be taken when lifting or moving the equipment so as not to injure your ... -
Page 3: Exploded Diagram
EXPLODED DIAGRAM... -
Page 4: Parts List
PARTS LIST Parts No. Description QTTY Parts No. Description QTTY Main Frame Armrest Front Stabilizer 32L/R Handlebar 1pr. Rear Stabilizer Domed Nut Roller Cap Spring Washer Leveler Cap Hex Bolt Carriage Bolt Decorative Cover Arc Washer Carriage Bolt Domed Nut Meter Handlebar Post Spring Washer... -
Page 5: Assembly Instructions
ASSEMBLY INSTRUCTIONS Step 1: Install the Front Stabilizer & Rear Stabilizer. Attach the Front Stabilizer (2) and Rear Stabilizer (3) onto the Main Frame (1). Secure with the Carriage Bolts (6), Arc Washers (7) and Domed Nuts (8) which are pre-attached to the stabilizer. ★... - Page 6 Step 3: Install Pedal Support Tube and Swing Bar. ★IMPORTANT: Please read entire page before starting this step, and note all cautions. A: Fix the Swing Bar (24L/R) to the long axle of the Handlebar Post (9) with Hex Bolt (25) and Flat Washer (26). (Note: please don’t fasten tightly now) B: Fix the Pedal Support Tube (18L/R) to the Crank (49) with Locking Bolt...
- Page 7 If you have trouble connecting this part; try this alternate assembly suggestion: Step 4: Install the Pedals. Secure the Pedals (27L/R) to the Pedal Support Tube (18L/R) respectively using Hex Bolt (28), Flat Washer (29) and Nylon Nut (30), viewed from the rider’s seated position.
- Page 8 Step 5: Install the Handlebar and Armrest. A: Fix the Armrest (31) onto the Handlebar Post (9) using the Spring Washers (34) and Hex Bolts (35) which came pre-attached to the Handlebar Post. Then pull the Pulse Sensor Wire (46) through the small hole on the front of the Handlebar Post (9) and pull them out of the top (as seen in diagram below for Step 6).
- Page 9 USING YOUR ELLIPTICAL BIKE Using your elliptical bike will provide you with several benefits. It will improve your physical fitness, tone your muscles and in conjunction with a calorie controlled diet, help you lose weight. WARM-UP PHASE The purpose of warming up is to prepare your body for exercise and to minimize injuries. Warm up for two to five minutes before strength-training or aerobic exercising.
-
Page 10: Troubleshooting
TROUBLE SHOOTING 1. If you find there is no difference between tension level 1 to level 8, please check the connection of the tension cable. Please see Diagram A under Step 2. 2. If the meter does not show numbers correctly, please check the batteries. If the meter does not count the speed and time, please check the connections of Upper Sensor Wire (15) to the Meter (38) and Upper Sensor Wire (15) to Lower Sensor Wire (16). - Page 11 6. If it is very hard to pedal on the higher tension levels, or you hear rubbing noises, please remove the chain cover, and adjust the screw seen in the following diagram. You will need to lower the position of the screw by turning counter-clockwise; this will keep the magnet board from contacting the magnetic flywheel.
Need help?
Do you have a question about the SF-E905 and is the answer not in the manual?
Questions and answers
What is the size of part 60 axel bushing 2