Table of Contents
Advertisement
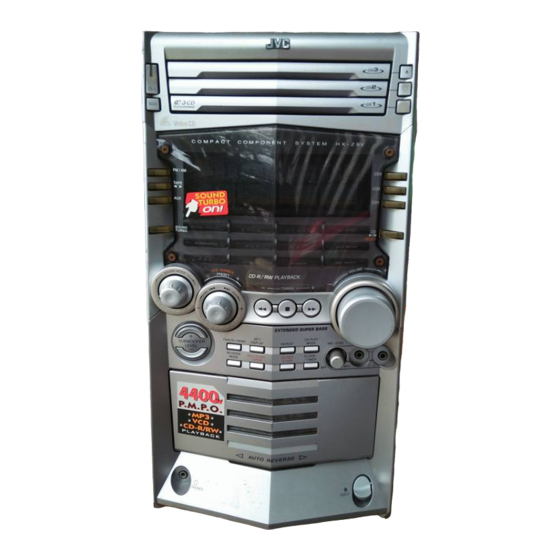
COMPACT COMPONENT SYSTEM
CA-HXZ9V/CA-HXZ98V
CA-HXZ7V
CA-HXZ9V
CA-HXZ98V
COMPACT
DIGITAL VIDEO
COMPACT
DIGITAL VIDEO
SELECT
INSTRUCTIONS
SELECT
CA-HXZ7V
For Customer Use:
Enter below the Model No. and Serial No.
which are located either on the rear, bot-
tom or side of the cabinet. Retain this
information for future reference.
Model No.
Serial No.
GVT0096-003A
[US, UN, UX]
COMPACT
DIGITAL VIDEO
Advertisement
Table of Contents

Related Manuals for JVC CA-HXZ7V


Summary of Contents for JVC CA-HXZ7V
- Page 1 COMPACT COMPONENT SYSTEM CA-HXZ9V/CA-HXZ98V CA-HXZ7V CA-HXZ9V CA-HXZ98V COMPACT DIGITAL VIDEO COMPACT DIGITAL VIDEO SELECT INSTRUCTIONS COMPACT DIGITAL VIDEO SELECT CA-HXZ7V For Customer Use: Enter below the Model No. and Serial No. which are located either on the rear, bot- tom or side of the cabinet. Retain this information for future reference.
- Page 2 Warnings, Cautions and Others Caution— (STANDBY/ON) button! Disconnect the mains plug to shut the power off completely. The (standby/on) button in any position does not disconnect the mains line. The power can be remote controlled. – G-1 –...
- Page 3 CAUTION To reduce the risk of electrical shocks, fire, etc.: 1. Do not remove screws, covers or cabinet. 2. Do not expose this appliance to rain or moisture. CAUTION • Do not block the ventilation openings or holes. (If the ventilation openings or holes are blocked by a newspaper or cloth, etc., the heat may not be able to get out.) •...
- Page 4 Place on the level surface. Maintain an adequate air path for ventilation by placing on a stand with a height of 10 cm or more. Front view 15 cm 15 cm 1 cm CA-HXZ9V CA-HXZ98V CA-HXZ7V Side view 1 cm 15 cm 10 cm – G-3 – 15 cm 15 cm...
- Page 5 IMPORTANT FOR LASER PRODUCTS REPRODUCTION OF LABELS / 1 1 1 1 1 CLASSIFICATION LABEL ON EXTERIOR SURFACE 1. CLASS 1 LASER PRODUCT 2. DANGER: Invisible laser radiation when open and interlock failed or defeated. Avoid direct exposure to beam. 3.
- Page 6 Introduction We would like to thank you for purchasing one of our JVC products. Before operating this unit, read this manual carefully and thoroughly to obtain the best possible performance from your unit, and retain this manual About This Manual This manual is organized as follows: •...
-
Page 7: Table Of Contents
Contents Location of the Buttons and Controls ... 3 Front Panel ... 3 Remote Control ... 5 Getting Started ... 6 Supplied Accessories ... 6 Putting the Batteries into the Remote Control ... 6 Connecting Antennas ... 6 Connecting Speakers ... 7 Connecting Other Equipment ... -
Page 8: Location Of The Buttons And Controls
Become familiar with the buttons and controls on your unit. Front Panel Front Panel Top view of Indication-lamp panel p For model CA-HXZ7V For model CA-HXZ7V Note: All illustrations in this manual will be based on CA-HXZ9V/CA-HXZ98V. For model CA-HXZ7V... - Page 9 4 / ¢ (reverse skip/forward skip) control (10, 12, 17 – 19, 22, 24 – 25, 27, 30 – 32) e For CA-HXZ7V: ACTIVE BASS EX. LEVEL + / – buttons (11) For CA-HXZ9V/98V: SUBWOOFER LEVEL + / – buttons (11) r Setting buttons (8, 10, 12 –...
-
Page 10: Remote Control
8 MPX button (24, 28) 9 SOUND TURBO button (11) p SOUND MODE button (11) q For CA-HXZ7V: ACTIVE BASS EX. LEVEL buttons (11) For CA-HXZ9V/98V: SUBWOOFER LEVEL + / – buttons (11) w KEY CONTROL i, I button (29) -
Page 11: Getting Started
Getting Started Supplied Accessories Make sure that you have all the following items. The number in the parentheses indicates the quantity of the pieces supplied. • AM loop antenna (1) • FM antenna (1) • Remote control (1) • Batteries (2) •... -
Page 12: Connecting Speakers
• Keep the antennas away from metallic parts of the unit, connecting cords, and the AC power cord. Connecting Speakers Vinyl-covered wire (not supplied) For model CA-HXZ7V Speaker cords (black/red) For model CA-HXZ9V/ CA-HXZ98V Speaker cords (black/blue) -
Page 13: Connecting Other Equipment
To connect surround speakers By connecting surround speakers to the SURROUND SPEAKERS jacks you can enjoy surround effect. Right surround surround speaker • Connect the right surround speaker to the RIGHT jack. • Connect the left surround speaker to the LEFT jack. Connecting Other Equipment You can connect both analog and digital equipment. -
Page 14: Common Operations
Common Operations Turning On or Off the Power To turn on the unit, press STANDBY/ON on the remote control) so that the lamp on the button goes off. To turn off the unit (on standby), press (or STANDBY/ON on the remote control) again so that the lamp on the button lights up. -
Page 15: Setting The Clock
Setting the Clock You can set the clock whether the unit is on or off; however, if Ecology Mode is activated, you cannot set the clock while the unit is off (on standby). If Ecology Mode is not in use while the unit is turned off (on standby), “0:00”... -
Page 16: Reinforcing The Bass Sound
Reinforcing the Bass Sound ONLY FOR CA-HXZ7V: You can select one of the 4 bass levels. This function only affects the playback sound, but does not affect your recording. The bass level can be adjusted in 4 steps—LEVEL 0 (BASS OFF), LEVEL 1, LEVEL 2, LEVEL 3 and LEVEL 4 (MAX LEVEL). -
Page 17: Creating Your Own Sound Mode-User Mode
Creating Your Own Sound Mode—User Mode You can change SEA (Sound Effect Amplifier) pattern to suit your preference. The SEA (Sound Effect Amplifier) pattern can be adjusted into 5 frequency ranges—LOW1, LOW2, MID, HIGH1, and HIGH2. These changed settings can be stored in the USER 1, USER 2, and USER 3 modes. -
Page 18: Listening To Fm And Am Broadcasts
Listening to FM and AM Broadcasts Tuning in to a Station Press FM/AM. The unit automatically turns on and tunes in to the previously received station (either FM or AM). • Each time you press the button, the band alternates between FM and AM. 2 Start searching for stations. -
Page 19: Disc Play Introduction
Disc Play Introduction This unit has been designed to play back the following discs: • CD (Audio CD) • CD-R (CD-Recordable) • CD-RW (CD-ReWritable) • MP3 disc (MP3 files recorded on a CD-R or CD-RW) When playing a CD-R or CD-RW User-edited CD-Rs (CD-Recordable) and CD-RWs (CD-ReWritable) can be played back only if they are already “finalized.”... - Page 20 How are MP3 files recorded and played back? MP3 “tracks (files)” can be recorded in “group”—folders or directories, in PC terminology. During recording, the tracks and groups can be arranged similarly to the tracks and folders/directories of computer data. “Root” is similar to the root of a tree. Every track and group can be linked to the root.
-
Page 21: Playing Back Discs
Playing Back Discs Loading Discs On the unit ONLY: Press 0 for the disc tray (CD1, CD2, or CD3) you want to load a disc onto. The unit automatically turns on and the disc tray comes out. Place a disc correctly on the circle of the disc tray, with its label side up. -
Page 22: Basic Disc Operations
Select a track to start playing with. 1) Turn 4 / ¢ (or press PREV. 4 (1) / NEXT ¢ (¡) on the remote control) to select a group you want, then press CD 3/8 SELECT. The track number starts flashing. 1 2 3 4 5 6 7 8 9 10 11 12... -
Page 23: Programming The Playing Order Of The Tracks -Program Play
Programming the Playing Order of the Tracks —Program Play You can arrange the playing order of the tracks before you start playing. You can program up to 50 tracks. • To use Repeat Play (see page 20) for Program Play, press REPEAT after starting Program Play. -
Page 24: Playing At Random-Random Play
To check the program contents On the remote control ONLY: Before playing, you can check the program contents by pressing PREV. 4 (1) or NEXT ¢ (¡). • PREV. 4 (1) : Shows the programed tracks in the reverse order. •... -
Page 25: Repeating Tracks Or Discs-Repeat Play
Repeating Tracks or Discs—Repeat Play You can have all the discs, the program or the individual track currently playing repeat as many times as you like. To repeat playing, press REPEAT during or before play. • Each time you press the button, Repeat Play mode changes as follows: REPEAT ALL REPEAT 1DISC... -
Page 26: Playing Back Video Cds
Playing Back Video CDs Selecting Video Output (PAL, MULTI, NTSC) You can set this setting in Standby mode. (Wait for 2 second after the clock timer appear.) Before playing a VCD, use the buttons on the unit to select a video output mode to match your TV system. -
Page 27: Playing Video Cds With Pbc Function - Menu Play
Playing Video CDs with PBC Function — Menu Play This System provides Playback Control (PBC) which utilizes a procedure (menu selection) programmed in a video CD. The playback operation procedure may differ depending on the disc you use. For Menu Play, use the following buttons: On the unit: ¢... -
Page 28: Playing Video Cds Without Pbc - Continuous Play
Screen-saver • When a menu screen of a karaoke disc is displayed for a few minutes without any selection being made, it automatically starts from the first song. Do not paused Video CD for more then 10 minutes to prevent screen burns. -
Page 29: Playing A Multiplex Sound Cd
Press VIDEO INTRO on the remote control after a picture appears on the TV screen. The video intro play starts and shows in sequence for about 7 seconds of the first nine tracks on the TV screen. To preview subsequent tracks, press “NEXT ¢ (¡)” on the remote control. -
Page 30: Playing Back Tapes
Playing Back Tapes You can play back type I tapes without changing any settings. Playing Back a Tape Press 0 EJECT for the cassette deck. Insert a cassette with the exposed part of the tape down. Close the cassette holder gently. Press TAPE 2 3. -
Page 31: Recording
• The recording level is automatically set correctly, so it is not affected by the VOLUME, the ACTIVE BASS EX. (For CA-HXZ7V), SUBWOOFER LEVEL (For CA-HXZ9V), and the SOUND MODE controls. Thus, during recording you can adjust the sound you are actually listening to without affecting the recording level. -
Page 32: Synchronized Recording
Synchronized Recording By using Synchronized Recording methods, you can start and stop both disc play and tape recording at the same time. Direct Recording Everything on the disc goes onto the tape in the order on the disc, or according to the order you have made for Program Play. -
Page 33: Using The Microphones
Using the Microphones You can enjoy singing along (Karaoke) and microphone mixing by using two microphones. • MIC LEVEL adjustment is valid for both microphones connected to MIC 1 and MIC 2 jacks. IMPORTANT: • Always set MIC LEVEL to MIN when connecting or disconnecting the microphone. -
Page 34: Adjust The Music Key Control (For Cd Play Only)
Rotate MIC LEVEL and VOLUME to adjust the microphone level and the speaker output level. Sing into the microphone. To apply echo to your voice, see “To apply an echo to your voice” on page 28. To adjust the music key, see “Adjusting the Music Key Control”... -
Page 35: Using The Timers
Using the Timers There are three timers available—DAILY (Daily Timer), REC (Recording Timer), and SLEEP (Sleep Timer). You can set the timers whether the unit is on or off; however, if Ecology Mode is activated, you cannot set the timers while the unit is off. - Page 36 Set the off-time you want the unit to turn off (on standby) at. 1) Turn 4 / ¢ to set the hour, then press SET/DISPLAY. 2) Turn 4 / ¢ to set the minute, then press SET/DISPLAY. “SET” appears for 1 second, then the unit enters source selecting mode.
-
Page 37: Using Recording Timer
Using Recording Timer With Recording Timer, you can make a tape of a radio broadcast automatically. How Recording Timer actually works The unit automatically turns on, tunes in to the specified station, sets the volume level to “VOLUME MIN,” and starts recording when the on-time comes (“REC”... -
Page 38: Using Sleep Timer
To turn on or off Recording Timer after its setting is done Press CLOCK/TIMER repeatedly until “REC” appears on the display. The REC (Recording Timer) indicator starts flashing on the display and the (Timer) indicator remains lit. To turn off the Recording Timer, press CANCEL/DEMO. -
Page 39: Maintenance
Maintenance To get the best performance of the unit, keep your discs, tapes, and mechanism clean. General Notes In general, you will have the best performance by keeping your discs and the mechanism clean. • Store discs in their cases, and keep them in cabinets or on shelves. -
Page 40: Troubleshooting
Troubleshooting If you are having a problem with your unit, check this list for a possible solution before calling for service. If you cannot solve the problem from the hints given here, or the unit has been physically damaged, call a qualified person, such as your dealer, for service. -
Page 41: Specifications
370 mm 370 mm (W/H/D) Mass (approx.): 10.0 kg Supplied accessories See page 6. Design and specifications are subject to change without notice. CA-HXZ7V Amplifier section Output Power (IEC 268-3) MAIN SPEAKERS: at 63 Hz with no Audio input sensitivity/Impedance:... - Page 42 Mains (AC) Line Instruction (not applicable for Europe, U.S.A., Canada, Australia, and U.K.) IMPORTANT for mains (AC) line BEFORE PLUGGING IN, do check that your mains (AC) line voltage corresponds with the position of the voltage selector switch provided on the outside of this equipment and, if different, reset the voltage selector switch, to prevent from damage or risk of fire/electric shock.
-
Page 43: Speaker System
JVC dealer. Le estamos muy agradecidos por haber adquirido estos altavoces de JVC. Antes de utilizarlos, sirvase leer las instrucciones detenidamente a fin de obtener el mejor rendimiento posible. Si tiene alguna pregunta, acuda a su agente de JVC. - Page 45 MAIN SPEAKER SYSTEM : SP-XZ9V MAIN SPEAKER SYSTEM : SP-XZ9V SISTEMA DE ALTAVOZ PRINCIPAL : SP-XZ9V SISTEMA DE ALTO-FALANTE PRINCIPAL : SP-XZ9V SPEAKER FOR A/V COMBINATION SP-XZ9V has a magnetically-shielded design for placement adjacent to TV’s and monitors without causing color aberrations. However, color may be affected as a result of how the speaker system is installed.
- Page 46 Connection Conexión Ligaçao qO u « Subwoofer Subwoofer Main Speaker Subwoofer (Right Side) !"# Altavoz principal (Lado derecho) Alto-falante principal (Lado direito) Black Negra Rojo Preto Vermelho Blue Azul Azul Black Negra Preto Amplifier output terminals Terminales de salida de amplificador Terminais de saida do amplificador !"#$ CONNECTION...
- Page 47 CONEXIÓN • NO utilice ningún otro amplificador para operar este sistema de altavoces excepto CA-HXZ9. • Desactive la alimentación de todo el sistema antes de conectar los altavoces al amplificador. • La capacidad máxima de potencia del altavoz principal es de 50 W, y del Subwoofer es de 200 W.
- Page 48 !"#$%&'( • !"#$%&'"()*+,-./012345 • !"#$%&'()*+ • !"#$%&'()*+,-.'/0123.4!5 !"#$%&'()*+ !,-./01"#(23456 !"#$%&'()*+,-./01&23456)789 !"#$%& !"#$%&'()*+$,-./01$.23456 !"#$%&'()*+,-./01 !"#$% &'(&)*+,-./01 !"#$%&'()*+,-./0 !"#$%&'()*+,-. !"#$%&'"()*+,-./!0123 !"#$%&'()* !"#$%&'()*+,-. !"#$%&'()*+,-./01234 !" !"# !"#$% P= =P= !" !" × × × × !" !" !" !" !" – – !" UP=Ç_Lt ã...
- Page 49 SURROUND SPEAKER SYSTEM SURROUND SPEAKER SYSTEM : SP-XSZ9 SISTEMA DE ALTAVOCES PERIMÉTRICOS : SP-XSZ9 SISTEMA DE COLUNAS SURROUND : SP-XSZ9 HOW TO INSTALL SURROUND SPEAKERS • This equipment is not magnet-proof. If it is placed near a TV set, color on a TV screen may become uneven. If the case of installation, therefore, locate it at sufficient distance from the TV set.
- Page 50 Amplifier Connection Conexión del amplificador Ligação do amplificador !" r C*U U UL « qO u « Surround speakers Altavoces peromètricos Colunas surround !" Amplifier output terminals Terminales de salida de amplificador Terminais de saida do amplificador SURROUND SPEAKERS CONNECTION A pin plug is attached to the tip of the speaker cord.
- Page 51 CONEXIÓN Una clavija monopolar está fijada al extremo del cordón del altavoz. Si el terminal de conexión para altavoz en el amplificador al cual se conectará el altavoz es un jack monopolar, conecte el cable del altavoz izquierdo al terminal izquierdo, y el cable de altavoz derecho al terminal derecho.
- Page 52 !"#$%&'()'$*+,-. /01234 !"#$%&'()'*+,-. !"#$%&'()*!+ , !"#$%&'"()*+,-./0123456 • !"# • !"#$%&'()*&+,%- !"#$%&'()* • !"#$%&'()*+,-.&/012345%&' !"#$%&'()*+,-./01234567)8 !"#$%& !"#$%&'()*+#,-./01#.234 !"#$%&'()*+,-./ !"#$%&'# ()*+ (,-.#/0123 !"#$%&'()*+,-&. !"#$%&'()*+,- !"#$%&!%'()*+, -%. !"#$%&'()*+( ! "# – !"# × × !"#$%&'()*+, -./ !/0"#1-$ !"#$%&'()*+, × !" × × × ×...
- Page 54 VICTOR COMPANY OF JAPAN, LIMITED EN. SP. PR. CH. AR. 0103FSKMAMFPI...