Advertisement
Quick Links
Instructions for use
Thank you for purchasing the Musical Fidelity M6 DAC.
The M6 DAC consists of two 24 bit DACs arranged in a fully differential (balanced) dual mono topology. It also
features a top quality over sampling 24 bit sample rate converter circuit which asynchronously up-samples all
incoming data rates to 192 kHz. This moves the digital artefacts to well outside the audio band, allowing easy
removal without detriment to the top end of the audio band. Our well tuned filtering circuit gives immeasurably small
jitter, noise and distortion artefacts allowing astounding imaging, detail and transparency, to deliver all music types
exactly as the artist originally intended. This revised design now takes into account different sampling frequencies
with the upper bandwidth now extending to 90 kHz for 192 kHz natively sampled input signals.
The M6 DAC fully asynchronous USB input copes with files up to 24-bit 192 kHz sample rate input. This takes full
advantage of the higher quality recordings now available. It works with all personal computers running Microsoft
Windows®, Linux and Apple® OS.
An aptX® capable Bluetooth A2DP receiver has been included. aptX® is a high quality Bluetooth link. It features full
bandwidth sound, for wireless connection to Bluetooth-capable products, such as mobile phones, computers, etc.
The Bluetooth receiver is also backward-compatible with non-aptX® Bluetooth devices.
M6 DAC has been carefully designed to be partnered with other M3 and M6 products. It also matches well with M8
and M1 series products. Using any of these combinations will yield one of the best high-fidelity systems available at
any price.
Used carefully, it should give many years of outstanding musical reproduction.
Dust regularly with a soft duster or soft brush, but be careful when using cleaning or polishing agents - they may
harm the surface finish.
If there are any questions about the audio system, please consult the dealer who is there to help and advise.
Advertisement

Subscribe to Our Youtube Channel
Related Manuals for Musical Fidelity M6DAC


Summary of Contents for Musical Fidelity M6DAC
- Page 1 Instructions for use Thank you for purchasing the Musical Fidelity M6 DAC. The M6 DAC consists of two 24 bit DACs arranged in a fully differential (balanced) dual mono topology. It also features a top quality over sampling 24 bit sample rate converter circuit which asynchronously up-samples all incoming data rates to 192 kHz.
- Page 3 CONTENTS Section Page Safety Information – Mains plug (UK only), modification warning General advice – Installation precautions Disposal information – EU disposal information – Introduction, cleaning, installation, power connections, audio Installation connections, digital connections Facilities and connections – Illustrations - main unit front & rear panels Remote –...
-
Page 4: Safety Information
• If connecting to a BS1363 plug, a 13 amp fuse must be used. WARNING: MODIFICATIONS THIS PRODUCT EXPRESSLY APPROVED BY MUSICAL FIDELITY WHO IS THE PARTY RESPONSIBLE STANDARDS COMPLIANCE COULD VOID USER'S AUTHORITY TO OPERATE THIS EQUIPMENT. Issue 2... - Page 5 Do not remove any covers or try to gain access to the inside. There are no user adjustments or fuses to change without qualification. Refer all service work to an authorised Musical Fidelity agent. * Note: Unauthorised opening of the equipment will invalidate any warranty claim.
- Page 6 ITEM DISPOSAL INFORMATION DISPOSAL The crossed out wheeled bin label that appears on the back panel of the product indicates that the product must not be disposed of as normal household waste. To prevent possible harm to the environment please separate the product from other waste to ensure that it can be recycled in an environmentally safe manner.
-
Page 7: Power Connections
Unit passes on +12V DC at up to 60mA, for further devices. Interconnects Please note: Musical Fidelity currently do not make any interconnecting cables other than those supplied with the unit. Musical Fidelity does not endorse any other manufacturer’s cables. - Page 8 FACILITIES & CONNECTIONS POWER Mains ON/STBY button and LEDs DE-EMPHASIS off or auto DISPLAY Window INPUT LEVEL matching controls INPUT selector switches IR remote control sensor lens FILTER digital filter 21 22 BLUETOOTH RP-SMA antenna socket 16 OPTICAL digital output 16 OPTICAL digital output COAXIAL digital input 2 17 AES BALANCED digital output...
- Page 9 REMOTE CONTROL HANDSET The universal remote control shown below enables functions from this and related units to be operated from a convenient distance. Equivalent buttons on the remote control have the same functions as those on the front panel of the unit. Other functions are only available by remote control.
- Page 10 In this mode the M6 DAC is consuming a minimal amount of power. To switch the unit on, press the POWER STBY button so the blue POWER LED is lit. The display should also come on, in a similar sequence to below: Musical Fidelity M6 DAC V. 1.00...
- Page 11 FILTER AND DE-EMPHASIS FILTER The FILTER button allows gradual or sharp roll off digital filter characteristics to be used. The button should be set according to personal taste and may vary between different sources/media. Press the Filter button on the front panel or remote control.
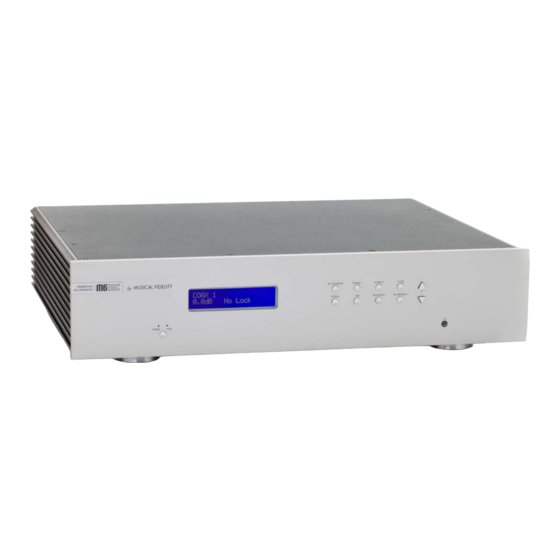
- Page 12 SPDIF INPUTS & OUTPUTS COAXIAL1 input To use the COAXIAL1 input, press the COAXIAL1 input select button on the front panel, or remote control. The incoming sample rate will be displayed if a valid digital signal is present. COAXIAL 1 Fixed 44.1kHz The above example shows successfully connected input from CD player digital (SPDIF or optical) output.
- Page 13 Also check antenna is fitted; positioned away from potential sources of interference, and in full, plain view from across the room. “Pair” (see device user manual for more details) with the “Musical Fidelity M6 DAC” that should appear in the device’s Bluetooth list.
- Page 14 BLUETOOTH ® aptX audio (automatic) If aptX is available on the connecting device, the M6 DAC will automatically implement it for best audio quality. ® To check if the connecting device supports aptX please consult the device manuals/support. No user intervention on the M6 DAC is possible and the setting is entirely automatic.
- Page 15 Earlier and other operating systems are not supported. Additionally, the use of third party software such as “ASIO” or similar is not supported by Musical Fidelity. In case of difficulty with any of these software types, please consult the relevant software documentation and/or its support services.
- Page 16 RENAMING INPUTS For further convenience the inputs may be renamed to suit the particular setup; and make choosing the right input easier. All inputs can be renamed with custom names up to 20 characters (including symbols and spaces). The renaming feature is available through remote control only, and uses the M6 DAC remote CD player section grey buttons in addition to the...
- Page 17 RENAMING INPUTS COAXIAL 1 CD Player Once the complete name has been typed in; the “RENAME INPUT” button is pressed again to store the input name. Input renamed The renamed input(s) now display the stored name. To rename another input, select that input and repeat the above process.
- Page 18 USB SETUP - APPLE OS ® Apple OS X ® This product has been tested and works with Apple OS X 10.6.4 or later. ® To install into Apple OS X simply plug the unit into a spare USB port. The unit will then need to be chosen as the default audio device.
- Page 19 USB SETUP - LINUX Linux This device has been successfully set up and tested with Ubuntu Linux kernel 2.6.33 or later. Linux is open source and many different versions are available, the latest of which inherently support 192 kHz 24 bit audio. The drivers are automatically installed (other and/or older Linux distributions may require further setup procedures –...
- Page 20 SERVICE PACK 3 FOR WINDOWS® XP ® Service Pack Requirements for Microsoft Windows This product will work with Windows XP installations that have been updated to SERVICE PACK 3 (also known simply as “SP3”). ® If you already have Windows XP Service Pack 3 installed you may skip this section and go on to next page ®...
- Page 21 XP driver Connect the MF USB Audio output to a spare USB port on your computer. Insert the Musical Fidelity MF USB Audio driver disk into the CDROM of your computer. It will auto run, if CD auto run is enabled on your computer.
- Page 22 DRIVER INSTALL – WINDOWS® XP If for any reason the unit is not plugged in or not detected, the message below will pop up. Check the device is plugged in (and switched on, if applicable) and press “Next”. Click “Install” to Confirm install location (There is usually no reason to change the offered destination folder). Issue 2 Page 22 of 42...
- Page 23 DRIVER INSTALL – WINDOWS® XP The setup program will copy over files required for the installation. The below message will show. Please click Continue Anyway. The display now shows “Setup was completed”, and “Preinstallation successful”. Click “Next”. Issue 2 Page 23 of 42...
- Page 24 “No, not this time”, then click “Next”. Select “Install the software automatically (Recommended)”. Click “Next”. The “Found New Hardware Wizard” will appear for “Musical Fidelity MF USB 2.0 Audio out”, then a sub-window “Hardware Installation” appears Issue 2 Page 24 of 42...
- Page 25 DRIVER INSTALL – WINDOWS® XP Ignore the warning and press “Continue Anyway” ® Windows copies the driver files into the correct places in its system directory. When copying is completed the following box will appear: Click “Finish”. A pop-up on the task bar says: “Your new hardware is installed and ready to use.” This indicates the unit has been recognised correctly by the computer and is ready for use.
- Page 26 SETTINGS – WINDOWS® XP ® In order to ensure the device is used for music in Windows XP, it can set it as the default device in either the ® preferred media software (please refer to the relevant software HELP or online support) or Windows itself: Click the START button and open CONTROL PANEL.
- Page 27 DRIVER UNINSTALL – WINDOWS® XP ® Windows XP uninstalling software ® To remove the driver and its associated software, go to Windows Control Panel. Click on MF USB 2.0 Audio Out USB Audio Driver then click “Remove”. The uninstaller runs, showing: Click “Uninstall”...
- Page 28 DRIVER UNINSTALL – WINDOWS® XP Click “Finish”. Driver removal is now complete. Issue 2 Page 28 of 42...
- Page 29 Connect the MF USB Audio to a spare USB port on your computer. Cancel the pop-up window that may appear asking where to look for the driver. Insert the Musical Fidelity MF USB Audio driver disk into the CDROM of your computer.
- Page 30 DRIVER INSTALL – WINDOWS® VISTA/7 If a “User Account Control” window pops up, asking permission to continue, please press “Continue”. Click Next. The install program will take a look at the system configuration to prepare for setup If for any reason the unit is not plugged, in or not detected, the message below will pop up Check the device is plugged in (and switched on, if applicable) and press “Next”.
- Page 31 DRIVER INSTALL – WINDOWS® VISTA/7 Click “Install” to confirm install location.(There is usually no reason to change the offered destination folder). The setup program will copy over files required for the installation. The display now shows “Setup was completed”, and “Preinstallation successful”. Click “Next”.
- Page 32 DRIVER INSTALL – WINDOWS® VISTA/7 Click “Finish”. A pop-up on the task bar says: “Your new hardware is installed and ready to use.” This indicates the unit has been recognised correctly by the computer and is ready for use. Issue 2 Page 32 of 42...
- Page 33 SETTINGS – WINDOWS® VISTA/7 ® In order to ensure the device is used for music in Windows XP/Vista, you can set it as the default device in either your favourite media software (please refer to the relevant software HELP or online support) or ®...
- Page 34 UNINSTALL – WINDOWS® VISTA/7 ® ® Windows Vista / Windows 7 uninstalling software To remove the driver and associated software, go to Control Panel - Programs and Features. Click on MF USB 2.0 Audio Out USB Audio Driver then click “uninstall”. The uninstaller runs, showing: Click “Uninstall”...
- Page 35 UNINSTALL – WINDOWS® VISTA/7 Click “Finish”. Driver removal is now complete. Issue 2 Page 35 of 42...
- Page 36 ADDITIONAL SETTINGS – WINDOWS® ® Software Overview for Windows Machines These settings are for advanced use only. In most cases the default settings are suitable for normal playback. The following is given for reference only. Third party software if enabled may override or be affected by changes in these settings.
- Page 37 This shows the product name and the manufacturer. It also shows the revision (Revision ID) of the currently installed MF USB 2.0 Audio Out firmware. The Musical Fidelity unique vendor ID and the MF USB Audio product's ID are shown.
- Page 38 ADDITIONAL SETTINGS – WINDOWS® Neither the USB driver nor the MF USB 2.0 Audio out do any sample-rate conversion. Audio will always be played in its native sample rate, as stored on the computer. Streaming Mode The USB driver provides a facility to continuously stream samples to the USB device even when audio is not being played.
- Page 39 Please check device is listed in device manager (Windows®) or in Sound, audio devices for MAC OS X. Make sure the Musical Fidelity USB audio device is selected as the default OUTPUT device. Check USB port functions with another device.
-
Page 40: Specifications
192 kHz Asynchronous USB Audio support driver for Windows® XP, Vista and 7. Remote Control M6 DAC type Batteries AAA type (2 off) Musical Fidelity reserves the right to make improvements which may result in specification or feature changes without notice. E&OE. Issue 2 Page 40 of 42... - Page 41 BLUETOOTH ANTENNA Bluetooth Antenna The Bluetooth antenna pictured above is supplied with the unit. The antenna is supplied as a one piece antenna-and-base assembly. If the base is not required, the antenna part may be unscrewed from the base and re-attached directly to the unit.
- Page 42 MANUAL HISTORY RELEASE DATE CHANGES Issue 1 September 2012 First issued Issue 2 September 2012 Remote and weights updated Microsoft and Windows® are either registered trademarks or trademarks of Microsoft Corporation in the United States and/or other countries. Mac and Mac OS are trademarks of Apple Inc., registered in the U.S. and other countries. The aptX®...
Need help?
Do you have a question about the M6DAC and is the answer not in the manual?
Questions and answers