Table of Contents
Advertisement
Advertisement
Table of Contents

Related Manuals for Dometic B3000 Plus


Summary of Contents for Dometic B3000 Plus
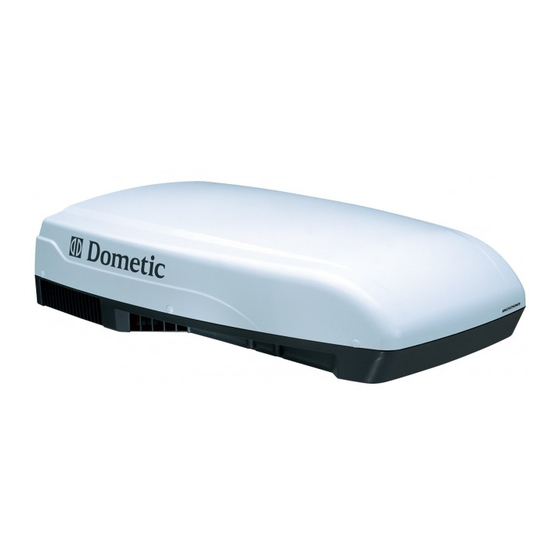
- Page 1 B3000 PLUS Operation, maintenance and installation manual...
- Page 2 ENGLISH With Dometic at home everywhere. Thank you for your decision to buy an Dometic product. They all have been specially conceived for your vehicle, matching totally the requirements of leisure on wheels - with more than 75 years of experience, the most advanced technology, fi...
- Page 3 The Manufacturer s warranty does not extend to Product failures, defects or damage arising from and/or attribu- table to a wrong installation. The Consumer is entitled to let the Product be installed by an authorised dealer, not bound by Dometic. ©DOMETIC - 2009 All rights reserved - Printed in Italy No part of this publication may be reproduced, copied or transmitted in any form or by any means without prior written permission from DOMETIC.
- Page 4 (oil, grease, etc.) are disposed of correctly keep noise levels down to reduce noise pollution For more information on correct dismantling of our products please refer to the recycling handbooks at www.dometic.com/ambiente..
-
Page 5: Table Of Contents
Index Operation, Maintenance and Installation manual Air conditioner General informations 1.1. Scope of the manual..........4 1.2. Manufacturer and air conditioner data plate..4 1.3. Description of the air conditioner......4 1.4. How to use the air conditioner........6 1.5. Description of the controls........7 1.6. -
Page 6: General Informations
(c) to deliver the heat into the passenger compartment. Over time, this increases the temperature inside the vehicle. Manufacturer Conformity marking Model/Serial number Year of manufacture Technical data B3000 PLUS users ‘ instructions... - Page 7 Condenser (b) Compressor (a) warm air Solenoid valve (f) discharged Evaporator (d) warm air Fan (c) discharged conditioned air drawn inside the vehicle air recirculated condensate draining inside the vehicle users ‘ instructions B3000 PLUS...
-
Page 8: How To Use The Air Conditioner
Position the air diffusing fl aps to direct the air to the desired position. In order to balance the airfl ow it’s necessary to rotate the center knob in anticlockwise, to choose the wished position and then rotate clockwise. B3000 PLUS users ‘ instructions... -
Page 9: Description Of The Controls
Every 10 minutes the operating set point is adjusted to the temperature detected by the remote control. I FEEL The RESET button erases all the configuration parameters to default. * (only for models equipped with resistance) - **(only for models equipped with light) users ‘ instructions B3000 PLUS... -
Page 10: Automatic Mode
Choose the Fan Speed commands. You can use the LIGHT** and ROOM Replace the batteries 2x1.5V AAA * (only for models equipped with resistance) - **(only for models equipped with light) B3000 PLUS users ‘ instructions... - Page 11 Note: The remote control must not be in an area that is much warmer or much cooler than the normal room temperature (e.g.: exposed to direct sunlight or to the cold air coming from the diffuser.) users ‘ instructions B3000 PLUS...
- Page 12 Anomaly - Malfunctioning of the E1 temperature probe (internal) Red (2 fl icks) Anomaly - Malfunctioning of the E2 temperature probe (external) Red (3 fl icks) Anomaly - Malfunctioning of the E3 temperature probe (external) Flashing green Defrost / Start heat pump B3000 PLUS users ‘ instructions...
-
Page 13: Technical Data
1.6. Technical data min 30 Model Description Unit B3000 plus Refrigerant gas (type/quantity) see date template Nominal capacity Cooling-Heating consumption 1200-1350 Heating capacity Electrical rating V-Hz 230-50 Protection degree Conditioned air volume Max internal volume of the vehicle... -
Page 14: Ordinary Maintenance
Filters cleaning (1): periodically carry out this operation; wash the fi lters with a detergent solution and allow to dry before refi tting. Active carbon fi lter (2): It’s recomended to change the active carbon fi lters every year. B3000 PLUS users ‘ instructions... -
Page 15: Installation Instructions 2
Remove the air conditioner from its packaging and made sure that it is not damaged. Never use the rear air openings to lift the air conditioner from its packaging Move the air conditioner to the installation site under safe condi- tions. users ‘ instructions B3000 PLUS... -
Page 16: Preparing The Roof Opening
Some- times vehicle manufacturers previously arrange areas for the unit installation weakening and/or electric cable from being cut. The air conditioner should preferably be installed on a level plane. Maximum allowed inclination: 10°. B3000 PLUS users ‘ instructions... - Page 17 Turn all power sources off Using an existing opening Remove the skylight cover. Clean the installation opening all around by removing any adhesive residues. Fill any existing screw hole or deformation with fi ller or silicone. users ‘ instructions B3000 PLUS...
- Page 18 fi nd the position and di- mensions of the new opening. Drill the four corners. Cut by joining the previously made holes. If necessary, mount a reinforcing wooden frame. Drill a hole for the supply cables B3000 PLUS users ‘ instructions...
-
Page 19: Mounting The Air Conditioner
Always tighten to the recommended tor- Mount the airdiffuser linking gaskets. Do the electrical connection as described que wrench setting. Do not overtighten! For correct thickness follow the table on in paragraph 2.4. page 19. users ‘ instructions B3000 PLUS... - Page 20 50 mm 30 mm from 55 mm 35 mm from 60 mm 40 mm from 65 mm 45 mm from 70 mm 50 mm from 75 mm 55 mm from 80 mm 60 mm B3000 PLUS users ‘ instructions...
-
Page 21: Electric Connection
Arrange a specifi c electric system 12V DC B2200 230V 50Hz Connect the wires to the air conditioner. Connect the electric system to a circuit supplying the required power (see technical data) and fi tted with a good ground system. users ‘ instructions B3000 PLUS... -
Page 22: Troubleshooting, Maintenance, Recycling
3.2. Extraordinary maintenance For the best performance of your air conditioner, have your dea- ler/workshop clean it thoroughly before use: thermal exchange batteries water outlet holes are properly cleaned. B3000 PLUS users ‘ instructions... -
Page 23: Spare Part List
Spare part list users ‘ instructions B3000 PLUS... - Page 24 AIR DIFFUSER FLAP GRILLE SOLENOID VALVE DEFLECTOR SLIDE RETURN PIPE KNOB DELIVERY PIPE COVER LED BOARD RECEIVER BOARD OR GASKET RECEIVER COVER SUPPORT LABEL LABEL FIXING BRACKET SUPPORT GASKET WIRING GASKET PLENUM GASKET FAN SUPPORT SCREW B3000 PLUS users ‘ instructions...
-
Page 25: Wiring Diagram
DIFFUSER LIGHT ALSO WHEN THERE IS NO MAIN. BATTERY PLEASE USE THE FUSE F2AL250V PROVIDED CONNECTOR PLUGGED IN THE BOARD + 12vdc BATTERY - BATTERY AIR DIFFUSER TEMPERATURE PROBE MAIN FUSE F10AL250V board board board board users ‘ instructions B3000 PLUS... - Page 28 DOMETIC ITALY s.p.a. Via Virgilio, 3 - 47122 Forlì - Tel. 0543/754901 Fax. 0543/756631...
Need help?
Do you have a question about the B3000 Plus and is the answer not in the manual?
Questions and answers