Dometic Brisk II Installation And Operation Manual
Hide thumbs
Also See for Brisk II:
- Installation and operation manual (28 pages) ,
- Installation and operation manual (28 pages)
Table of Contents
Advertisement
CLIMATE CONTROL
AIR CONDITIONERS
Brisk II (B57915, B59516, B79516), High Performance (540315, 540316),
Blizzard NXT (H540315, H540316), FreshJet (FJX3473, FJX3573)
Rooftop Air Conditioner (Air
EN
Distribution Box, Mechanical Controls)
Installation and operation manual . . . . . . . . . 2
WARNING
Cancer and Reproductive Harm
www.P65Warnings.ca.gov
Form No. 4445104227 3317817.000 2023-10-31
Advertisement
Table of Contents

Related Manuals for Dometic Brisk II


Summary of Contents for Dometic Brisk II
- Page 1 CLIMATE CONTROL AIR CONDITIONERS Brisk II (B57915, B59516, B79516), High Performance (540315, 540316), Blizzard NXT (H540315, H540316), FreshJet (FJX3473, FJX3573) Rooftop Air Conditioner (Air Distribution Box, Mechanical Controls) Installation and operation manual ..2...
- Page 2 Rooftop Air Conditioner (Air Distribution Box, Mechanical Controls) Copyright © 2023 Dometic Group. The visual appearance of the contents of this manual is protected by copyright and design law. The underlying technical design and the products contained herein may be protected by design, patent or be patent...
-
Page 3: Table Of Contents
For up-to- date product information, please visit www.dometic.com. 11 Maintenance . . . . . . . . . . . . . . . . . . . . . . . . . . 23 Contents 11.1... -
Page 4: Explanation Of Symbols And Safety
DANGER! • Use only Dometic replacement parts and Indicates a hazardous situation that, if not avoided, components that are specifically approved for use will result in death or serious injury. -
Page 5: Intended Use
Rooftop Air Conditioner (Air Distribution Box, Mechanical Controls) Intended use 3 Intended use 4 .1 Tools and materials Dometic recommends that the following tools and The Rooftop Air Conditioner (Air Distribution Box, materials be used. Mechanical Controls), also referred to as the “product”... -
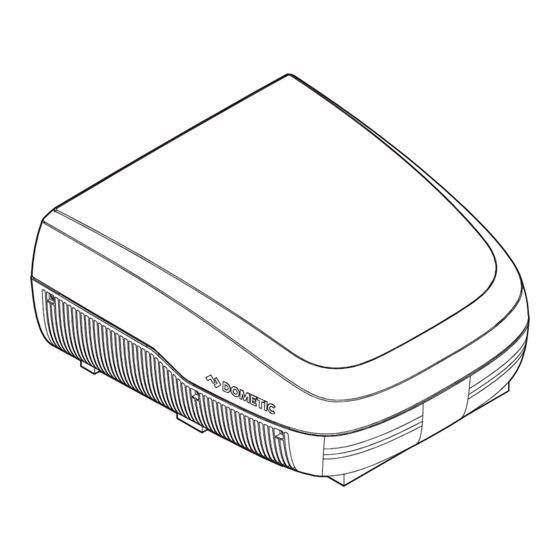
Page 6: Adb Components
General information Rooftop Air Conditioner (Air Distribution Box, Mechanical Controls) 4 .3 ADB components 4 .4 Rooftop component dimensions by model This section identifies the main ADB components. This section provides the external dimensions and clearance measurements of the rooftop component. 4 .4 .1 FreshJet 1 ADB components Foam Dividers... - Page 7 Rooftop Air Conditioner (Air Distribution Box, Mechanical Controls) General information 4 .4 .2 Brisk II 4 .4 .3 Blizzard NXT 4 Blizzard NXT (H540315, H540316) 3 Brisk II (B57915,B59516, B79516) 13.9 in. (353 mm) 4.0 in. (102 mm) 13.7 in. (349 mm)
- Page 8 General information Rooftop Air Conditioner (Air Distribution Box, Mechanical Controls) 4 .4 .4 High Performance ADB component dimensions 4 .4 .5 This section provides the internal dimensions of the ADB component. 5 High Performance (540315, 540316) 6 Dimension measurements 13.0 in. (330 mm) Front of Unit Front of Unit Center Line of Unit...
-
Page 9: Placement Requirements
Rooftop Air Conditioner (Air Distribution Box, Mechanical Controls) General information 4 .5 Placement requirements 4 .5 .1 Tilt requirements When measuring for placement, confirm the following The rooftop component is specifically designed for tilt requirements. installation on the roof of an RV. To determine where to place the rooftop component, consider the following 1. -
Page 10: Specifications
Circuit protection: a time delay fuse or circuit breaker is required. Dometic Corporation gives general guidelines for generator requirements. These guidelines come from experiences people have had in actual applications. When sizing the generator, the total power usage of your RV must be considered. Generators may lose power at high altitudes and from lack of maintenance. -
Page 11: Wiring Diagrams
GRN/YEL From A/C Thermostat 10 ADB wiring diagram - all models 8 Brisk II (B57915, B59516, B79516 ) Wiring Diagram Definitions; 115 VAC; 60 Hz 1 PH; Use Copper Conductors only - - - - - - Field Wiring ---------- Factory Wiring •... -
Page 12: Pre-Installation
Pre-installation Rooftop Air Conditioner (Air Distribution Box, Mechanical Controls) 7 Pre-installation 7 .2 Preparing the RV roof opening NOTICE: The roof opening must be structurally framed WARNING: FIRE OR ELECTRICAL SHOCK to provide adequate support and to prevent air from HAZARD . -
Page 13: Routing The Wiring
Rooftop Air Conditioner (Air Distribution Box, Mechanical Controls) Pre-installation 1. Shut off the gas supply, disconnect the 115 VAC power from the RV, and disconnect the positive (+) 12 VDC terminal from the supply battery. 2. Carefully mark the required roof opening. See “Placement requirements”... -
Page 14: Positioning The Rooftop Component
Pre-installation Rooftop Air Conditioner (Air Distribution Box, Mechanical Controls) 2. Route the 115 VAC power supply wire from the 4. Lift and place the rooftop component over time-delay fuse or circuit breaker box to the roof the prepared opening using the gasket on the opening. -
Page 15: Installation
Rooftop Air Conditioner (Air Distribution Box, Mechanical Controls) Installation 3. Reach up into the return air opening of the rooftop component and pull the rooftop component electrical cord down for later connection. 4. Remove the ADB and the mounting hardware from the carton. - Page 16 Installation Rooftop Air Conditioner (Air Distribution Box, Mechanical Controls) 8 .1 .1 Roof thickness 1 .25 to 5 .5 in . (32 to 152 mm) All models 1.25 in. 1.5 in. 2.0 in. 2.5 in. 3.0 in. 3.5 in. 4.0 in. 4.5 in. 5.0 in. 5.5 in. Roof (32 mm) (38 mm) (51 mm) (64 mm)
- Page 17 Rooftop Air Conditioner (Air Distribution Box, Mechanical Controls) Installation 8 .1 .2 Roof thickness 6 .0 - 7 .5 in . 1. Using the tables, determine the number and combination of foam dividers required based on the (152 to 191 mm) roof thickness. All models 6.0 in.
-
Page 18: Securing The Unit
Installation Rooftop Air Conditioner (Air Distribution Box, Mechanical Controls) 2. Use the following figures to determine the proper mounting pattern and bolt location. 20 Mounting bolt pattern - all models 19 Passing the wire through the filter notch Filter ADB Second Slot Filter Notch 115 VAC Power Supply Wire and 6-pin Unit Electrical Cord... -
Page 19: Wiring The Unit To The Power Supply
Rooftop Air Conditioner (Air Distribution Box, Mechanical Controls) Installation 8 .3 Wiring the unit to the power 5. Route the 115 VAC power supply wire from the roof opening to the junction box location. supply 6. Thread the 115 VAC power supply wire through the strain relief. -
Page 20: Finalizing The Installation
Operation Rooftop Air Conditioner (Air Distribution Box, Mechanical Controls) 4. Tape the connectors to the 115 VAC power supply wire to ensure they do not vibrate loose. 5. Push the connected wires into the junction box. 6. Align the junction box cover to the notch on the side of the junction box. -
Page 21: Understanding The Controls
Rooftop Air Conditioner (Air Distribution Box, Mechanical Controls) Operation 9 .1 Understanding the controls 2. Select the coolness level that best satisfies your needs: This section describes the operating controls. – Low Cool (shorter dash) maintains the room at the current comfort level. -
Page 22: Troubleshooting
For a more permanent solution to high heat gain, accessories like the Dometic outdoor patio or window awnings reduce the effects of direct sunlight. During normal operation, this product is designed to remove a certain amount of moisture from the air, depending on the size of the space being conditioned. -
Page 23: Maintenance
OF THE LIMITED WARRANTY FREE OF CHARGE, 11 .1 Cleaning the air filter CONTACT: NOTICE: Never run the unit without the return DOMETIC CORPORATION air filter in place. Otherwise, dirt will restrict the CUSTOMER SUPPORT CENTER rooftop component’s evaporator coil and may... - Page 24 .com YOUR LOCAL YOUR LOCAL YOUR LOCAL DEALER SUPPORT SALES OFFICE dometic .com/dealer dometic .com/contact dometic .com/sales-offices...
Need help?
Do you have a question about the Brisk II and is the answer not in the manual?
Questions and answers