Siemens Optiset E Standard Quick Reference Manual
For hicom 150 e, officepoint, officecom, and officepro version 1.0
Hide thumbs
Also See for Optiset E Standard:
- Operating instructions manual (110 pages) ,
- User manual (44 pages) ,
- Manual (43 pages)

Related Manuals for Siemens Optiset E Standard


Summary of Contents for Siemens Optiset E Standard
-
Page 1: Quick Reference Guide
Quick Reference Guide Optiset E Standard, Advance Plus, and Memory for Hicom 150 E, OfficePoint, OfficeCom, and OfficePro Version 1.0 G281-0462-01... - Page 2 NOTE: The Siemens Optiset telephones for Hicom 150 E systems are hearing- aid compatible and comply with the applicable FCC Rules, Part 68, and Industry Canada CS-034 standard.
- Page 3 Siemens Business Communication Systems, Inc. 4900 Old Ironsides Drive P.O. Box 58075 Santa Clara, CA 95052-8075 (408) 492-2000 Siemens, Optiset, and PhoneMail are registered trademarks and Hicom is a trademark of Siemens Aktiengesellschaft. Copyright Siemens Business Communication Systems, Inc. 1998. All rights reserved.
-
Page 5: Table Of Contents
Memory Telephones ....... . 1 Optiset E Standard Telephone ......2 Optiset E Advance Plus Telephone . - Page 6 vi Optiset E QRG...
-
Page 7: Welcome To Your Optiset E Standard, Advance Plus, And Memory Telephones
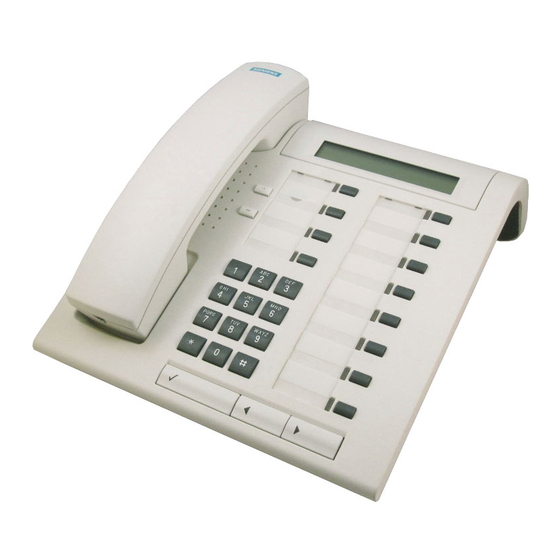
A BC D EF 1 2 3 4 5 6 PQRS TUV WXYZ 7 8 9 Figure 1. Optiset E Standard and Advance Plus Telephones Handset Speaker (ringing tone/open listening) Volume keys for telephone settings Key pad Microphone for handsfree talking... -
Page 8: Optiset E Standard Telephone
Optiset E Standard Telephone The Optiset E Standard telephone has a microphone for a two- way speakerphone and does not support user-installable option modules. The Standard and Advance Plus telephones have four default feature keys for the Program/Service, Redial, Mute, and Speakerphone features. -
Page 9: Optiset E Advance Plus Telephone
Optiset E Advance Plus Telephone The Optiset E Advance Plus telephone has two bays underneath the base of the telephone for any of the following user- installable option modules: • Optiset E Analog Adapter • Optiset E Data Adapter • Optiset E Headset Adapter •... -
Page 10: Optiset E Memory Telephone
Repdial keys or user-preferred, commonly accessed feature keys, and there are three OptiGuide™ keys for working with the Siemens OptiGuide display. The Memory telephone has an alphanumeric keyboard used for entering text in situations like programming names on stations,... - Page 11 AB C D EF AB C D EF Program/Ser- 1 2 3 PQR S TUV J KL MN O – Redial 4 5 6 PQRS TUV WXYZ 7 8 9 Mute Speaker ← Ü Ö Ä Delet e ↵ ← → ↑...
-
Page 12: Bay Option Modules
38.4 kilobytes per second (autobaud detection), simultaneous voice and data communication, hardware flow control (RTS/CTS), and full duplex operation. It also supports the Siemens Application Programming Interface (API), data loopback for customer service tests, and V.120 and DMI mode 2-Bit Rate Adaptation. -
Page 13: Optiset E Headset Plus Adapter
headset does not require an amplifier. Connection is made through two RJ8 connectors. Only the Optiset E Advance Plus and Memory telephones support this option. When a headset is plugged into the adapter, the speakerphone does not function. Optiset E Headset Plus Adapter The Optiset E Headset Plus Adapter lets you plug one or two carbon microphone-type headsets and a recorder into your telephone. - Page 14 Figure 6. Installation of Bay Option Modules To install a bay option module 1. Disconnect the telephone line from the wall jack or telephone and place the telephone on a soft surface with the keypad facing down. 2. Hold the adapter with the plug connector strip facing down and mount it in one of the two mounting locations on the bottom of the telephone, sliding the two tabs...
- Page 15 For the Data Adapter, connect the data terminal equipment to the 25-pin (EIA-232) connector on the back of the Data Adapter. Reconnect the telephone line to the telephone. For the Headset Adapter, connect the headset to the headset (RJ8) connector on the adapter. Reconnect the telephone line to the telephone.
-
Page 16: Optiset E Local Power Supply
Optiset E Local Power Supply The Local Power Supply is required for the Analog Adapter. It may also be required in other situations, depending on the Optiset E telephone’s configuration, the type of telephone cable used, the length of the telephone cable from the communications server, and the type of communications server used. -
Page 17: Where To Go For Assistance
Telephones for Hicom 150 E, Administrator Guide (G281- 0460-00). Your Class of Service Each telephone in your Siemens telephone system has a class of service (COS) specifying the features available to it. Therefore, you may find that some features included in this guide are not available on your telephone. -
Page 18: The Optiguide Display
The OptiGuide Display The OptiGuide™ display provides information to help you use your telephone. The top line shows the time and date and call- related information such as the extension calling you. The second line indicates some of the features available to your telephone in its current state and provides prompts on how to use them. - Page 19 This quick reference guide discusses how to use the most popular Optiset E Standard, Advance Plus, and Memory telephone features; for complete instructions on all of the features, please see the Optiset E Telephones for Hicom 150 E Administrator Guide (G281-0460-00).
-
Page 20: Feature Keys And Access Codes
Feature Keys and Access Codes You can press feature keys to gain access to Siemens telephone system features such as Hold, Transfer, Mailbox, and Program/ Service. By programming a feature key or dialing a feature access code, you can easily use any accessible feature without scrolling through the OptiGuide display. -
Page 21: Volume Keys
Volume Keys Use the Volume Up and Volume Down keys to adjust the voice volume of your telephone. While on a call, press to raise the volume, or press to lower it until you reach the desired volume level. When you hang up or switch to another call, the volume returns to the original level. -
Page 22: Sounds
Sounds Your telephone makes different sounds to indicate what is going on. Rings occur on free lines, indicating an incoming call. Tones occur while you are using your telephone and provide information about calls and features. Table 1: Rings Sound Meaning Single (repeated) Internal call... -
Page 23: Changing Your Audio Settings
Changing Your Audio Settings To change the audio settings on your telephone: 1. Press the key to display the Configure Telephone option. 2. Scroll through and select from the following options: Ring volume? Ring tone? Speakerphone mode? 3. Use the keys to select the option that you want to adjust. -
Page 24: Callback Request
Callback Request Callback Request has the communications server help you complete calls to busy, ringing, or Do Not Disturb extensions. It lets you hang up and have the communications server call you back with triple rings when the extension is available. When you then answer, the communications server automatically dials the number. -
Page 25: Caller List
Caller List Caller list keeps track of your unanswered incoming calls in addition to saving any other calls that you add to the list. Using the list, you can quickly redial any internal/external caller that has called you, or you can redial numbers that you have added to your list. -
Page 26: Conference
Conference The Conference feature lets you have up to five internal or external parties, including yourself, in a telephone conversation. Once a conference has begun, only the person who set it up may add or remove parties. That person is the conference master. If the conference master has left the conference, then the internal caller whom has been participating in the conference the longest will be the new conference master. - Page 27 1. When you here the call waiting tone, accept the waiting call by selecting Call waiting?. This places the conference on hold and connects you with the caller. 2. Scroll to and select Conference? from your OptiGuide display to join all the parties. To add a call in park to a conference Note: You can easily park and retrieve parked calls by programming a Park key.
- Page 28 To drop a party 1. Scroll to View conference parties? and select it. Only the person who set up the conference may do this. 2. From this menu you use the cursor or scroll keys to select the option, Remove party?. 3.
-
Page 29: Consultation
Consultation Consultation lets you put a call on consultation hold, so you can call and talk privately with a different party. You can then use the Toggle/Connect feature to alternate between the two parties. To consult with a second party during a call 1. -
Page 30: Directed Call Pickup
Directed Call Pickup This feature lets you pickup calls from any extension. Note: For the procedure described here, you must program a Pickup - directed key (refer to “To program a feature key” on page 14). To pickup a call at an extension not in your pickup group 1. -
Page 31: Forwarding
Forwarding Forwarding automatically redirects your incoming calls to another extension or an outside number. Forwarding lets you set up an extension or outside number for forwarding under conditions you specify. To automatically forward calls 1. With your telephone idle, scroll to and select Forwarding On?. -
Page 32: Hold
Hold The Hold feature lets you place an active external call on hold without disconnecting the caller. For this feature, you must set up one of your programmable feature keys as a Hold key (refer to “To program a feature key” on page 14). -
Page 33: Hold-Internal Consultation
Hold—Internal Consultation This feature lets you place an intercom or internal/external call on exclusive hold. Upon activating this feature, you are limited in the following ways: • you cannot replace the handset on the cradle • you cannot place or receive additional calls •... -
Page 34: Last Number Redial-Expanded
Last Number Redial—Expanded Last Number Redial lets you quickly redial the last three external number you dialed. Each time you dial a valid external telephone number, it is automatically stored. To redial numbers 1. Press the Redial key (the second default feature key from the top). -
Page 35: Mailbox / Text Messages
Mailbox / Text Messages This feature lets you receive and answer reminder messages left on your telephone by internal callers and voicemail systems. Messages turn on the status light beside your Mailbox key (if programmed) and provide information about the call. To display messages 1. - Page 36 To answer a displayed message 1. When the message you want to answer is displayed, scroll to Call sender? and select it. 2. The communications server calls back the party that left you the message. If the party answers, the message is deleted automatically.
-
Page 37: Park
Park Park lets you move a call to a temporary holding place (a system slot). Any internal party can then retrieve the call by selecting the parked slot and retrieving the call. If you do not retrieve the parked call, the system calls you back after a designated time. The amount of time a caller can remain in call park can be changed by the system administrator. -
Page 38: Pickup
Pickup Pickup features let you answer calls ringing or queued at other extensions. Group Pickup lets you answer a call to an extension in your pickup group (set up at the communications server) even when you do not know the number for the extension. Pickup groups are set up at the communications server by a system administrator. -
Page 39: Repertory Dialing (Repdial) Keys
Repertory Dialing (Repdial) Keys This feature lets you set up Repdial keys for one-touch dialing of an internal extension or an outside number. To set up a Repdial key, refer to “To program a feature key” on page 14. After setting up the Repdial key, just press the Repdial key to automatically connect to the programmed number or extension. -
Page 40: Saved Number Redial
Saved Number Redial This feature lets you save up to ten internal or external previously dialed numbers. After saving a number, you can then select it from the caller list, and the system dials the number. To save a number you have dialed After calling a number, select Save number? from your OptiGuide display before hanging up. -
Page 41: Speakerphone
Speakerphone The Optiset E Standard, Advance Plus, and Memory telephones have a two-way speakerphone, consisting of a speaker and a microphone. You can use either the handset or the speakerphone to make or receive calls. During a conversation, you can use your speakerphone instead of your handset by pressing the Speakerphone key (the bottom default feature key) and hanging up the handset. -
Page 42: Station / Individual Speed Dialing
Station / Individual Speed Dialing This feature lets you assign frequently called external numbers to a code (*0 through *9). You can then dial this digit code instead of the entire telephone number. The Hicom 150 E CS allows a dialing sequence of up to 25 characters to be assigned to each digit code. -
Page 43: System Speed Dialing
System Speed Dialing If the System Speed Dialing feature is set up on your communications server, you can dial frequently called outside numbers (local, long distance, and international) by dialing a code number. Usually these codes are published for an entire company in a special system speed directory. -
Page 44: Transfer
Transfer Transfer lets you send a call to another extension or to an outside number if your communications server is set up to do this. To transfer a call 1. During a call, scroll to and select Start transfer?. 2. When you have dial tone, dial the extension, or dial 9 and the outside number. -
Page 45: Feature Access Codes
Feature Access Codes The table below lists the features that can be activated (*) and deactivated (#) by dialing feature access codes. Feature Activate Deactivate Account code (max. 11 digits) *60+ACCT Busy override * 62 Call forwarding - all calls *11+Stn. -
Page 47: Index
Index access codes 14 Analog Adapter 6 power supply 10 assistance. See system administrator Bay option modules 6 installation 8 Optiset E Analog Adapter 6 power supply 10 Optiset E Control Adapter 7 Optiset E Data Adapter 6 Optiset E Headset Adapter 6 Optiset E Headset Plus Adapter 7 Optiset E ISDN Adapter 7 Optiset E Phone Adapter 7... - Page 48 feature access codes - list 39 feature keys 14 programming 14 forwarding 25 all calls 25 external calls 25 internal calls 25 to external number 25 to internal extension 25 Headset Adapter 6 Headset Plus Adapter 7 hold 26 hold See also consultation hold hold—internal consultation 27 individual speed dialing.
- Page 49 Optiset E Phone Adapter 7 Optiset E Key Module 9 Optiset E Key Module options 3 Optiset E Memory telephone 4 alphanumeric board (Qwerty) 4 Electronic Notebook 4 Optiset E Standard telephone 2 park 31 retrieve 31 Phone Adapter 7 pickup group 32...
- Page 50 volume keys 15 changing audio settings 17 I-4 Optiset E QRG...
-
Page 51: Quick Reference Guide To Optiset Phones
Quick Reference Guide to Optiset Phones Important Note: Depending on the active/inactive state of your telephone you may need to Select Consult? to get dial tone before dialing a code. Important Note: If you have an analog telephone, you may need to dial 7 5 instead of * or 7 6 instead of #. - Page 52 Station Speed Dial Numbers System Speed dial: Dial * 7, then enter the speed dial code. Company speed dial codes are three digits (000-299 for OfficePoint or 000-999 for OfficeCom and OfficePro). Important Note: If you have a display telephone, your OptiGuide display will guide you through most of these functions.
Need help?
Do you have a question about the Optiset E Standard and is the answer not in the manual?
Questions and answers