Table of Contents
Advertisement
Advertisement
Table of Contents

Related Manuals for JVC XM-R70


Summary of Contents for JVC XM-R70
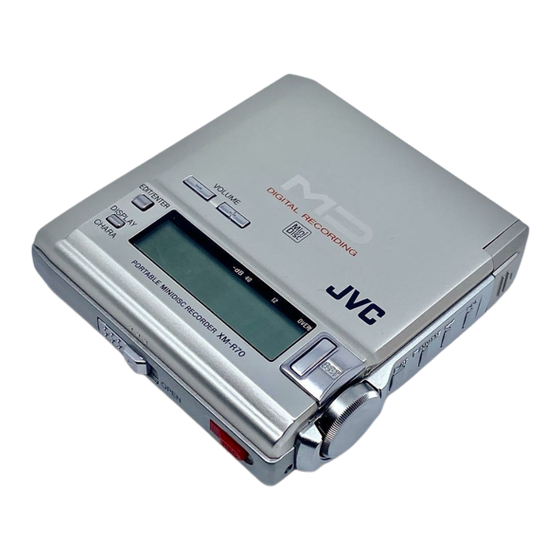
- Page 1 PORTABLE MINIDISC RECORDER XM-R70 SL/BK INSTRUCTIONS LVT0335-004A...
-
Page 2: Laser Product
CAUTION! THIS PRODUCT UTILIZES A LASER. USE OF CONTROLS OR ADJUSTMENTS OR PERFORMANCE OF PROCEDURES OTHER THAN THOSE SPEC- IFIED HEREIN MAY RESULT IN HAZARDOUS RADIATION EXPOSURE. DO NOT OPEN COVERS AND DO NOT REPAIR YOURSELF. REFER SERVICING TO QUALIFIED PERSONNEL. WARNING : TO REDUCE THE RISK OF FIRE OR ELECTRIC SHOCK, DO NOT EXPOSE THIS APPLIANCE TO RAIN OR MOISTURE. - Page 3 “SOME DOS AND DON’TS ON THE SAFE USE OF EQUIPMENT” This equipment has been disigned and manufactured to meet international safety standards but, like any electrical equipment, care must be taken if you are to obtain the best results and safety is to be assured. Do read the operating instructions before you attempt to use the equipment.
-
Page 4: Table Of Contents
Thank you for purchasing this JVC product. Please read these instructions carefully before starting operation to be sure to obtain optimum performance and a longer service life from the unit. Table of Contents Supplied Accessories ... 1 Location of Controls ... 1 Power Supply Preparations ... -
Page 5: Power Supply Preparations
Power Supply Preparations As a power supply source, you can use the rechargeable battery and/or dry-cell batteries, or AC adaptor. For information on operating times of batteries, refer to the specifications (page 16). Using lithium–ion battery (rechargeable battery) (BN-R3610) Insert the rechargeable battery into the unit. Slide the cover and open it. -
Page 6: Accidental Operation Prevention Function (Hold Mode)
Note The unit is in the standby condition when the AC adaptor is connected. The primary circuit is always “live” as long as the AC adaptor is connected to an electrical outlet. Battery indicator The battery indicator appears on the display of the unit and remote control. When the indication changes as follows, power will be shut off a short while after. - Page 7 Press the 6 button on the unit or remote control. Playback will start from the first track and ends after playing all the tracks of the MD. [Unit’s display] Disc mark turns. Peak Level Meter Track title Number of tracks being played To eject the MD, slide the OPEN switch to open the lid and open it by hand.
-
Page 8: Showing The Disc Information
Showing the Disc Information Each time you press the DISPLAY / CHARA. (or DISPLAY) button in Stop mode or during playback, the disc in- formation is displayed as follows. The DISPLAY / CHARA. button on the unit and the DISPLAY button on the remote control work independently. Display change on the unit: In Stop mode: Disc title*, total track number, and total playback time... -
Page 9: Selecting The Operational Options Of Remote Control
AC adaptor is connected to the unit. Optical digital cable (not supplied) For recording or editing Microphone (not supplied) MD player, tape deck, etc. CD player, etc. Accidental erasure prevention knob Open Close For protecting erasure... -
Page 10: Check Items Before Starting Recording
Check Items Before Starting Recording • The MD is not the Play-only type one. • The accidental erasure prevention knob of the MD cartridge is set to the close position. • The MD has enough space for recording. If not, carry out ALL ERASE or ERASE function mentioned later to erase all the tracks or desired tracks in the MD. -
Page 11: Synchro Recording (Synchro)
SYNCHRO Recording (SYNCHRO) The synchro recording automatically starts when an input signal is given and ends if no signal condition continues for 30 seconds. Insert an MD with its label side facing up. Set the REC MODE switch to SYNCHRO. Slide the REC button. -
Page 12: Dividing Tracks (Divide Function)
Dividing Tracks (DIVIDE Function) Use the unit to carry out this function. In Stop mode, press the EDIT/ENTER button and turn the JOG dial until “DIVIDE?” is dis- played. Press the SET button and then press the 6 button. Turn the JOG dial (or press the 4 or ¢ button) to select the track number to be di- vided. -
Page 13: Moving Tracks (Move Function)
Moving Tracks (MOVE Function) Use the unit to carry out this function. In Stop mode, press the EDIT/ENTER button and turn the JOG dial until “MOVE?” is displayed. Press the SET button. JOG dial • You can listen to the track by pressing the 6 button. -
Page 14: Giving Titles To Md (Title Function)
Giving Titles to MD (TITLE Function) Use the unit to carry out this function. • You can give a disc title to the MD and a track title to the tracks in the MD. Any title name can be give up to 64 characters using the provided character sets. -
Page 15: Using The Unit With Optional Accessories
Using the Unit with Optional Accessories Listening to MDs with an audio system You can listen to MDs through your audio system. • Connect a stereo connection cable (not supplied) as shown on the right after turning off the amplifier. •... -
Page 16: Information On Mds (Minidiscs)
Carrying batteries: When putting dry cell or rechargeable battery in a pocket or bag, ensure that no other metal objects such as a neck- lace are placed together with them. Contact with metal may cause short-circuiting which, in turn, may cause a fire. Notice about the rechargeable battery. -
Page 17: Md (Minidisc) Messages
ATRAC (Adaptive Transform Acoustic Coding) Within recordings, there are sounds which cannot be readily heard. For example, as the volume decreases, high-pitched sounds and low-pitched sounds become difficult to hear. Also, if a quiet sound comes at the same time as or just after a loud sound, it will not be heard. -
Page 18: Minidisc Limitations
Minidisc Limitations The minidisc records information in an original format that differs from that of conventional cassette tapes or DATs. Since there are some limitations with this recording format, the following types of conditions may arise. These condi- tions are not malfunctions. Condition “DISC FULL”... -
Page 19: Troubleshooting Guide
Troubleshooting Guide Before requesting service for this unit, check the chart below for a possible cause of the problem you are experiencing. Some simple checks or a minor adjustment on your part may eliminate the problem and restore proper operation. If you are in doubt about some of the check points, or if the remedies indicated in the chart do not solve the problem, refer to the directory of Authorized Service Centers (enclosed with this unit) to locate a convenient service center, or consult your dealer for instructions. - Page 20 VICTOR COMPANY OF JAPAN, LIMITED Printed in Japan 0699MNMCREOZK...