Sharp UP-3500 Instruction Manual
Pos terminal
Hide thumbs
Also See for UP-3500:
- Instruction manual (269 pages) ,
- Instruction manual (59 pages) ,
- Instruction manual (344 pages)
Table of Contents
Advertisement
Quick Links
Download this manual
See also:
Instruction Manual
Advertisement
Table of Contents

Related Manuals for Sharp UP-3500


Summary of Contents for Sharp UP-3500
- Page 1 POS TERMINAL MODEL UP-3500 INSTRUCTION MANUAL www.cashregisters.net...
- Page 2 WARNING FCC Regulations state that any unauthorized changes or modifications to this equipment not expressly approved by the manufacturer could void the user s authority to operate this equipment. Note: This equipment has been tested and found to comply with the limits for a Class A digital device, pursuant to Part 15 of the FCC Rules.
-
Page 3: Introduction
INTRODUCTION Thank you very much for your purchase of the SHARP POS Terminal Model UP-3500. Please read this Manual carefully before operating your machine in order to gain full understanding of functions and features. Please keep this manual for future reference. It will help you if you encounter operational problems. -
Page 4: Table Of Contents
CONTENTS INTRODUCTION ··········································································································································· 1 IMPORTANT ················································································································································· 1 PRECAUTION ·············································································································································· 1 1. Part Names and Functions ··················································································································· 7 External View ······································································································································· 7 Front view ···································································································································· 7 Rear view ····································································································································· 7 Displays ··············································································································································· 9 Operator display (touch panel) ···································································································· 9 Customer display ······················································································································· 12 Screen save mode ·····················································································································... - Page 5 Including-tax-subtotal (full subtotal) ··························································································· 44 Tray subtotal ······························································································································ 44 Eat-in subtotal ···························································································································· 44 Finalization of Transaction ················································································································· 45 Tax Calculations ································································································································· 46 Automatic tax ····························································································································· 46 Manual tax ·································································································································· 46 Tax deletion ································································································································ 46 Tax status shift ··························································································································· 46 Guest Check (GLU) ··························································································································· 47 GLU system ·······························································································································...
- Page 6 Addition receipt type ·················································································································· 78 Single/double receipt type ········································································································· 78 Addition + single receipt type ····································································································· 79 Double addition receipt type ······································································································ 79 Double (addition + single) receipt type ······················································································ 79 Sorted Receipt Function ···················································································································· 80 Kitchen Printer Send Function ··········································································································· 82 Electronic Journal ······························································································································...
- Page 7 Macro keys ······························································································································· 128 Capture keys ···························································································································· 129 Capture job ······························································································································ 129 Function keys ··························································································································· 130 Tax rate ···································································································································· 131 Doughnut tax exempt ··············································································································· 132 Baked food exempt ·················································································································· 132 Manual tax ································································································································ 133 Tax delete ································································································································· 133 Cash keys ································································································································ 134 Check keys ······························································································································...
- Page 8 Expand function ······················································································································· 163 Z1 mode secret codes ············································································································· 164 PGM2 mode secret codes ······································································································· 165 System Z1 mode secret codes ································································································ 166 System PGM2 mode secret codes ·························································································· 167 Initial down-loading secret codes ···························································································· 168 Maintenance down-loading secret codes ················································································ 169 E-payment secret codes ··········································································································...
-
Page 9: Part Names And Functions
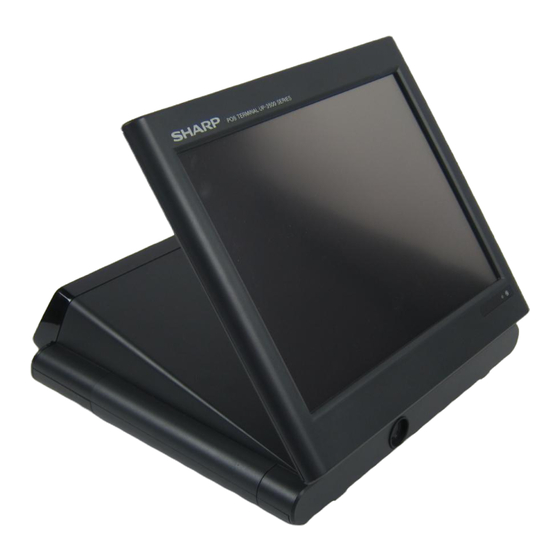
Part Names and Functions This chapter describes the part names and functions of this POS terminal. External View I I I I I Front view Magnetic card reader Operator display (touch panel) Power indicator I I I I I Rear view Side cover AC adapter jack Mode switch... - Page 10 Opening the side cover While moving the release lever towards you, pull the side cover and rotate the cover upward Side cover as shown in the illustration at the right. Release lever (located at the bottom cabinet) Terminal Connection/slot inside the side cover SD card slot RS232 port RS-232C...
-
Page 11: Displays
Displays This POS terminal is equipped with a color LCD operator display. The operator display is a touch panel. Operations can be performed by touching the screen (that shows keys or items in the window) of the operator display. I I I I I Operator display (touch panel) •... - Page 12 Ten key pad window: The Ten key pad is used to enter various numerical data (e.g. cashier code, amounts, quantities). When numeric entries are necessary (e.g. secret code is forced), the ten key pad pops up automatically. Cashier code/cashier name Numeric entry: The entry displays here.
- Page 13 • • • • • Drive-thru screen The drive-thru screen is used for the drive-thru function (after the drive-thru transaction or by touching the [D-DISP] key). Screen example: Receipt window Waiting time Touch the receipt window to select it, and touch again to release it. •...
-
Page 14: Customer Display
I I I I I Customer display There are two customer display options available for the UP-3500. The pole type customer display or an integrated type rear display can be installed. I I I I I Screen save mode The screen save function starts when the POS terminal is left idle for an extended period of time. You can program the time for which your POS terminal should keep the normal status before it goes into the screen saver mode. -
Page 15: Before Operating The Pos Terminal
Before Operating the POS Terminal This chapter describes those steps required prior to using the POS terminal for the first time. Display Angle The display may be positioned for the best viewing angle. The allowable tilt angle of the display is within 56 degrees as shown in the illustration at the right. -
Page 16: Prior To Making Entries
Prior to Making Entries Preparations for Entries Ensure that all printers in your system have adequate paper rolls prior to beginning entries. For more information, please refer to the applicable printer’s manual. Error Warning In the following examples, your POS terminal will go into an error state accompanied with a warning beep and the error message on the display. -
Page 17: Selecting An Operating Mode
Selecting an Operating Mode The POS terminal will display the following listing by touching the [MODE] key. Mode selection window: I I I I I Operating modes You can select any mode other than REG from the list in the mode selection window. Your POS terminal supports the following operating modes: This mode allows you to enter various sales information. -
Page 18: Mode Selection
I I I I I Mode selection Touch the [MODE] key. The following mode screen is displayed. Select the mode and touch it in the window to operate the desired function. When you want to enter the REG mode, simply touch the [EXIT] key. www.cashregisters.net... -
Page 19: Entering A Secret Code
Entering a secret codes When a secret code has been set for the selected mode or assigned cashier, you must enter the secret code and touch the [ENTER] key. www.cashregisters.net... -
Page 20: Entries
This POS terminal provides several types of basic screens for various functions or modes. For example: · REG mode screen (HOME screen) · Mode screen · Payment screen · Drive-thru screen etc. If you want to change the layout, consult your authorized SHARP dealer. Screen transitions (example) Mode screen [MODE] [EXIT] [HOME] [PAY]... -
Page 21: Function Keys List (Using Default Key Labels)
I I I I I Function keys list (using default key labels) Classification Description Function TEN KEY 0 thru 9 Used to enter numeric data (0 thru 9). Used to enter numeric data (00). Used to enter numeric data (000). •... - Page 22 Classification Description Function ITEM PLU/UPC Specified item(PLU) number SCALE Scale entry OPN TR Scale entry, tare weight entry SUBSTITU Used to enter the item substitution (modifier PLU). WITH Add tied PLU for combo/set PLU. WITHOUT Delete tied PLU from combo/set PLU. C NEXT Used to skip the next table of condiments.
- Page 23 Classification Description Function CHARGE CH n Charge (n: 1 - 9) CONV CONV n Used to creates a subtotal in foreign currency (n: 1 - 4). Used to enter the tip. TIP PAID Used to execute the tip paid function. EDIT TIP Used to enter the tip after finalization.
-
Page 24: Item Key List (Using Default Key Labels)
Classification Description Function PRINTING RCPT Used to print the receipt after transaction. RCP.SW Used to switch the receipt printing state (ON/OFF). BILL Used to print the bill. GC RCPT Bill on receipt RP SND Used to send a partial order to the remote printer. RCPT SFT Receipt shift, change print type SORT SFT... -
Page 25: How To Use The Touch Panel
Do not use extreme force when touching the display. Do not use any sharp or pointed objects, and avoid using your fingernails to touch the display. I I I I I Cursor control by touching option(s) or item(s) in the window You can select option(s) or item(s) by touching corresponding line(s) in the window as follows. -
Page 26: Cashier Entries (Sign-On/Sign-Off)
Cashier entries (Sign-on/Sign-off) Prior to item entries, the cashier will be compelled to enter his or her assigned cashier code. Note: This may not be necessary when the POS terminal has been programmed for the cashier code entry as “cashier stay-down mode.” •... -
Page 27: Starting Cash Memory Entry
Starting Cash Memory Entry If you enter the amount of currency for the starting amount in the drawer before entry operations, you can separate that amount from the sales amount when reports are generated. Your POS terminal can be programmed to enforce the entry of starting cash into memory. Touch the [SCM+] or [SCM–] key. -
Page 28: Item Entries
Item Entries I I I I I Registration screen Item (direct PLU) key Receipt window The registration screen can be changed to another registration screen by using the [SCREEN n] key or ➝ ➝ screen# entries ( Screen no. [SCREEN#]). When the item (direct PLU) key is held in the PLU menu key, touch the corresponding PLU menu key (main ➝... -
Page 29: Repeat Entries
• • • • • PLU code entries ➝ ➝ For “preset only type”: PLU code [PLU/UPC] ➝ ➝ ➝ ➝ For “open only type”: PLU code [PLU/UPC] Unit price [ENTER] ➝ ➝ ➝ ➝ For “open and preset type”: PLU code [PLU/UPC] Unit price... -
Page 30: Multiplication Entries
I I I I I Multiplication entries Use this feature when you need to enter two or more of the same items. This feature helps you when you sell multiples of items or need to enter quantities that contain decimals. When the kitchen printer is used under “Issuing S/D receipts by the number of times of multiplication: Yes”... - Page 31 • • • • • UPC entries ➝ ➝ ➝ By scanning UPC code: Q’ty [X/TIMES] (Scan UPC code) ➝ ➝ ➝ ➝ By UPC code entry: Q’ty [X/TIMES] UPC code [PLU/UPC] • UPC code: max. 13 digits • Q’ty: Up to 4 digits integer •...
-
Page 32: Scale Entries
I I I I I Scale entries This function is used to sell items by weight. There are two types of weight entry systems available; auto scale entries and manual scale entries. Auto scale entry is used when the weight is read automatically from the connected scale (option). -
Page 33: Plu Menu Keys (Categories)
I I I I I PLU menu keys (categories) Items can be categorized into PLU menu keys for ease of registration. A PLU menu key can contain both PLU items and other PLU menu keys. This can make a PLU menu tree of choices. -
Page 34: Plu Level Shift (For Direct Plus)
I I I I I PLU level shift (for direct PLUs) This shift can double or triple the number of direct PLUs on your POS terminal without adding additional direct PLU keys. You can use direct PLUs in ten levels by utilizing the PLU level shift keys [L1] thru [L10]. Level key shifts the PLU level from the other nine to the required level. -
Page 35: Mix-And-Match Function
I I I I I Mix-and-match function This function is convenient for matching several PLU/UPC items and selling them as a form of discount. The mix-and-match table consists of the discount type (item type/ subtotal type), trip level for discount (satisfying count of entered item), and discount value. -
Page 36: Set Plu Entries
I I I I I Set PLU entries The operations are the same as normal PLU’s. When a set PLU is entered, an entered or preset amount is printed as the unit price and then those PLUs linked to the set PLU can be printed automatically. You can program a maximum of 99 set PLUs. -
Page 37: Combo Meal Entries
I I I I I Combo meal entries The operation is the same as that for normal PLU entries. When a combo meal is entered with the Combo key, the labels of those PLUs linked to the Combo key are printed automatically. -
Page 38: With/Without Entries
I I I I I With/without entries This function is used to add/delete tied PLU(s) to/from a Combo/set PLU entered. The with/without function is used to change the tied PLUs of the combo/set PLU in compliance with a special request made by a guest or to meet other situations. For example, the function is needed when receiving a request to remove tomato from a certain dish in a restaurant. -
Page 39: Condiment Entries
I I I I I Condiment entries The terminal may be programmed for prompting condiment and instructions for a menu-item PLU. Example: When you enter a menu-item PLU, a message such as “HOWCOOK?” is prompted and a list of the “Condiment PLUs”... - Page 40 • • • • • Single entry method The items of the condiment table must be entered for each menu-item by one-set individually. (Example:) 3 steaks process: Operation Display Receipt window Note 3 [Steak] How cook? for 1’st steak [Rare] Vegetable? [Peas] 1x Steak...
- Page 41 • • • • • Price roll-up for condiment entries The price of each condiment PLU may be rolled-up in the price of menu-item PLU (parent PLU) entry. (Example:) Name Price Condiment Table # PLU00001 Condiment 1 $25.00 Condiment table Linking Condiment PLU Condiment...
-
Page 42: Price Inquiry (View) Function
I I I I I Price inquiry (view) function You can use this function when you want to know the unit price of the PLU/UPC item during transaction. The PLU/UPC can be registered in VIEW mode. The unit price of a PLU/UPC can be temporarily changed. The programmed unit price is not changed. -
Page 43: Upc Learning Function
I I I I I UPC learning function When you enter or scan an undefined code, you are required to enter the unit price and the associated department. The PLU/UPC code, unit price and the department entered are stored in the PLU/UPC file and are used for future sales entries. -
Page 44: Price Change Function
I I I I I Price change function You can use this function when you need to change the preset price and/or associated department of a PLU/UPC. The programmed price and/or associated department is changed to the new ones. (1) Touch the [PRCHNG] key, then enter the PLU/UPC item. (1a) Enter the PLU/UPC item then touch the [PRCHNG] key. -
Page 45: Recipe Text Display/Print
I I I I I Recipe text display/print This function enables you to confirm the recipe instructions for preparing select items. The displayed guidance text can be printed. If this function is required, the guidance text of the recipe can be programmed for the recipe table, and the recipe table no. -
Page 46: Subtotal Display
Subtotal Display Your POS terminal provides these five types of subtotals: I I I I I Merchandise subtotal Touch the [MDS ST] key at any point during a transaction. The net sales subtotal (not including tax) will appear in the window. I I I I I Taxable subtotal Taxable n (n: 1 - 4) subtotal Touch the [TAX SFT n] and [SBTL] keys in this order at any point during a transaction. -
Page 47: Finalization Of Transaction
Finalization of Transaction The following types of media can be used for the finalization of transactions. • Cash • Check • Charge (Credit) The direct finalization or amount tendering can be performed to finalize the transaction. • • • • • Amount tendering ➝... -
Page 48: Tax Calculations
Tax Calculations I I I I I Automatic tax When your POS terminal is programmed with a tax table (or tax rate) and the tax status of an individual department or PLU is set for taxable, it computes the tax automatically on any item that is entered into the department directly or indirectly via a related PLU. -
Page 49: Guest Check (Glu)
Guest Check Your POS terminal is provided the guest lookup (GLU) system. GLU system: The balance due and the details of the order are placed in the guest check file. The information can be automatically recalled by entering a guest check code (= a GLU code) when additional ordering occurs. - Page 50 Reorder entries For making additional guest check entries; [SRVC] GLU code [PBAL] [Item entries] [FINAL] [BILL] (max. 8 digits) [Payment operations] To issue the bill The open table can be displayed by touching the [GLU LIST] key. To operate the reorder entries, touch a corresponding line of the GLU list and touch the [ENTER] key. To exit from the GLU list screen, touch the [CANCEL] key.
-
Page 51: Drive-Thru Function
I I I I I Drive-thru function A second GLU function can be used as the drive-thru function. This system looks up drive-thru codes automatically (First In/First Out). This drive-thru system provides two types of POS terminal functions (Order taker, cashier station). Drive-thru screen The drive-thru screen can be displayed by touching the [D-DISP] key or by finalizing the drive-thru registration (refer to PGM: FUNC.SELECTING). -
Page 52: Deposit Entries
Settlement Use the following procedure: [Payment operations] [PBAL 2] [Item entries] • After a payment operation is completed, a bill number is created for the closed drive-thru. It is printed on the receipt or journal and printed on the bill when issued. The bill number should be used to refer to the closed drive-thru on a sales report. -
Page 53: Bill Totalizing
I I I I I Bill totalizing The bill totalizing function is used to combine multiple bills when, for example, a particular guest pays not only his or her bill, but also the bills of other guests. (1) To display the open table list or drive-thru list, touch the [GLU LIST] or [D-T LIST] key. (Open table list) (Drive-thru list) (2) Touch the corresponding lines to select, and touch the [ADD] button. -
Page 54: Wait (Parking) A Drive-Thru Order
I I I I I Wait (Parking) a drive-thru order The guest checks can be changed to waiting mode from the registration mode for the drive-thru function. (1) Touch the [D-DISP] key to display the drive-thru window. (2) Touch the required guest check. (3) Touch the [WAIT] key. -
Page 55: Drive-Thru Order Check Recall
I I I I I Drive-thru order check recall Each cashier is able to recall the guest checks of waiting mode for reorder entries, item corrections or settlement again by using the [RECALL] key. (1) Touch the [D-DISP] key to display the drive-thru window. (2) Touch the [RECALL] key, the waiting guest list will be shown. -
Page 56: Auxiliary Entries
Auxiliary Entries I I I I I Percent calculations (% premium or % discount) Your POS terminal provides percent calculations for a merchandise subtotal or each item entry. You need to program, in advance, for which merchandise subtotal or which item entry your POS terminal should perform a percent calculation. -
Page 57: Group Discount Entries
I I I I I Group discount entries The terminal provides the percent calculation (discount/premium) for associated group. Percentage: 0.01 to 100.00% (programmed rate) • • • • • Display of the group discountable subtotal ➝ ➝ [GD SFT n] [SBTL] •... -
Page 58: Refund Entries
I I I I I Refund entries When you perform the refund item entry, touch the [RFND] key and perform the item entry operation. The terminal also allows you to perform a refund entry for selected item by cursor. ➝ ➝... -
Page 59: Printing Of Free Text
I I I I I Printing of free text You can perform the free text entry after PLUs/UPCs item entry. Programmed free text can be printed out by entering the corresponding text code and touching the [TEXT #] key or by touching the corresponding direct text key ([TEXT n ]). ➝... -
Page 60: Payment Handling
Payment Handling I I I I I Tip-in entries Your POS terminal allows the entry of tips that your guests give to cashiers in cash or by credit card. The tip entry must be done before a payment entry. You cannot make any previous or credit balance entry after making a tip-in entry. Two different tip-in entry systems are available: the tip amount entry system and the tip percent rate entry system. -
Page 61: Tip Paid Entries
I I I I I Tip paid entries This operation is used when tips that guests have paid by using credit card are paid to respective cashiers in cash. To perform the tip paid entry, enter the cashier code (assigning the cashier), then touch the [TIP PAID] key. -
Page 62: Received-On-Account Entries
[CHK n] [M. MENU] [CH n] To cancel You may also choose the RA procedure instead of the above procedure only for cash payment. Contact your authorized SHARP dealer to change the procedure. • Direct key entries ➝ ➝ ➝... -
Page 63: Paid-Out Entries
Amount (max. 8 digits) [M. MENU] [CH n] To cancel You may also choose the PO procedure instead of the above procedure only for cash payment. Contact your authorized SHARP dealer to change the procedure. • Direct key entries ➝ ➝ ➝... -
Page 64: No-Sale
I I I I I No-sale Simply press the [NS] key without any entry. The drawer will be opened and the text of no-sale will be printed. When the no-sale function is programmed to “complex key type”, press the [CASH] key instead of the [NS] key. -
Page 65: Bill Separating Paymemt
I I I I I Bill separating payment The function is used when two guests will each pay a portion of the order. With this function, you can select some Items (touching required items) on the receipt window and make an entry for the payment (cash, check or charge). -
Page 66: Employee Function
Cashiers can be signed on by entering employee codes, or they can be signed on by using employee cards. To use an employee card, you need a magnetic card reader (MCR). Contact your authorized SHARP dealer. Use the following procedures: •... -
Page 67: Employee's Working Time Recording
I I I I I Employee’s working time recording You can manage the number of hours for which employees work. The working time can be recorded by the following operations: Time-in/out, break-in/out and break-in/paid operations • • • • • Time-out, break-in or break-paid [TIME-OUT] [BREAK] [BREAK PD]... -
Page 68: Supervisor Cashier
Supervisor Cashier This function is used to allow a supervisor cashier to open the GLU records of a normal cashier. The supervisor cashier cannot begin transactions under their own number. When the supervisor cashier begins a transaction an ordinary cashier number will be requested and must be entered before the transaction begins. -
Page 69: Overlapped Cashier Entry
Overlapped Cashier Entry This function allows you to switch from one cashier to another cashier and to interrupt the first cashier’s entry, so the second cashier can do his or her entry in this mode. Interrupt handling is possible only in the overlapped cashier entry. -
Page 70: Training Mode
TRAINING Mode The training mode is used when the operator or the manager practices POS terminal operations. When a cashier set as in training is selected, the POS terminal automatically enters the training mode. When a cashier not set as in training is selected, the POS terminal automatically enters the ordinary registration mode. -
Page 71: Open/Close The Shift Status
Open/Close the Shift Status The shift status can be specified for each employee. Each employee is only allowed to work during the shift. When you open/close the shift status, perform the following procedure. (1) Touch the [SHIFT] key, the following window is displayed. (2) Touch the required employee. -
Page 72: Authority Level/ Secret Code
Authority Level / Secret code I I I I I Authority level It is possible to specify an authority level to each job function. Each employee can be assigned an authority level. The authority level can be set to any function. The employee will not be allowed to operate higher- level functions. -
Page 73: Macro Key Entries
MACRO Key Entries The MACRO key can call one or more Auto-key sets and change the register mode if needed. You can run these key sequences simply by entering the corresponding MACRO keys during key operations. ➝ By the direct MACRO key entries: [MACRO n] (n: 1 - 99) When the [CLEAR] key is programmed in the key sequence for the MACRO key, the operation will stop at... -
Page 74: Corrections
Corrections Correction of Entries If you make an incorrect entry (relating to item entries, percent entries, amount discount entries, refund entries, return entries, manual amount tax entries, and tip entries), you can void or correct entries as follows. • • • • • Voiding the entry (1) Select the line of designated item in the receipt window. - Page 75 • • • • • Repeat the serviced item entry (1) Select the line of designated item in the receipt window. (The selected line will be highlighted.) 1 PLU0001 1.00 1 PLU0002 2.00 1 PLU0003 3.00 ------------------ 1 PLU0004 4.00 (2) Press the [ + ] key.
-
Page 76: Subtotal Void
Subtotal Void You can void an entire transaction. Once the subtotal void is executed, the transaction is aborted and the POS terminal issues a receipt. The terminal provides two types of void functions (subtotal void for new order or additional orders, and subtotal void for the whole of guest check). •... -
Page 77: Correction After Finalizing A Transaction (Void Mode)
Correction after Finalizing a Transaction (Void mode) When you need to void incorrect entries that cashiers cannot correct (incorrect entries that are found after finalizing a transaction or cannot be corrected by subtotal void), the following procedure can be performed by an employee with the proper authority level. -
Page 78: Printing Function
Printing Function Receipt ON/OFF The receipt ON(printing receipt)/ OFF(no receipting) status can be toggled by touching the [RCP.SW] key. ➝ ➝ ➝ ➝ ➝ (Receipt ON) [RCP.SW] (Receipt OFF) [RCP.SW] (Receipt ON) Copy Receipt Printing If your customer wants a receipt after you have finalized a transaction with the receipt ON/OFF function in the “OFF”... -
Page 79: Bill Printing
Bill Printing The guest check sales data can be printed at a bill printer or receipt printer. A bar-code of the bill number (or transaction number) can be printed on the bill. • • • • • Bill printing on bill printer: ➝... -
Page 80: Type Of Receipt
Type of Receipt You can select one of the following five types of receipts. These types of receipts are available for the transaction receipt. By default, the addition receipt type is selected. • Addition receipt type • Single/double receipt type •... -
Page 81: Addition + Single Receipt Type
I I I I I Addition + single receipt type When this type is selected: • An addition receipt and each single receipt are issued in series after you finalize the transaction. • Footer logo message is printed at the end of the addition receipt part. •... -
Page 82: Sorted Receipt Function
Sorted Receipt Function When the sorted receipt function is programmed for your POS terminal, PLUs are printed in sorted form by PLU group regardless of the order that you enter items. The sort group number is temporarily changed by using the [SORT SFT] key (Sort Shift function). ➝... - Page 83 • • • • • Addition + single receipt type This is printed immediately after entering the PLU of group “0”. This is printed when you touch the [GC RCPT] They are printed key after the when the transaction. transaction is (After transaction finalized.
-
Page 84: Kitchen Printer Send Function
Kitchen Printer Send Function This function enables a partial order to be sent to the kitchen for preparation while the remaining order is still being placed. When the programmed kitchen printer no. is used. (Item entry) Kitchen printer no. (1 - 9) [RP SND] Remaining items will be sent to the remote printer when the transaction is finalized. -
Page 85: Electronic Journal
Electronic Journal This function is intended to record the journal data in electronic memory instead of journal paper. Also, this data is used instead of Transaction Log data. All transaction data and the operation log is kept in the Electronic Journal File. Electronic Mail When the information/status “M”... -
Page 86: Universal Product Code (Upc) Or European Article Number (Ean)
Universal Product Code (UPC) or European Article Number (EAN) I I I I I UPC or EAN code The following codes can be supported: • UPC-A (Number system character: 0, 2, 3, 4) • UPC-E • EAN-8 • EAN-13 • Internal code EAN-8/EAN-13 For the codes used in-store marking, there are two kinds of PLU type (treated as a code like PLU no.) and Non-PLU type (price/quantity information is included in the code). -
Page 87: Customer Code
EAN-13 • Ordinary EAN-13 code (used in the source marking) • Specific EAN-13 code (flag 977, 978, 979) (used in the source marking: ISBM, ISSN) For entry, you must enter the full 13-digit number. • Internal code (used in the in-store marking, the flag character number: 20 thru 29 and 02) I I I I I Customer code EAN-13 code (free format or established format) is used for... -
Page 88: Reading (X) And Resetting (Z) Of Sales Totals
Reading (X) and Resetting (Z) of Sales Totals • Use the reading function (X) when you need to take a reading of sales information entered after the last reset. You can take this reading any number of times. It does not affect the POS terminal’s stored transactions. -
Page 89: Report List
I I I I I Report list Available report type in each mode Data to be entered/ Item Description (Remarks) OPX/Z X1/Z1 X2/Z2 X3/Z3 X4/Z4 [Revenue Center] [REVENUE CENTER] REVENUE DEPARTMENT Department Group X1/Z1 X2/Z2 X3/Z3 X4/Z4 GROUP (Revenue center by GT + Transaction REVENUE TRANSACTION X1/Z1... - Page 90 Available report type in each mode Data to be entered/ Item Description (Remarks) OPX/Z X1/Z1 X2/Z2 X3/Z3 X4/Z4 Piece count report PIECE COUNT X1/Z1 X2/Z2 X3/Z3 X4/Z4 PLU code range Transaction report TRANSACTION X1/Z1 X2/Z2 X3/Z3 X4/Z4 Daily summary DAILY SUMMARY X2/Z2 Dynamic UPC report DYNAMIC UPC...
- Page 91 Available report type in each mode Data to be entered/ Item Description (Remarks) OPX/Z X1/Z1 X2/Z2 X3/Z3 X4/Z4 [Employee] [EMPLOYEE] ALL Employee ALL EMPLOYEE TEFRA Employee range TEFRA report Ind. Employee INDIVIDUAL EMPLOYEE TEFRA report TEFRA Tefra by Employee TEFRA BY EMPLOYEE Employee list LIST report LIST...
-
Page 92: Compulsory Cash/Check Declaration
I I I I I Compulsory cash/check declaration If your POS terminal has been programmed for compulsory cash/check declaration, you must declare the cash/check value in the drawer in advance according to the type of declaration specified for when you take cashier Z reports. Use the following procedure for this declaration. - Page 93 For cash: • Select the money type by touching item or using the [ENTER] key. • Enter quantities of money and touch the [ENTER] key. • To terminate the entry, touch the [OK] key. • To void an incorrect entry, select the money type and enter correct quantities and touch the [ENTER] key.
-
Page 94: Programming
Programming This chapter explains how to program various items. Before you start programming, select the PGM1 or PGM2 mode from the mode selection window depending on the item you are going to program. Programming Menu Processing The programming menu processing is shown below tables. I I I I I OPXZ mode 3 GLU# ASSIGN I I I I I PGM1 mode... -
Page 95: Pgm2 Mode
I I I I I PGM2 mode 1 POS READING 1 DEPARTMENT 1 DEPARTMENT 2 DEPT GR. REVENUE 2 ITEM SETUP 1 PLU/UPC 2 MODIFIER PLU 3 COUPON PLU 4 RECIPE TEXT 5 DYNAMIC UPC 6 UPC OTHER 3 TABLES 1 CONDIMENT TABLES 2 COMBO MEAL TABLES 3 LINK PLU/UPC TABLES... - Page 96 (1 POS READING) 7 TERMINAL 1 REPORTS 2 MAINTENANCE 3 TERMINAL 4 OPTIONAL SETTINGS 5 GLU/D-THRU CODE 8 TEXT EDITOR 1 REVENUE CENTER TEXT 2 FUNCTION TEXT 3 LOGO TEXT 4 SORT GROUP TEXT 9 SYSTEM 1 PRINTERS 2 DEVICE CONFIGURATIONS 3 EPAY DEVICE PRESET 4 CVM PRESET...
- Page 97 (2 POS SETTING) 3 TABLES 1 CONDIMENT TABLES 2 COMBO MEAL TABLES 3 LINK PLU/UPC TABLES 4 SET PLU TABLES 5 MIX&MATCH TABLES 6 SCALE TABLES 4 WORK FORCE 1 CASHIER 2 EMPLOYEE 1 EMPLOYEE ID 2 JOB LOCATION TABLES 3 LABOR COST 4 CASHIER KEY 1 CONTACT LESS KEY...
- Page 98 (2 POS SETTING) 17 TAX17 RATE 18 TAX18 RATE 19 TAX19 RATE 20 TAX20 RATE 21 DOUGHNUT EXEMPT 22 BAKED FOOD EXEMPT 23 MANUAL TAX 24 TAX DELETE 2 MEDIA 1 CASH KEYS 2 CHECK KEYS 3 CHARGE KEYS 4 EAT-IN KEYS 5 SERVICE KEY 6 FINAL KEY 7 CHANGE POLICY...
- Page 99 (2 POS SETTING) 4 HOURLY REPORT 5 STACKED REPORT 6 TEFRA RATE 2 MAINTENANCE 1 MAINTENANCE DATA CREATE 2 MAINTENANCE DATA D/L 3 D-UPC DOWNLOAD 4 SYSTEM BACKUP 5 SYSTEM RESTORE 3 TERMINAL 1 MACHINE# 2 CONSECUTIVE# 3 TILL TIMER 4 SCREEN SETUP 5 BILL NUMBER 6 CONDIMENT IGNORE...
- Page 100 (2 POS SETTING) 3 BILL LOGO 1 BILL HEADER 2 BILL FOOTER 4 EAT IN LOGO 4 SORT GROUP TEXT 9 SYSTEM 1 PRINTERS 1 RECEIPT PRINTER 2 JOURNAL PRINTER 3 BILL PRINTER 4 REPORT PRINTER 5 KP#1 6 KP#2 7 KP#3 8 KP#4 9 KP#5...
-
Page 101: How To Program Alphanumeric Characters
How to Program Alphanumeric Characters When you program alphanumeric characters, the character keyboard will be displayed as shown below. [BKSPC] : Backs up the cursor for deleting the character or figure at the left of the cursor. [SHIFT] : You can enter an upper-case letter by using this key. Touch this key just before you enter the upper-case letter. -
Page 102: Alphanumeric Characters
Alphanumeric Characters www.cashregisters.net... -
Page 103: Basic Instructions
Basic Instructions This section illustrates the basic programming by using an example of programming for departments. ➝ (I Department (1 DEPARTMENT 1 DEPARTMENT ..PGM2)) I I I I I Programming example (1) Select the PGM2 mode in the mode window. The following window is displayed. (2) Touch the [2 POS SETTING] button to perform the programming. - Page 104 (3) Touch the [1 DEPARTMENT] button to program the department, and select the desired department and touch the [ENTER] key. (4) Select the programming items, and set the proper data. (5) To terminate the programming, touch the [EXIT] key. www.cashregisters.net...
-
Page 105: Programming Function Key
I I I I I Programming function key [DELETE] : Used to delete the data or item. [BKSPC] : Backs up the cursor for deleting the character or figure at the left of the cursor. [COPY] : Used to copy the data from the designated item. Touch this key and select designated item. -
Page 106: Pos Setting Data
POS Setting Data The POS setting data can be confirmed with the following tables. The default programming data of parameters is emphasized in bold character. I I I I I Department ➝ (1 DEPARTMENT 1 DEPARTMENT ..PGM2) (1) Select the PGM2 mode in the mode selection window, and touch the [2 POS SETTING] to perform the programming. -
Page 107: Plu/Upc
I I I I I PLU/UPC ➝ (2 SALES ITEMS 1 PLU/UPC ..PGM1) ➝ ➝ (2 ITEM SETUP 1 PLU/UPC 1 INDIVIDUAL PLU/UPC ..PGM2) PLU code: max. 6 digits (1 to 999999) UPC/EAN code: max. 13 digits (EAN13, EAN8, UPC-A) (1) Select the PGM1 or PGM2 mode and touch the [2 POS SETTING] to perform the programming. - Page 108 Text Parameter Classification AMT. ENTRY TYPE OPEN&PRESET/PRESET/OPEN/INHIBIT Amount entry type [UPC(EAN) is fixed at “PRESET”.] BASE Q’TY 2 digits (0 to 99) Base Q’ty ZERO PRICE ALLOWED/DISALLOWED Entry of zero price MENU TYPE LINK/SET/NORMAL Menu type [UPC(EAN) is Setting at “LINK/NORMAL”.] LINK/SET TBL# 2 digits (1 to 99/0) LINK or SET Table No.
-
Page 109: Coupon Plu
Text Parameter Classification FOOD COST % 5 Digits (0.00 to 100.00) Food Cost % BAKED FOOD YES/NO Baked Food object DATA ENT.JOB# 2 digits (1 to 99/0) [1 to 99 : Data Entry Key Data Entry Number Compulsory] [0 : Data Entry Inhibit] NON-ACCESS NON DEL./DEL. -
Page 110: Range Plu Programming
I I I I I Range PLU programming ➝ ➝ (2 ITEM SETUP 1 PLU/UPC 2 RANGE PLU ..PGM2) The following parameters of PLU can be programmed by a range. The range data of PLUs is required at the beginning. PLU code: max. - Page 111 Text Parameter Classification TAXABLE1 YES/NO Taxable 1 TAXABLE2 YES/NO Taxable 2 TAXABLE3 YES/NO Taxable 3 TAXABLE4 YES/NO Taxable 4 SORT GROUP 2 digits (1 to 99/0) PLU SORT grouping GR.DISC. 2 digits (1 to 99/0) Group discount GR.DISC. 2 digits (1 to 99/0) Group discount GR.DISC.
-
Page 112: Preparation Assignment
I I I I I Preparation assignment ➝ ➝ (2 ITEM SETUP 1 PLU/UPC 3 PREP ASSIGNMENT ..PGM2) PLU code: max. 6 digits (1 to 999999) UPC/EAN code: max. 13 digits (EAN13, EAN8, UPC-A) (1) Select the PGM2 mode and touch the [2 POS SETTING] to perform the programming. (2) Touch the [2 ITEM SETUP] button to display the menu, and touch the [1 PLU/UPC] button to display the detail menu. -
Page 113: Cvm Routing
I I I I I CVM routing ➝ ➝ (2 ITEM SETUP 1 PLU/UPC 5 CVM ROUTING ..PGM2) PLU code: max. 6 digits (1 to 999999) UPC/EAN code: max. 13 digits (EAN13, EAN8, UPC-A) (1) Select the PGM2 mode and touch the [2 POS SETTING] to perform the programming. (2) Touch the [2 ITEM SETUP] button to display the menu, and touch the [1 PLU/UPC] button to display the detail menu. -
Page 114: Modifier Plu Table
I I I I I Modifier PLU table ➝ (2 ITEM SETUP 2 MODIFIER PLU ..PGM2) Modifier table no.: max. 3 digits (1 to 999) (1) Select the PGM2 mode and touch the [2 POS SETTING] to perform the programming. (2) Touch the [2 ITEM SETUP] button to display the menu, and touch the [2 MODIFIER PLU] button to display the modifier table list. -
Page 115: Recipe Table
I I I I I Recipe table ➝ (2 ITEM SETUP 4 RECIPE TEXT ..PGM2) Recipe number: max. 3 digits (1 to 999) (1) Select the PGM2 mode and touch the [2 POS SETTING] to perform the programming. (2) Touch the [2 ITEM SETUP] button to display the menu, and touch the [4 RECIPE TEXT] button to display the recipe text list. -
Page 116: Upc Non-Plu Code Format
I I I I I UPC Non-PLU code format ➝ (2 ITEM SETUP 6 UPC NON-PLU ..PGM2) The register allows you to specify the Non-PLU code format (System sign(Flag code): 2, 02, 20 -29). The format data is as follows: Flag Free format Free format... -
Page 117: Upc Delete
I I I I I UPC delete ➝ (2 ITEM SETUP 7 UPC DELETE ..PGM2) You can delete the UPC codes which have not been accessed during the period you set in this program when you execute the delete job in the Z1 mode. (1) Select the PGM2 mode and touch the [2 POS SETTING] to perform the programming. -
Page 118: Combo Meal Tables
I I I I I Combo meal tables ➝ (3 TABLES 2 COMBO MEAL TABLES ..PGM2) Combo meal table no.: max. 3 digits (1 to 999) (1) Select the PGM2 mode and touch the [2 POS SETTING] to perform the programming. (2) Touch the [3 TABLES] button to display the menu, and touch the [2 COMBO MEAL TABLES] button to program the combo meal table. -
Page 119: Link Plu/Upc Tables
Text Parameter Classification COMBO PLU#7 PLU #7 : 6 digits (PLU code) Associated PLU code 7 PRICE 6 digits (1 to 999999) Unit price of code 7 COMBO PLU#8 PLU #8 : 6 digits (PLU code) Associated PLU code 8 PRICE 6 digits (1 to 999999) Unit price of code 8... -
Page 120: Set Plu Tables
I I I I I Set PLU tables ➝ (3 TABLES 4 SET PLU TABLES ..PGM2) Set PLU table no.: max. 2 digits (1 to 99) (1) Select the PGM2 mode and touch the [2 POS SETTING] to perform the programming. (2) Touch the [3 TABLES] button to display the menu, and touch the [4 SET PLU TABLES] button to program the set PLU table. -
Page 121: Mix&Match Tables
I I I I I Mix & match tables ➝ (3 TABLES 5 MIX&MATCH TABLES ..PGM2) Mix & Match table no.: max. 2 digits (1 to 99) (1) Select the PGM2 mode and touch the [2 POS SETTING] to perform the programming. (2) Touch the [3 TABLES] button to display the menu, and touch the [5 MIX&MATCH TABLES] button to program the mix&match table. -
Page 122: Scale Tables
SBTL TYPE Text Parameter Classification DISCOUNT AMT Price : 6 digits Discount Amount TAXABLE1 YES/NO Taxable 1 TAXABLE2 YES/NO Taxable 2 TAXABLE3 YES/NO Taxable 3 TAXABLE4 YES/NO Taxable 4 REVENUE NO. 1 digit (1 to 9) Revenue center no. TRIP LEVEL1 Base Q’ty : 2 digits (0 to 99) Trip level1 PLU/UPC#1... -
Page 123: Cashier
I I I I I Cashier ➝ (2 WORK FORCE 1 CASHIER ..PGM1) ➝ (4 WORK FORCE 1 CASHIER ..PGM2) Cashier code: 4 digits (1 to 9999) (1) Select the PGM1 or PGM2 mode and touch the [2 POS SETTING] to perform the programming. (2) In the PGM1 mode, touch the [2 WORK FORCE] button to display the menu, and touch the [1 CASHIER] button to display the cashier list. -
Page 124: Employee Id
I I I I I Employee ID ➝ ➝ (4 WORK FORCE 2 EMPLOYEE 1 EMPLOYEE ID ..PGM2) Employee code: 10 digits (0 to 9999999999) (1) Select the PGM2 mode and touch the [2 POS SETTING] to perform the programming. (2) Touch the [4 WORK FORCE] button to display the menu, and touch the [2 EMPLOYEE] button to display the detail menu. -
Page 125: Job Location Tables
I I I I I Job location tables ➝ ➝ (4 WORK FORCE 2 EMPLOYEE 2 JOB LOCATION TABLES ..PGM2) Job location table no.: 2 digits (0 to 99) (1) Select the PGM2 mode and touch the [2 POS SETTING] to perform the programming. (2) Touch the [4 WORK FORCE] button to display the menu, and touch the [2 EMPLOYEE] button to display the detail menu. -
Page 126: Contact Less Key
I I I I I Contact less key ➝ ➝ (4 WORK FORCE 4 CASHIER KEY 1 CONTACTLESS KEY ..PGM2) (1) Select the PGM2 mode and touch the [2 POS SETTING] to perform the programming. (2) Touch the [4 WORK FORCE] button to display the menu, and touch the [4 CASHIER KEY] button to display the detail menu. -
Page 127: Authority Level
I I I I I Authority level ➝ (4 WORK FORCE 5 AUTHORITY ..PGM2) (1) Select the PGM2 mode and touch the [2 POS SETTING] to perform the programming. (2) Touch the [4 WORK FORCE] button to display the menu, and touch the [5 AUTHORITY] button to program the authority level for functions. -
Page 128: Plu Menu Keys
I I I I I PLU menu keys ➝ (5 KEYBOARD FUNCTIONS 1 PLU MENU KEYS ..PGM2) (1) Select the PGM2 mode and touch the [2 POS SETTING] to perform the programming. (2) Touch the [5 KEYBOARD FUNCTIONS] button to display the menu, and touch the [1 PLU MENU KEYS] button to display the PLU menu key list. -
Page 129: Direct Keys
I I I I I Direct keys ➝ (5 KEYBOARD FUNCTIONS 3 DIRECT KEYS ..PGM2) (1) Select the PGM2 mode and touch the [2 POS SETTING] to perform the programming. (2) Touch the [5 KEYBOARD FUNCTIONS] button to display the menu, and touch the [3 DIRECT KEYS] button to display the screen list. -
Page 130: Macro Keys
I I I I I Macro keys ➝ (5 KEYBOARD FUNCTIONS 4 MACRO KEYS ..PGM2) (1) Select the PGM2 mode and touch the [2 POS SETTING] to perform the programming. (2) Touch the [5 KEYBOARD FUNCTIONS] button to display the menu, and touch the [4 MACRO KEYS] button to display the macro key list. -
Page 131: Capture Keys
I I I I I Capture keys ➝ (5 KEYBOARD FUNCTIONS 5 CAPTURE KEYS ..PGM2) Data capture key no.: 2 digits (1 to 10) (1) Select the PGM2 mode and touch the [2 POS SETTING] to perform the programming. (2) Touch the [5 KEYBOARD FUNCTIONS] button to display the menu, and touch the [5 CAPTURE KEYS] button to display the capture key list. -
Page 132: Function Keys
Text Parameter Classification MESSAGE#2 12 Characters (space) Job description (Display message) ENTRY#2 NUMERIC/CHARACTER/INHIBIT Data entry type MAX.LENGTH#2 0 to 13 (“0” means same as “ENTRY#2: INHIBIT”) Maximum length of data entry MIN.LENGTH#2 0 to 13 Minimum length of data entry TEXT PRINT#2 NO/YES Print entry data on R/J,BILL... -
Page 133: Tax Rate
I I I I I Tax rate ➝ ➝ (6 POS FUNCTIONS 1 TAX 1 TAX1 RATE to 20 TAX20 RATE ..PGM2) Up to 20 tax rates (tax tables or % rates) can be programmed. (1) Select the PGM2 mode and touch the [2 POS SETTING] to perform the programming. (2) Touch the [6 POS FUNCTIONS] button to display the menu, and touch the [1 TAX] button to display the detail menu. -
Page 134: Doughnut Tax Exempt
I I I I I Doughnut tax exempt ➝ ➝ (6 POS FUNCTIONS 1 TAX 21 DOUGHNUT EXEMPT ..PGM2) The quantity for the doughnut tax exempt function can be programmed. (1) Select the PGM2 mode and touch the [2 POS SETTING] to perform the programming. (2) Touch the [6 POS FUNCTIONS] button to display the menu, and touch the [1 TAX] button to display the detail menu. -
Page 135: Manual Tax
I I I I I Manual tax ➝ ➝ (6 POS FUNCTIONS 1 TAX 23 MANUAL TAX ..PGM2) (1) Select the PGM2 mode and touch the [2 POS SETTING] to perform the programming. (2) Touch the [6 POS FUNCTIONS] button to display the menu, and touch the [1 TAX] button to display the detail menu. -
Page 136: Cash Keys
I I I I I Cash keys ➝ ➝ (6 POS FUNCTIONS 2 MEDIA 1 CASH KEYS ..PGM2) UP to 9 cash keys (1) Select the PGM2 mode and touch the [2 POS SETTING] to perform the programming. (2) Touch the [6 POS FUNCTIONS] button to display the menu, and touch the [2 MEDIA] button to display the detail menu. - Page 137 Text Parameter Classification HEADER ON BILL YES/NO Header printing on bill FOOTER ON BILL YES/NO Footer printing on bill RETAINED/NO RETAINED (Method of retention CLOSED GC FILE Closed guest check retention on closed GC file) BILL PRINT COMPULSORY/NON-COMPULSORY Bill printing compulsory FOOTER ON RCPT YES/NO Footer printing on receipt...
-
Page 138: Eat-In Keys
Text Parameter Classification CARD# PRT. YES/NO Card number printing CARD# FORMAT FULL/PARTIAL-1/PARTIAL-2 Card number format CARD# HIDE DIGIT 2 digits (0-99/04) Card number hide digits TIP LINE PRT. YES/NO Tip line printing SIGN.LINE PRT. YES/NO Signature line printing CARD HOLDER PRT. YES/NO Name of card holder printing EXPIRATION PRT. -
Page 139: Service Key
I I I I I Service key ➝ ➝ (6 POS FUNCTIONS 2 MEDIA 5 SERVICE KEY ..PGM2) (1) Select the PGM2 mode and touch the [2 POS SETTING] to perform the programming. (2) Touch the [6 POS FUNCTIONS] button to display the menu, and touch the [2 MEDIA] button to display the detail menu. -
Page 140: Final Key
Text Parameter Classification EXPIRATION PRT. YES/NO Expiration printing CARD READER COMPULSORY/OFFLINE ACCT. BAL. KIND Account balance kind COMPULSORY/ONLINE COMPULSORY NEGATIVE# YES/NO Negative# checck POSITIVE# YES/NO Positive# check NUMBER OF RCPT 1 digit (1 to 9/0) Number of authorization receipt Gift card authorization receipt print RCPT PRINT LALO 4 digits (0 to 9999) LALO... -
Page 141: Check Change
Text Parameter Classification TYPE3 TRANS. TYPE 3 characters (ASCII) : (FIN) Type3 setting CARD# PRT. YES/NO Card number printing CARD# FORMAT FULL/PARTIAL-1/PARTIAL-2 Card number format CARD# HIDE DIGIT 2 digits (0-99/04) Card number hide digits TIP LINE PRT. YES/NO Tip line printing SIGN.LINE PRT. -
Page 142: Conversion Rates
I I I I I Conversion rates ➝ ➝ (6 POS FUNCTIONS 3 CONVERSION RATES 1 CONVERSION RATES ..PGM2) UP to 4 conversion rates (1) Select the PGM2 mode and touch the [2 POS SETTING] to perform the programming. (2) Touch the [6 POS FUNCTIONS] button to display the menu, and touch the [3 CONVERSION RATES] button to display the detail menu. -
Page 143: Money Type
I I I I I Money type ➝ ➝ (6 POS FUNCTIONS 3 CONVERSION RATES 2 MONEY ..PGM2) UP to 20 money type (1) Select the PGM2 mode and touch the [2 POS SETTING] to perform the programming. (2) Touch the [6 POS FUNCTIONS] button to display the menu, and touch the [3 CONVERSION RATES] button to display the detail menu. -
Page 144: - ) Keys
I I I I I ( - ) keys ➝ (3 POS FUNCTIONS 1 SALE/ITEM COUPONS ..PGM1) ➝ ➝ (6 POS FUNCTIONS 4 FUNCTIONS 1 SALE/ITEM COUPONS ..PGM2) UP to 99 ( - ) keys (1) Select the PGM1 or PGM2 mode and touch the [2 POS SETTING] to perform the programming. (2) In the PGM1 mode, touch the [3 POS FUNCTIONS] button to display the menu, and touch the [1 SALE/ITEM COUPONS] button to display the ( - ) key list. -
Page 145: Keys
I I I I I % keys ➝ (3 POS FUNCTIONS 2 SALE/ITEM DISCOUNTS ..PGM1) ➝ ➝ (6 POS FUNCTIONS 4 FUNCTIONS 2 SALE/ITEM DISCOUNTS ..PGM2) UP to 99 % keys (1) Select the PGM1 or PGM2 mode and touch the [2 POS SETTING] to perform the programming. (2) In the PGM1 mode, touch the [3 POS FUNCTIONS] button to display the menu, and touch the [2 SALE/ITEM DISCOUNTS] button to display the ( % ) key list. -
Page 146: Group Discount
I I I I I Group discount ➝ (3 POS FUNCTIONS 3 GROUP DISCOUNTS ..PGM1) ➝ ➝ (6 POS FUNCTIONS 4 FUNCTIONS 3 GROUP DISCOUNTS ..PGM2) UP to 99 group discounts (1) Select the PGM1 or PGM2 mode and touch the [2 POS SETTING] to perform the programming. (2) In the PGM1 mode, touch the [3 POS FUNCTIONS] button to display the menu, and touch the [3 GROUP DISCOUNTS] button to display the group discount key list. -
Page 147: Vender Coupon Upc
I I I I I Vender coupon UPC ➝ ➝ (6 POS FUNCTIONS 4 FUNCTIONS 4 VENDER COUPON UPC ..PGM2) (1) Select the PGM2 mode and touch the [2 POS SETTING] to perform the programming. (2) In the PGM2 mode, touch the [6 POS FUNCTIONS] button to display the menu, and touch the [4 FUNCTIONS] button to display the detail menu. -
Page 148: Ra Functions
I I I I I RA functions ➝ ➝ (6 POS FUNCTIONS 4 FUNCTIONS 6 RA FUNCTIONS ..PGM2) UP to 9 RA keys (1) Select the PGM2 mode and touch the [2 POS SETTING] to perform the programming. (2) Touch the [6 POS FUNCTIONS] button to display the menu, and touch the [4 FUNCTIONS] button to display the detail menu. -
Page 149: No Sale
I I I I I No sale ➝ ➝ (6 POS FUNCTIONS 4 FUNCTIONS 8 NO SALE ..PGM2) (1) Select the PGM2 mode and touch the [2 POS SETTING] to perform the programming. (2) In the PGM2 mode, touch the [6 POS FUNCTIONS] button to display the menu, and touch the [4 FUNCTIONS] button to display the detail menu. -
Page 150: Printed Void
I I I I I Printed void ➝ ➝ ➝ (6 POS FUNCTIONS 4 FUNCTIONS 9 VOID 3 PRINTED VOID ..PGM2) (1) Select the PGM2 mode and touch the [2 POS SETTING] to perform the programming. (2) Touch the [6 POS FUNCTIONS] button to display the menu, and touch the [4 FUNCTIONS] button to display the detail menu. -
Page 151: 10 Refund
I I I I I Refund ➝ ➝ ➝ (6 POS FUNCTIONS 4 FUNCTIONS 10 REFUND 1 REFUND ..PGM2) (1) Select the PGM2 mode and touch the [2 POS SETTING] to perform the programming. (2) Touch the [6 POS FUNCTIONS] button to display the menu, and touch the [4 FUNCTIONS] button to display the detail menu. -
Page 152: Non Add Code
I I I I I Non add code ➝ ➝ (6 POS FUNCTIONS 4 FUNCTIONS 11 NON ADD CODE ..PGM2) (1) Select the PGM2 mode and touch the [2 POS SETTING] to perform the programming. (2) In the PGM2 mode, touch the [6 POS FUNCTIONS] button to display the menu, and touch the [4 FUNCTIONS] button to display the detail menu. -
Page 153: Negative Code
I I I I I Negative code ➝ (6 POS FUNCTIONS 5 NEGATIVE# ..PGM2) (1) Select the PGM2 mode and touch the [2 POS SETTING] to perform the programming. (2) Touch the [6 POS FUNCTIONS] button to display the menu, and touch the [5 NEGATIVE#] button to display the negative code list. -
Page 154: Report Zero Skip
I I I I I Report zero skip ➝ ➝ (7 TERMINAL 1 REPORTS 1 ZERO SKIP ..PGM2) (1) Select the PGM2 mode and touch the [2 POS SETTING] to perform the programming. (2) Touch the [7 TERMINAL] button to display the menu, and touch the [1 REPORTS] button to display the detail menu. -
Page 155: Report Print Options
I I I I I Report print options ➝ ➝ (7 TERMINAL 1 REPORTS 2 REPORT PRINT OPTIONS ..PGM2) (1) Select the PGM2 mode and touch the [2 POS SETTING] to perform the programming. (2) Touch the [7 TERMINAL] button to display the menu, and touch the [1 REPORTS] button to display the detail menu. -
Page 156: Department Group Projection
I I I I I Department group projection ➝ ➝ (7 TERMINAL 1 REPORTS 3 DEPT GR. PROJECTION ..PGM2) (1) Select the PGM2 mode and touch the [2 POS SETTING] to perform the programming. (2) Touch the [7 TERMINAL] button to display the menu, and touch the [1 REPORTS] button to display the detail menu. -
Page 157: Stacked Report
I I I I I Stacked report ➝ ➝ (7 TERMINAL 1 REPORTS 5 STACKED REPORT ..PGM2) Up to 2 stacked reports (STACKED REPORT1 or STACKED REPORT2) Text Parameter Classification STACKED REPORT Max. 20 reports Stacked report (1) Select the PGM2 mode and touch the [2 POS SETTING] to perform the programming. (2) Touch the [7 TERMINAL] button to display the menu, and touch the [1 REPORTS] button to display the detail menu. -
Page 158: Tefra Rate
I I I I I TEFRA rate ➝ ➝ (7 TERMINAL 1 REPORTS 6 TEFRA RATE ..PGM2) (1) Select the PGM2 mode and touch the [2 POS SETTING] to perform the programming. (2) Touch the [7 TERMINAL] button to display the menu, and touch the [1 REPORTS] button to display the detail menu. -
Page 159: Maintenance Data Down-Loading
I I I I I Maintenance data down-loading ➝ ➝ (7 TERMINAL 2 MAINTENANCE 2 MAINTENANCE DATA D/L ..PGM2) (1) Select the PGM2 mode and touch the [2 POS SETTING] to perform the programming. (2) Touch the [7 TERMINAL] button to display the menu, and touch the [2 MAINTENANCE] button to display the detail menu. -
Page 160: System Restore Data
I I I I I System restore data ➝ ➝ (7 TERMINAL 2 MAINTENANCE 4 SYSTEM RESTORE ..PGM2) (1) Select the PGM2 mode and touch the [2 POS SETTING] to perform the programming. (2) Touch the [7 TERMINAL] button to display the menu, and touch the [2 MAINTENANCE] button to display the detail menu. -
Page 161: Till Timer And Drawer Alarm
I I I I I Till timer and drawer alarm ➝ ➝ (7 TERMINAL 3 TERMINAL 3 TILL TIMER ..PGM2) (1) Select the PGM2 mode and touch the [2 POS SETTING] to perform the programming. (2) Touch the [7 TERMINAL] button to display the menu, and touch the [3 TERMINAL] button to display the detail menu. -
Page 162: Condiment Ignore
I I I I I Condiment ignore (7 TERMINAL ➝ 3 TERMINAL ➝ 6 CONDIMENT IGNORE ..PGM2) (1) Select the PGM2 mode and touch the [2 POS SETTING] to perform the programming. (2) Touch the [7 TERMINAL] button to display the menu, and touch the [3 TERMINAL] button to display the detail menu. -
Page 163: Drive-Thru By Terminal
I I I I I Drive-thru by terminal ➝ ➝ (7 TERMINAL 3 TERMINAL 9 DRIVE THRU BY TERMINAL ..PGM2) (1) Select the PGM2 mode and touch the [2 POS SETTING] to perform the programming. (2) Touch the [7 TERMINAL] button to display the menu, and touch the [3 TERMINAL] button to display the detail menu. -
Page 164: Function Selections
I I I I I Function selections ➝ ➝ (7 TERMINAL 4 OPTIONAL SETTINGS 1 FUNCTION SELECTIONS ..PGM2) (1) Select the PGM2 mode and touch the [2 POS SETTING] to perform the programming. (2) Touch the [7 TERMINAL] button to display the menu, and touch the [4 OPTIONAL SETTINGS] button to display the detail menu. -
Page 165: Printing Options
I I I I I Printing options ➝ ➝ (7 TERMINAL 4 OPTIONAL SETTINGS 2 PRINTING OPTIONS ..PGM2) (1) Select the PGM2 mode and touch the [2 POS SETTING] to perform the programming. (2) Touch the [7 TERMINAL] button to display the menu, and touch the [4 OPTIONAL SETTINGS] button to display the detail menu. -
Page 166: Z1 Mode Secret Codes
I I I I I Z1 mode secret codes ➝ ➝ (7 TERMINAL 5 AUTHORITY SETUP 1 Z1 MODE ..PGM2) (1) Select the PGM2 mode and touch the [2 POS SETTING] to perform the programming. (2) Touch the [7 TERMINAL] button to display the menu, and touch the [5 AUTHORITY SETUP] button to display the detail menu. -
Page 167: Pgm2 Mode Secret Codes
I I I I I PGM2 mode secret codes ➝ ➝ (7 TERMINAL 5 AUTHORITY SETUP 2 PGM2 MODE ..PGM2) (1) Select the PGM2 mode and touch the [2 POS SETTING] to perform the programming. (2) Touch the [7 TERMINAL] button to display the menu, and touch the [5 AUTHORITY SETUP] button to display the detail menu. -
Page 168: System Z1 Mode Secret Codes
I I I I I System Z1 mode secret codes ➝ ➝ (7 TERMINAL 5 AUTHORITY SETUP 3 SYS Z1 MODE ..PGM2) (1) Select the PGM2 mode and touch the [2 POS SETTING] to perform the programming. (2) Touch the [7 TERMINAL] button to display the menu, and touch the [5 AUTHORITY SETUP] button to display the detail menu. -
Page 169: System Pgm2 Mode Secret Codes
I I I I I System PGM2 mode secret codes ➝ ➝ (7 TERMINAL 5 AUTHORITY SETUP 4 SYS PGM2 MODE ..PGM2) (1) Select the PGM2 mode and touch the [2 POS SETTING] to perform the programming. (2) Touch the [7 TERMINAL] button to display the menu, and touch the [5 AUTHORITY SETUP] button to display the detail menu. -
Page 170: Initial Down-Loading Secret Codes
I I I I I Initial down-loading secret codes ➝ ➝ (7 TERMINAL 5 AUTHORITY SETUP 5 INITIAL D/L ..PGM2) (1) Select the PGM2 mode and touch the [2 POS SETTING] to perform the programming. (2) Touch the [7 TERMINAL] button to display the menu, and touch the [5 AUTHORITY SETUP] button to display the detail menu. -
Page 171: Maintenance Down-Loading Secret Codes
I I I I I Maintenance down-loading secret codes ➝ ➝ (7 TERMINAL 5 AUTHORITY SETUP 6 MAINTENANCE D/L ..PGM2) (1) Select the PGM2 mode and touch the [2 POS SETTING] to perform the programming. (2) Touch the [7 TERMINAL] button to display the menu, and touch the [5 AUTHORITY SETUP] button to display the detail menu. -
Page 172: E-Payment Secret Codes
I I I I I E-payment secret codes ➝ ➝ (7 TERMINAL 5 AUTHORITY SETUP 7 E-PAYMENT ..PGM2) (1) Select the PGM2 mode and touch the [2 POS SETTING] to perform the programming. (2) Touch the [7 TERMINAL] button to display the menu, and touch the [5 AUTHORITY SETUP] button to display the detail menu. -
Page 173: Drive-Thru Code Range
I I I I I Drive-thru code range ➝ ➝ (7 TERMINAL 6 GLU/D-THRU SETTINGS 2 D-THRU RANGE ..PGM2) (1) Select the PGM2 mode and touch the [2 POS SETTING] to perform the programming. (2) Touch the [7 TERMINAL] button to display the menu, and touch the [6 GLU/D-THRU SETTINGS] button to display the detail menu. -
Page 174: Revenue Center Text
I I I I I Revenue center text ➝ (8 TEXT EDITOR 1 REVENUE CTR TEXT ..PGM2) (1) Select the PGM2 mode and touch the [2 POS SETTING] to perform the programming. (2) Touch the [8 TEXT EDITOR] button to display the menu, and touch the [1 REVENUE CTR TEXT] button to display the revenue center list. - Page 175 RFD TAX4 Tax 4 total of refund entries 16 characters TAX4 Net tax 4 total TX4 EXPT Exempt tax 4 TAX5 ST Net taxable 5 subtotal GRS TAX5 Gross tax 5 total RFD TAX5 Tax 5 total of refund entries TAX5 Net tax 5 total TX5 EXPT...
- Page 176 GRS TAX13 Gross tax 13 total 16 characters RFD TAX13 Tax 13 total of refund entries TAX13 Net tax 13 total TX13 EXPT Exempt tax 13 TAX14 ST Net taxable 14 subtotal GRS TAX14 Gross tax 14 total RFD TAX14 Tax 14 total of refund entries TAX14 Net tax 14 total...
- Page 177 * TTL TAX Tax total 16 characters N E T N E T 2 Sales total including tax total CP PLU Coupon-like PLU V. CP UPC Vender coupon UPC V O I D Void mode R F N D Refund mode HASH VD Hash direct void HASH PRVD...
- Page 178 DEPT(-) (-)Dept total 16 characters * HASH TL Hash (+)Dept total HASH(-) Hash (-)Dept total * BTTL TL Bottle (+)Dept total BTTL(-) Bottle (-)Dept total * NT TL Non turnover total SUBTOTAL Subtotal MDSE ST Merchandise subtotal NON-TURN Non-turnover subtotal *** TOTAL Total CHANGE...
- Page 179 BREAK-OUT Break-out 16 characters BREAK PD Break-in/paid LABOR% Labor% SHIFT-OPEN Shift-open SHIFT-CLS Shift-close TRANSFER Cash transfer VAT EXPT VAT exempt TARE WT. Tare weight RCP S.W. Receipt switch FREE GLU Free GLU AVE SALE Average sales ST(-) TL ST(-) total ST % TL ST % total ITEM(-) TL...
- Page 180 COUPON IS Coupon is 16 characters CCD DIF. CCD DIFFER DIF. TL CCD DIFFER total SCM (+) SCM(+) SCM (-) SCM(-) SCM TTL SCM total SALES/COST Sales/cost (food cost REPO.) G L U # GLU text C A R # Drive thru text GIFT RF Gift refund...
-
Page 181: Header Logo Text
I I I I I Header logo text ➝ ➝ (8 TEXT EDITOR 3 LOGO TEXT 1 HEADER LOGO ..PGM2) (1) Select the PGM2 mode and touch the [2 POS SETTING] to perform the programming. (2) Touch the [8 TEXT EDITOR] button to display the menu, and touch the [3 LOGO TEXT] button to display the detail menu. -
Page 182: Bill Footer Logo Text
I I I I I Bill footer logo text ➝ ➝ ➝ (8 TEXT EDITOR 3 LOGO TEXT 3 BILL LOGO 1 BILL FOOTER ..PGM2) (1) Select the PGM2 mode and touch the [2 POS SETTING] to perform the programming. (2) Touch the [8 TEXT EDITOR] button to display the menu, and touch the [3 LOGO TEXT] button to display the detail menu. -
Page 183: Receipt Printer
I I I I I Receipt printer ➝ (4 PRINTERS 1 RECEIPT PRINTER ..PGM1) ➝ ➝ (9 SYSTEM 1 PRINTERS 1 RECEIPT PRINTER ..PGM2) (1) Select the PGM1 or PGM2 mode and touch the [2 POS SETTING] to perform the programming. (2) In the PGM1 mode, touch the [4 PRINTERS] button to display the menu, and touch the [1 RECEIPT PRINTER] button to program for the receipt printer. -
Page 184: Journal Printer
I I I I I Journal printer ➝ (4 PRINTERS 2 JOURNAL PRINTER ..PGM1) ➝ ➝ (9 SYSTEM 1 PRINTERS 2 JOURNAL PRINTER ..PGM2) (1) Select the PGM1 or PGM2 mode and touch the [2 POS SETTING] to perform the programming. (2) In the PGM1 mode, touch the [4 PRINTERS] button to display the menu, and touch the [2 JOURNAL PRINTER] button to program for the journal printer. -
Page 185: Bill Printer
I I I I I Bill printer ➝ (4 PRINTERS 3 BILL PRINTER ..PGM1) ➝ ➝ (9 SYSTEM 1 PRINTERS 3 BILL PRINTER ..PGM2) (1) Select the PGM1 or PGM2 mode and touch the [2 POS SETTING] to perform the programming. (2) In the PGM1 mode, touch the [4 PRINTERS] button to display the menu, and touch the [3 BILL PRINTER] button to program for the bill printer. -
Page 186: Report Printer
I I I I I Report printer ➝ (4 PRINTERS 4 REPORT PRINTER ..PGM1) ➝ ➝ (9 SYSTEM 1 PRINTERS 4 REPORT PRINTER ..PGM2) (1) Select the PGM1 or PGM2 mode and touch the [2 POS SETTING] to perform the programming. (2) In the PGM1 mode, touch the [4 PRINTERS] button to display the menu, and touch the [4 REPORT PRINTER] button to program for the report printer. -
Page 187: Kitchen Printer
I I I I I Kitchen printer ➝ (4 PRINTERS 5 KP#1 to 13 KP#9 ..PGM1) ➝ ➝ (9 SYSTEM 1 PRINTERS 5 KP#1 to 13 KP#9 ..PGM2) (1) Select the PGM1 or PGM2 mode and touch the [2 POS SETTING] to perform the programming. (2) In the PGM1 mode, touch the [4 PRINTERS] button to display the menu, and touch the [5 KP#1] thru [13 KP#9] button to program for the kitchen printer. -
Page 188: Chit Format
I I I I I Chit format ➝ (4 PRINTERS 14 CHIT FORMAT ..PGM1) ➝ ➝ (9 SYSTEM 1 PRINTERS 14 CHIT FORMAT ..PGM2) (1) Select the PGM1 or PGM2 mode and touch the [2 POS SETTING] to perform the programming. (2) In the PGM1 mode, touch the [4 PRINTERS] button to display the menu, and touch the [14 CHIT FORMAT] button to program for the chit format. -
Page 189: Coin Dispenser
I I I I I Coin dispenser ➝ ➝ (9 SYSTEM 2 DEVICE CONFIGURATIONS 2 COIN DISPENSER ..PGM2) (1) Select the PGM2 mode and touch the [2 POS SETTING] to perform the programming. (2) Touch the [9 SYSTEM] button to display the menu, and touch the [2 DEVICE CONFIGURATIONS] button to display the detail menu. -
Page 190: E-Pay Device Type1 (Omni)
I I I I I E-pay device type1 (OMNI) ➝ ➝ (9 SYSTEM 3 EPAY DEVICE PRESET 1 TYPE#1 ..PGM2) (1) Select the PGM2 mode and touch the [2 POS SETTING] to perform the programming. (2) Touch the [9 SYSTEM] button to display the menu, and touch the [3 EPAY DEVICE PRESET] button to display the detail menu. -
Page 191: E-Pay Device Type2 (Data Tran)
I I I I I E-pay device type2 (DATA TRAN) ➝ ➝ (9 SYSTEM 3 EPAY DEVICE PRESET 2 TYPE#2 ..PGM2) (1) Select the PGM2 mode and touch the [2 POS SETTING] to perform the programming. (2) Touch the [9 SYSTEM] button to display the menu, and touch the [3 EPAY DEVICE PRESET] button to display the detail menu. -
Page 192: E-Pay Device Type3 (Pnc-330)
I I I I I E-pay device type3 (PNC-330) ➝ ➝ (9 SYSTEM 3 EPAY DEVICE PRESET 3 TYPE#3 ..PGM2) (1) Select the PGM2 mode and touch the [2 POS SETTING] to perform the programming. (2) Touch the [9 SYSTEM] button to display the menu, and touch the [3 EPAY DEVICE PRESET] button to display the detail menu. -
Page 193: E-Pay Device Ic Card
I I I I I E-pay device IC card ➝ ➝ (9 SYSTEM 3 EPAY DEVICE PRESET 5 IC CARD ..PGM2) (1) Select the PGM2 mode and touch the [2 POS SETTING] to perform the programming. (2) Touch the [9 SYSTEM] button to display the menu, and touch the [3 EPAY DEVICE PRESET] button to display the detail menu. -
Page 194: E-Pay Device Card Reader
I I I I I E-pay device card reader ➝ ➝ (9 SYSTEM 3 EPAY DEVICE PRESET 7 CARD READER ..PGM2) (1) Select the PGM2 mode and touch the [2 POS SETTING] to perform the programming. (2) Touch the [9 SYSTEM] button to display the menu, and touch the [3 EPAY DEVICE PRESET] button to display the detail menu. -
Page 195: Ocb Preset
I I I I I OCB preset ➝ (9 SYSTEM 5 OCB PRESET ..PGM2) (1) Select the PGM2 mode and touch the [2 POS SETTING] to perform the programming. (2) Touch the [9 SYSTEM] button to display the menu, and touch the [5 OCB PRESET] button to program. (3) Touch the required program item, and enter each parameter and touch the [ENTER] key. -
Page 196: On-Line Preset
I I I I I On-line preset ➝ (9 SYSTEM 7 ONLINE SETTING ..PGM2) (1) Select the PGM2 mode and touch the [2 POS SETTING] to perform the programming. (2) Touch the [9 SYSTEM] button to display the menu, and touch the [7 ONLINE PRESET] button to program. -
Page 197: Data Clear
The DATA CLEAR is chiefly used for clearing data in the event some system trouble occurred. Use the following procedure to perform the data clear operation only when instructed by your authorized SHARP dealer. (1) Select the menu “POS SETTING” in the PGM2 mode, the job menu window is displayed. -
Page 198: Automatic Sequencing Key Programming
Automatic Sequencing Key Programming If you program frequently performed key operations for the AUTO keys, you can enter those key operations simply by pressing the corresponding AUTO keys in key operations. To program an automatic sequencing key is as follows: (1) Select the menu “AUTO KEY”... -
Page 199: Reading Stored Programs
Reading Stored Programs You can read programs stored in the PGM1 or PGM2 mode. (1) Select the menu “POS READING” in the PGM1 or PGM2 mode, the job menu window is displayed. (2) Select the required reading menu, the output device selection window is displayed. Select the output device “DISPLAY/REPORT PRINTER”. - Page 200 PGM2 mode 6 POS FUNCTIONS 1 TAX 2 MEDIA 3 CONVERSION 4 FUNCTIONS 5 NEGATIVE# 6 POSITIVE# 7 TERMINAL 1 REPORTS 2 MAINTENANCE 3 TERMINAL 4 OPTIONAL SETTING 5 GLU/D-THRU CODE 8 TEXT EDITOR 1 REVENUE CENTER TEXT 2 FUNCTION TEXT 3 LOGO TEXT 4 SORT GROUP TEXT 9 SYSTEM...
-
Page 201: Unit Price Mode Programming
Unit Price Mode Programming The UNIT PRICE mode programming is mainly used for daily changes of the PLU’s unit price. The programming procedure of unit prices for PLUs is as follows. (1) Select the “UNIT PRICE” mode in the mode selection window, the programming window is displayed. (2) To select the screen touch the [SELECT SCREEN] key and select the required screen. -
Page 202: Data Saving Or Loading (Sd Card)
Data Saving or Loading (SD Card) The POS terminal data can be saved to the SD memory card, and the programming data can be loaded from the SD memory card. To use the SD memory card function, select the “SD CARD” mode in the mode selection window and perform the following operations. -
Page 203: Folder Creating
I I I I I Folder creating The master folder can be created for the data file. (¥SHARP¥ECRmmmm¥nnnnnnnn¥: mmmm/machine no., nnnnnnnn/folder code) (1) Select the “FOLDER CONTROL” menu in the “SD CARD” mode, the folder control menu window is displayed. -
Page 204: Operator Maintenance
Operator Maintenance In Case of Power Failure When power is lost, the POS terminal retains its memory contents and all information on sales totals. • When power failure is encountered in the POS terminal idle state or during an entry, the POS terminal returns to the normal state of operation after power recovery. -
Page 205: Options
List of Options The following Sharp options are available for your POS terminal: Please do not try to install options yourself. For further details about additional options not listed below, contact your SHARP dealer. 1. External thermal printer models ER-01PU/ER-01PUG 2. -
Page 206: Specifications
Specifications Model: UP-3500 12.5(W) × 12.3(D) × 11.6(H) in. approximately External dimensions: (317(W) × 313(D) × 294(H) mm) Weight: Approximately 10.1 lb. (4.6 kg) (excluding the AC adapter) Power source: 120V AC ±10%, 60 Hz Power consumption: Stand-by: 6.5 W... - Page 207 Sharp. You should be aware, however, that Sharp does not itself extend any warranties, either express or implied, directly to you, the end-user, and no one is author- ized to make any representations or warranties on behalf of Sharp.
- Page 208 SHARP ELECTRONICS CORPORATION Sharp Plaza, Mahwah, New Jersey 07430-2135 1-800-BE-SHARP http://www.sharp-usa.com SHARP CORPORATION UP3500U_MIE10 www.cashregisters.net...