Sharp UP-3500 Instruction Manual
Pos terminal
Hide thumbs
Also See for UP-3500:
- Instruction manual (269 pages) ,
- Instruction manual (59 pages) ,
- Instruction manual (208 pages)
Table of Contents
Advertisement
Quick Links
Advertisement
Table of Contents

Related Manuals for Sharp UP-3500


Summary of Contents for Sharp UP-3500
- Page 1 POS TERMINAL MODEL UP-3500 INSTRUCTION MANUAL Second Edition...
- Page 2 CAUTION: Please observe the following when an optional drawer is used. The drawer unit should be securely fitted to the supporting platform to avoid instability when the drawers are open. CAUTION: The socket-outlet shall be installed near the equipment and shall be easily accessible. VORSICHT: Die Netzsteckdose muß...
-
Page 3: Introduction
• Do not drop this terminal nor subject it to any strong shock. This may cause damage to the terminal. • Do not apply excessive pressure to the display. Do not use a sharp-pointed object on the display. This may cause damage to the LCD display. -
Page 4: Table Of Contents
CONTENTS INTRODUCTION ··········································································································································· 1 IMPORTANT ················································································································································· 1 PRECAUTION ·············································································································································· 1 CONTENTS ·················································································································································· 2 1. Part Names and Functions ··················································································································· 7 External View ······································································································································· 7 Front view ···································································································································· 7 Rear view ····································································································································· 7 Displays ··············································································································································· 9 Operator display (touch panel) ···································································································· 9 Customer display ·······················································································································... - Page 5 PLU menu keys (categories) ····································································································· 51 PLU level shift (for direct PLUs) ································································································ 52 Price level shift ··························································································································· 54 Condiment entries ······················································································································ 56 Pint entries ································································································································· 59 Happy hour ································································································································ 60 Crate entries ······························································································································ 61 Display of Subtotals ··························································································································· 63 Subtotal ······································································································································...
- Page 6 Supervisor Clerk ······························································································································ 125 Overlapped Clerk Entry ··················································································································· 126 6. Corrections ········································································································································ 127 Correction of Entries ························································································································ 127 Subtotal Void ···································································································································· 129 Correction of Incorrect Entries Not Handled by the Direct, Indirect or Subtotal Void Function ······· 129 7. Special Printing Function ················································································································· 130 Receipt ON/OFF ······························································································································...
- Page 7 PLU/EAN stock ························································································································ 221 EAN delete ······························································································································· 222 Direct key ································································································································· 223 Discount key ((-)1 through (-)9) ······························································································· 224 Percent key (%1 through %9) ·································································································· 224 Group discount key (GDSC%1 through GDSC%9) ································································· 225 Commission ····························································································································· 225 Miscellaneous functions (deposit, RA, PO, cash tip, non-cash tip, cash in drawer, check change) ·························································································································...
- Page 8 Scrolling message for pole display ·························································································· 276 Scrolling message for main display ························································································· 276 Function menu key ·················································································································· 277 Function key text/color ············································································································· 277 Journal printer ·························································································································· 278 Receipt/report printer ··············································································································· 279 Bill printer ································································································································· 280 Remote printer ························································································································· 281 BCR (SCANNER) ····················································································································...
-
Page 9: Part Names And Functions
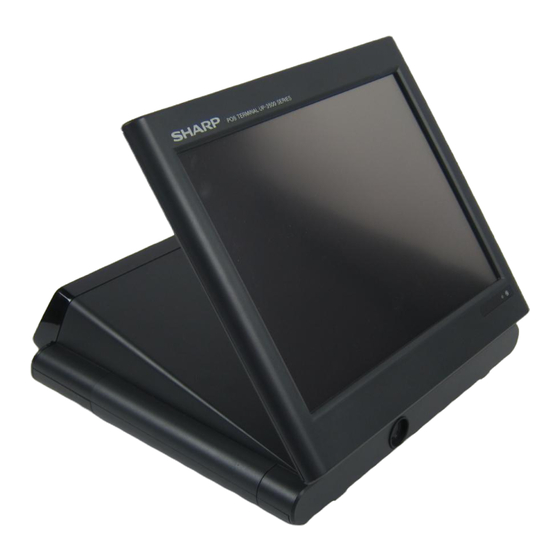
Part Names and Functions This chapter describes the part names and functions of this POS terminal. External View I I I I I Front view Operator display (touch panel) Power indicator Contactless clerk switch I I I I I Rear view Side cover Bottom cabinet AC adapter jack... - Page 10 Contactless clerk switch Contactless clerk switch is used with contactless clerk keys. Contactless clerk key Put the key to the contactless clerk switch. Contactless clerk key (optional) How to open the side cover While moving the side cover release lever towards you, pull the side cover and rotate the cover upward as shown Side cover in the illustration at the right.
-
Page 11: Displays
Displays This POS terminal is equipped with a color LCD operator display. The operator display is a touch panel. Operations can be performed by touching the screen (that shows keys or items in the window) of the operator display. I I I I I Operator display (touch panel) •... - Page 12 Ten key pad window: The Ten key pad is used to enter various numerical data (e.g. clerk code, amounts, quantities). When numeric entries are necessary (e.g. secret code is forced), the ten key pad pops up automatically. Clerk code/name Numeric entry: The entry displays here. •...
- Page 13 • • • • • Programming screen • • • • • C haracter entry screen The character entry screen is used when you need to enter text data. Screen example:...
-
Page 14: Customer Display
The preview of the key text (When the [PREVIEW] key is touched, the display is updated.) I I I I I Customer display There are two customer display options available for the UP-3500. The pole type customer display or an integrated type rear display can be installed. -
Page 15: Clerk Keys
* The WMF clerk key is not a SHARP product. The standard POS terminal comes with a combination of the contactless clerk key and clerk code entry systems by default. If you want to change the clerk identification system, contact your authorized SHARP dealer. -
Page 16: Before Operating The Pos Terminal
Before Operating the POS Terminal This chapter describes those steps required prior to using the POS terminal for the first time. Display Adjustment The display may be positioned for the best viewing angle. The allowable tilt angle of the display is within 53 degrees as shown in the illustration at the right. -
Page 17: Selecting An Operating Mode
Selecting an Operating Mode The POS terminal will display the following listing by touching the [MODE] key. Mode selection window: Operating Mode You can select any mode other than REG from the list in the mode selection window. Your POS terminal supports the following operating modes: This mode allows you to enter various sales information. -
Page 18: Mode Selection
Mode Selection I I I I I Selecting a mode Touch the [MODE] key. The following mode screen is displayed. Select the mode and touch it in the window to operate the desired function. When you want to enter the REG mode, simply touch the [EXIT] key. -
Page 19: Prior To Making Entries
Prior to Making Entries Preparations for Entries Ensure that all printers in your system have adequate paper rolls prior to beginning entries. For more information, please refer to the applicable printer’s manual. Error Warning In the following examples, your POS terminal will go into an error state accompanied with a warning beep and the error message on the display. -
Page 20: Entering A Secret Code
Entering a Secret Code When a secret code has been set for the assigned clerk, you must enter the secret code and touch the [ENTER] key. -
Page 21: Entries
This POS terminal provides the several types of basic screens for various functions or modes. For example: · REG mode screen (HOME screen) · Mode screen · Payment key screen etc. If you want to change the layout, consult your authorized SHARP dealer. Screen transitions (example) Mode screen [MODE] [EXIT] [PAY]... -
Page 22: Function Key List (Using Default Key Labels)
I I I I I Function key list (using default key labels) Classification Description Function TEN KEY 0 through 9 Used to enter a numeric data (0 through 9). Used to enter a numeric data (00). Used to enter a numeric data (000). •... - Page 23 Classification Description Function PLU MENU PLU_MENU01 through Used to display the PLU menu (nn). PLU_MENU50 (nn: 01 through 50) PLU_EAN Specified item(PLU/EAN) number DEPT# Used to enter the department number. SCALE Scale entry OPEN _TARE Scale entry, tare weight entry WITH Add tied PLU for combo/set PLU.
- Page 24 Classification Description Function PAYMENT CASH_TOTAL Cash CASH CASH n Cash (n: 2 -5) CHECK CHECK Check CHECK n Check (n: 2 - 5) CREDIT CREDIT n Credit (n: 1 - 9) EXCHANGE EXCH n Used to creates a subtotal in foreign currency (n: 1 - 9). CASH_TIP Used to enter the cash tip.
- Page 25 Classification Description Function GUEST# Used to enter the guest number. RECALL_TRANS. Used to re-call the corresponding transaction. INTER_MED. Intermediate GLU key B.T. Bill totalizing B.S._ITEM Bill separation by items B.S._AMOUNT Bill separation by amount B.S._PERSON Bill separate by person B.S._RETURN Used to return B.S.
-
Page 26: How To Use The Touch Panel
Do not use extreme force when touching the display. Do not use any sharp or pointed objects, and avoid using your fingernails to touch the display. I I I I I Cursor control by touching option(s) or item(s) in the window You can select option(s) or item(s) by touching corresponding line(s) in the window as follows. -
Page 27: Clerk Assignment (Sign-On/Sign-Off)
Clerk Assignment (Sign-on/Sign-off) I I I I I Clerk assignment Prior to any item entries, a clerk must enter his/her clerk codes into the POS terminal. On your POS terminal, You can use any of the following procedures to assign your clerk code. •... - Page 28 • In the clerk code entry type, if another clerk is signed on while a clerk is signed on, the latter will automatically be signed off. • If you want to enter a clerk code before every transaction, consult your authorized SHARP dealer. • Your POS terminal can provide the clerk + cashier system instead of current system (clerk only system).
-
Page 29: Item Selection From The Menu
Item Selection from the Menu Your POS terminal allows you to select PLU items/functions/auto-keys from a menu. For example, if you want to enter the function from a menu, touch the corresponding menu key to display the menu and touch the function key. -
Page 30: Starting Cash Memory Entry
Starting Cash Memory Entry If you enter the amount of currency for the starting amount in the drawer before entry operations, you can separate that amount from the sales amount when reports are generated. Your POS terminal can be programmed to enforce the entry of starting cash into memory. 1) Touch the [OPXZ] mode to display the SCM job menu screen. -
Page 31: Item Entries
Item Entries I I I I I Registration screen Item (direct PLU) key Receipt window The registration screen can be changed to another registration screen by using the [SCREEN n] key or ➝ ➝ screen# entries ( Screen no. [SCREEN#]). I I I I I Single item entries •... - Page 32 • • • • • Direct PLU entries ➝ For “preset only type”: [Direct PLU key] ➝ ➝ For “open only type”: Unit price [Direct PLU key] ➝ ➝ ➝ For “open and preset type” (open price entry): Unit price [AMOUNT] [Direct PLU key] ➝...
- Page 33 • • • • • EAN entries ➝ By scanning EAN code: (Scan EAN code) ➝ ➝ By EAN code entry: EAN code [PLU_EAN] • EAN code: max. 13 digits + 5 digits (add-on code) • When you enter or scan an undefined code, (if the terminal is programmed for the learning function as “yes”,) you are required to enter its unit price and the associated department.
-
Page 34: Repeat Entries
I I I I I Repeat entries You can use this function for repetitive entries (department, PLU/EAN) of the same items. Multiple items can also be repeated by using the [ + ] key. Touch the [ + ] (or same key: department, PLU/EAN) key after an item entry, or touch the desired item(s) on the receipt window, then touch the [ + ] key. -
Page 35: Multiplication Entries
I I I I I Multiplication entries Use this feature when you need to enter two or more of the same items. This feature helps you when you sell multiples of items or need to enter quantities that contain decimals. When the kitchen printer is used under “Issuing S/D receipts by the number of times of multiplication: Yes”... - Page 36 • • • • • EAN entries ➝ ➝ ➝ By scanning EAN code: Q’ty [X/QTY] (Scan EAN code) ➝ ➝ ➝ ➝ By EAN code entry: Q’ty [X/QTY] EAN code [PLU_EAN] • EAN code: max. 13 digits + 5 digits (add-on code) •...
-
Page 37: Split-Pricing Entries
I I I I I Split-pricing entries You will use this function when your customer wants to purchase more or less than the base quantity of a loose item. • • • • • Department entries For “using a programmed unit price”: ➝... - Page 38 • • • • • EAN entries ➝ ➝ ➝ ➝ ➝ By scanning EAN code: Selling q’ty [X/QTY] Base q’ty [X/QTY] (Scan EAN code) ➝ ➝ ➝ ➝ ➝ ➝ By EAN code entry: Selling q’ty [X/QTY] Base q’ty [X/QTY] EAN code [PLU_EAN]...
-
Page 39: Successive Multiplication Entries
I I I I I Successive multiplication entries This function is practical for example when you enter a sale of items sold by area (square meter). • • • • • Department entries For “using a programmed unit price”: ➝ ➝... - Page 40 • • • • • EAN entries ➝ ➝ ➝ ➝ ➝ By scanning EAN code: Length [X/QTY] Width [X/QTY] (Scan EAN code) ➝ ➝ ➝ ➝ ➝ ➝ By EAN code entry: Length [X/QTY] Width [X/QTY] EAN code [PLU_EAN] •...
-
Page 41: Scale Entries
I I I I I Scale entries This function is used to sell items by weight. There are two types of weight entry systems available; auto scale entries and manual scale entries. Auto scale entry is used when the weight is read automatically from the connected scale (option). -
Page 42: Single Item Cash Sale (Sics)/Single Item Finalize (Sif) Entries
Key Operation Display 3 [SCALE] 1 [PLU_EAN] [CASH_TOTAL] I I I I I Single item cash sale (SICS)/single item finalize (SIF) entries The operation is the same as that for normal department/PLU/EAN entries. The SICS and SIF functions can be available only when the KP receipt type is “addition receipt type.” •... -
Page 43: Non-Turnover Sales
In this case, a clerk once pays the bill and demands together with other payment. It is performed by entering a department belonging to the non-turnover group or PLU belonging to the department. If you need this function, contact your authorized SHARP dealer. -
Page 44: Special Entries For Plu/Ean
Special Entries for PLU/EAN I I I I I Promotion function You have a choice of either global or individual type for promotion entry. You also need to select a promotion type from the following: Amount discount : discounts the programmed amount. Percent discount : discounts the amount at the programmed percent rate. - Page 45 • • • • • Individual type This function is convenient for matching several PLU/EAN items and selling them in a lump (e.g. value meal etc.). Operation is the same as for normal PLU/EAN. The promotion table consists of the text for the table, a maximum of 25 objected items (selected from PLU/EAN, department or group), trip levels (the number of entries to be satisfied) for each item, promotion type and promotion detail.
-
Page 46: Plu/Ean Link Entries
I I I I I PLU/EAN link entries In case that you register a PLU or EAN that has any PLU linked with the PLU or EAN, the linked PLU(s) are automatically registered together with the leading link PLU or EAN when it is registered. The print format on the receipt depends on the programming (PRINT SELECT2 in OPTIONAL menu in PGM2 mode) as described below. -
Page 47: Ean Learning Function
I I I I I EAN learning function When you enter or scan an undefined code, you are required to enter its unit price and the associated department. The code, associated department and unit price entered are stored in the EAN file or the dynamic EAN file and used for future EAN sales entries. -
Page 48: Ean/Itf-To-Plu Conversion
I I I I I EAN/ITF-to-PLU conversion EAN/ITF-to-PLU conversion allows you to convert an EAN/ITF code to a PLU code. • Link an EAN/ITF code to a PLU code in the EAN/ITF-to-PLU converting table to use this function. • Follow the same key procedure as for ordinary EAN entries. •... -
Page 49: Plu/Ean Information Inquiry (View) Function
I I I I I PLU/EAN information inquiry (view) function You can use this function when you want to know the unit price of the PLU/EAN item during transaction. The PLU/EAN can be registered in VIEW mode. The unit price of a PLU/EAN can be temporarily changed. The programmed unit price is not changed. -
Page 50: Ean Price Change Function
I I I I I EAN price change function You can use this function when you need to change the preset price and/or associated department of an EAN item. The programmed price and/or associated department is changed to the new ones. There are two methods for change: 1. -
Page 51: Combo Meal Plu/Ean Entries
I I I I I Combo meal PLU/EAN entries Operation is the same as that for normal PLU/EAN entries. When a Combo meal PLU/EAN is entered, the labels of those PLUs tied to the Combo PLU/EAN are printed automatically. The sum of all adjusted prices (of those PLUs tied to the Combo PLU) becomes the “combo”... -
Page 52: With/Without Entries
I I I I I With/without entries This function is used to add/delete tied PLU(s) to/from a Combo PLU/EAN. The with/without function is used to change the tied PLUs of the combo PLU/EAN in compliance with a special request made by a guest or to meet other situations. The following two types are available: With: This entry adds one of the tied PLUs to combo PLU/EAN. -
Page 53: Plu Menu Keys (Categories)
I I I I I PLU menu keys (categories) Items can be categorized into PLU menu keys for ease of registration. A PLU menu key can contain both PLU items and other PLU menu keys. This can make a PLU menu tree of choices. -
Page 54: Plu Level Shift (For Direct Plus)
I I I I I PLU level shift (for direct PLUs) This shift can double or triple the number of direct PLUs on your POS terminal without adding additional direct PLU keys. You can use direct PLUs in ten levels by utilizing the PLU level shift number key [LEVEL#] or the PLU level shift keys [LEVEL1] through [LEVEL10]. - Page 55 When the POS terminal has been programmed for the automatic return mode (by one item): Key Operation Display ➝ Level 1 key [PLU 00001 ] ➝ Level 2 key [LEVEL2] [PLU 00051 ] ➝ Level 1 key [PLU 00002 ] [CASH_TOTAL] When the POS terminal has been programmed for the lock shift mode: Key Operation...
-
Page 56: Price Level Shift
I I I I I Price level shift Eight different price levels can be programmed for each PLU/EAN. The price levels can be changed for PLU/EAN registrations. You can shift the PLU/EAN price level (level 1 through 8) by utilizing the price level shift number key [PRICE_SHIFT#] or the price shift keys [PRICE_SHIFT1] through [PRICE_SHIFT8]. - Page 57 When the POS terminal has been programmed for the automatic return mode (by one item): Key Operation Display ➝ Price level 1 [PLU 00001 ] ➝ Price level 2 [PRICE_SHIFT2] [PLU 00001 ] ➝ Price level 1 [PLU 00002 ] [CASH_TOTAL] When the POS terminal has been programmed for the lock shift mode: Key Operation...
-
Page 58: Condiment Entries
I I I I I Condiment entries The terminal may be programmed for prompting condiment and instructions for a menu-item PLU. Example: When you enter a menu-item PLU, a message such as “HOWCOOK?” is prompted and a list of the “Condiment PLUs”... - Page 59 When the [C NEXT] key is touched, the entry skips to the next table which is programmed. When the [CANCEL] key is touched, its condiment entry is canceled. When you enter a PLU priced at “0.00,” only the text will be printed on the receipt. •...
- Page 60 Key Operation Display [PLU 00021 ] [RARE] [MASHED.P] [CASH_TOTAL]...
-
Page 61: Pint Entries
To perform this function, touch the [HALF_PINT] key and enter an item assigned a PLU/EAN code for which you have programmed a pint price and a pint quantity. The price for the pint quantity will appear on the receipt. For details, contact your authorized SHARP dealer. < FF method (for speedy entries) >... -
Page 62: Happy Hour
I I I I I Happy hour If the date/time range is programmed for each happy hour, the price corresponding to the price level is automatically registered within the time range. When the entry time becomes to be out of the time range, the price level returns to the level before the time range: You can program “Happy hour price shift: YES/NO”... -
Page 63: Crate Entries
I I I I I Crate entries Using the [CRATE#] or [CRATE01] through [CRATE99] key, you can sell bottles of drinks in a crate (A crate is a box for transporting and storing drink bottles). To use this function, you need to program the following items in the PGM2 mode: •... - Page 64 • • • • • Combination entries Use this type of entry to sell a crate of several kinds of drinks. Crate table no.: Crate PLU/EAN: PLU code 9 (preset price: 0.20) Number of bottles: PLU/EANs in the bottles: PLU code 10, 12, 13 (price level: 1) Price of the crate table: 5.50 Combination function: Crate table text:...
-
Page 65: Display Of Subtotals
Display of Subtotals Your POS terminal provides the following types of subtotals: I I I I I Subtotal Touch the [SUBTOTAL] key at any point during a transaction. The sales subtotal including tax will appear in the display. I I I I I Difference subtotal (Differ ST) Touch the [DIFFER_ST] key at any point during a transaction. -
Page 66: Finalization Of Transaction
Finalization of Transaction The following types of media can be used for the finalization of transactions. • Cash • Check • Credit (Charge) The direct finalization or the amount tendering can be performed to finalize the transaction. • • • • • Amount tendering Cash (n): Q’ty [X/QTY]... - Page 67 • • • • • Direct finalization ➝ Cash (n): [CASH_TOTAL] or [CASH n] (n: 2 - 5) ➝ Check (n): [CHECK] or [CHECK n] (n: 2 - 5) ➝ Charge (n): [CREDIT n] (n: 1 - 9) • The direct charge function is allowed when its media is programmed for prohibited tendering. Key Operation Display [SUBTOTAL]...
-
Page 68: Computation Of Vat (Value Added Tax)/Tax
I I I I I VAT/tax system The POS terminal may be programmed for the following six tax systems by your authorized SHARP dealer. • • • • • Automatic VAT 1 through 6 system (Automatic operation method using programmed percentages) This system, at settlement, calculates VAT for taxable 1, taxable 2, taxable 3, taxable 4, taxable 5, and taxable 6 subtotals by using the corresponding programmed percentages. -
Page 69: Vat Shift Entries
VAT6 system is selected.) • If you want to achieve the VAT shift at the end of transaction, contact your authorized SHARP dealer. • To program the initial status of the POS terminal to be in the VAT shift mode (Initial VAT SHIFT), please... -
Page 70: Guest Check (Glu)
Guest Check (GLU) Your POS terminal is provided the guest lookup (GLU) system. GLU system: The balance due and the details of the order are placed in the guest check file. The information can be automatically recalled by entering a guest check code (= a GLU code) when additional ordering occurs. - Page 71 Key Operation Display [N.C.] [PLU 00002 ] [PLU 00003 ] [NBAL] • • • • • Additional ordering [CANCEL] To cancel [ENTER] (Select the GLU code ( [OPENED_GLU] (Touch the GLU code) [ENTER] (Enter the GLU code) Guest no. entry GLU code [Item entries] [GLU]...
- Page 72 (When the GLU code is selected from the opened GLU list). Key Operation Display [OPENED_GLU] (Selection of “GLU#1001”) [PLU 00008 ] [CASH_TOTAL]...
-
Page 73: Room Glu Entry
I I I I I Room GLU entry • • • • • New order Guest no. entry Selection of the Room GLU code [Item entries] [ROOM] (max. 2 digits) price level (1 to 9999.9) [NBAL] [G.C._RCPT] [FINAL] [SLIP] XXXXXX [RA] [Payment operations] [VP]... - Page 74 Key Operation Display 5 [ROOM] [PLU 00008 ] [PLU 00007 ] [CASH_TOTAL] (When the room GLU code is selected from the opened room GLU list). Key Operation Display [OPENED_ROOM] (Selection of “room GLU#5”) [PLU 00008 ] [PLU 00007 ] [CASH_TOTAL]...
- Page 75 • • • • • Transfer the transaction to room GLU (hotel transfer) To cancel [CANCEL] [ENTER] (Select the room GLU code ( [Item entries] [OPENED_ROOM] (Touch the room GLU code) (Enter the room GLU code) [ENTER] Room GLU code [ROOM] (1 to 9999.9) Key Operation...
-
Page 76: Deposit Entries
I I I I I Deposit entries Deposit refers to a prepayment on a guest check. It can be received in cash or by check or credit (1 through 9). You can make a deposit entry only when entering a guest check. It cannot be done during handling of a tendered amount. -
Page 77: Transferring Guest Out Or In (Transfer-Out/In)
I I I I I Transferring guest check out or in (Transfer-out/in) Open guest checks can be transferred from a clerk to another clerk. This function may be convenient at the end of a clerk shift or whenever a clerk is relieved. It is possible to transfer one, several or all open tables. The clerk who has served the table must be signed on. -
Page 78: Bill Printing
• This function is available immediately after the finalization of transaction. • If the copy function is allowed, you can print the bill copy on slip and receipt only once. If you need the bill copy, contact your authorized SHARP dealer. Key Operation Print [G.C._RCPT]... -
Page 79: Intermediate Glu Reading
I I I I I Intermediate GLU reading This function is used for temporary inspection of the guest check. The details of the guest check can be printed on the receipt or the slip. 1) Touch the [INTER_MED.] key. The following window is displayed. 2) Select the GLU type (“normal GLU”... -
Page 80: Bill Totalizing/Bill Transfer
I I I I I Bill totalizing/bill transfer • • • • • Bill totalizing The bill totalizing function is used to totalize multiple bills when, for example, a particular guest pays not only his or her bill, but also the bills of other guests. [CANCEL] [B.T.] (Select the GLU code (... - Page 81 • • • • • Bill transfer This function is used to change the GLU code of a particular bill. [CANCEL] [ENTER] [B.T.] [OPENED_GLU] (Select the GLU code ( (Touch the GLU code) [ENTER] (Enter the GLU code) [GLU] (Enter the GLU code) (Enter the new GLU code) [GLU] [NBAL]...
-
Page 82: Bill Separating
I I I I I Bill separating This function is used when each guest of a group pays his or her own order. With this function, you can select some items from a guest check and make an entry for the payment. Also, you can transfer the items you have selected to other guest checks. - Page 83 Bill separating by item Key Operation Display 1001 [GLU] [B.S._ITEM] Touch the item to be separated. [ENTER]...
- Page 84 Touch the item to be separated. (PLU00006) Split q’ty → 2 [SPLIT] Touch the item. (PLU00006) 1 [ENTER] [CASH_TOTAL] [NBAL]...
- Page 85 Bill separating by amount Key Operation Display 1002 [GLU] [B.S._AMOUNT] 250 [ENTER] [CASH_TOTAL] [NBAL]...
- Page 86 Bill separating by person Key Operation Display 1003 [GLU] [B.S._PERSON] 2 [ENTER] Select “1. IND. PAYMENT” [CASH_TOTAL]...
- Page 87 [B.S._RETURN] [CASH_TOTAL]...
-
Page 88: Transaction Migration
I I I I I Transaction migration This POS terminal allows you to migrate the transaction of non-GLU type to the GLU file. [Item entries] For automatic GLU/PBLU code generation Guest no. entry GLU code [GLU] [Item entries] (max. 2 digits) (1 to 9999.9) [NBAL] [G.C._RCPT]... -
Page 89: Recall Transaction
I I I I I Recall transaction You can recall data of closed transactions. All payment operations are canceled for the recalled guest checks, and the transaction is opened again. Following operation are available after a recall: • To correct items •... -
Page 90: Ordering System
Ordering System I I I I I Customer advance ordering Perform this function to register a customer advance order. An ordering number is assigned to each customer advance order. Every time a new customer advance order is registered, an incremented ordering number is assigned to the order. If the order is finalized or canceled, the once-assigned ordering number will never be used again. - Page 91 • • • • • Additional ordering ➝ ➝ (Enter the ordering no.) [ADVANCE_ORDER] : The order record is appeared. Skip to the next step 2). If the order record is selected from the list, touch the [ADVANCE_ORDER] key without a ordering no. to display the list.
- Page 92 • • • • • Delete the order record 1) Touch the [ADVANCE_ORDER] key, the following window is displayed. 2) Select the order record and touch the [RECORD_DELETE] key. The confirmation message is displayed. To delete the order, select “YES”. To cancel the deletion, select “NO”. To cancel the operation, touch the [CANCEL] key.
-
Page 93: Credit Customer Advance Ordering
The customer number is six digits and the customer related consecutive number is 1 to 10 by default. They can be changed to five digits and 1 to 99 respectively by programming. To program the setting, please consult your authorized SHARP dealer. The customer related consecutive number is incremented every time a credit customer advance order is registered. - Page 94 • • • • • Additional ordering ➝ ➝ (Enter the customer code) [CREDIT_ORDER] : The order record is appeared. Skip to the next step 2). If the customer is selected from the list, touch the [CREDIT_ORDER] key without a customer code to display the list.
- Page 95 • • • • • Delete the order record ➝ ➝ (Enter the customer code) [CREDIT_ORDER] : The order record is appeared. Skip to the next step 2). If the customer is selected from the list, touch the [CREDIT_ORDER] key without a customer code to display the list.
-
Page 96: Article Order Masks
I I I I I Article order masks To use this function, please consult your SHARP authorized dealer. Article order masks are basically the data entry forms of orders to be sent from the POS terminal to the headquarters. They are also used for the forms of merchandise returns, inventories, delivery notes, etc. -
Page 97: Auxiliary Entries
Auxiliary Entries I I I I I Percent calculations (% premium or % discount) Your POS terminal provides percent calculations for a merchandise subtotal or each item entry. You need to program, in advance, for which merchandise subtotal or which item entry your POS terminal should perform a percent calculation. -
Page 98: Discount Entries (-)
I I I I I Discount entries ( - ) For item discount or subtotal discount, you can use the [( - ) n ] key when it is allowed by the programming. ➝ ➝ [( - ) n ] For item entries: (Item entry) Discount amount When the programmed discount amount is used, touch the [( - ) n ] key without entering... -
Page 99: Refund Entries
I I I I I Refund entries For a refund entry, touch the [REFUND] key just before you touch a department key, [DEPT#] key, direct PLU key or [PLU_EAN] key or just before you scan an EAN code. The operation before touching the [REFUND] key is the same as the one of normal operation. -
Page 100: Printing Of Non-Add Code Numbers
• You can void the free text by cursor or touching void operation. • You can enter free texts before item entry by default. If you want to enter free texts after item entry, please contact your authorized SHARP dealer. Key Operation... -
Page 101: Payment Treatment
Payment Treatment I I I I I Tip-in entries Your POS terminal allows the entry of tips that your guests give to clerks in cash or other media (check or credit). The tip in entry assumes that it is carried out in the following system: •... -
Page 102: Tip Paid Entries
I I I I I Tip paid entries This operation is used when tips that guests have paid by using credit card are paid to respective clerks in cash. To perform the tip paid entry, touch the [TIP_PAID] key in the MGR mode. Key Operation Display ➝... -
Page 103: Currency Exchange
I I I I I Currency exchange Your POS terminal allows payment entries in foreign currency after sales entry or during amount tendered entry. Touching the [EXCH1] through [EXCH9] keys creates a subtotal in foreign currency. Cash alone can be handled after currency conversion. -
Page 104: Received-On-Account Entries
RA by cash, check or credit. In either system, you cannot receive RA in foreign currency. When you want to use the cash only system, contact with your authorized SHARP dealer. • • • • • Mixed tendering system... - Page 105 • • • • • Cash only system ➝ ➝ RA amount (max. 8 digits) [RA] or [RA2] Key Operation Display 1234567 [ # ] 4500 [RA]...
-
Page 106: Paid-Out Entries
In either system, you must a PO entry only in a transaction. When you want to use the cash only system, contact with your authorized SHARP dealer. • • • • • Mixed media type... -
Page 107: No-Sale (Exchange)
I I I I I No-sale (exchange) Simply touch the [NO SALE] key without any entry. The drawer will be opened and the text of no-sale will be printed. When the no-sale function is programmed to “complex key type”, touch the [CASH_TOTAL] key instead of the [NO SALE] key. -
Page 108: Cashing A Check
I I I I I Cashing a check To use this function, please consult your authorized SHARP dealer, while you cannot use this function together with the cash transferring function. ➝ ➝ Check amount [CHECK 1] through [CHECK 5] Key Operation... -
Page 109: Service Charge
I I I I I Service charge When the payment operation is made for sales registrations, the service charge amount is calculated and printed. You can program a percent rate for calculating the service charge. If the percent rate is programmed as 0%, the POS terminal does not print any service charge. -
Page 110: Vip Sales
I I I I I VIP sales This function is used for transaction for the important guest who is free of charge. In this mode, any unit price is not counted. ➝ ➝ ➝ [VIP_SALE 1] through [VIP_SALE 3] [Item entries] [CASH_TOTAL] Key Operation Display... -
Page 111: Customer Management
Customer Management Your POS terminal can provide the customer management function. To enable the customer management function, enter the customer code assigned to a customer. You can enter the customer code at any point during a transaction. Normally customer information (name, code and address) are previously set by the programming. However, you can enter a new customer information during transaction. - Page 112 * If the customer name is not found in the list, the new record can be created by touching the [NEW] key, then the window is displayed to enter a new customer record. To cancel the operation, touch the [CANCEL] key. *If the customer record is not found in the list, the new record can be created in the following window.
-
Page 113: Basic Operations
I I I I I Basic operations Key Operation Print [CUSTOMER] 0800000000075 [ENTER] [PLU 00003 ] [CASH_TOTAL] • To enter a new customer code in the REG/MGR mode Key Operation Print [PLU 00003 ] [CUSTOMER] 0800000001232 [ENTER] [EDIT] NAME_5 [OK] [EDIT] ADDR_5 [OK] [OK] [CASH_TOTAL]... -
Page 114: Name And Address Printing On Receipt/Bill
I I I I I Name and address printing on receipt/bill To use this function, please consult your SHARP authorized dealer. This function allows you to print on the receipt or bill a name and address saved in the name and address file. - Page 115 Key Operation Display [PLU 00003 ] [NAME&ADD] [ OK ] Enter a name (In this example, “N” is entered) (The customer list is displayed.) Select the customer [ENTER] [PLU 00002 ] [CASH_TOTAL]...
-
Page 116: Customer Bill Printing
I I I I I Customer bill printing This function prints the data of customer transactions finalized with the [CUST_CHARGE] key. Enter a customer code for which you want to print the transaction data. The range of data to be printed can be specified by date. -
Page 117: Employee Function
Clerks or managers can be signed on by entering employee codes, or they can be signed on by using employee cards. To use an employee card, you need a magnetic card reader (MCR). Contact your authorized SHARP dealer. Use the following procedures: •... -
Page 118: Employee's Working Time Recording
I I I I I Employee’s working time recording You can manage the number of hours for which employees work. The working time can be recorded by the following operations: • • • • • Time-in/out and break-in/out operations The POS terminal allows a clerk to sign-on or off without checking the clerk’s time-in or out. •... - Page 119 5) Enter or select the clerk code in the following window. If the clerk is not assigned, enter “0” as a code. 6) If the working time shift window is displayed, select the working time shift from the list. 7) If the drawer selection window is displayed, select the drawer (or none). •...
- Page 120 • • • • • Break-in 1) Touch the [BREAK] key. The following window is displayed to enter the employee code. 2) Enter the employee code (max. 10 digits) and touch the [ENTER] key (or read the employee card). 3) If the secret code is requested, enter the secret code and touch the [ENTER] key in the following window.
- Page 121 • • • • • Time-edit operations A manager can edit employee’s time-in/out data to record his or her time correctly. 1) Select the “OPXZ” mode and touch the “EMPLOYEE” menu, then touch the “TIME EDIT” job. The following window is displayed. 2) Enter the manager code and secret code, then touch the [ENTER] key or the [CONTINUE] key.
-
Page 122: Employee's Working Time Shift
I I I I I Employee’s working time shift This function enables you to control the employees’ working time shifts. Working time shifts of a day are divided into a maximum of nine. You can also use this function to control CCD entries, forcing the employees to make those entries at this operation (CCD per shift). -
Page 123: Customer Relation Management
Customer Relation Management I I I I I Group discount entries The terminal provides the percent calculation (discount/premium) for associated group. Percentage: 0.01 to 100.00% (programmed rate) • • • • • Display of the group discountable subtotal ➝ ➝ [GR.DISC_SHIFT n] [SUBTOTAL] •... -
Page 124: Bonus Points
I I I I I Bonus points Customers can get redeemable bonus points for their purchases. There are the following two types of bonus points: • Bonus points to be given for purchasing specified PLU/EANs. • Bonus points to be given for purchasing more than the specified amount. For the former type, the number of bonus points to be given can be programmed in the PLU/EAN article programming. -
Page 125: Waste Mode
WASTE Mode This mode is used to throw away an article which has already been prepared and is no longer serviceable. [WASTE] [Item registration] [WASTE] WASTE mode • PLU entries are only allowed in the WASTE mode, and direct and indirect void operations are also allowed in this mode. -
Page 126: Training Mode
TRAINING Mode The training mode is used when the operator or the manager practices POS terminal operations. In case “clerk and cashier system” is applied to your POS terminal, cashiers can enter to the training mode. When a clerk/cashier set in training is selected, the POS terminal automatically enters the training mode, while a clerk/cashier not set in training is selected, the POS terminal automatically enters the ordinary REG mode. -
Page 127: Supervisor Clerk
Supervisor Clerk This function is used to substitute a supervisor clerk for an ordinary clerk. The supervisor clerk can make entry as an ordinary clerk by assigning the ordinary clerk code. You can use the supervisor clerk function only for substituting for an ordinary clerk. This function is available only in the real clerk key system. To use this function, insert a real clerk key assigned supervisor clerk, enter the ordinary clerk code and touch the [CLK#] key. -
Page 128: Overlapped Clerk Entry
Interrupt handling is possible only in the overlapped clerk entry. For actual use of this function, contact your authorized SHARP dealer. • The overlapped clerk entry is available only in the clerk entry system. -
Page 129: Corrections
Corrections Correction of Entries If you make an incorrect entry (relating to item entries, percent entries, amount discount entries, refund entries, return entries, manual amount tax entries, and tip entries), you can void or correct entries as follows. • • • • • Voiding the entry (1) Select the line of designated item in the receipt window. - Page 130 • • • • • Repeat the item entry (1) Select the line of designated item in the receipt window. (The selected line will be highlighted.) 1 PLU00001 1.00 1 PLU00002 2.00 1 PLU00003 3.00 (2) Touch the [ + ] key. 1 PLU00001 1.00 1 PLU00002...
-
Page 131: Subtotal Void
Subtotal Void You can void an entire transaction. Once subtotal void is executed, the transaction is aborted and the POS terminal issues a receipt. (1) Make item registrations (2) Touch the [SUBTOTAL] key. (3) Touch the [ - ] key. (4) Touch the [SUBTOTAL] key. -
Page 132: Special Printing Function
Special Printing Function Receipt ON/OFF The receipt ON(printing receipt)/OFF(no receipting) status can be toggled by touching the [RCPT_ONOFF] key. ➝ ➝ ➝ ➝ ➝ (Receipt ON) [RCPT_ONOFF] (Receipt OFF) [RCPT_ONOFF] (Receipt ON) Copy Receipt Printing If your customer wants a receipt after you have finalized a transaction with the receipt ON/OFF function in the “OFF”... -
Page 133: Guest Check Copy
1. Set a validation slip to the slip printer. 2. Touch the [VP] key. The validation printing will start. Programmed compulsory validation printing can be overridden by performing the following operation. If you need this function, contact your authorized SHARP dealer. ➝ [CANCEL]... -
Page 134: Barcode Printing
This function is used to print a barcode which encodes the total amount of the sales or the amounts of each department sales. The transaction must be finalized with the [CASH2] key. For details, please contact your authorized SHARP dealer. Key Operation... -
Page 135: Entertainment Bill
Entertainment Bill This function is used to print sales data on guest checks (Entertainment bill) on a receipt printer. ➝ ➝ [E. BILL] Print sample... -
Page 136: Type Of Receipt
Type of Receipt You can select one of the following five types of receipts. These types of receipts are available for the transaction receipt. By default, the addition receipt type is selected. • Addition receipt type • Single/double receipt type •... - Page 137 • • • • • Single/double receipt type When you select this type: • One receipt is issued and the transaction is finalized each time you enter an item. • A single receipt or a double receipt is issued depending on the PGM2 programming for the department. •...
- Page 138 • • • • • Addition + single receipt type When you select this type: • An addition receipt and each single receipt are issued in series after you finalize the transaction. • Footer logo message is printed at the end of the addition receipt part. •...
-
Page 139: Sorted Receipt Function
Sorted Receipt Function When the sorted receipt function is programmed for your POS terminal, PLUs are printed in sorted form by PLU group regardless of the order that you enter items. The sort group number is temporarily changed by using the [SORT SHIFT] key (Sort Shift function). ➝... - Page 140 • • • • • Addition + single receipt type This is printed immediately after entering the PLU of group “0”. This is printed when you touch the [G.C.RCPT] They are printed key after the when the transaction. transaction is (After transaction finalized.
-
Page 141: Electronic Journal
Electronic Journal This function is intended to record the journal data in electronic memory instead of journal paper. Also, this data is used instead of Transaction Log data. All transaction data and the operation log is kept in the Electronic Journal File. Electronic Mail When the information/status “M”... -
Page 142: Manager Mode
Manager mode The manager mode is used when managerial decisions must be made concerning POS terminal entries, for example, for overriding limitations and for other various non-programming managerial tasks. Normal POS terminal operations may also be performed in this mode. Entering the Manager Mode To enter the manager mode, use the following procedure in the REG mode: [MGR#]... -
Page 143: Tip Paid Entries
Tip Paid Entries This operation is used when tips that guests have paid by using media other than cash (check or credit) are paid to respective clerks in cash. You can make tip paid entries in the MGR mode only. The tips are paid to corresponding clerks according to their portions. -
Page 144: Correction After Finalizing A Transaction (Void Mode)
Correction after Finalizing a Transaction (Void mode) When you need to void incorrect entries that clerks cannot correct (incorrect entries that are found after finalizing a transaction or cannot be corrected by subtotal void), the following procedure can be performed in the MGR mode. -
Page 145: Reading (X) And Resetting (Z) Of Sales Totals
Reading (X) and Resetting (Z) of Sales Totals • Use the reading function (X) when you need to take the reading of sales information entered after the last resetting. You can take this reading any number of times. It does not affect the POS terminal’s memory. •... -
Page 146: Report List
I I I I I Report list Operating modes Report Description Data to be entered/(Remarks) OPX/Z X1/Z1 X2/Z2 GENERAL General report X1/Z1 X2/Z2 <Department> Department code DEPT./GROUP Department by group report (The range can be specified by entering start and end codes.) Individual department group DEPT. - Page 147 Operating modes Report Description Data to be entered/(Remarks) OPX/Z X1/Z1 X2/Z2 <Transaction> TRANSACTION Transaction report TL-ID Total-in-drawer report COMMISSION SALES Commission sales report Tax report CHIEF Chief report <Personnel> ALL CLERK All clerk report X1,Z1 X2,Z2 IND.CLERK Individual clerk report X1,Z1 X2,Z2 ALL CASHIER All cashier report...
- Page 148 Operating modes Report Description Data to be entered/(Remarks) OPX/Z X1/Z1 X2/Z2 Customer code Customer ordering report X2,Z2 (The range can be specified by (by specified code range) entering start and end codes.) CUSTOMER ORDERING Date Customer ordering report X2,Z2 (The range can be specified by (by specified date range) entering start and end date.) Stacked report 1...
-
Page 149: Daily Report Samples
Daily Report Samples I I I I I General report • • • • • Sample X report Read symbol Report title Dept. code Sales q’ty Ratio of dept. 1 sales amount to “+” dept. total Dept. description and sales amount Guest counter Item deduction q’ty Item deduction amount... - Page 150 “+” hash dept. counter and total “–” hash dept. counter and total “+” bottle return dept. counter and total “–” bottle return dept. counter and total Non-turnover 1 counter and total Non-turnover 2 counter and total Non-turnover 3 counter and total Report title Subtotal (–) counter and total Subtotal % counter and total...
- Page 151 Memory of difference due to rounding *1 Taxable 1 subtotal VAT 1 total Tax total Credit customer taxable 1 subtotal Credit customer VAT 1 total Credit customer tax total Net sales total without VAT VAT shift total Tax delete total Credit customer VAT shift total Credit customer tax delete total Service charge total...
- Page 152 Order total Paid total Paid total average per guest Order total – paid total Vip 1 sale Vip 2 sale Vip 3 sale Trans out counter and total Trans in counter and total Bill balance (Trans out – trans in) counter and total Starting cash memory (+) Starting cash memory (–) Starting cash memory total...
- Page 153 The subsequent printout occurs in the same format as in the sample X1 report. *1 Printed in case “Memory of difference due to rounding” is programmed. For details please consult your authorized SHARP dealer. *2 The following is printed in case add-on tax is included. For details please consult your authorized...
- Page 154 I I I I I Department by group report Dept. code Sales q’ty Dept. description Sales amount Guest counter Item deduction q’ty Item deduction amount Ratio of dept. 2 sales amount to “+” dept. total Group 1 total sales q’ty Ratio of dept.
- Page 155 “–” bottle return dept. counter and total Non-turnover 1 counter and total I I I I I Individual department group report Dept. code Sales q’ty Dept. description Sales amount Guest counter Item deduction q’ty Item deduction amount Group 1 text/sales q’ty and total Group 1 deduction total q’ty and total...
- Page 156 I I I I I Department group total report Group 1 text/sales q’ty and total “+” dept. counter and total “–” dept. counter and total “+” hash dept. counter and total “–” hash dept. counter and total “+” bottle return dept. counter and total “–”...
- Page 157 I I I I I PLU/EAN sales report by specified range When you take a Z report, “Z1” is printed instead of “X1”. PLU code PLU range Price level 1 description, sales q’ty and total Price level 1 waste q’ty and total Price level 2 description, sales q’ty and total Price level 2 waste q’ty and total Price level 3 description, sales q’ty and total...
- Page 158 EAN code Price level 1 description, sales q’ty and amount total Price level 1 waste q’ty and amount total Add-on code (5 digit) Add-on code (2 digit) Price level 2 description, sales q’ty and amount total Price level 2 waste q’ty and amount total Price level 3 description, sales q’ty and amount total Price level 3 waste q’ty and amount total Total for EAN sales...
- Page 159 Total for combo meal EAN sales I I I I I Combo sales report PLU code PLU range Price level 1 description, sales q’ty and total Price level 1 waste q’ty and total Price level 1 combo sales q’ty and total Price level 1 combo waste q’ty and total...
- Page 160 Total for price level 1 I I I I I PLU/EAN report by associated department When you take a Z report, “Z1” is printed instead of “X1”. Description of associated dept. Associated dept. code PLU code Price level 1 description, sales q’ty and total Price level 1 waste q’ty and total Price level 1 combo sales q’ty and total Price level 1 combo waste q’ty and total...
- Page 161 Total for price level 1 EAN code Price level 1 description, sales q’ty and total Price level 1 waste q’ty and total Add-on code (5 digit) Add-on code (2 digit)
- Page 162 Total for price level 1 I I I I I PLU/EAN individual group report PLU code Price level 1 description, sales q’ty and total Price level 1 waste q’ty and total EAN code Price level 1 description, sales q’ty and total Price level 1 waste q’ty and total Add-on code (5 digit) Add-on code (2 digit)
- Page 163 Group 8 sales q’ty and total Group 8 label Plus dept. total I I I I I PLU/EAN group total report Group 1 text Group 1 sales q’ty and total Plus dept. total I I I I I PLU/EAN stock report Range PLU code Stock q’ty...
- Page 164 I I I I I PLU/EAN top 20 sales report by sales amount Ranking PLU code Price level 1 description, sales q’ty and total Total sales q’ty and amount for price level 1...
- Page 165 I I I I I PLU/EAN top 20 sales report by sales quantity Ranking PLU code Price level 1 description, sales q’ty and total Total sales q’ty and amount for price level 1...
- Page 166 I I I I I PLU/EAN zero sales report PLU code Description Description EAN code I I I I I PLU/EAN zero sales report by associated department Description of dept. Associated dept. code PLU code I I I I I PLU/EAN minimum stock report Range PLU code Stock q’ty...
- Page 167 I I I I I PLU/EAN sales report by price category Price range...
- Page 168 I I I I I PLU/EAN hourly group report When you take a Z report, “Z1” is printed instead of “X1”. Time Transaction counter Sales total...
- Page 169 I I I I I Promotion PLU/EAN report Promotion sales counter and discount total Quantity for promotion sales...
- Page 170 I I I I I Transaction report Plus dept. total Minus dept. total Hash dept. total Hash minus total Bottle return dept. total Bottle return minus total Non-turnover 1 total In this report, the same transaction data as those printed in the general report are printed. I I I I I Total-in-drawer report Exchange 1 counter Currency exchange 1 total...
- Page 171 I I I I I Commission sales report Commission sale 1 total Commission amount 1 = Commission sale x Commission rate Commission amount total Non-commission sales amount...
- Page 172 I I I I I Tax report Net sales total Taxable 1 subtotal VAT 1 total Tax total Credit customer taxable 1 subtotal Credit customer VAT 1 total Credit customer tax total Net sales total without tax I I I I I Chief report Turnover amount per table Order total/used guest check Turnover amount per guest...
- Page 173 I I I I I All clerk report When you take a Z report, “Z1” is printed instead of “X1”. The subsequent items are printed out in the same format as in the individual clerk report from the clerk #1. In the all clerk report, the total sales of all clerks are also printed.
- Page 174 I I I I I Individual clerk report (In case of clerk only system) When you take a Z report, “Z1” is printed instead of “X1”. Clerk code Clerk name Order total Commission sale 1 total Commission amount 1 Commission amount total Non-commission sales amount Paid total Paid total average per guest...
- Page 175 Deposit (+) counter and total Deposit (–) counter and total Received-on-account counter and total Received-on-account (–) counter and total Received-on-account % counter and total Paid-out counter and total Starting cash memory (+) Starting cash memory (–) Starting cash memory total Service charge total Hotel transfer counter and total Cash counter and total...
- Page 176 Cash in drawer Cash + check in drawer Change total for check tendering Ticket total for change due Open GLU code Open room GLU code From here, the printing is selectable by programming; “PRINT ON CLK” in department and PLU/EAN programming in ARTICLE menu. When “YES”...
- Page 177 I I I I I All cashier report (In case of clerk + cashier system) When you take a Z report, “Z1” is printed instead of “X1”. The subsequent items are printed out in the same format as in the individual cashier report from the cashier #1.
- Page 179 I I I I I Hourly report When you take a Z report, “Z1” is printed instead of “X1”. Time Transaction counter Sales total Average of sales amount I I I I I Labor cost % report Time Transaction counter Employee cost Labor cost % Sales total...
- Page 180 I I I I I GLU report When you take a Z report, “Z1” is printed instead of “X1”. GLU code Range Clerk code PBAL Deposit (+) total Deposit (–) total “T” indicates that the transaction was handled by a clerk under training.
- Page 181 I I I I I Room GLU report When you take a Z report, “Z1” is printed instead of “X1”. Room GLU code Range Clerk code PBAL Deposit (+) total Deposit (–) total “T” indicates that the transaction was handled by a clerk under training.
- Page 182 I I I I I Balance report Grand total balance of the previous day Order total Paid total Old balance + today’s balance I I I I I Bill report When you take a Z report, “Z1” is printed instead of “X1”. Bill number Date Clerk code...
- Page 183 I I I I I Non-accessed EAN report EAN code Item label *1 When you select “DELETE”, “Z1” is printed instead of “X1”. *2 When there is any sales data of the EAN for PLU/EAN report, the data is printed here. When you delete the EAN in Z1 mode under this situation, the EAN data for PLU/EAN report is also deleted.
-
Page 184: Periodic Report Samples
Periodic Report Samples Your POS terminal allows you to take consolidation X and Z reports of a chosen period (the period is usually one week or month). I I I I I General information The periodic reading or resetting reports are the same in format as those in the X1/Z1 report for daily sales information except mode indication (“X2”... - Page 185 I I I I I Employee report When you take a Z report, “Z2” is printed instead of “X2”. Employee code Range Employee name Date Time-in Job location no./Job location name Break-in Break-out Edited time Time-out Total break time per location Total working time per location Total cost per location Total hour...
- Page 186 I I I I I Employee time adjustment report Range Date Operation Operation time before time editing Edited time I I I I I Employee active status report Employee code Range Employee name Indicates that the employee is under break. Indicates that the employee is not timed in.
- Page 187 I I I I I Employee over time report When you take a Z report, “Z2” is printed instead of “X2”. Employee code Range Employee name Date Over time (Hour) Over time cost I I I I I Daily net report When you take a Z report, “Z2”...
- Page 188 I I I I I Customer sales report (1 and 2 in Z2 mode) • You can print detailed or total sales information on customer sales report. Select “DETAIL” or “TOTAL” in FUNCTION SELECT2 menu. • In Z2 mode, you can select customer sales report 1 or customer sales report 2. Customer sales report 1 allows you to reset charge total of each customer, date and sales items.
- Page 189 The full total on the customer file I I I I I Customer sales report by specified sales range Sales range Customer code Name Address VAT-ID Sales q’ty and total Charge account Date Sales items...
- Page 190 Subtotal on the report The full total on the customer file I I I I I Customer charge account report Customer code Name Address VAT-ID...
- Page 191 I I I I I Customer ordering report When you take a Z report, “Z2” is printed instead of “X2”. Customer advance order Ordering number Date/Time Balance “T” indicates that the transaction was handled by a clerk under training. Credit customer advance order Customer number/Consecutive number I I I I I X2/Z2 stacked report You can print multiple X2/Z2 reports in sequence under a single transaction.
- Page 192 I I I I I Non-accessed customer report Customer code Name Address VAT-ID * When you select “DELETE”, “Z2” is printed instead of “X2”. I I I I I Customer delete report Customer range Customer code Name Address VAT-ID...
-
Page 193: Non-Accessed Ean And Customer Deletion
Non-accessed EAN and Customer Deletion You can delete EANs and customers that had not been accessed for a certain period. You can program a period in the PGM2 mode. As for customer, you can also delete customers with regardless to a non-accessed period. -
Page 194: Compulsory Cash/Check Declaration (Ccd)
Compulsory cash/check declaration is available in the above six types. You can choose either of these. Contact your authorized SHARP dealer for details. (1) When CCD entry is compulsory, the following window is displayed for declaring the cash/check value in the drawer. - Page 195 For cash: • Select the money type by touching item or using the [ENTER] key. • Enter quantities of money and touch the [ENTER] key. • To terminate the entry, touch the [OK/ADD] key. • To void an incorrect entry, select the money type and enter correct quantities and touch the [CORR.] key.
-
Page 196: Programming
Programming This chapter explains how to program various items. Before you start programming, select the PGM1 or PGM2 mode from the mode selection window depending on the item you are going to program. Programming Menu Processing The programming menu processing is shown below tables. I I I I I PGM1 mode READING DEPARTMENT... -
Page 197: Pgm2 Mode
I I I I I PGM2 mode READING DEPARTMENT PLU/EAN RANGE PICK UP NEW PICKING LAST PICKING DYNAMIC EAN RANGE PICK UP NEW PICKING LAST PICKING LINK PLU/EAN TABLE COMBO MEAL CONDIMENT TABLE EAN PLU CONVERT ITF PLU CONVERT CRATE TABLE PROMOTION TABLE EAN OTHERS PLU INFORMATION... - Page 198 BRANCHES TRANSFER MASK DEVICE CONFIG DIRECT KEY ONLINE CONFIG INLINE CONFIG MWS CONFIG VMP CONFIG ROM VERSION SETTING ARTICLE DEPARTMENT PLU/EAN DYNAMIC EAN PLU RANGE HAPPY HOUR PLU MENU KEY COMBO MEAL LINK PLU/EAN TABLE CONDIMENT TABLE PROMOTION TABLE BASIC PRESET OBJECTED ITEM LEVEL1 LEVEL2...
- Page 199 DIRECT KEY FUNCTIONS ( - ) GROUP DISCOUNT % COMMISSION MISC. FUNCTIONS DEPOSIT DEPO. ( - ) ***RA ***RA2 ***PO ***PO2 CASH TIP NON CASH TIP CHK/CG SERVICE CHARGE BONUS POINT BONUS POINT TABLE BONUS REDEMPTION MEDIA CASH CHECK CREDIT HOTEL TRANSFER CA/CHK CUSTOMER CHARGE...
- Page 200 TERMINAL DATE/TIME OPTIONAL FUNCTION PROHIBIT FUNCTION SELECT1 FUNCTION SELECT2 PRINT SELECT1 PRINT SELECT2 DISPLAY SELECT EURO REPORT 0 SKIP GENERAL RPT FORMAT TRANS. RPT FORMAT CLERK RPT FORMAT HOURLY REPORT DEPT. RPT FORMAT STACKED REPORT REPORT 1 REPORT 2 MESSAGE RECEIPT LOGO FREE TEXT VP TEXT...
- Page 201 CUSTOMER CUSTOMER CUSTOMER PROG. ORDER MASK BRANCHES TRANSFER MASK BACKUP SEND BACKUP RECEIVE ONLINE CONFIG INLINE CONFIG MWS CONFIG VMP CONFIG ORDERMAN CONFIG ORDERMAN D/L D/L ALL PGM/PLU D/L ALL W/O PLU D/L PLU D-EAN LOAD DATA CLEAR E. JOURNAL T-LOG TRANSACTION CLERK...
-
Page 202: How To Program Alphanumeric Characters
How to Program Alphanumeric Characters When you program alphanumeric characters, the character keyboard will be displayed as shown below. [TEXTCOPY] : Used to copy the text data. [PASTE] : Used to paste the text data. [TEXT_START] : Used to skip to the start of a text. [TEXT_END] : Used to skip to the end of a text. -
Page 203: Alphanumeric Characters
Alphanumeric Characters Code table for alpha descriptor programming (DC) Double-size character code _(095) : Line feed code Shaded characters are Czech characters. The characters “ , , , ” of the character list can not be printed, they are only for display. -
Page 204: Basic Instructions
Basic Instructions This section illustrates the basic programming by using an example of programming for departments. ➝ ➝ (I Department (ARTICLE DEPARTMENT ..PGM1) (ARTICLE DEPARTMENT ..PGM2)) I I I I I Programming example (1) Select the PGM2 mode in the mode window. The following window is displayed. (2) Touch the [SETTING] button to perform the programming. - Page 205 (3) Touch the [ARTICLE] and [DEPARTMENT] button to program the department, and select the desired department and touch the [ENTER] key. (4) Select the programming items, and set the proper data. (5) To terminate the programming, touch the [EXIT] key.
-
Page 206: Programming Function Key
I I I I I Programming function key [RECORD_DELETE] : Used to delete the data or item. [BACK_SPACE] : Backs up the cursor for deleting the character or figure at the left of the cursor. [COPY] : Used to copy the data from the designated item. Touch this key and select designated item. -
Page 207: Pos Setting Data
POS Setting Data The POS setting data can be confirmed with the following tables. The default programming data of parameters is emphasized in bold character. I I I I I Department (ARTICLE ➝ DEPARTMENT ..PGM2 or PGM1) (1) Select the PGM2 or PGM1 mode in the mode selection window, and touch the [SETTING] to perform the programming. - Page 208 Text Parameter YES: Prints the department sales information on the clerk report. PRNT ON CLK NO: Prints nothing on the clerk report. COMPULSORY: Makes item validation printing compulsory. ITEM VP NON-COMPULSORY: Makes item validation printing non-compulsory. • You can set an upper limit amount (HALO) for each department. The limit is effective for the REG mode operations and can be overridden in the MGR mode.
-
Page 209: Plu/Ean
I I I I I PLU/EAN (ARTICLE ➝ PLU/EAN ..PGM2 or PGM1) PLU code: max. 5 digits (1 to 99999) UPC/EAN code: max. 13 digits (EAN13, EAN8, UPC-A) (1) Select the PGM1 or PGM2 mode and touch the [SETTING] to perform the programming. (2) Touch the [ARTICLE] button to display the menu, and touch the [PLU/EAN] button to display the each PLU/EAN. - Page 210 Text Parameter Department code to be associated with the entered PLU/EAN (01 through 99) When a PLU/EAN is associated with a department, the following functions of the PLU/EAN depend on the programming for the department. • Grouping (group 1 through 17) DEPT.CODE •...
- Page 211 Text Parameter COMPULSORY: Makes PLU/EAN price level shift compulsory. PRICE SHIFT INHIBIT: Inhibits PLU/EAN price level shift. ALLOWED: Allows PLU/EAN price level shift. COMPULSORY: Makes a scale entry compulsory. SCALE ENABLE: Enables a scale entry. INHIBIT: Inhibits a scale entry. TARE TABLE# Scale table number associated with scale entry (1 through 9)/0 SORT GROUP...
-
Page 212: Happy Hour
Text Parameter BONUS POINT Bonus points for a PLU/EAN (max. 7 digits)/0 MINIMUM STOCK Minimum stock quantity for a PLU/EAN (max. 7 digits)/0 NON DEL.: Not delete non-accessed EANs by Z1 report. NON-ACCESS DEL. BY Z: Delete non-accessed EANs by Z1 report. (For PLU, it is fixed to “NON DEL.”.) I I I I I Happy hour (ARTICLE ➝... -
Page 213: Plu Menu Key
I I I I I PLU menu key (ARTICLE ➝ PLU MENU KEY ..PGM2) Menu number: max. 2 digits (1 to 50) (1) Select the PGM2 mode and touch the [SETTING] to perform the programming. (2) Touch the [ARTICLE] button to display the menu, and touch the [PLU MENU KEY] button to display the menu key list. -
Page 214: Combo Meal Table
I I I I I Combo meal table (ARTICLE ➝ COMBO MEAL ..PGM2) Table number: max. 2 digits (1 to 99) Tied PLU: max. 10 PLUs (1) Select the PGM2 mode and touch the [SETTING] to perform the programming. (2) Touch the [ARTICLE] button to display the menu, and touch the [COMBO MEAL] button to display the table list. -
Page 215: Plu Condiment Table
I I I I I PLU condiment table (ARTICLE ➝ CONDIMENT TABLE ..PGM2) Table number: max. 2 digits (1 to 99) Condiment PLU: max. 30 condiment PLUs Example: When you enter a menu-item PLU, a message such as “HOWCOOK?” is prompted and a list of the “Condiment PLUs”... - Page 216 Table number: max. 2 digits (1 to 99) Condiment PLU: max. 30 condiment PLUs (1) Select the PGM2 mode and touch the [SETTING] to perform the programming. (2) Touch the [ARTICLE] button to display the menu, and touch the [CONDIMENT TABLE] button to display the table list.
-
Page 217: Promotion Table (Global/Individual Type)
I I I I I Promotion table (global/individual type) (ARTICLE ➝ PROMOTION TABLE ..PGM2) There are two types of promotion tables: the global type and individual type. The global type requires you to program a trip level for a set of objected items while the individual type requires you to program a trip level for each objected item. - Page 218 • • • • • Objected item (ARTICLE ➝ PROMOTION TABLE ➝ OBJECTED ITEM ..PGM2) Objected items for promotion: max. 25 items Text Parameter PLU/EAN: Select to program a PLU/EAN. DEPT: Select to program a department. ITEM KIND GROUP: Select to program a PLU group. INHIBIT: Inhibited PLU/EAN CODE PLU code (max.
-
Page 219: Crate Table
I I I I I Crate table (ARTICLE ➝ CRATE TABLE ..PGM2) Table number: max. 2 digits (1 to 99) (1) Select the PGM2 mode and touch the [SETTING] to perform the programming. (2) Touch the [ARTICLE] button to display the menu, and touch the [CRATE TABLE] button to display the table list. -
Page 220: Ean-To-Plu Converting Table
I I I I I EAN- to-PLU converting table (ARTICLE ➝ EAN PLU CONVERT ..PGM2) EAN code: 6 - 13 digits (1) Select the PGM2 mode and touch the [SETTING] to perform the programming. (2) Touch the [ARTICLE] button to display the menu, and touch the [EAN PLU CONVERT] button to display the convert list. -
Page 221: Ean Non-Plu Code Format
I I I I I EAN Non-PLU code format (ARTICLE ➝ EAN NON-PLU ..PGM2) Format table: Format 1 through Format 12 EAN-13 type EAN-8 type Flag Free format Free format (02 or 20-29) Flag Price check digit Field 1 Field 2 Free format area (1) Select the PGM2 mode and touch the [SETTING] to perform the programming. -
Page 222: Press Code (For Ean)
I I I I I Press code (for EAN) (ARTICLE ➝ PRESS CODE ..PGM2) Press code format: GERMAN TYPE1/U.K./FRENCH/SWEDEN/German TYPE2 1: GERMAN TYPE1 (prefix code: 434/439) 2: U.K. (prefix code: 988/989) 3: FRENCH (prefix code: 378/379) 4: SWEDEN (prefix code: 7388) 5: GERMAN TYPE2 (prefix code: 414/419) (1) Select the PGM2 mode and touch the [SETTING] to perform the programming. -
Page 223: Scale Table
I I I I I Scale table ( ARTICLE ➝ SCALE TABLE ..PGM2) Scale table no.: 1 digit (1 to 9) (1) Select the PGM2 mode and touch the [SETTING] to perform the programming. (2) Touch the [ARTICLE] button to display the menu, and touch the [SCALE TABLE] button to display the scale table list. -
Page 224: Ean Delete
I I I I I EAN delete (ARTICLE ➝ EAN DELETE ..PGM2) You can delete the EAN codes which have not been accessed during the period you set in this program when you execute the delete job in EAN DELETE in X1/Z1 mode. (1) Select the PGM2 mode and touch the [SETTING] to perform the programming. -
Page 225: Direct Key
I I I I I Direct key (DIRECT KEY ..PGM2) (1) Select the PGM2 mode and touch the [SETTING] to perform the programming. (2) Touch the [DIRECT KEY] button to display the screen list. (3) Select the corresponding screen, the “SETTING/COPY” selection window is displayed. To program the key, select the “SETTING”. -
Page 226: Discount Key ((-)1 Through (-)9)
I I I I I Discount key (( - )1 through ( - )9) (FUNCTIONS ➝ ( - ) ..PGM2 or PGM1) (1) Select the PGM1 or PGM2 mode and touch the [SETTING] to perform the programming. (2) Touch the [FUNCTIONS] button to display the menu, and touch the [( - )] button to display the ( - ) key list. -
Page 227: Group Discount Key (Gdsc%1 Through Gdsc%9)
I I I I I Group discount key (GDSC%1 through GDSC%9) (FUNCTIONS ➝ GROUP DISCOUNT % ..PGM2) (1) Select the PGM2 mode and touch the [SETTING] to perform the programming. (2) Touch the [FUNCTIONS] button to display the menu, and touch the [GROUP DISCOUNT %] button to display the group discount % key list. -
Page 228: Miscellaneous Functions
I I I I I Miscellaneous functions (deposit, RA, PO, cash tip, non-cash tip, cash in drawer, check change) (FUNCTIONS ➝ PMISC. FUNCTIONS ..PGM2) Miscellaneous functions: • Deposit or Deposit refund • RA or RA2 • PO or PO2 •... -
Page 229: Service Charge
CID (Sentinel) Text Parameter TEXT Description for the cash in drawer. Up to 12 characters can be entered. HALO max. 9 digits (0 to 999999999) CHK/CG Text Parameter TEXT Description for the check change. Up to 12 characters can be entered. HALO max. -
Page 230: Bonus Points
I I I I I Bonus points (FUNCTIONS ➝ BONUS POINT ..PGM2) You can program up to 10 sets of purchase amounts and bonus points in the bonus point table. In the bonus redemption programming, you can set the minimum bonus point, redeemed bonus points and discount amount for the redeemed bonus points. -
Page 231: Cash Key
I I I I I Cash key (MEDIA ➝ CASH ..PGM2) (1) Select the PGM2 mode and touch the [SETTING] to perform the programming. (2) Touch the [MEDIA] button to display the menu, and touch the [CASH] button to display the cash key list. -
Page 232: Check Key
I I I I I Check key (MEDIA ➝ CHECK ..PGM2) (1) Select the PGM2 mode and touch the [SETTING] to perform the programming. (2) Touch the [MEDIA] button to display the menu, and touch the [CHECK] button to display the check key list. -
Page 233: Credit Key
I I I I I Credit key (MEDIA ➝ CREDIT ..PGM2) (1) Select the PGM2 mode and touch the [SETTING] to perform the programming. (2) Touch the [MEDIA] button to display the menu, and touch the [CREDIT] button to display the credit key list. -
Page 234: Hotel Transfer
I I I I I Hotel transfer (MEDIA ➝ HOTEL TRANSFER ..PGM2) (1) Select the PGM2 mode and touch the [SETTING] to perform the programming. (2) Touch the [MEDIA] button to display the menu. (3) Touch the [HOTEL TRANSFER] button to program details. (4) Touch the required programming item, and enter or select each parameter and touch the [ENTER] key. -
Page 235: Customer Charge Key
I I I I I Customer charge key (MEDIA ➝ CUSTOMER CHARGE ..PGM2) (1) Select the PGM2 mode and touch the [SETTING] to perform the programming. (2) Touch the [MEDIA] button to display the menu. (3) Touch the [CUSTOMER CHARGE] button to program details. (4) Touch the required programming item, and enter or select each parameter and touch the [ENTER] key. -
Page 236: Currency Exchange Key
I I I I I Currency exchange key (MEDIA ➝ FOREIGN CURRENCY ➝ FOREIGN1 through FOREIGN9 ..PGM2) (FOREIGN CURRENCY ➝ FOREIGN1 through FOREIGN9 ..PGM1) (1) Select the PGM2 or PGM1 mode and touch the [SETTING] to perform the programming. When the PGM2 mode is selected, touch the [MEDIA] button to display the menu. -
Page 237: Currency Money
I I I I I Currency money (MEDIA ➝ CURRENCY MONEY ..PGM2) You can program the texts and amounts of each domestic bill, coin and foreign currency used for the starting cash memory. Up to 20 currencies (MOENY1 through 20) can be programmed. (1) Select the PGM2 mode and touch the [SETTING] to perform the programming. -
Page 238: Orderman Media
I I I I I Orderman media (MEDIA ➝ ORDERMAN MEDIA ..PGM2) You can program the media and bill printing status for the orderman media. Up to 20 orderman media (ORDERMAN.MED 01 through 20) can be programmed. (1) Select the PGM2 mode and touch the [SETTING] to perform the programming. (2) Touch the [MEDIA] button to display the menu, and touch the [ORDERMAN MEDIA] button to display the orderman media list (ORDERMAN.MED 01 through ORDERMAN.MED 20). -
Page 239: Function Text
I I I I I Function text (TEXT ➝ FUNCTION TEXT ..PGM2) You can program a maximum of 12 characters for each function by using the following table: (1) Select the PGM2 mode and touch the [SETTING] to perform the programming. (2) Touch the [TEXT] button to display the menu, and touch the [FUNCTION TEXT] button to display the function text list. - Page 240 Default text Classification Note *** PBAL PBAL (for GLU) max. 12 characters *** NBAL NBAL (for GLU) SCM (+) Starting cash memory (+) SCM (-) Starting cash memory (-) EXCH1 IS Exchange 1 is EXCH2 IS Exchange 2 is EXCH3 IS Exchange 3 is EXCH4 IS Exchange 4 is...
- Page 241 Default text Classification Note * HASH TL Hash(+) total max. 12 characters HASH(-) Hash(-) total * BTTL TL Bottle return (+) total BTTL (-) Bottle return (-) total NET 1 Net 1 (Taxable 1 - VAT/tax 1) NET 2 Net 2 (Taxable 2 - VAT/tax 2) NET 3 Net 3 (Taxable 3 - VAT/tax 3) NET 4...
- Page 242 Default text Classification Note COM.AMT6 Commission amount 6 max. 12 characters COM.AMT7 Commission amount 7 COM.AMT8 Commission amount 8 COM.AMT9 Commission amount 9 COM.TTL Commission amount total BILL BAL Bill balance FREE GLU Free GLU OLD BAL. Old balance SCM TTL Starting cash memory total T.TABLE Turnover per table...
- Page 243 Default text Classification Note EX1 CHK Check payment for exchange 1 max. 12 characters EX1 CREDIT Credit payment for exchange 1 DOM. CUR1 CHK Domestic currency 1 for check DOM. CUR1 CR Domestic currency 1 for credit VOID VOID text on KP REFUND REFUND text on KP RETURN...
-
Page 244: Department Group Text
I I I I I Department group text (TEXT ➝ DEPT. GROUP ..PGM2) You can program a maximum of 12 characters for each department group (1 to 9). (1) Select the PGM2 mode and touch the [SETTING] to perform the programming. (2) Touch the [TEXT] button to display the menu, and touch the [DEPT. -
Page 245: Plu Hourly Group Text
I I I I I PLU hourly group text (TEXT ➝ PLU HOURLY GROUP ..PGM2) You can program a maximum of 12 characters for each PLU hourly group (1 to 9). (1) Select the PGM2 mode and touch the [SETTING] to perform the programming. (2) Touch the [TEXT] button to display the menu, and touch the [PLU HOURLY GROUP] button to display the group list. -
Page 246: Clerk
I I I I I Clerk (PERSONNEL ➝ CLERK ..PGM2 or PGM1) (1) Select the PGM1 or PGM2 mode and touch the [SETTING] to perform the programming. (2) Touch the [PERSONNEL] button to display the menu, and touch the [CLERK] button to display the clerk list. - Page 247 DISABLE: Disables operation in the FLASH mode. FLASH MODE ENABLE: Enables operation in the FLASH mode. DISABLE: Disables operation in the AUTO KEY mode. AUTO KEY MODE ENABLE: Enables operation in the AUTO KEY mode. DISABLE: Disables operation in the SD CARD mode. SD CARD MODE ENABLE: Enables operation in the SD CARD mode.
-
Page 248: Cashier
I I I I I Cashier (PERSONNEL ➝ CASHIER ..PGM2 or PGM1) (1) Select the PGM1 or PGM2 mode and touch the [SETTING] to perform the programming. (2) Touch the [PERSONNEL] button to display the menu, and touch the [CASHIER] button to display the cashier list. -
Page 249: Manager
P.SFT END Price level range (end): (PRICE 1 through PRICE 8) NO: Disables the happy hour price shift. HAPPY HOUR YES: Enables the happy hour price shift. DISABLE: Disables customer bill printing. CUST BILL PRINT ENABLE: Enables customer bill printing. DISABLE: Disables customer bill deletion. -
Page 250: Employee
I I I I I Employee (PERSONNEL ➝ EMPLOYEE ..PGM2) (1) Select the PGM2 mode and touch the [SETTING] to perform the programming. (2) Touch the [PERSONNEL] button to display the menu, and touch the [EMPLOYEE] button to display the employee list. -
Page 251: Job Location Table
I I I I I Job location table (PERSONNEL ➝ JOB LOCATE TBL ..PGM2) (1) Select the PGM2 mode and touch the [SETTING] to perform the programming. (2) Touch the [PERSONNEL] button to display the menu, and touch the [JOB LOCATE TBL] button to display the job location table. -
Page 252: Contact-Less Key
I I I I I Contact-less key (PERSONNEL ➝ CONTACTLESS KEY ..PGM2) (1) Select the PGM2 mode and touch the [SETTING] to perform the programming. (2) Touch the [PERSONNEL] button to display the menu, and touch the [CONTACTLESS KEY] button to program the contact less key. -
Page 253: Terminal Programming
I I I I I Terminal programming (TERMINAL ..PGM2) (1) Select the PGM2 mode and touch the [SETTING] to perform the programming. (2) Touch the [TERMINAL] button to program details. (3) Touch the required programming item, and enter or select each parameter and touch the [ENTER] key. Repeat this step (3) satisfactorily. -
Page 254: License Programming
I I I I I License programming (LICENSE ..PGM1) (1) Select the PGM1 mode and touch the [SETTING] to perform the programming. (2) Touch the [LICENSE] button to program details. (3) Enter the activation code for license and touch the [ENTER] key. Text Parameter LICENSE... -
Page 255: Function Prohibition
I I I I I Function prohibition (OPTIONAL ➝ FUNCTION PROHIBIT ..PGM2) (1) Select the PGM2 mode and touch the [SETTING] to perform the programming. (2) Touch the [OPTIONAL] button to display the menu, and touch the [FUNCTION PROHIBIT] button to program details. - Page 256 DISABLE: Disables drawer opening when the sales amount printed on the receipt is “0”. 0 RECEIPT DRAWER ENABLE: Enables drawer opening when the sales amount printed on the receipt is “0”. LIMITED: Allows void operation after the subtotal key is touched only in the MGR mode. VOID AFTER ST-KEY PUBLIC: Allows void operation after the subtotal key is touched in the REG and MGR modes.
-
Page 257: Function Selection 1
I I I I I Function selection 1 (OPTIONAL ➝ FUNCTION SELECT1 ..PGM2) (1) Select the PGM2 mode and touch the [SETTING] to perform the programming. (2) Touch the [OPTIONAL] button to display the menu, and touch the [FUNCTION SELECT1] button to program details. -
Page 258: Function Selection 2
I I I I I Function selection 2 (OPTIONAL ➝ FUNCTION SELECT2 ..PGM2) (1) Select the PGM2 mode and touch the [SETTING] to perform the programming. (2) Touch the [OPTIONAL] button to display the menu, and touch the [FUNCTION SELECT2] button to program details. -
Page 259: Printing Selection 1
I I I I I Printing selection 1 (OPTIONAL ➝ PRINT SELECT1 ..PGM2) (1) Select the PGM2 mode and touch the [SETTING] to perform the programming. (2) Touch the [OPTIONAL] button to display the menu, and touch the [PRINT SELECT1] button to program details. -
Page 260: Printing Selection 2
I I I I I Printing selection 2 (OPTIONAL ➝ PRINT SELECT2 ..PGM2) (1) Select the PGM2 mode and touch the [SETTING] to perform the programming. (2) Touch the [OPTIONAL] button to display the menu, and touch the [PRINT SELECT2] button to program details. -
Page 261: Display Selection
I I I I I Display selection (OPTIONAL ➝ DISPLAY SELECT ..PGM2) (1) Select the PGM2 mode and touch the [SETTING] to perform the programming. (2) Touch the [OPTIONAL] button to display the menu, and touch the [DISPLAY SELECT] button to program details. -
Page 262: Zero Skip
I I I I I Zero skip (REPORT ➝ 0 SKIP ..PGM2) (1) Select the PGM2 mode and touch the [SETTING] to perform the programming. (2) Touch the [REPORT] button to display the menu, and touch the [0 SKIP] button to program details. (3) Touch the required programming item, and enter or select each parameter and touch the [ENTER] key. -
Page 263: General Report Format
I I I I I General report format (REPORT ➝ GENERAL RPT FORMAT ..PGM2) (1) Select the PGM2 mode and touch the [SETTING] to perform the programming. (2) Touch the [REPORT] button to display the menu, and touch the [GENERAL RPT FORMAT] button to program details. -
Page 264: Transaction Report Format
I I I I I Transaction report format (REPORT ➝ TRANS. RPT FORMAT ..PGM2) (1) Select the PGM2 mode and touch the [SETTING] to perform the programming. (2) Touch the [REPORT] button to display the menu, and touch the [TRANS. RPT FORMAT] button to program details. - Page 265 Text Classification Parameter CC TAX6 ST Credit customer taxable 6 ST SKIP/NOT SKIP CC VAT6 Credit customer VAT/TAX 6 CC TTL TAX Credit customer total tax N E T Net without tax VAT SFT VAT shift TAX DELE VAT/tax delete CC VAT SFT Credit customer VAT shift CC TAX DELE...
- Page 266 Text Classification Parameter O - P Difference (order total - paid total) SKIP/NOT SKIP VIP SALES1 VIP1 sale VIP SALES2 VIP2 sale VIP SALES3 VIP3 sale TRANS OUT Transfer out TRANS IN Transfer in BILL BAL Transfer out - transfer in SCM (+) Starting cash memory (+) SCM (-)
- Page 267 Text Classification Parameter EXCH 1 Exchange 1 SKIP/NOT SKIP DOM.CUR1 Domestic currency 1 EX1 CHK Exchange 1 paid by check DOM.CUR CHK Domestic currency 1 paid by check EX1 CREDIT Exchange 1 paid by credit DOM.CR 1 Domestic currency 1 paid by credit EXCH 2 Exchange 2 DOM.CUR2...
-
Page 268: Clerk Report Format
I I I I I Clerk report format (REPORT ➝ CLERK RPT FORMAT ..PGM2) (1) Select the PGM2 mode and touch the [SETTING] to perform the programming. (2) Touch the [REPORT] button to display the menu, and touch the [CLERK RPT FORMAT] button to program details. - Page 269 Text Classification Parameter REFUND Refund SKIP/NOT SKIP Item void V O I D Void mode transaction MGR VD MGR void ST VD Subtotal void WASTE WASTE mode transaction RETURN Return *** PBAL PBAL *** NBAL NBAL SKIP/NOT SKIP NOSALE No sale SKIP/NOT SKIP G.C.
- Page 270 Text Classification Parameter CREDIT6 Credit6 SKIP/NOT SKIP CREDIT7 Credit7 CREDIT8 Credit8 CREDIT9 Credit9 CHARGE Charge EXCH 1 Exchange 1 DOM.CUR1 Domestic currency 1 EX1 CHK Exchange 1 paid by check DOM.CUR CHK Domestic currency 1 paid by check EX1 CREDIT Exchange 1 paid by credit DOM.CR 1 Domestic currency 1 paid by credit...
-
Page 271: Department Report Format
I I I I I Department report format (REPORT ➝ DEPT. RPT FORMAT ..PGM2) (1) Select the PGM2 mode and touch the [SETTING] to perform the programming. (2) Touch the [REPORT] button to display the menu, and touch the [DEPT. RPT FORMAT] button to program details. -
Page 272: Stacked Report
I I I I I Stacked report (REPORT ➝ STACKED REPORT ..PGM2) (1) Select the PGM2 mode and touch the [SETTING] to perform the programming. (2) Touch the [REPORT] button to display the menu, and touch the [STACKED REPORT] button to program details. - Page 273 Report text Classification Note Starting employee code/ending employee code EMP. ACTIVE STATUS Employee active status report (1 to 9999999999) HOURLY Hourly report Starting time/ending time (0 to 2345) LABOR COST% Labor cost percent report Starting employee code/ending employee code EMP. OVER TIME Employee over time report (1 to 9999999999) DAILY NET...
-
Page 274: Receipt Logo
• 6-line header message type • 3-line header and 3-line footer messages type • 3-line header message, graphical logo, and 3-line footer message type • Graphical logo and 3-line header and 3-line footer messages type Please contact your authorized SHARP dealer. -
Page 275: Free Text
I I I I I Free text (MESSAGE ➝ FREE TEXT ..PGM2) (1) Select the PGM2 mode and touch the [SETTING] to perform the programming. (2) Touch the [MESSAGE] button to display the menu, and touch the [FREE TEXT] button to display the free text list (TEXT01 to TEXT99). -
Page 276: Bill Header Text
I I I I I Bill header text (MESSAGE ➝ BILL TEXT ..PGM2) (1) Select the PGM2 mode and touch the [SETTING] to perform the programming. (2) Touch the [MESSAGE] button to display the menu, and touch the [BILL TEXT] button to program details. -
Page 277: Payee Name
I I I I I Payee name (MESSAGE ➝ PAYEE NAME ..PGM2) (1) Select the PGM2 mode and touch the [SETTING] to perform the programming. (2) Touch the [MESSAGE] button to display the menu, and touch the [PAYEE NAME] button to program details. -
Page 278: Scrolling Message For Pole Display
I I I I I Scrolling message for pole display (MESSAGE ➝ SCROLL PLOE DISP..PGM2) (1) Select the PGM2 mode and touch the [SETTING] to perform the programming. (2) Touch the [MESSAGE] button to display the menu, and touch the [SCROLL PLOE DISP.] button to program details. -
Page 279: Function Menu Key
I I I I I Function menu key (FUNCTION KEY ➝ FUNCTION MENU KEY ..PGM2) Max. 15 function keys can be programmed to each of 30 function menu keys. (1) Select the PGM2 mode and touch the [SETTING] to perform the programming. (2) Touch the [FUNCTION KEY] button to display the menu, and touch the [FUNCTION MENU KEY] button to display the function menu key list. -
Page 280: Journal Printer
I I I I I Journal printer (DEVICE CONFIG ➝ JOURNAL PRINTER ..PGM2) (1) Select the PGM2 mode and touch the [SETTING] to perform the programming. (2) Touch the [DEVICE CONFIG] button to display the menu, and touch the [JOURNAL PRINTER] button to program details. -
Page 281: Receipt/Report Printer
I I I I I Receipt/report printer (DEVICE CONFIG ➝ RECEIPT/REPORT PRINTER ..PGM2) (1) Select the PGM2 mode and touch the [SETTING] to perform the programming. (2) Touch the [DEVICE CONFIG] button to display the menu, and touch the [RECEIPT/REPORT PRINTER] button to program details. -
Page 282: Bill Printer
I I I I I Bill printer (DEVICE CONFIG ➝ BILL PRINTER ..PGM2) (1) Select the PGM2 mode and touch the [SETTING] to perform the programming. (2) Touch the [DEVICE CONFIG] button to display the menu, and touch the [BILL PRINTER] button to program details. -
Page 283: Remote Printer
I I I I I Remote printer (DEVICE CONFIG ➝ KP#1 through KP#9 ..PGM2) (1) Select the PGM2 mode and touch the [SETTING] to perform the programming. (2) Touch the [DEVICE CONFIG] button to display the menu, and touch the [KP#1] through [KP#9] button to program details. -
Page 284: Bcr (Scanner)
I I I I I BCR (SCANNER) (DEVICE CONFIG ➝ BCR (SCANNER) ..PGM2) (1) Select the PGM2 mode and touch the [SETTING] to perform the programming. (2) Touch the [DEVICE CONFIG] button to display the menu, and touch the [BCR (SCANNER)] button to program details. -
Page 285: On-Line
I I I I I On-line (DEVICE CONFIG ➝ ONLINE ..PGM2) (1) Select the PGM2 mode and touch the [SETTING] to perform the programming. (2) Touch the [DEVICE CONFIG] button to display the menu, and touch the [ONLINE] button to program details. -
Page 286: Drink Dispenser
I I I I I Drink dispenser (DEVICE CONFIG ➝ DRINK DISPENSER ..PGM2) (1) Select the PGM2 mode and touch the [SETTING] to perform the programming. (2) Touch the [DEVICE CONFIG] button to display the menu, and touch the [DRINK DISPENSER] button to program details. -
Page 287: Tax Programming
I I I I I Tax programming (TAX ..PGM2) (1) Select the PGM2 mode and touch the [SETTING] to perform the programming. (2) Touch the [TAX] button to display the tax list (tax1 to tax6). (3) Select the required tax from the list to program details. (4) Touch the required programming item, and enter or select each parameter and touch the [ENTER] key. -
Page 288: Customer Control Programming
I I I I I Customer control programming (CUSTOMER ➝ CUSTOMER PROG..PGM2) (1) Select the PGM2 mode and touch the [SETTING] to perform the programming. (2) Touch the [CUSTOMER] button to display the menu, and touch the [CUSTOMER PROG.] button to program details. -
Page 289: Branch Programming (Order Mask)
I I I I I Branch programming (order mask) (ORDER MASK ➝ BRANCHES ..PGM2) Branch number: max. 8 digits (1 to 99999999) (1) Select the PGM2 mode and touch the [SETTING] to perform the programming. (2) Touch the [ORDER MASK] button to display the menu, and touch the [BRANCHES] button to display the branch numbers list. -
Page 290: Backup Data Send Programming
I I I I I Backup data send programming (BACKUP SEND ..PGM2) (1) Select the PGM2 mode and touch the [SETTING] to perform the programming. (2) Touch the [BACKUP SEND] button to program details. (3) Touch the required programming item, and enter or select each parameter and touch the [ENTER] key. Repeat this step (3) satisfactorily. -
Page 291: On-Line Configuration Programming
I I I I I On-line configuration programming (ONLINE CONFIG ..PGM2) (1) Select the PGM2 mode and touch the [SETTING] to perform the programming. (2) Touch the [ONLINE CONFIG] button to program details. (3) Touch the required programming item, and enter or select each parameter and touch the [ENTER] key. Repeat this step (3) satisfactorily. -
Page 292: Vmp Configuration Programming
I I I I I VMP configuration programming (VMP CONFIG ..PGM2) (1) Select the PGM2 mode and touch the [SETTING] to perform the programming. (2) Touch the [VMP CONFIG] button to program details. (3) Touch the required programming item, and enter or select each parameter and touch the [ENTER] key. Repeat this step (3) satisfactorily. -
Page 293: Orderman Data Download
I I I I I ORDERMAN data download (ORDERMAN D/L ..PGM2) (1) Select the PGM2 mode and touch the [SETTING] to perform the data downloading. (2) Touch the [ORDERMAN D/L] button to download the data. (3) Touch the required downloading (“D/L ALL PGM/PLU”, “D/L ALL W/O PLU”, “D/L PLU”). Text Operation D/L ALL PGM/PLU... -
Page 294: Dynamic Ean Data Loading
Dynamic EAN Data Loading This function is used to load the dynamic EAN data to the EAN data file. (1) Select the PGM2 mode and touch the [D-EAN LOAD] button to perform the loading job. The confirmation window “ARE YOU SURE ?” is displayed to perform the loading job. (2) Select the [1. -
Page 295: Data Clear
The DATA CLEAR is chiefly used for clearing data in the event some system trouble occurred. Use the following procedure to perform the data clear operation only when instructed by your authorized SHARP dealer. (1) Select the PGM2 mode and touch the [DATA CLEAR] button to perform the data clear job. -
Page 296: Drink Dispenser Programming
Drink Dispenser Programming This function is used to program the drink dispenser data. I I I I I Drink dispenser preset (DD PRESET ..PGM2) (1) Select the PGM2 mode and touch the [DD SETTING] button to display the job menu. (2) Touch the [DD PRESET] button to program details. - Page 297 I I I I I Local drink dispenser (LOCAL DD ..PGM2) (1) Select the PGM2 mode and touch the [DD SETTING] button to display the job menu. (2) Touch the [LOCAL DD] button to program details. (3) Touch the required programming item, and select each parameter and touch the [ENTER] key. Repeat this step (3) satisfactorily.
-
Page 298: Price Mode Programming
PRICE Mode Programming The PRICE mode programming is mainly used for daily changes of the PLU’s unit price. To program a unit price for a PLU as follows. (1) Select the PRICE mode in the mode selection window, the programming window is displayed. (2) To select the screen touch the [SELECT SCREEN] button and select the required screen. -
Page 299: Automatic Sequencing Key Programming
Automatic Sequencing Key Programming Just one touch of an automatic sequencing key enables you to perform a set of frequently used key operations that are assigned to the automatic sequencing key. There are a maximum of 99 automatic sequencing keys available. You can also assign a maximum of 15 automatic sequencing keys to each of the 6 AUTO menu keys. -
Page 300: Reading Of Stored Programs
Reading of Stored Programs You can read programs stored in the PGM1 or PGM2 mode. (1) Select the menu [READING] in the PGM1 or PGM2 mode, the job menu window is displayed. (2) Select the required reading menu, the output device selection window is displayed. Select the output device “DISPLAY/PRINT”. - Page 301 PROMOTION TABLE EAN OTHERS PLU INFORMATION PLU MENU KEY SCALE TABLE HAPPY HOUR FUNCTIONS MEDIA TRAINING TEXT/CLK CLERK CASHIER MANAGER EMPLOYEE WORKING TIME SHIFT JOB LOCATE TABLE CONTACTLESS KEY OPTIONAL REPORT FUNCTION TEXT FUNCTION KEY FUNCTION MENU KEY DEPT. GROUP PLU GROUP PLU HOURLY GROUP MESSAGE...
-
Page 302: Pgm 2 Mode
Sample Reports of Stored Program Reading I I I I I Department (PGM1 or PGM2 mode) Operating mode* Report type Group discount 1 to 9 (Yes/no) Tax status (taxable1 – taxable6) Dept. code Unit price Description Group no. Commission group HALO limit Print station (Remote printer 1/2/receipt) Function programming... - Page 303 I I I I I PLU/EAN (PGM1 or PGM2 mode) Associated dept. code Menu type Report type (space: normal PLU, L: link PLU table Tax status no., C: combo meal no.) PLU code Base q’ty Group no. Price 1 Description for Pint price 1 price level 1 Price 2...
- Page 304 Non-accessed EAN delete method (*: Non-delete, space: Delete in the Z1 mode) I I I I I Dynamic EAN (PGM2 mode) Report type I I I I I Link PLU table (PGM2 mode) Report type Link PLU table no. Assigned PLU codes...
- Page 305 I I I I I Combo meal (PGM2 mode) Report type Combo meal no. Assigned PLU codes and prices I I I I I Condiment table (PGM2 mode) Report type Condiment table no. Assigned PLU codes Linked condiment table no. Message text I I I I I EAN-to-PLU converting table (PGM2 mode) Report type...
- Page 306 I I I I I Crate table (PGM2 mode) Report type Crate table no. Crate PLU or EAN Text Single function Number of bottles Price Price level Assigned PLU codes or EAN Combination function I I I I I Promotion table (PGM2 mode) Report type Promotion table no.
- Page 307 Promotion way/Discount amount I I I I I EAN other functions (PGM2 mode) Report type Non-PLU format setting Delete period Press code function...
- Page 308 I I I I I PLU information text (PGM2 mode) Report type Table no. PLU information text I I I I I PLU menu key (PGM2 mode) Report type Menu key no. Menu title Menu item I I I I I Scale table (PGM2 mode) Report type Scale table no.
- Page 309 I I I I I Happy hour (PGM2 mode) Report type Start time/End time/Shift level Day of week (1: Enable, 0: Disable) I I I I I Function groups (PGM1 or PGM2 mode) Report type Function text Sign (plus/minus) Amount HALO Type : I = Item S = Subtotal...
- Page 310 Sentinel HALO...
- Page 311 Amount for getting bonus point 1 Bonus point 1 Minimum bonus point Redeemed bonus point Redeemed amount I I I I I Media key (PGM2 mode) Report type Function text HALO Programming...
- Page 312 Rate...
- Page 313 I I I I I Training text/clerk (PGM2 mode) Report type Training clerk or cashier code Training mode title text I I I I I Clerk (PGM1 or PGM2 mode) Report type Clerk code Clerk name Linked GLU code Linked room GLU code Key number VIP sale programming (VIP1/2/3) Drawer number/Secret code...
- Page 314 I I I I I Cashier (PGM1 or PGM2 mode) Report type Cashier code Cashier name VIP sale programming Drawer number/Secret code (VIP1/2/3) Operation mode programming (PGM2/PGM1/PRICE/X1/Z1/X2Z2/AUTO KEY/ Key number FLASH/SD CARD/AUTO MENU 1 to 6) Function programming 0 0 0 1 8 1 0 0 Customer bill deletion Customer bill printing Happy hour...
- Page 315 I I I I I Working time shift (PGM2 mode) Report type Text I I I I I Job location table (PGM2 mode) Report type Job location table number Text Overtime pay rate Salary pay amount I I I I I Contactless key (PGM2 mode) - (only display)
- Page 316 I I I I I Optional features (PGM2 mode) Report type Setting Item Drawer open alarm time Information area color (fore color/back color)
- Page 317 I I I I I Report (PGM2 mode) Report type Item Setting Hourly report Stacked report 1 Stacked report 2...
- Page 318 I I I I I Function text (PGM2 mode) Report type Function text (default) Text (preset)
- Page 319 I I I I I Function key (PGM2 mode) Report type Key no. Key text Key color...
- Page 320 I I I I I Function menu key (PGM2 mode) Report type Function menu key no. Menu title Touch key no./Touch key text/Key no.
- Page 321 I I I I I Department group (PGM2 mode) Report type Function text (default) Text (preset) I I I I I PLU group (PGM2 mode) Report type Function text (default) Text (preset) I I I I I PLU hourly group (PGM2 mode) Report type Function text (default) Text (preset)
- Page 322 I I I I I Message (PGM2 mode) Report type Receipt logo text Free text VP text Bill text Bill footer Payee name for English check Entertainment bill message Scrolling message for pole display Scrolling message for main display I I I I I Auto generate GLU (PGM2) Start code/End code...
- Page 323 I I I I I Tax (PGM2 mode) Report type Tax no. Rate I I I I I Auto menu (PGM2 mode) Report type AUTO menu no. Text Automatic sequencing key no. Key no.
- Page 324 I I I I I Auto key sequence (PGM2 mode) Report type Automatic sequencing key no. Key operation I I I I I Customer (PGM2 mode) Report type Customer code Customer name Customer address Price level (0 - 6) Automatic group discount no. (0-10) I I I I I Customer control (PGM2 mode) Report type Limit of charge amount...
- Page 325 I I I I I Transfer mask (PGM2 mode) Report type Mask no. I I I I I Device configuration (PGM2 mode) Report type Device name Terminal no./Channel no. Head logo print Minimum length for bill on receipt/Auto cutter Initial slip feed line no./Maximum line no. of slip printing/ No.
- Page 326 I I I I I Direct key (PGM2 mode) Report type Key no. PLU level PLU code...
- Page 327 I I I I I On-line configuration (PGM2 mode) I I I I I VMP configuration (PGM2 mode) I I I I I ROM version (PGM2 mode)
-
Page 328: Data Saving Or Loading (Sd Card)
Data Saving or Loading (SD Card) The POS terminal data can be saved to the SD memory card, and the programming data can be loaded from the SD memory card. To use the SD card function, select the “SD CARD” mode in the mode selection window and perform the following operations. -
Page 329: Folder Creating
I I I I I Folder creating The master folder can be created for the data file. (¥SHARP¥ECRXXX05¥nnnnnnnn¥ : nnnnnnnn/folder code) (1) Select the [FOLDER CONTROL] menu in the “SD CARD” mode, the folder code list window is displayed. (2) Touch the [NEW] key, the text entry window is displayed and enter the folder code (max. 8 digits) to create. -
Page 330: Data Loading
I I I I I Data loading The programming data can be loaded from the SD card. (1) Select the [LOADING] menu in the “SD CARD” mode, the selection window “CLEAR & LOAD or LOAD ONLY” is displayed. 1. CLEAR & LOAD: For data loading with memory clear 2. -
Page 331: European Article Number (Ean) Or Universal Product Code (Upc)
European Article Number (EAN) or Universal Product Code (UPC) I I I I I EAN or UPC code Your machine can transact the following codes: • UPC-A (Number system character: 0, 2, 3, 4) • UPC-E • EAN-8 • EAN-13 •... - Page 332 13 digits number EAN code without an add-on code. The format for press articles is decided unique by each country. For the formats for other countries than the ones shown below, please ask your authorized SHARP dealer. German type 2...
-
Page 333: Add-On Code
(If not generated, they are directly saved in the EAN main file.) The data saved temporarily can be transferred to the EAN main file when necessary by executing D-EAN LOAD in the PGM2 mode. If you want to use the dynamic EAN file, consult your authorized SHARP dealer. -
Page 334: Euro Migration Function
“EURO STATUS” in X2/Z2 mode. However, there are several options you must set depending on your need. So, please carefully conduct necessary settings. For details, contact your authorized SHARP dealer. EURO status: You can select status from following 4 types ((A), (B), (C), or (D)). And the selectable type is decided as follows for each status. - Page 335 Setting the date and time when the automatic EURO modification operation should be executed To certainly execute the automatic modification operation, you can program the scheduled date and time to execute the automatic EURO modification operation. From ten days before the preset date, the remaining days are printed at the bottom of the daily full resetting report.
-
Page 336: Drink Dispenser
POS terminal. Drink Dispenser UP-3500 When an entry error is found, perform the following steps: Check the error by the drink dispenser misoperation file reading or drink dispenser error reading. - Page 337 I I I I I Drink dispenser misoperation file The error caused by misoperation or missetting is stored in the drink dispenser misoperation file. I I I I I Disposal of misoperation The following two types of misoperation disposal are possible: Type 1: Misoperation in the case when an incorrect GLU code is used.
- Page 338 I I I I I Correction of drink dispenser records from a drink dispenser misopera- tion file When a clerk recognizes that a drink dispenser misoperation file has a record, the clerk can correct the drink dispenser operation by selecting of the drink dispenser article on the screen. [DD_CORRECT] [ENTER] [OPENED_GLU]...
-
Page 339: Operator Maintenance
Operator Maintenance In Case of Power Failure When power is lost, the POS terminal retains its memory contents and all information on sales totals. • When power failure is encountered in the POS terminal idle state or during an entry, the POS terminal returns to the normal state of operation after power recovery. -
Page 340: Options
Options List of Options For your UP-3500 POS terminal, the following options are available: For details, contact your authorized SHARP dealer. Do not try to install any options yourself. 1. Integrated rear customer display: UP-I20DP 2. Remote customer pole display: UP-P20DP/UP-P20DPB 3. -
Page 341: Specifications
Rubber foot: Screw (M4 × 25): Screw (M3 × 8): Ferrite core (for LAN cable): 1 (Please keep this accessory. Contact your authorized SHARP dealer for intallation.) Nylon clamp: • Specifications and appearance are subject to change without notice for improvement. - Page 342 UNIT (KEY Model: RUNTZ3844RCZZ og BODY Model: RUNTZ3845RCZZ) overholder de væsentlige krav og øvrige relevante krav i direktiv 1999/5/EF. Hiermit erklärt SHARP CORPORATION , dass sich das Gerät CONTACTLESS CLERK KEY UNIT (KEY Model: RUNTZ3844RCZZ und BODY Model: RUNTZ3845RCZZ) in Übereinstimmung mit den grundlegenden Anforderungen und den übrigen einschlägigen Bestimmungen der Richtlinie 1999/5/EG...
- Page 343 Noise level: 37,3 dB(A) Measured according to EN ISO 7779:2001 [Maximum value if the optional cash drawer springs open: 74,1 dB(A)]...
- Page 344 UP3500V_MIE10...