Texecom Premier Elite 8XP-W Installation Manual
Hide thumbs
Also See for Premier Elite 8XP-W:
- Installation manual (52 pages) ,
- Installation manual (32 pages) ,
- Installation manual (40 pages)
Table of Contents
Advertisement
Advertisement
Table of Contents

Related Manuals for Texecom Premier Elite 8XP-W


Summary of Contents for Texecom Premier Elite 8XP-W
-
Page 1: Installation Manual
Installation Manual Premier Elite 8XP-W & Premier Elite 32XP-W INS467-3... -
Page 2: Table Of Contents
Premier Elite 8XP-W & 32XP-W Installation Manual 1. Contents Contents ....................2 Premier Elite 8XP-W & 32XP-W ..............4 Quick Start Guide ..................5 System Design Considerations..............6 Learning Devices ..................6 Placing Devices ................... 6 System Overview ..................7 Mounting the Expander .................. - Page 3 Arm Fail Indication ..................37 Battery Considerations ................... 38 SmartKey™ ....................38 Low Battery Warning .................. 38 Battery Maintenance .................. 38 Premier Elite 8XP-W & 32XP-W Power Loss ..........38 Specifications ..................39 Electrical ......................39 Physical ......................39 Wireless ......................39 Standards ......................
-
Page 4: Premier Elite 8Xp-W & 32Xp-W
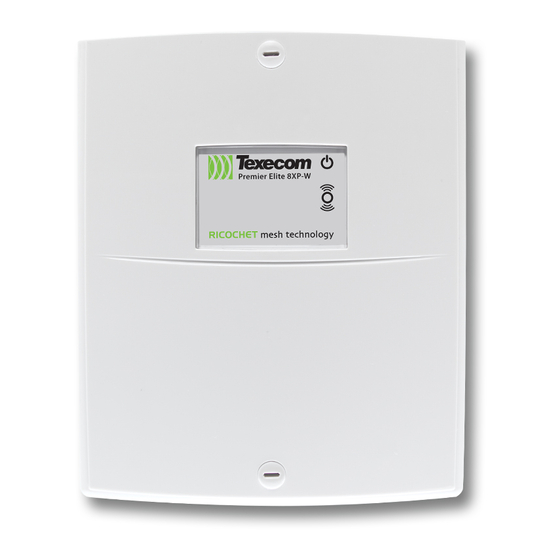
Premier Elite 8XP-W & 32XP-W Installation Manual 2. Premier Elite 8XP-W & 32XP-W Texecom has developed a new method of wireless security signalling based on the concept of mesh networking. Mesh-networking is the process whereby every single wireless device is capable of receiving and retransmitting any signal from any other wireless device on the network. -
Page 5: Quick Start Guide
Premier Elite 8XP-W & 32XP-W Installation Manual 3. Quick Start Guide Connect Receiver to Control Panel Network & Leave Tamper Circuit Open. See Page 9 Check Panel Firmware Version Ricochet™ See Page 4 Ensure all Option Switches Legacy are off... -
Page 6: System Design Considerations
Premier Elite 8XP-W & 32XP-W Installation Manual 4. System Design Considerations To ensure correct setup and operation of the Wireless Network it is important that the following procedures are used when learning and placing devices. Learning Devices All devices should be learnt before they are placed in their final location. The expander should be in commission mode, please see page 32.This will ensure that they are registered on the receiver... -
Page 7: System Overview
Premier Elite 8XP-W & 32XP-W Installation Manual 5. System Overview 1 2 3 4 1 2 3 4 1: Engineers Keypad Connection An engineer’s keypad (Premier/Elite LCD keypad and interface lead) can be temporarily plugged onto this connector to allow system programming and testing. (Functions dependent on Panel firmware version) Set the keypad address switches to all on. - Page 8 Premier Elite 8XP-W & 32XP-W Installation Manual 5: Lid Tamper When open puts the system into commission mode and digitally attenuates the receiver signal by 6Db. 6: Programming LED’s Allows programming of devices directly to the receiver, in conjunction with the learn switch.
-
Page 9: Mounting The Expander
Premier Elite 8XP-W & 32XP-W Installation Manual Mounting the Expander Remove each screw cap by inserting a flat bladed screwdriver into the slot and turning anti- clockwise, excessive force is NOT required. Remove both of the cover screws and put them in a safe place along with the screw caps. -
Page 10: Selecting An Address
Premier Elite 8XP-W & 32XP-W Installation Manual The networks are made up of four terminals incorporating power and data. To ensure correct operation, all four terminals on the device must be connected to the corresponding terminals on the control panel or previous device. -
Page 11: Programming
Premier Elite 8XP-W & 32XP-W Installation Manual 6. Programming It is highly recommended that you upgrade the Panel Firmware to the latest version to ensure full compatibility; however the system is backwards compatible as detailed in the table on page 4. -
Page 12: Deleting Devices
Premier Elite 8XP-W & 32XP-W Installation Manual Follow the instructions on the next page to learn devices to the system, once complete follow the instructions in the relevant control panel manual to programme zone type, attributes and user permissions. Place devices in their final location ONLY after they have been learned to the system. -
Page 13: Premier 24 V7.00-V8.23, 48/88/168 V7.00 - V8.14, 640 V7.00-V8.15
Premier Elite 8XP-W & 32XP-W Installation Manual Premier 24 V7.00-V8.23, 48/88/168 V7.00 – V8.14, 640 V7.00-V8.15 Option Switch Settings For V7.00-V8.11 of firmware switch 1 2 & 3 should be ON for all panels. For Versions prior to V7.40 on the Premier 24, Learned devices should be mapped to zones 9-24 only, it is not possible to map to Zones 1-8. -
Page 14: Deleting Devices
Premier Elite 8XP-W & 32XP-W Installation Manual Follow these instructions to learn devices to the control panel AFTER they have been learnt to the receiver. YES to Select:- Engineer Utils y / y Engineer Utils View Event Log Engineer Utils... -
Page 15: Premier 412/816/816 Plus & 832 Pv1.00
Premier Elite 8XP-W & 32XP-W Installation Manual Premier 412/816/816 Plus & 832 PV1.00> Premier 412/816 V11.10 & Later, Premier 832 V4.10 & Later Follow these instructions to learn devices to the system, once completed follow the relevant section of the control panel manual to programme zones and user attributes. -
Page 16: Removing Detectors
Premier Elite 8XP-W & 32XP-W Installation Manual Removing Detectors If a detector is no longer required it must be unassigned from the system. To remove a detector from a zone, proceed as follows: Enter Engineers code ???? Then press then ... - Page 17 Premier Elite 8XP-W & 32XP-W Installation Manual SmartKey™ are assigned to users as follows: Enter Engineers code ???? Then press then Programming Menu Enter Code > Enter User Program User ?? Program User ?? Number ?? Enter User No.??
-
Page 18: Smartkey
Premier Elite 8XP-W & 32XP-W Installation Manual SmartKey™ If a SmartKey™ is no longer required it must be unassigned from the system. To remove a SmartKey™ from a user, proceed as follows: Enter Engineers code ???? Then press then ... -
Page 19: Premier 412/816 V10.5 - V11.07 & Premier 832 V3.50.-.V4.07
Premier Elite 8XP-W & 32XP-W Installation Manual Premier 412/816 V10.5 – V11.07 & Premier 832 V3.50.-.V4.07 Follow these instructions to learn devices to the system, once completed follow the relevant section of the control panel manual to programme zones and user attributes. -
Page 20: Removing Detectors
Premier Elite 8XP-W & 32XP-W Installation Manual Select engineer’s mode by entering the engineer code followed by / then . Enter to select the Assign Radio Device menu, if an error tone is generated then the receiver is not installed or configured correctly. -
Page 21: Smartkey
Premier Elite 8XP-W & 32XP-W Installation Manual SmartKey™ All SmartKey™ must be assigned to one of the available users on the system. The users available will vary depending on the control panel: Control Panel Available Users Premier 412 Users 1 to 31... -
Page 22: Removing Smartkey
Premier Elite 8XP-W & 32XP-W Installation Manual Removing SmartKey™ If a SmartKey™ is no longer required it must be unassigned from the system. To remove a SmartKey™ from a user, proceed as follows: Enter Engineers code ???? Then press then ... -
Page 23: Learning Devices Directly To The 8Xp-W & 32Xp-W
Premier Elite 8XP-W & 32XP-W Installation Manual Learning Devices directly to the 8XP-W & 32XP-W this is only available in legacy mode. All devices can be learnt directly to the receiver. Device attributes cannot be changed when learning devices in this mode, all devices will use their factory default. -
Page 24: Using The Engineers Keypad
Premier Elite 8XP-W & 32XP-W Installation Manual Using the Engineers Keypad The Engineers Keypad can be connected directly to the expander, and has the following features & functions. Learning & Deleting devices is only available in Legacy Mode Device list... - Page 25 Premier Elite 8XP-W & 32XP-W Installation Manual Delete Devices Eng Keypad 1:Device List y / y 01 PIR ..Poll:00 ID4DD3C3 y / y 01 ..20 Activate Device R / R XX No Dev ..
- Page 26 Premier Elite 8XP-W & 32XP-W Installation Manual Change Device attributes Device attribute changes should be saved by either pressing the y/ key after each device change, or by pressing the y/ key after scrolling through the devices and making multiple changes.
- Page 27 Premier Elite 8XP-W & 32XP-W Installation Manual Change SmartKey™ attributes SmartKey™ attribute changes should be saved by either pressing the key after each SmartKey™ change, or by pressing the key after scrolling through the devices and making multiple changes.
-
Page 28: Update Devices
Premier Elite 8XP-W & 32XP-W Installation Manual Update Devices Used to immediately update devices (NOT SmartKey™) attributes when changed in the Device List menu. Eng Keypad 2:Update Devices y / y Updating Devices xx of xx done Devices Up To Date ... -
Page 29: Walktest Mode
Premier Elite 8XP-W & 32XP-W Installation Manual Walktest Mode Used to initiate & stop Walktest Mode Eng Keypad 3:Walktest Mode y / y Walktest Mode Turn on for 1hr y / y Updating Devices xx of xx done Wh en u pd atin g d evic es a mes s ag e is s en t to all to ena ble th e LE D’... -
Page 30: System Status
Premier Elite 8XP-W & 32XP-W Installation Manual System Status Shows various System Details Sys: OK = Receiver connected to Premier Network correctly NC = Not Connected V:?.?.? = Firmware version of the Premier 8XP-W/32XP-W AM = Receiver is being Jammed CM = Commission Mode Nw:xx = the Wireless Network. -
Page 31: Device Status Indications
Premier Elite 8XP-W & 32XP-W Installation Manual Device Status Indications On the top line of the display the following may be seen depending on the device and status:- Ft = all devices Front Tamper xx ..Ft .. Poll:00... -
Page 32: Modes Of Operation
Premier Elite 8XP-W & 32XP-W Installation Manual 7. Modes of Operation Commission Mode Expander The expander has a Commission Mode, which when operated ensures secure communications with devices on the system. Commission Mode is automatically enabled when the expander is in tamper. -
Page 33: Walktest Mode
Premier Elite 8XP-W & 32XP-W Installation Manual The two additional inputs are NOT independently programmable of the reed switch, when mapped to a panel zone if either the reed switch or any of the inputs are triggered the zone which the device is mapped too will go active. -
Page 34: System Attributes
Premier Elite 8XP-W & 32XP-W Installation Manual 8. System Attributes Polling Polling occurs between the devices and the receiver at a pre-determined interval of 15 minutes. This helps to conserve battery life. Poll intervals are set to 4 minutes when the system is in Commission Mode. -
Page 35: Premier Elite Smartkey
Premier Elite 8XP-W & 32XP-W Installation Manual Premier Elite SmartKey™ LED Indications SmartKey™ Status LED The Status LED has four colours. This LED cannot be disabled. Pink = Power Up or Down Green = Successful communication with the system Flashing Blue = communication with system. -
Page 36: Auxiliary Functions
Premier Elite 8XP-W & 32XP-W Installation Manual Auxiliary Functions The SmartKey™ can also be used to activate auxiliary devices from the control panel outputs. The function keys should first be enabled either from the Engineers Keypad see page 27, or RICOCHET™... -
Page 37: Arm Fail Indication
Premier Elite 8XP-W & 32XP-W Installation Manual S martKey s tatus LE D AR M PAR T AR M DIS AR M P O WE R (hold 2 s ecs) Alarm status LE D’s DIS AR ME D PAR T AR ME D... -
Page 38: Battery Considerations
Premier Elite 8XP-W & 32XP-W Installation Manual Battery Considerations Battery life for all devices will be determined by system complexity, the number of devices that hop, and the use of the Always Awake mode. In a typical system, battery life should be up to 4 years for devices, hopping devices should achieve between 2-3 years. -
Page 39: Specifications
Premier Elite 8XP-W & 32XP-W Installation Manual 9. Specifications Electrical 10 - 13.7VDC Operating Voltage Current Consumption <120mA Network 4-wire standard 7/0.2 alarm cable up to 250m. Star, Daisy Chain or any combination. Outputs 1 - 8 Not Used -10°C (+14°F) to +50°C (+122°F) Operating Temperature -20°C (-4°F) to +60°C (+140°F) -
Page 40: Standards
RoHs Directive: 2002/95/EC RoHS Compliant. Hereby, Texecom declares that this device does not contain lead, mercury, cadmium, hexavalent chromium, polybrominated biphenyls (PBB) or polybrominated depheny ethers (PBDE) in more than the percentage specified by EU directive 2002/95/EC, except exemptions stated in EU directive 2002/95/EC annex. -
Page 41: Warranty
As the Premier Elite 8 XP-W & 32XP-W expander is not a complete alarm system but only a part thereof, Texecom cannot accept responsibility or liability for any damages whatsoever based on a claim that the Premier Elite 8 XP-W & 32XP-W expander/s failed to function correctly. Due to our policy of continuous improvement Texecom reserve the right to change specification without prior notice. -
Page 42: Notes
Premier 8XP-W & 32XP-W Installation Manual Notes INS467-3... -
Page 43: Notes
Premier 8XP-W & 32XP-W Installation Manual Notes INS467-3... -
Page 44: Technical Support
Texecom Limited, Bradwood Court, St. Crispin Way, Haslingden, Lancashire BB4 4PW, England. Technical Support: UK Customers Tel: 08456 300 600 (Calls charged at local rate from a BT landline. Calls from other networks may vary.) International Customers Tel: +44 1706 233875 Email: techsupport@texe.com...
Need help?
Do you have a question about the Premier Elite 8XP-W and is the answer not in the manual?
Questions and answers