Table of Contents
Advertisement
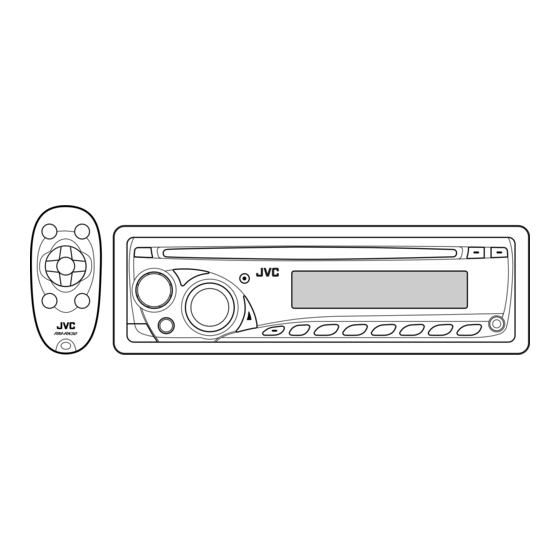
CD RECEIVER
RECEPTOR CON CD
RÉCEPTEUR CD
For canceling the display demonstration, see page 6.
Para cancelar la demostración en pantalla, consulte la página 6.
Pour annuler la démonstration des affichages, référez-vous à la page 6.
For installation and connections, refer to the separate manual.
Para la instalación y las conexiones, refiérase al manual separado.
Pour l'installation et les raccordements, se référer au manuel séparé.
INSTRUCTIONS
MANUAL DE INSTRUCCIONES
MANUEL D'INSTRUCTIONS
KD-APD49/KD-PDR40
KD-APD49/KD-PDR40
KD-APD49/KD-PDR40
For customer Use:
Enter below the Model
No. and Serial No. which
are located on the top or
bottom of the cabinet. Retain
this information for future
reference.
Model No.
Serial No.
GET0483-001A
[J]
Advertisement
Table of Contents
Troubleshooting

Related Manuals for JVC GET0483-001A


Summary of Contents for JVC GET0483-001A
- Page 1 MANUAL DE INSTRUCCIONES MANUEL D’INSTRUCTIONS KD-APD49/KD-PDR40 KD-APD49/KD-PDR40 KD-APD49/KD-PDR40 For customer Use: Enter below the Model No. and Serial No. which are located on the top or bottom of the cabinet. Retain this information for future reference. Model No. Serial No. GET0483-001A...
- Page 3 CONTENTS • Your preset adjustments will also be erased. • Be careful not to drop the disc when it ejects. • If this does not work, reset your unit. 5 ∞...
-
Page 4: Control Panel
Control panel — ∞ DO NOT expose the remote sensor to strong light (direct sunlight or artificial lighting). ¢ KD-APD49 / KD-PDR40... -
Page 5: Remote Controller
Remote controller — Installing the lithium coin battery (CR2025) Aim the remote controller directly at the remote sensor on the unit. Make sure there is no obstacle in between. Warning: Main elements and features RM-RK50 ∞ ∞ ∞ 2 ∞ ∞... -
Page 6: Getting Started
Getting started Ÿ ⁄... -
Page 7: Radio Operations
Radio operations Ÿ... -
Page 8: Disc Operations
Disc operations... -
Page 10: Ipod Operations
iPod operations Ÿ... - Page 11 5 ∞ 4 ¢ Ô Ô Ô Ô Ô Ô Ô Ô ¢...
-
Page 12: Sound Adjustments
Functions only if you select “ALL” in “ALBUMS” of the main menu. When “TAG DISPLAY” is set to “TAG OFF” (see page 15), file name and folder name appear. Sound adjustments... -
Page 14: General Settings - Psm
General settings — PSM If the power supply is not interrupted by turning off the ignition key of your car, it is recommended that you select “CLOCK OFF” to save the car’s battery. - Page 15 Displayed only when an iPod is connected and playback is controlled from the unit. Some characters or symbols will not be shown correctly (or will be blanked) on the display. Displayed only when “L/O MODE” is set to “SUB.W.”...
- Page 16 Other external component operations Ÿ ⁄ Title assignment Ô...
-
Page 17: Maintenance
Maintenance More about this unit Continued on the next page... - Page 18 General Tuner operations Storing stations in memory Disc operations Caution for DualDisc playback General Playing a CD-R or CD-RW Playing an MP3/WMA disc...
- Page 19 Notice: Ejecting a disc General settings—PSM iPod operations Continued on the next page...
-
Page 20: Troubleshooting
Troubleshooting... - Page 21 Symptoms Remedies/Causes...
-
Page 22: Specifications
Specifications AUDIO AMPLIFIER SECTION Power Output: TUNER SECTION FM Tuner AM Tuner 20 W RMS × 4 Channels at 4 Ω and ≤ 1% THD+N... -
Page 23: Cd Player Section
CD PLAYER SECTION GENERAL Design and specifications are subject to change without notice. - Page 24 Having TROUBLE with operation? Please reset your unit Refer to page of How to reset your unit Still having trouble?? USA ONLY Call 1-800-252-5722 http://www.jvc.com We can help you! EN, SP, FR © 2007 Victor Company of Japan, Limited 1107DTSMDTJEIN...
- Page 25 KD-APD49/KD-PDR40 Installation/Connection Manual Manual de instalación/conexión Manuel d’installation/raccordement GET0483-002A ENGLISH WARNINGS • • • • • • • ESPAÑOL ADVERTENCIAS • • • • • • • 1107DTSMDTJEIN EN, SP, FR © 2007 Victor Company of Japan, Limited FRANÇAIS AVERTISSEMENTS •...
-
Page 26: Installation
INSTALLATION (IN-DASH MOUNTING) • INSTALACION (MONTAJE EN EL TABLERO DE INSTRUMENTOS) • × × × × INSTALLATION (MONTAGE DANS LE TABLEAU DE BORD) • × × × ×... -
Page 27: Electrical Connections
ENGLISH ELECTRICAL CONNECTIONS Typical connections / Conexiones tipicas / Raccordements typiques Before connecting: Connecting to the steering wheel remote controller (only for KD-APD49) / Conexión al control remoto del volante de dirección (sólo para KD-APD49) / Connexion de la télécommande de volant (seulement pour le KD-APD49) ESPAÑOL CONEXIONES ELECTRICAS Antes de la conexión:... -
Page 28: Localizacion De Averias
(Consulte la página 15 del MANUAL DE INSTRUCCIONES.) Réglez “L/O MODE” sur “REAR” (Voir page 15 du MANUEL D’INSTRUCTIONS.) JVC Amplifier Amplificador de JVC JVC Amplificateur Set “L/O MODE” to “SUB.W” (See page 15 of the INSTRUCTIONS.) Ajuste “L/O MODE” a “SUB.W”... - Page 29 CD RECEIVER KD-PDR45 KD-PDR45 For canceling the display demonstration, see page 6. For installation and connections, refer to the separate manual. INSTRUCTIONS GET0489-001A [U/UH]...
- Page 31 CONTENTS • Your preset adjustments will also be erased. • Be careful not to drop the disc when it ejects. • If this does not work, reset your unit. 5 ∞...
-
Page 32: Control Panel
Control panel ∞ DO NOT expose the remote sensor to strong light (direct sunlight or artificial lighting). ¢... -
Page 33: Remote Controller
Remote controller — Installing the lithium coin battery (CR2025) Aim the remote controller directly at the remote sensor on the unit. Make sure there is no obstacle in between. Warning: Main elements and features RM-RK50 ∞ ∞ ∞ 2 ∞ ∞... -
Page 34: Getting Started
Getting started Ÿ ⁄... -
Page 35: Radio Operations
Radio operations Ÿ... -
Page 36: Disc Operations
Disc operations... -
Page 38: Ipod Operations
iPod operations Ÿ... - Page 39 Adjust the sound as you want. (See pages 12 and 13.) To control playback from your iPod Playback control from the unit Selecting a track from the menu Enter the main menu. 5 ∞ 4 ¢ Select the desired menu. Ô...
-
Page 40: Sound Adjustments
Sound adjustments... -
Page 42: General Settings - Psm
General settings — PSM If the power supply is not interrupted by turning off the ignition key of your car, it is recommended that you select “CLOCK OFF” to save the car’s battery. - Page 43 Displayed only when an iPod is connected and playback is controlled from the unit. Some characters or symbols will not be shown correctly (or will be blanked) on the display. Displayed only when “L/O MODE” is set to “SUB.W.”...
- Page 44 Other external component operations Ÿ ⁄ Title assignment Ô...
-
Page 45: Maintenance
Maintenance More about this unit Continued on the next page... - Page 46 Tuner operations Storing stations in memory Disc operations Caution for DualDisc playback General Playing a CD-R or CD-RW Playing an MP3/WMA disc...
- Page 47 Notice: Ejecting a disc General settings—PSM iPod operations Continued on the next page...
-
Page 48: Troubleshooting
Troubleshooting... -
Page 50: Specifications
Specifications AUDIO AMPLIFIER SECTION TUNER SECTION FM Tuner AM Tuner... - Page 51 Design and specifications are subject to change without notice.
- Page 52 Having TROUBLE with operation? Please reset your unit Refer to page of How to reset your unit EN, TH © 2007 Victor Company of Japan, Limited 1107DTSMDTJEIN...
- Page 53 KD-PDR45 Installation/Connection Manual GET0489-006A [U/UH] ENGLISH WARNINGS • • • Ω Ω • • • • • • • • • 1107DTSMDTJEIN EN, TH © 2007 Victor Company of Japan, Limited Ω Ω × × ×...
- Page 54 INSTALLATION (IN-DASH MOUNTING) • • × ×...
-
Page 55: Electrical Connections
ENGLISH ELECTRICAL CONNECTIONS Typical connections / Before connecting:... - Page 56 • Disconnect the speakers from this unit, connect them to the amplifier. Leave the speaker leads of this unit unused. Set “L/O MODE” to “REAR” (See page 15 of the INSTRUCTIONS.) “L/O MODE” “REAR” ( JVC Amplifier Set “L/O MODE” to “SUB.W” (See page 15 of the INSTRUCTIONS.) “L/O MODE” “SUB.W” ( JVC Amplifier...
- Page 57 CD RECEIVER ALAT PENERIMA CD For canceling the display demonstration, see page 6. Untuk membatalkan tampilan demonstrasi, lihat halaman 6. For installation and connections, refer to the separate manual. Untuk instalasi dan penyambungan, lihat buku pedoman terpisah. INSTRUCTIONS BUKU PETUNJUK KD-PDR45 KD-PDR45 GET0489-004A...
- Page 59 CONTENTS • Your preset adjustments will also be erased. • Be careful not to drop the disc when it ejects. • If this does not work, reset your unit. 5 ∞...
-
Page 60: Control Panel
Control panel ∞ DO NOT expose the remote sensor to strong light (direct sunlight or artificial lighting). ¢... -
Page 61: Remote Controller
Remote controller — Installing the lithium coin battery (CR2025) Aim the remote controller directly at the remote sensor on the unit. Make sure there is no obstacle in between. Warning: Main elements and features RM-RK50 ∞ ∞ ∞ 2 ∞ ∞... -
Page 62: Getting Started
Getting started Ÿ ⁄... -
Page 63: Radio Operations
Radio operations Ÿ... -
Page 64: Disc Operations
Disc operations... -
Page 66: Ipod Operations
iPod operations Ÿ... - Page 67 Adjust the sound as you want. (See pages 12 and 13.) To control playback from your iPod Playback control from the unit Selecting a track from the menu Enter the main menu. 5 ∞ 4 ¢ Select the desired menu. Ô...
-
Page 68: Sound Adjustments
Sound adjustments... -
Page 70: General Settings - Psm
General settings — PSM If the power supply is not interrupted by turning off the ignition key of your car, it is recommended that you select “CLOCK OFF” to save the car’s battery. - Page 71 Displayed only when an iPod is connected and playback is controlled from the unit. Some characters or symbols will not be shown correctly (or will be blanked) on the display. Displayed only when “L/O MODE” is set to “SUB.W.”...
- Page 72 Other external component operations Ÿ ⁄ Title assignment Ô...
-
Page 73: Maintenance
Maintenance More about this unit Continued on the next page... - Page 74 Tuner operations Storing stations in memory Disc operations Caution for DualDisc playback General Playing a CD-R or CD-RW Playing an MP3/WMA disc...
- Page 75 Notice: Ejecting a disc General settings—PSM iPod operations Continued on the next page...
-
Page 76: Troubleshooting
Troubleshooting... -
Page 78: Specifications
Specifications AUDIO AMPLIFIER SECTION TUNER SECTION FM Tuner AM Tuner... - Page 79 Design and specifications are subject to change without notice.
- Page 80 Having TROUBLE with operation? Please reset your unit Refer to page of How to reset your unit Ada MASALAH dengan cara pengoperasian? Setel kembali unit Anda Lihat halaman mengenai Bagaimana mereset unit anda EN, IN © 2007 Victor Company of Japan, Limited 1107DTSMDTJEIN...
- Page 81 KD-PDR45 Installation/Connection Manual Manual Pemasangan/Penyambungan GET0489-009A [UN] ENGLISH WARNINGS • • • Ω Ω • • • • INDONESIA PERINGATAN • • • • • 1107DTSMDTJEIN EN, IN © 2007 Victor Company of Japan, Limited Ω Ω × ×...
- Page 82 INSTALLATION (IN-DASH MOUNTING) • PEMASANGAN (BINGKAI-DALAM DASH) • × ×...
-
Page 83: Electrical Connections
ENGLISH ELECTRICAL CONNECTIONS Typical connections / Ciri khas sambungan-sambungan Before connecting: Keluaran (lihat diagram Terminal tanah belakang Terminal antena Putih dengan strip hitam Putih Abu-abu dengan strip hitam Speaker kiri (depan) INDONESIA SAMBUNGAN-SAMBUNGAN LISTRIK Sebelum penyambungan: Cek perkabelan dalam mobil dengan hati-hati. Penyambungan yang tidak benar mungkin menyebabkan kerusakan serius pada unit. -
Page 84: Pemecahan Masalah
Set “L/O MODE” to “REAR” (See page 15 of the INSTRUCTIONS.) Setel “L/O MODE ” ke “REAR” (Lihat halaman 15 dari BUKU PETUNJUK.) JVC Amplifier Penguat JVC Set “L/O MODE” to “SUB.W” (See page 15 of the INSTRUCTIONS.) Setel “L/O MODE ” ke “SUB.W” (Lihat halaman 15 dari BUKU PETUNJUK.) - Page 85 CD RECEIVER For canceling the display demonstration, see page 6. For installation and connections, refer to the separate manual. INSTRUCTIONS KD-PDR45 KD-PDR45 GET0489-005A [UT]...
- Page 87 CONTENTS • Your preset adjustments will also be erased. • Be careful not to drop the disc when it ejects. • If this does not work, reset your unit. 5 ∞...
-
Page 88: Control Panel
Control panel ∞ DO NOT expose the remote sensor to strong light (direct sunlight or artificial lighting). ¢... -
Page 89: Remote Controller
Remote controller — Installing the lithium coin battery (CR2025) Aim the remote controller directly at the remote sensor on the unit. Make sure there is no obstacle in between. Warning: Main elements and features RM-RK50 ∞ ∞ ∞ 2 ∞ ∞... -
Page 90: Getting Started
Getting started Ÿ ⁄... -
Page 91: Radio Operations
Radio operations Ÿ... -
Page 92: Disc Operations
Disc operations... -
Page 94: Ipod Operations
iPod operations Ÿ... - Page 95 Adjust the sound as you want. (See pages 12 and 13.) To control playback from your iPod Playback control from the unit Selecting a track from the menu Enter the main menu. 5 ∞ 4 ¢ Select the desired menu. Ô...
-
Page 96: Sound Adjustments
Sound adjustments... -
Page 98: General Settings - Psm
General settings — PSM If the power supply is not interrupted by turning off the ignition key of your car, it is recommended that you select “CLOCK OFF” to save the car’s battery. - Page 99 Displayed only when an iPod is connected and playback is controlled from the unit. Some characters or symbols will not be shown correctly (or will be blanked) on the display. Displayed only when “L/O MODE” is set to “SUB.W.”...
- Page 100 Other external component operations Ÿ ⁄ Title assignment Ô...
-
Page 101: Maintenance
Maintenance More about this unit Continued on the next page... - Page 102 Tuner operations Storing stations in memory Disc operations Caution for DualDisc playback General Playing a CD-R or CD-RW Playing an MP3/WMA disc...
- Page 103 Notice: Ejecting a disc General settings—PSM iPod operations Continued on the next page...
-
Page 104: Troubleshooting
Troubleshooting... -
Page 106: Specifications
Specifications AUDIO AMPLIFIER SECTION TUNER SECTION FM Tuner AM Tuner... - Page 107 Design and specifications are subject to change without notice.
- Page 108 Having TROUBLE with operation? Please reset your unit Refer to page of How to reset your unit EN, CT © 2007 Victor Company of Japan, Limited 1107DTSMDTJEIN...
- Page 109 KD-PDR45 Installation/Connection Manual 安裝/連接手冊 GET0489-010A [UT] ENGLISH WARNINGS • • • Ω Ω • • • • 硬盒/控制面板 直接連接電纜 橡膠防震墊 中文 本機僅可使用直流 壓變換器,可以在 警告 為防止短路,建議在安裝本機之前,拔開電池的負極,並把所有電路都連接好。 • 安裝完畢後務必將本機的地線重新接至車身。 注意: • 把保險絲更換為額定負荷值的保險絲。如果保險絲經常燒壞,請向 • 後置和前置揚聲器的最大輸入功率應大於 請調校“ • 為防止電源短路,請用絕緣帶包住未使用電線的端子。 • 本機使用後,散熱片會很熱。因此,在移出本機時,小心不要觸摸散熱片。 散熱片 電源和揚聲器接線注意事項: • 切勿把揚聲器導線接頭接至電池,否則本機將會嚴重損壞。 •...
-
Page 110: Installation (In-Dash Mounting)
INSTALLATION (IN-DASH MOUNTING) • 若選用支撐架 防火板 儀表板 將本機安裝在少於 安裝(裝設、固定在儀表板內) 下面的圖解表示了典型的安裝程序。如果您有問題,或需要有關配套元件的資料,請向 汽車音響分銷商或配套元件供應公司詢問。 如果您不能確定如何正確地安裝本機,應請合格的技術人員來安裝。 進行所需的電路連接。 拆卸本機 在拆卸本機前,應將本機後部的固定和連接部分鬆開。 按圖所示,將兩片板條型把手插入卡槽, 然後輕穩地從兩側向外拉兩片把手,本機 隨之拉出。 以豐田牌( )汽車為例:首先取出汽車收音機,然後將本機裝入其空出的位置。 支撐架(選用的) 平頭螺絲釘( 托座 螺絲釘(選用的) 空殼 : 的角度。 注意 :把本機安裝在托座上時,務必使用 您豎起本機時,小心不要損壞底部的保險絲。 不隨本機提供。 弄彎機殼的突舌,把外套機殼牢固在儀 表板內。 若不使用外套機殼安裝本機 ) 平頭螺絲釘( 托座 長的螺絲釘。如使用過長的螺絲釘,會損壞本機。 )... - Page 111 ENGLISH ELECTRICAL CONNECTIONS Typical connections / 典型的接線方法 Before connecting: 線性輸出(參閱圖表 ) 本機後背接地端子 天線端子 白色帶有黑色條紋 白色 灰色帶有黑色條紋 左揚聲器(前置) 中文 電路連接 接線前: 仔細檢查汽車內的線路。不正確的接線會導致本機嚴重損壞。 電源線的引線和車身的連接器引線在顏色上可能有所不同。 依照下圖所示之次序連接電源線的顏色導線。 將天線的電線連接起來。 最後,把配線束的插頭插在本機上。 保險絲 連接器(參閱圖表 ) 黑色 接至金屬體或汽車底盤 黃色 接至保險絲單元內的帶電端子,保險絲單元與車裝電池相連接 (用於旁路點火開關)(恆定 ) 紅色 接至保險絲單元內的附屬端子 藍色 接至自動天線(若有裝設)(最大 藍色帶有白色條紋 連接至其他裝置上的遙控導線(最大 灰色...
- Page 112 Set “L/O MODE” to “REAR” (See page 15 of the INSTRUCTIONS.) 將“ ”設定為“ ”(參閱使用 L/O MODE REAR 說明書的第 頁。) JVC Amplifier 後置揚聲器 JVC 功率放大器 Set “L/O MODE” to “SUB.W” (See page 15 of the INSTRUCTIONS.) 將“ ”設定為“ ”(參閱使用 L/O MODE SUB.W...
- Page 113 CD RECEIVER RECEPTOR CON CD For canceling the display demonstration, see page 6. Para cancelar la demostración en pantalla, consulte la página 6. For installation and connections, refer to the separate manual. Para la instalación y las conexiones, refiérase al manual separado. INSTRUCTIONS MANUAL DE INSTRUCCIONES KD-S35...
- Page 115 CONTENTS • Your preset adjustments will also be erased. • Be careful not to drop the disc when it ejects. • If this does not work, reset your unit. 5 ∞...
- Page 116 Control panel ∞ DO NOT expose the remote sensor to strong light (direct sunlight or artificial lighting). ¢...
- Page 117 Remote controller — RM-RK50 ∞ ∞ ∞ 2 ∞ ∞...
- Page 118 Getting started Ÿ ⁄...
- Page 119 Radio operations Ÿ...
-
Page 120: Disc Operations
Disc operations... -
Page 122: Ipod Operations
iPod operations Ÿ... - Page 123 5 ∞ 4 ¢ Ô Ô Ô Ô Ô Ô Ô Ô ¢...
- Page 124 Sound adjustments...
-
Page 126: General Settings - Psm
General settings — PSM If the power supply is not interrupted by turning off the ignition key of your car, it is recommended that you select “CLOCK OFF” to save the car’s battery. - Page 127 Displayed only when an iPod is connected and playback is controlled from the unit. Some characters or symbols will not be shown correctly (or will be blanked) on the display. Displayed only when “L/O MODE” is set to “SUB.W.”...
- Page 128 Other external component operations Ÿ ⁄ Title assignment Ô...
- Page 129 Maintenance More about this unit Continued on the next page...
- Page 131 Continued on the next page...
-
Page 132: Troubleshooting
Preset value setting for each sound mode Preset value Sound mode BASS LOUD Freq. Level Freq. Level Freq. Level USER ROCK CLASSIC POPS HIP HOP JAZZ Troubleshooting Symptoms Remedies/Causes... - Page 134 Specifications AUDIO AMPLIFIER SECTION Power Output: TUNER SECTION FM Tuner AM Tuner 20 W RMS × 4 Channels at 4 Ω and ≤ 1% THD+N...
- Page 135 Design and specifications are subject to change without notice.
- Page 136 Having TROUBLE with operation? Please reset your unit Refer to page of How to reset your unit Still having trouble?? USA ONLY Call 1-800-252-5722 http://www.jvc.com We can help you! EN, SP © 2008 Victor Company of Japan, Limited 0508DTSMDTJEIN...
- Page 137 KD-S35 Installation/Connection Manual Manual de instalación/conexión GET0563-002A ENGLISH PREPARATIONS INSTALLATION TROUBLESHOOTING × × × 0508DTSMDTJEIN EN, SP © 2008 Victor Company of Japan, Limited * Not supplied for this unit. ×...
- Page 138 ELECTRICAL CONNECTIONS Not supplied for this unit. Before checking the operation of this unit prior to installation, this lead must be connected, otherwise power cannot be turned on. Firmly attach the ground wire to the metallic body or to the chassis of the car—to the place not coated with paint (if coated with paint, remove the paint before attaching the wire).