Table of Contents
Advertisement
Advertisement
Table of Contents

Related Manuals for XDrum DD-501


Summary of Contents for XDrum DD-501
- Page 1 DD-501 E-Drum Set Users manual 00022173 Version 01/2010...
-
Page 2: Power Supply
Congratulations! Thank you for purchasing this digital drum module. The drum module has been developed to act and play like a drum set but with greater ease. Before you use the instrument, we recommend you to read through this manual. Taking Care of Your Digital Drum Set Location Handling and Transport... -
Page 3: Table Of Contents
Contents Panel Controls - Front Panel - Rear Panel Setup - Connect the Pads and the Pedals - Connect the Power supply jack - Connect a audio equipment - Connect a CD player, etc.(Mix in jack) - Connect Headphones - Connect a MIDI and USB device - MIDI out format Functions - Switch the power ON... -
Page 4: Panel Controls
Panel Controls Front Panel [pattern] Button [volume] knob Enter the pattern select mode and provide Control the volume of phone. MIDI output format choice. Turn it clockwise to increase the volume and anticlockwise to decrease it. [voice] Button Enter the voice select mode. [ + ] and [ - ] buttons Adjust the parameter of the current menu [kit] Button... -
Page 5: Rear Panel
Rear Panel DC Input Support DC 9V power. Phone Jack Connect headphone or loudspeaker. Output Jacks Support Line stereo output. MIX Input Jacks Connect with external sound source. USB Port Connect to computer or other USB host devices. Trigger Input Jacks Connect with kick, snare, tom1~tom3, ride, crash, hi-hat, hi-hat control triggers. -
Page 6: Setup
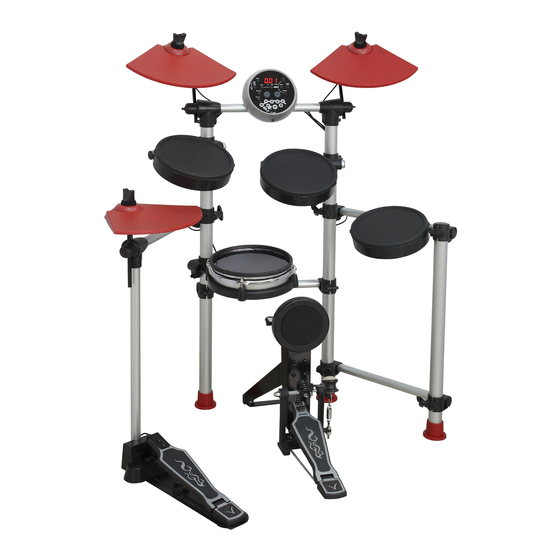
Setup Caution! To prevent electric shock and damage to the device, make sure the power is switched OFF on the drum and all related device before making any connection. Connect the Pads and the Pedal Using the provided cables, connect with kick, snare, tom1~tom3, ride, crash, hi-hat, hi-hat control triggers. Snare is stereo input, supports double triggering (increase edge triggering);... -
Page 7: Connect The Power Supply Jack
Connect the Power supply jack Make sure the power is switched OFF and connect the power adaptor with the DC jack on the rear panel. Note: 1. To protect the speakers, amplifier and the drum module from damage, rotate the volume knob to the minimum volume level before switching the power ON. -
Page 8: Connect A Midi And Usb Device
Connect a MIDI and USB device Connect PC or other USB host devices that support USB Audio. For devices with USB cable, you can choose USB Audio Device in the device menu of the software to transfer midi data. The USB is compatible with XP, Vista and Mac OS without any PC driver The drum module sends the MIDI data by hitting pads or stepping pedal through USB port. -
Page 9: Functions
Functions Switch the power ON After confirming all connection have been completed, rotate the volume knob to the left ( minimum volume level) before switching the power on. Set the power switch to "on" position to switch on the power. Display shows the kit s number and its indicator lights up. -
Page 10: Select A Pad Voice
Select a pad voice Voice indicator It provides 108 built-in drum voices in all to choose. Press [voice] button to enter pad voice selecting mode, 3-digit LED displays the current pad voice number and voice indicator lights. In the pad voice selecting mode, press [+] and [-] button to choose the voice of current pad or cymbal (1-108, in cycle). -
Page 11: Select A Pattern
Select a pattern Pattern indicator It offer 41 built-in patterns (40 preset patterns and one user pattern). Press [pattern] button to enter pattern choice mode, 3-digit LED displays the current pattern number and pattern indicator lights. Press [+] and [-] button to choose the current pattern number (1-41, in cycle). -
Page 12: Recording
Recording light and flash Enter the Recording Waiting Mode Press and hold [save] button more than 2 seconds, to enter user pattern recording waiting mode,3-digit LED displays KIT number and REC indicator flashes. In recording waiting mode, the correspondent parameter can be adjusted. Adjust pattern number as accompaniment. -
Page 13: Drum Off
Playback User Pattern Choose the pattern number 41, press [start/stop] button to play user pattern. If there is no recording data, 3-digit LED displays “N-P”. The user are allowed to change pattern volume and tempo value when playing user pattern. Response pads operations realistically. -
Page 14: Adjust The Pattern Tempo
Adjust the pattern tempo Press [tempo] button to enter tempo adjustment mode, 3-digit LED temporarily displays TEMPO value. Press [+] and [-] button to change the tempo of click and pattern playing (30-280, not in cycle). Press [+] and [-] button at the same time, to reset to the default value(the current pattern default tempo). -
Page 15: Adjust The Click Volume
Adjust the click volume In click time signature choice mode, press [volume] button to enter click volume adjusting mode, volume indicator lights, 3-digit LED displays the click current volume value; Its volume value can be, adjusted by pressing [+] and [-] button (0-16 not in cycle). Return click time signature choice mode In click volume adjusting mode, press [click] button to exit volume adjusting mode, return to click time signature... -
Page 16: Specifications
Specifications Drum Pad: 3 tom pads , 2 cymbal pads ,1 snare pad(dual trigger), 1 hi-hat control pedal , 1 hi-hat, 1 kick Voices: 108 voices Drum kits: 10 preset kits, 5 user kits Patterns: 40 preset songs and 1 user pattern Controls: POWER SWITCH, START/STOP, SAVE/RECORD, KIT, PATTERN, VOICE, KIT/VOICE/PATTERN/CLICK VOLUME, DRUM OFF, CLICK,... -
Page 17: Voice List
Voice List NAME NAME NAME KICK Rock Tom 4 Percussion Standard Kick 1 Tabla 001 Rock Tom 5 Standard Kick 2 Tabla 002 Rock Tom 6 Classic Kick 1 Tabla 003 Brush Tom 1 Classic Kick 2 Tabla 004 Brush Tom 2 Rock Kick Tabla 005 Brush Tom 3... -
Page 18: Pattern List
Pattern List PATTERN PATTERN Fusion1 Fusion2 Latin Jazz1 Jazz1 Funk1 Guitar Bossa Latin Pop1 Break Beat 60's Rock World1 Big Band1 Funk3 Drum N'Bass Latin Jazz3 Latin Pop2 Ballad Swing Reggae1 Pop1 World2 Funk2 Latin Latin Jazz2 Bossa Pop Funk1 Samba2 3/4Pop Latin Rock1... -
Page 19: Percussion Set List
Percussion Set List Standard(PC0) Rock(PC1) Pop(PC2) Funk(PC3) Brush(PC4) Jazz(PC5) 606(PC6) DJ(PC7) High Q <- <- <- <- <- <- <- <- 28 Slap <- <- <- <- <- <- <- <- <- <- <- <- <- 29 Scratch Push <- <- <- <-... -
Page 20: Midi Implementation Chart
MIDI Implementation Chart Function Transmitted Recognized Remarks Basic Default 10 ch 1-16 Channel Changed Default Mode Messages Altered ************** *********** Note 0 - 127 0-127 Number: True voice ************** 0-127 Velocity Note on 99 H, V= 1 -127 (9 9H, V= 0) Note off After Key's...
Need help?
Do you have a question about the DD-501 and is the answer not in the manual?
Questions and answers