Table of Contents
Advertisement
Advertisement
Table of Contents

Related Manuals for XDrum DD-505


Summary of Contents for XDrum DD-505
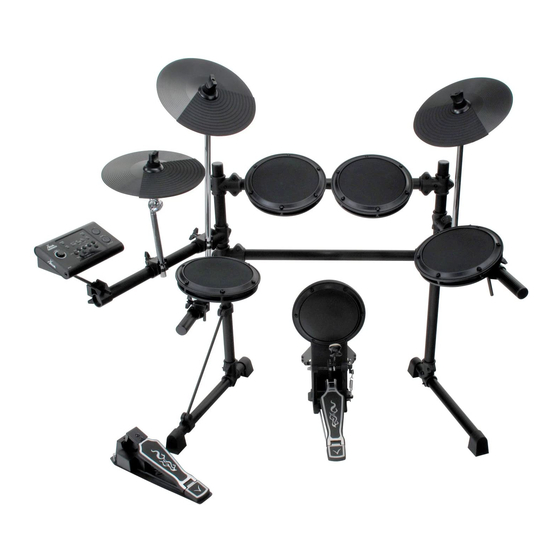
- Page 1 DD-505 E-Drum Set Users manual 00023429 Version 01/2010...
-
Page 2: Power Supply
Congratulatons! Thank you for purchasing this digital drum module. The drum module has been developed to act and play like a drum set but with greater ease. Before you use the instrument, we recommend you to read through this manual. Taking Care of Your Digital Drum Set Location Handling and Transport... -
Page 3: Table Of Contents
Contents Panel Controls - Front Panel - Rear Panel - Side Panel Setup - Connect the Pads and the Pedal - Connect a MIDI device - Connect a audio equipment - Connect a CD player, etc.(Aux in jack) - Connect Headphones - Connect the Power supply jack Functions - Switch the power ON... -
Page 4: Panel Controls
Panel Controls Front Panel Volume knob [ drum off ] button and indicator Control the volume of phone and line output. This button is used to turn on or turn off the Turn it clockwise to increase the volume percussion of song. and anticlockwise to decrease it. -
Page 5: Rear Panel
Rear Panel MIDI out jack Aux.in jack Connect with external sound module. Connect with external sound source. Trigger input jacks Power supply jack ( DC in 9V) Connect with pads, cymbals, hi-hat control, Connect an AC adaptor to this jack. kick trigger. -
Page 6: Setup
Setup Caution! To prevent electric shock and damage to the device, make sure the power is switched OFF on the drum and all related device before making any connection. Connect the Pads and the Pedals Using the provided cables, connect each Trigger input jack on the rear panel of the module, and make sure each pad is connected to its corresponding Trigger input jack. -
Page 7: Connect A Midi Device
Connect a MIDI device MIDI device This is for you want to use an external sound module or MIDI sequencer. Transmit MIDI Data 1. Use a MIDI cable to connect the MIDI OUT jack on the drum module with the MIDI IN jack on the external MIDI device. MIDI OUT MIDI IN 2. -
Page 8: Functions
Functions Switch the power ON After confirming all connection have been completed, rotate the volume knob to the left ( minimum volume level) before switching the power on. Set the power switch to "on" position to switch on the power. Display shows the song's number and its indicator lights up. -
Page 9: Play A Song
Play a Song Select a song This drum module has a total of 50 preset songs. Note: The preset song setting is 001 after you slide on power. Song indicator 1. Press [ song / volume ] button. The song indicator lights and the current song's number appears. 2. -
Page 10: Tap Tempo Function
Tap tempo function tempo/tap This function allows you to set the song's tempo by tapping in tempo on a pad. 1. Press the [ tempo/tap ] button. Display shows the current tempo value. 2. Tap on the pad in the tempo that you want to get. Tap on the pad 4 times. -
Page 11: Create A User Drum Kit
Create a User Drum Kit Set a drum voice Voice indicator The unit comes with 215 high quality percussion sounds that you can assign to any of the drum pad, 3 cymbals, hi-hat control and bass drum. This way you can create your own drum kit that consists of the voice you want. -
Page 12: Setting
Setting Adjust the pad Sensitivity You can adjust the sensitivity(gain) of the inputs from pads. 1. Hold down [ kit ] and press [ voice / volume ] buttons. Display shows: "EXX", the pad sensitivity value is indicated. (XX=gain level value, 00 to 15.) 2. -
Page 13: Reverb
Reverb This function sets the reverb effect of the drum. 1. In " kit mode", press the [ kit ] button, display shows the current reverb setting. 2. Press [ + ] or [ - ] buttons to turn on or turn off the reverb. Tuning This function sets the pitch of each drum pad voice. -
Page 14: Specifications
Specifications Drum Pad: 4 drum pads , 3 cymbal pads ,1 hi-hat control pedal , 1 kick trigger Voices: 215 voices Drum kits: 20 preset kits, 10 user kits Song: 50 preset songs Controls: POWER SWITCH, START/STOP , SAVE, KIT, VOICE/VOLUME, SONG/VOLUME, DRUM OFF, CLICK, HI-HAT, CRASH, RIDE, HI-HAT CONTROL, SNARE, TOM 1, TOM 2, TOM3, KICK, VOLUME, + / -, TEMPO + / -, TAP... -
Page 15: Voice List
Voice List Name Name Name Name Name Acoustic Base Drum Acoustic Snare Drum Acoustic Tom Cymbal Percussion 001 BD Head 024 SD-Std 1 078 Tom-Std 5 113 CrashStd 151 Agogo-1 025 SD-Std 2 002 Real BD 1 079 Tom-Std 3 114 CrashBrt 152 Agogo-2 003 Real BD 2... -
Page 16: Preset Kit List
Drum Kit List Name Name Standard 1 Latin 2 Standard 2 Percussion 1 Room 1 Percussion 2 Room Stick Dance 1 Rhythm & Blues Dance Stick Jazz Orchestra Jazz Latin Jungle Brush Electric Brush 2 China Luogu Latin 1 Oriental User 1 (Electronic 5) User 6 (Jazz latin) User 2(Percussion 1) -
Page 17: Midi Implementation Chart
MIDI Implementation Chart Function... Transmitted Remarks Basic Default 10 ch Channel Changed Default Mode Messages Altered ************** Note 0 - 127 Number: True voice ************** Velocity Note on O 9n H, V = 1 - 127 Note off X (9 nH. V= 0) After Key's Touch...
Need help?
Do you have a question about the DD-505 and is the answer not in the manual?
Questions and answers