
Related Manuals for Leica D-LUX 6


Summary of Contents for Leica D-LUX 6
- Page 1 LEICA D-LUX 6 Instructions About downloading Adobe Photoshop ® ® Lightroom ® see page 189.
-
Page 2: Table Of Contents
Table of contents Using the [Setup] menu ...... 27 Preparations [Clock Set] ...........27 [World Time] ..........27 Before use ..........6 [Travel Date] ..........28 Scope of Delivery ........8 [Beep] ............29 Accessories ........... 8 [Volume] ............30 Names of the components ....9 [Cust.Set Mem.] ..........30 Attaching lens cap and [Fn Button Set] ..........30... - Page 3 Table of contents Using [Creative Control] Mode ... 64 Taking pictures [Expressive] ..........66 [Retro] ............66 Sequence of operations ...... 45 [High Key] ............67 About recording modes ...... 48 [Low Key] ............67 Snapshot mode ........49 [Sepia] ............68 Automatic Scene Detection ......49 [Dynamic Monochrome] ......68 Determining the extent of the area [Impressive Art] ...........69...
- Page 4 Table of contents Using the zoom lens ......92 Using the Face Recognition function [Face Recog.] ........130 Optical Zoom ..........93 Extended optical zoom ........93 Registering faces ........131 [i.Zoom] ............94 Editing or deleting information about [Digital Zoom] ..........94 registered faces ........133 [Step Zoom] ..........95 Using the [Rec] menu ......
- Page 5 [Auto Retouch] ..........169 [Creative Retouch] ........170 Q&A Troubleshooting ...... 207 Using the [Playback] menu....171 Usage cautions and notes ....216 [Title Edit] ..........171 Leica Service Addresses ....220 [Text Stamp] ..........172 [Video Divide] ..........173 [Resize] .............174 [Cropping] ..........175 [Leveling] ...........176 [Favorite] ...........177...
-
Page 6: Preparations
Preparations Before use ■ Camera handling Protect the camera from excessive vibration, force, or pressure. ● Avoid using the camera under the following conditions, which may damage the lens, the monitor, or the camera body. This may also cause the camera to malfunction or prevent recording. - Page 7 Preparations Before use ■ Always take a test shot first Before important events when you will use the camera (at weddings, for example), always take a test shot to make sure that pictures and sound are recorded correctly. ■ No compensation for missed shots We cannot compensate for missed shots if technical problems with the camera or card prevent recording.
-
Page 8: Scope Of Delivery
Preparations Scope of Delivery Accessories Order No. Order No. Rechargeable battery Leather case D-LUX 6 18 727 BP-DC10-E 18 719 Protector 18 730 BP-DC10-U 18 720 Small system case 18 746 Charger Shoulder strap 18 747 BC-DC10-E 423-092.001-010 Hand grip D-LUX 6... -
Page 9: Names Of The Components
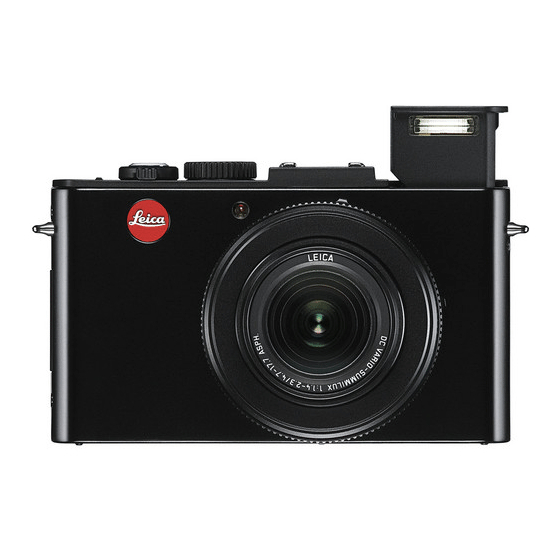
Preparations Names of the components 1 Self-timer indicator / AF Assist Lamp Illuminates when the self-timer is set or when Autofocus is operated in dark locations. (→116, 143) 2 Mode dial Switches the recording mode. (→48) 3 Hot shoe (Hot shoe cover) The hot shoe cover is on the hot shoe at the time of purchase. - Page 10 Preparations Names of the components 9 Aperture ring Adjusts the aperture value. (→60, 62) 10 Microphone Records sound when you record motion pictures. (→82) 11 Zoom lever Adjusts the recording range. (→92) 12 Motion picture button Press this button to start and stop motion picture recording.
- Page 11 Preparations Names of the components 20 LCD monitor (→200) 21 [ND/FOCUS] lever To operate the lever, move it left or right or press it forwards. Use this lever for Manual Focus adjustment or for turning the built-in ND filter on/off, etc. (→104, 123) 22 Dial To operate the dial, rotate it left or right...
- Page 12 Preparations Names of the components 27 Playback button Switches between picture taking and playback mode. (→152) 28 [MENU/SET] Mainly used to display menu screens or to set menu items. (→25) 29 [WB] button / Right cursor button ( ) Displays the White Balance setting screen. This button is also used to move the cursor on the menu screens and for other functions.
-
Page 13: Attaching Lens Cap And Shoulder Strap
• Attach the other end of the shoulder strap the same way. • Make sure that the shoulder strap does not come loose. • Attach the shoulder strap with the LEICA logo on the strap facing outwards. • Use the shoulder strap on your shoulder. -
Page 14: Charging The Battery
There is a possibility that these batteries may lead to fire or explosion. Please be advised that Leica Camera AG is not liable for any accident or failure occurring as a result of use of a counterfeit battery. -
Page 15: Remaining Battery Capacity
(such as clips). ● To remove the battery, turn the camera off and wait until the Leica indicator on the monitor goes off. (Failure to wait may cause the camera to malfunction and may damage the card or recorded data.) Remaining battery capacity When using the camera, the remaining battery capacity is displayed. -
Page 16: Guidelines For The Number Of Recordable Pictures And Operating Time
Preparations Charging the battery Guidelines for the number of recordable pictures and operating time The number of recordable pictures or available operating time may vary according to the surrounding environment and usage conditions. Figures may be reduced if flash, zoom, or other functions are used frequently, or in colder conditions. -
Page 17: Recording Motion Pictures
Preparations Charging the battery ■ Recording motion pictures [Rec Mode] [AVCHD] [MP4] [Rec Quality] [PSH] [FSH] [FHD] Available recording time Approx. 90 min Approx. 100 min Approx. 110 min Actual available recording time Approx. 50 min Approx. 55 min Approx. 60 min ●... -
Page 18: Inserting And Removing The Card/The Battery
Preparations Inserting and removing the card/the battery • Set the camera ON/OFF switch to [OFF]. Push the release slider to the [OPEN] position and open the card/battery door Release slider Do not touch the [OPEN] [LOCK] Latch terminals Insert battery and card, making sure that they are correctly aligned •... - Page 19 Keep memory cards out of reach of children to prevent swallowing. ● To remove the card or the battery, turn the camera off and wait until the Leica logo display on the monitor and the status indicator go out. (Failure to wait may cause the camera to malfunction and may damage the card or recorded data.)
-
Page 20: Saving Your Pictures (To An Inserted Memory Card Or The Built-In Memory)
Preparations Saving your pictures (to an inserted memory card or the built-in memory) Pictures will be saved to a card if one is inserted, or to the built-in memory if not. ■ Built-in memory (approx. 70 MB) • Pictures can be copied between cards and the built-in memory. (→181) •... -
Page 21: Recording Capacity Guidelines (Pictures/Recording Time)
Preparations Saving your pictures (to an inserted memory card or the built-in memory) Recording capacity guidelines (pictures/recording time) The number of pictures you can take and the recording time vary in proportion to card capacity (and depending on recording conditions and type of card). Displayed when no card is inserted (pictures will be saved to built-in memory) Estimated remaining number of pictures or recording time... - Page 22 Preparations Saving your pictures (to an inserted memory card or the built-in memory) ■ Recording time capacity (motion pictures) ([h], [m] and [s] indicate “hour”, “minute” and “second”.) When the [AVCHD] recording mode is used [Rec Quality] Built-in memory 2 GB 32 GB 64 GB [PSH]...
-
Page 23: Setting Time And Date
Preparations Setting time and date The clock is not set when the camera is shipped. Preparation: Before using the camera, remove the lens cap. Turn on the power Press [MENU/SET] while the message is displayed Press to select the language and then [MENU/SET] The [Please set the clock] message appears. -
Page 24: Changing Settings
Preparations Setting time and date Changing settings Select [Clock Set] from the [Setup] or [Rec] menu to change the current time settings. • Clock settings will be saved for approx. 3 months even after the battery is removed, provided a fully-charged battery was installed in the camera for 24 hours beforehand. Select [Clock Set] from the [Setup] or [Rec] menu •... -
Page 25: Setting The Menu
Preparations Setting the menu You can use the menu to set camera and picture taking functions, operate playback functions, and perform other operations. Press [MENU/SET] to bring up the Zoom lever menu Each item’s background color changes when it is selected Select the menu type (→26) Press... - Page 26 Preparations Setting the menu ■ Menu type ● ● In recording mode In playback mode [Rec] menu For settings such as resolution and flash mode. [Motion Picture] For settings such as recording method and resolution. menu [Playback Mode] For settings for playback methods such as [Slide Show] and menu [Filtering Play].
-
Page 27: Using The [Setup] Menu
Preparations Using the [Setup] menu [Clock Set], [Economy] and [Auto Review] are important for clock setting and battery life. Please check these before use. • For the setting procedures of the menu. (→25) ● In [Snapshot Mode], only [Clock Set], [World Time], [Beep], [Language] and [O.I.S. Demo.] are set. -
Page 28: [Travel Date]
Preparations Using the [Setup] menu ■ To set summer time Press in step . (Press again to release the setting) • When summer time is set, the current time is advanced by 1 hour. If the setting is canceled, the time automatically returns to the current time. ■... -
Page 29: [Beep]
Preparations Using the [Setup] menu ● The travel date is calculated from the set departure date and the date set in the camera’s clock. When the destination is set in [World Time], the elapsed days are calculated based on the local destination time. ●... -
Page 30: [Volume]
Preparations Using the [Setup] menu • For the setting procedures of the menu. (→25) [Volume] For adjusting the volume of sound from the loudspeaker (7 levels). ■ Settings: [0] / [1] / [2] / [3] / [4] / [5] / [6] ●... -
Page 31: [Lcd Display] / [Viewfinder]
Preparations Using the [Setup] menu • For the setting procedures of the menu. (→25) [LCD Display] / [Viewfinder] For adjusting the brightness and the color rendition of the monitor. When the display is switched to an attached external electronic viewfinder (available as accessory (→8)), the brightness and color rendition of the viewfinder are adjusted. -
Page 32: [Evf Disp.style] / [Lcd Disp.style]
Preparations Using the [Setup] menu • For the setting procedures of the menu. (→25) [EVF Disp.Style] / [LCD Disp.Style] [EVF Disp.Style]: Set the display mode for an attached external electronic viewfinder (available as accessory (→8)). [LCD Disp.Style]: Set the display mode for the monitor. ■... -
Page 33: [Histogram]
Preparations Using the [Setup] menu • For the setting procedures of the menu. (→25) [Histogram] A histogram illustrates the distribution of brightness (Example) in the picture – e.g. if the graph peaks at the right, this means there are more bright areas in the picture. A peak in the center represents a correct exposure. -
Page 34: [Video Rec Area]
Preparations Using the [Setup] menu • For the setting procedures of the menu. (→25) [Video Rec Area] This mode allows the identification of the recordable area for a motion picture before recording. ■ Settings: [ON] / [OFF] ● The recordable area displayed for motion pictures should be interpreted as an approximation. -
Page 35: [Expo.meter]
Preparations Using the [Setup] menu • For the setting procedures of the menu. (→25) [Expo.Meter] For selecting whether or not to display the setting display when e.g. shutter speed and aperture value settings or Exposure Compensation are performed. ■ Settings: [ON] / [OFF] ●... -
Page 36: [Economy]
Preparations Using the [Setup] menu • For the setting procedures of the menu. (→25) [Economy] For switching off the camera and/or the monitor when they are not being used to minimize battery consumption. [Sleep Mode] ■ Settings: [10MIN.] / [5MIN.] / [2MIN.] / [1 MIN.] / [OFF] Automatically switches the camera off when no operation is performed for a preset period of time. -
Page 37: [Play On Lcd]
Preparations Using the [Setup] menu • For the setting procedures of the menu. (→25) [Play on LCD] This mode automatically switches on the monitor during playback even if an external electronic viewfinder (available as accessory (→8)) is attached. ■ Settings: [ON] / [OFF] [Auto Review] This mode automatically displays still pictures immediately after taking them. -
Page 38: [Start Mode]
Preparations Using the [Setup] menu • For the setting procedures of the menu. (→25) [Start Mode] For determining whether picture taking or playback mode is active when the camera is switched on. ■ Settings : When the camera is turned on, recording mode is activated. : When the camera is turned on, playback mode is activated. -
Page 39: [Reset]
Preparations Using the [Setup] menu • For the setting procedures of the menu. (→25) [Reset] For returning the [Rec] menu and [Setup] menu settings to the default settings. ■ Settings: [Reset Rec. settings?] / [Reset setup parameters?] ● The information registered in [Face Recog.] is reset if recording settings are reset. ●... -
Page 40: [Hdtv Link]
Preparations Using the [Setup] menu • For the setting procedures of the menu. (→25) [HDTV Link] This mode allows automatic linking with other HDTV Link-compatible devices, and operability with a HDTV compatible remote control when connecting via the HDMI mini cable (available as accessory (→8)) (→184). -
Page 41: [Scene Menu]
Preparations Using the [Setup] menu • For the setting procedures of the menu. (→25) [Scene Menu] For setting whether or not to display the selection screen for Scene Mode when the camera is switched to Scene Mode. ■ Settings [AUTO]: Displays the selection screen. [OFF]: Displays the currently selected Scene Mode recording screen. -
Page 42: [Version Disp.]
This requires a sufficiently charged battery. Do not turn off power or perform other operations during formatting. ● Formatting the built-in memory may take several minutes. ● Consult the dealer or your nearest Leica Customer Care center if formatting cannot be successfully completed. - 42 -... -
Page 43: [Language]
Preparations Using the [Setup] menu • For the setting procedures of the menu. (→25) [Language] For changing the display language. Set the language displayed on the screen. [O.I.S. Demo.] The amount of camera shake is shown on a graph (Guide) Amount of camera shake Effect of camera shake after correction ●... -
Page 44: Entering Text
Preparations Entering Text Use the cursor button to enter names with the Face Recognition function and in Scene Modes [Baby] and [Pet], or to register locations in [Travel Date] etc. Use cursor button to select characters Press [MENU/SET] until the desired character is displayed Text is inserted at the cursor position. -
Page 45: Taking Pictures
Taking pictures Sequence of operations Before using the camera, remove the lens cap. Turn on the power Status indicator illuminated for approx. 1 second. Rotate the mode dial to select the recording mode Align the desired mode with index. • Make sure the dial is set exactly to the click-stop Status indicator position of the desired mode. -
Page 46: Take Pictures
Taking pictures Sequence of operations Take pictures ■ Taking still pictures (Shutter button) Press halfway Press fully (Press lightly to focus) (Press the button all the way to record) ■ Recording motion pictures Camera shake alert display (Motion picture button) Press Press (Start recording) -
Page 47: Holding The Camera
Taking pictures Sequence of operations ■ Holding the camera • To avoid camera shake, hold the camera with both AF Assist Lamp hands keeping your arms close to your body while Microphone standing with your feet slightly apart. • Do not touch the lens. •... -
Page 48: About Recording Modes
Taking pictures About recording modes Rotate the mode dial to switch recording modes. Set to the desired recording mode Make sure the dial is set exactly to the → click-stop position of the desired mode. For taking pictures with extended automatic [Snapshot Mode] settings. -
Page 49: Snapshot Mode
Taking pictures Snapshot mode Optimum settings are made automatically based on information such as “face”, “movement”, “brightness”, and “distance” just by pointing the camera at the subject, meaning that sharp and correctly exposed pictures can be taken without the need to make settings manually. -
Page 50: Determining The Extent Of The Area Rendered Sharply
Taking pictures Snapshot mode Determining the extent of the area rendered sharply You can also use [Snapshot Mode] to easily adjust the depth of field, i.e. which parts are rendered sharply and which are not, as with [Aperture-Priority] mode. Press the dial Press Rotate the dial to adjust the aperture value (which determines... - Page 51 Taking pictures Snapshot mode Shallow depth Extended depth of field of field The yellow range shown in the left figure is the depth of field, i.e. the range in which subject parts are rendered sharply. • This range changes based on the distance to the focused subject, the set focal length, etc.
-
Page 52: Using The Built-In Flash
Taking pictures Snapshot mode Using the built-in flash Let the built-in flash pop up to use it. (→106) Open the built-in flash ■ Closing the built-in flash When you do not want to use the flash or after using it, press it back down until it clicks into place. -
Page 53: [Color Mode]
Taking pictures Snapshot mode [Color Mode] By changing the [Color Mode] setting in the [Rec] menu, you can determine the color rendition of still and motion pictures. • For the setting procedures of the menu. (→25) Setting Description [STANDARD] Records pictures with colors close to the actual ones. [Happy] Records pictures with sharp and vivid colors. -
Page 54: [Ihdr]
Taking pictures Snapshot mode [iHDR] When [iHDR] is set to [ON] and there is, for example, strong contrast between different parts of the subject, multiple still pictures are recorded with differing exposures and combined to create a single still picture rich in gradation. •... -
Page 55: Af Tracking
Taking pictures Snapshot mode AF Tracking In [Snapshot Mode], you can select [AF Tracking] in [AF Mode] in a single operation. When [AF Tracking] mode is used, the camera can continuously focus on a subject and adjust its exposure even when it is moving. Press to set [AF Tracking] •... -
Page 56: [Snapshot Plus Mode]
Taking pictures Snapshot mode [Snapshot Plus Mode] When [Snapshot Plus Mode] is selected, you can easily adjust the brightness and coloring, in addition to the depth of field, without compromising the user-friendly operation of the [Snapshot Mode]. ■ Switching to [Snapshot Plus Mode] Use the [Snapshot Mode] menu to switch the mode. -
Page 57: About Setting Items
Taking pictures Snapshot mode ● When you record motion pictures, the camera performs aperture control within the appropriate exposure range, and the depth of field may not change for some subject brightness levels. About setting items Only the menu items which are displayed in the [Snapshot Mode] can be set. The settings selected in the [Program AE] or other modes will reflect on the menu items in the [Setup] menu that are not displayed. -
Page 58: Program Mode
Taking pictures Program mode The camera automatically sets both shutter speed and aperture value according to the brightness of the subject. You can change various settings in the [Rec] menu. • About recording modes (→48) ● Aperture and shutter speed are shown in red, if an appropriate exposure is not possible. -
Page 59: [Program Diagram]
Taking pictures Program mode ■ Example of Program Shift (Ev) (Aperture value) 1/15 1/60 1/250 1/1000 1/4000 (Shutter speed) 1/30 1/125 1/500 1/2000 Program Shift range Automatic camera setting Program Shift limit [Program Diagram] You can change the automatically controlled shutter speed/aperture combinations in Program Mode. -
Page 60: Aperture Priority Mode
Taking pictures Aperture priority mode Set the aperture value to a higher number when you want a larger in-focus area (in front of and behind the main subject), to a lower number for a smaller in-focus area. • About recording modes (→48) Rotate the aperture ring to select the aperture value... -
Page 61: Shutter Speed Priority Mode
Taking pictures Shutter speed priority mode When you want to take a sharp picture of a fast moving subject, set with a faster shutter speed. When you want to create a trailing effect, set to a slower shutter speed. • About recording modes (→48) Rotate the dial to select the shutter speed... -
Page 62: Manual Exposure Mode
Taking pictures Manual exposure mode Determine the exposure by manually setting the aperture value and the shutter speed. • About recording modes (→48) Select shutter speed and aperture value ■ Setting the aperture value You can set the aperture values between [1.4] and [8] in 1/3-stop increments. - Page 63 Taking pictures Manual exposure mode ■ Light balance (approximation) Indicates pictures with standard brightness. Indicates overexposure. For a correct exposure, use a faster shutter speed and/or a higher aperture value. Indicates underexposure. For a correct exposure, use a slower shutter speed and/or a lower aperture value.
-
Page 64: Using [Creative Control] Mode
Taking pictures Using [Creative Control] Mode You can select your own settings from various effects and take pictures while confirming these effects on the monitor. • About recording modes (→48) Press to select the effect and then [MENU/SET] Preview screen •... - Page 65 Taking pictures Using [Creative Control] Mode ■ Adjusting the brightness, depth of field, setting conditions of a selected effect, etc. Press the dial Press to select an item to adjust Adjusts the brightness. Adjusts the depth of field. Adjusts the setting conditions of the selected effect, etc. (The settings to be adjusted vary depending on the selected effect.) •...
-
Page 66: [Expressive]
Taking pictures Using [Creative Control] Mode For the [Creative Control] menu setting procedures. (→64) [Expressive] This effect creates a pop art style picture that enhances the color. ■ Items that can be set Underexposure Overexposure Brightness (darker) (brighter) Depth of field Shallower Extended Gaudy... -
Page 67: [High Key]
Taking pictures Using [Creative Control] Mode For the [Creative Control] menu setting procedures. (→64) [High Key] This effect creates a brighter and lighter toned appearance for the entire picture. ■ Items that can be set Underexposure Overexposure Brightness (darker) (brighter) Depth of field Shallower Extended... -
Page 68: [Sepia]
Taking pictures Using [Creative Control] Mode For the [Creative Control] menu setting procedures. (→64) [Sepia] This effect creates a picture with sepia tone. ■ Items that can be set Underexposure Overexposure Brightness (darker) (brighter) Depth of field Shallower Extended High Contrast [Dynamic Monochrome] This effect creates a monochromatic picture with a higher... -
Page 69: [Impressive Art]
Taking pictures Using [Creative Control] Mode For the [Creative Control] menu setting procedures. (→64) [Impressive Art] This effect creates a picture with a higher contrast and surreal appearance. ■ Items that can be set Underexposure Overexposure Brightness (darker) (brighter) Depth of field Shallower Extended Coloring... -
Page 70: [Cross Process]
Taking pictures Using [Creative Control] Mode For the [Creative Control] menu setting procedures. (→64) [Cross Process] This effect allows you to play with color effects. ■ Items that can be set Underexposure Overexposure Brightness (darker) (brighter) Depth of field Shallower Extended Coloring Greenish / Bluish / Yellowish / Reddish... -
Page 71: [Miniature Effect]
Taking pictures Using [Creative Control] Mode For the [Creative Control] menu setting procedures. (→64) [Miniature Effect] This effect creates a diorama-like picture by intentionally defocusing all but one section of the picture. ■ Items that can be set Underexposure Overexposure Brightness (darker) (brighter) -
Page 72: [Soft Focus]
Taking pictures Using [Creative Control] Mode For the [Creative Control] menu setting procedures. (→64) [Soft Focus] This effect creates a soft appearance by intentionally blurring the entire picture. ■ Items that can be set Underexposure Overexposure Brightness (darker) (brighter) Depth of field Shallower Extended Degree of... -
Page 73: [One Point Color]
Taking pictures Using [Creative Control] Mode For the [Creative Control] menu setting procedures. (→64) [One Point Color] This effect creates a monochromatic picture by retaining only the amount of color you determine. ■ Items that can be set Underexposure Overexposure Brightness (darker) (brighter) -
Page 74: [Radial Defocus]
Taking pictures Using [Creative Control] Mode For the [Creative Control] menu setting procedures. (→64) [Radial Defocus] This effect defocuses the entire picture by retaining a sharper focus on the main subjects than with [Soft Focus] by operating focus when the shutter is open during the exposure. This effect is recommended when recording night scenes, for example. -
Page 75: Using [Scene Mode]
Taking pictures Using [Scene Mode] Using [Scene Mode] enables you to take pictures with optimum settings (exposure, coloring, etc.) for given scenes. • About recording modes (→48) Use cursor buttons to select the scene mode and then press [MENU/SET] • When you select [ ] by rotating the mode dial, the menu appears automatically. -
Page 76: [Portrait]
Taking pictures Using [Scene Mode] • How to select a scene (→75) Improves the skin tone of subjects for a healthier appearance in bright daylight conditions. [Portrait] • The longer the set focal length and the closer the camera is to the subject, the greater the effect will be. - Page 77 Taking pictures Using [Scene Mode] • How to select a scene (→75) • Pan the camera in the recording direction as steadily as possible. If the camera shakes too much, it may not be able to take pictures or may end up creating a narrow (small) panorama picture.
-
Page 78: [Sports]
Taking pictures Using [Scene Mode] • How to select a scene (→75) Takes pictures of scenes with fast movement, e.g. sports. • Stand at least 5m (16 feet) away. Notes [Sports] • Sports mode requires adequate lighting, to enable the higher shutter speed to be used. -
Page 79: [Hdr]
Taking pictures Using [Scene Mode] • How to select a scene (→75) The camera can combine several still pictures taken with different exposures into a single properly exposed picture with rich gradation. • After the shutter button has been pressed, do not move the camera during the exposure series. -
Page 80: [Sunset]
Taking pictures Using [Scene Mode] • How to select a scene (→75) Takes clear pictures of scenes such as sunsets. [Sunset] Most suitable for taking pictures such as a landscapes through a window. Notes • If there are stains such as dust or a reflection on the glass, the camera may [Glass focus on the glass instead of the subject. -
Page 81: [3D Photo Mode]
Taking pictures Using [Scene Mode] • How to select a scene (→75) Pictures are recorded continuously while moving the camera horizontally, two of which are automatically selected and combined to make a single 3D picture. To view 3D pictures, a television that supports 3D is required (The camera will play back in 2D). -
Page 82: Taking Motion Pictures
Taking pictures Taking motion pictures You can record motion pictures with audio (stereo). Do not cover the microphone when recording motion pictures. Press the motion picture button to start recording [Rec Mode] (→150)/[Rec Quality] (→150) Elapsed Remaining recording time recording time (approx.) ●... - Page 83 Taking pictures Taking motion pictures ● You can record motion pictures to the built-in memory only in [VGA] mode. (→150) ● Use a sufficiently charged battery. ● The available recording time displayed on the monitor may not decrease regularly. ● [Sensitivity] is set automatically while a motion picture is being recorded.
- Page 84 Taking pictures Taking motion pictures ■ About the recording format for recording motion pictures This camera can record motion pictures in either AVCHD or MP4 formats. AVCHD: You can record high definition quality images with this format. It is suitable for viewing motion pictures on a high-resolution TV or for saving them to a disc.
-
Page 85: About Recording Modes
Taking pictures Taking motion pictures ■ About recording modes The camera automatically detects the scene to record motion pictures with optimal settings. When the scene does not correspond to any on the right. • In mode, focus and exposure will be set according to the face detected. -
Page 86: Taking Still Pictures While A Motion Picture Is Being Recorded
Taking pictures Taking motion pictures Taking still pictures while a motion picture is being recorded Still pictures can be recorded even while a motion picture is being recorded. Press the shutter button fully during the motion picture recording Still pictures are recorded with an aspect ratio setting of [16:9] and [Picture Size] setting of 3.5 M. -
Page 87: Taking Motion Pictures With Manual Operation [Creative Video Mode]
Taking pictures Taking motion pictures with manual operation [Creative Video Mode] You can set the desired shutter speed and aperture value. • About recording modes (→48) Press to select the setting and then [MENU/SET] • When you select [ ] by rotating the mode dial, the menu appears automatically. - Page 88 Taking pictures Taking motion pictures with manual operation [Creative Video Mode] ● About aperture value To record motion pictures with a larger depth of field, set the aperture value to a higher number. To record motion pictures with a smaller depth of field, set a lower number. Setting the aperture value You can set the aperture values between [1.4] and [8] in 1/3-stop increments.
-
Page 89: [High Speed Video]
Taking pictures Taking motion pictures with manual operation [Creative Video Mode] [High Speed Video] With this mode, you can capture subjects during sporting events or other active scenes at a high frame rate, i.e. with a rapid succession of exposures, which allows details to be revealed that cannot be seen with the naked eye. -
Page 90: Registering Your Own Settings And Recording [Custom] Mode
Taking pictures Registering your own settings and recording [Custom] Mode Registering your preferred recording mode, [Rec] menu settings, etc. to [Cust.Set Mem.] and setting the mode dial to allows you to switch quickly to those settings. [Cust.Set Mem.] Up to 4 current camera settings can be registered. Select the recording mode you wish to register and set the [Rec], [Motion Picture], [Setup] menu, etc. -
Page 91: [Custom]
Taking pictures Registering your own settings and recording [Custom] Mode [Custom] Settings registered in [Cust.Set Mem.] can be quickly called up by setting the mode dial to Set mode dial to ([Custom] mode) • When set to → The camera switches to the recording mode and settings registered in •... -
Page 92: Using The Zoom Lens
Taking pictures Using the zoom lens You can determine how much of a subject is to be captured / how large a subject is to be rendered by selecting the appropriate focal length, i.e. by zooming. Zoom In/Out To widen the angle To make subjects of view, use shorter appear closer use... -
Page 93: Optical Zoom
Taking pictures Using the zoom lens Optical Zoom With this mode, a zoom ratio up to 3.8x is possible if pictures without have been selected by [Picture Size] in the [Rec] menu. (→135) ● Optical Zoom cannot be used in the following cases: •... -
Page 94: [I.zoom]
Taking pictures Using the zoom lens [i.Zoom] You can use the camera’s Intelligent Resolution technology to increase the zoom ratio up to 2x higher than the original zoom ratio with limited deterioration of the resolution. Set the [i.Zoom] in the [Rec] menu to [ON]. (→141) ●... -
Page 95: [Step Zoom]
Taking pictures Using the zoom lens [Step Zoom] You can set the zoom operation to allow easy visualization of the angle of view (picture angle) for the focal length of a regular fixed focal length lens (as with a 35mm film camera). -
Page 96: Using Autofocus
Taking pictures Using Autofocus When Autofocus is enabled, press the shutter button halfway to focus. The focusing methods differ depending on [Rec] mode and [AF Mode] setting. Switch the focus selector switch to [ ] or [ Autofocus is activated. Align with the index ●... -
Page 97: Face Detection
Taking pictures Using Autofocus ■ Switching [AF Mode] Select [AF Mode] from the [Rec] menu • For the setting procedures of the menu. (→25) Press to select Autofocus mode items and then [MENU/SET] (Face Detection) For taking front-on pictures of people (AF Tracking) For automatically locking the focus on a moving subject (→98) -
Page 98: Af Tracking
Taking pictures Using Autofocus AF Tracking Align the subject with the AF Tracking frame and then press the [AF/AE LOCK] button AF Tracking frame When the subject is recognized, the AF Tracking frame changes from white to yellow, and the subject is automatically kept in focus. -
Page 99: Spot Focusing
Taking pictures Using Autofocus Spot focusing Focusing is based on the subject registered in the center of the picture. (Recommended when focusing is difficult, or when it is supposed to be based on a specific off-center detail) • You can adjust the position of the AF area. (→100) ●... - Page 100 Taking pictures Using Autofocus ■ Changing the position and size of the AF area When [AF Mode] is set to (1-area-focusing), you can move the position or change the size of the AF area. Select [AF Mode] from the [Rec] menu •...
-
Page 101: Using Manual Focus Together With Autofocus
Taking pictures Using Autofocus Using Manual Focus together with Autofocus After setting the focus using Autofocus, you can make fine adjustments for the focus position using the Manual Focus. Press the [AF/AE LOCK] button to lock the focus Use the [ND/FOCUS] lever to adjust the focus Setting procedures for Manual Focus (→104) ●... -
Page 102: Close-Up Pictures
Taking pictures Close-up pictures When you want to enlarge the subject, setting to [ ] enables you to take pictures at an even closer distance than the normal focus range (up to 1 cm ( ”) for max. Wide). Switch the focus selector switch to [ Enables close-up focusing on a subject. -
Page 103: Locking The Exposure And/Or Focus
Taking pictures Locking the exposure and/or focus It is convenient to use the [AF/AE LOCK] button when you want to change the composition after having set focus and exposure for the decisive and off-center part of the subject. Point the camera at the subject Press the [AF/AE LOCK] button Focus is locked (AF Lock) Exposure is locked (AE lock) -
Page 104: Manual Focusing
Taking pictures Manual focusing Use this function when you want to determine the focus setting yourself or when using Autofocus proves difficult. Switch the focus selector switch to [ Align with the index Focus manually on a subject. Focus with the [ND/FOCUS] lever To focus on a To focus on a nearby subject... - Page 105 Taking pictures Manual focusing ● You can focus using the [ND/FOCUS] lever even during motion picture recording. Note, however, that indications such as MF assist and depth of field range are not displayed. ● After changing the focal length, i.e. zooming, refocus. ●...
-
Page 106: Using The Built-In Flash
Taking pictures Using the built-in flash You can use the built-in flash to take pictures in dark locations or light up a subject to reduce its contrast to a bright background. Open the built-in flash ■ Close the built-in flash When you do not want to use the flash or after using it, press it down until it clicks into position. -
Page 107: Changing The Flash Mode
Taking pictures Using the built-in flash Changing the flash mode Select [Flash] in the [Rec] menu • For the setting procedures of the menu. (→25) Press to select a mode and then [MENU/SET] Type, operations Uses [Auto] • The flash is automatically fired when the Standard setting for normal use. - Page 108 Taking pictures Using the built-in flash ■ Available flash modes in each exposure mode (○: Available, –: Not available, : Default setting) [Scene Mode] – – ○ ○ ○ ○ ○ ○ ○ ○ ○ – – – – – –...
-
Page 109: Setting The Iso Sensitivity
Taking pictures Setting the ISO Sensitivity The ISO setting determines the possible shutter speed/aperture combinations for a given subject brightness. Higher ISO settings allow faster shutter speeds and/or larger aperture values and vice versa. Press the [ISO] button Press to select the ISO Sensitivity and then [MENU/SET] ■... - Page 110 Taking pictures Setting the ISO Sensitivity ■ About extended ISO When [Extended ISO] in the [Rec] menu is set to [ON], you can also set the following ISO Sensitivity values. H.8000 * / H.10000 * / H.12800 When [ISO Increments] is [1/3EV] ●...
-
Page 111: Setting White Balance
Taking pictures Setting White Balance Adjust the white balance depending on the light source to ensure natural color rendition. Press the [WB] button Press to select the white balance and then [MENU/SET] ■ Settings: [AWB] ([Auto White Balance]) / ([Daylight]) / ([Cloudy]) / ([Shade]) / ([Flash]) /... -
Page 112: Setting The White Balance Manually
Taking pictures Setting White Balance ■ [AWB] operational range: 10000K Blue sky 9000K 8000K Cloudy sky (rain) 7000K Shade 6000K Sunlight 5000K White fluorescent lighting 4000K 3000K Incandescent lighting 2000K Sunset/sunrise Candlelight K=Color temperature in degrees Kelvin Setting the White Balance manually Take a picture of a white object under the target light source to adjust the color rendition. -
Page 113: Setting The White Balance Using A Color Temperature
Taking pictures Setting White Balance Setting the White Balance using a color temperature You can set the White Balance using a color temperature. Color temperature is a numeric value that expresses the color of light (unit: K * ). A picture becomes bluish when the color temperature value is higher, and reddish when it is lower. -
Page 114: White Balance Bracketing
Taking pictures Setting White Balance ● When you perform fine adjustments of the White Balance toward the A (amber) or B (blue) side, the color of the White Balance icon displayed on the screen will change to the fine-tuned color. ●... - Page 115 Taking pictures Setting White Balance ● When [WB Bracket] is set, [BKT] appears with the White Balance icon. ● The position of the bracket cannot exceed the maximum ranges of the White Balance fine adjustments. ● When White Balance fine adjustments are performed after the bracket is set, the bracket is used to take pictures with the changed adjustment value as the center value.
-
Page 116: Using With Self-Timer
Taking pictures Using with self-timer We recommend using a tripod when using the Self-Timer. This, plus setting the Self-Timer to 2 seconds is a convenient way to avoid the camera shake caused by pressing the shutter button. Press the [ ] button Press to select [Self Timer]... -
Page 117: Take The Picture
Taking pictures Using with self-timer Self-timer indicator Take the picture (Flashes for the set delay time) Press the shutter button fully to release the shutter after the preset time. • To cancel while in operation → Press [MENU/SET] ■ To cancel Select [ ] ([Single]) in step ●... -
Page 118: Setting The Exposure Series Function
Taking pictures Setting the exposure series function Pictures are taken continuously while the shutter button is pressed. Select the ones you really like from the pictures you have taken. Press the [ ] button Press to select [Burst Shooting] and then Press to select the frame rate and then [MENU/SET]... - Page 119 Taking pictures Setting the exposure series function Setting Speed No. of pictures Focus, exposure, White Balance Only the focus is fixed to the settings of the Approx. 2 pictures/s first picture taken. Approx. 2 pictures/s Adjusted within the possible range. Only the focus is fixed to the settings of the Approx.
- Page 120 Taking pictures Setting the exposure series function ● When [ ] is set, the image area is reduced. ● Pictures taken with the [ ] or [ ] setting are recorded together as a group (group display). (→156) ● Depending on changes in the brightness of the subject, the second and subsequent pictures may be recorded brighter or darker when using the exposure series function at the [ ], [...
-
Page 121: Changing The Aspect Ratio For Still Pictures
Taking pictures Changing the aspect ratio for still pictures This mode allows you to select the aspect ratio of the pictures to suit printing or the playback method. Select the aspect ratio switch ● The edges of pictures may be cut off when printing - be sure to check in advance. - 121 -... -
Page 122: [Aspect Bracket]
Taking pictures Changing the aspect ratio for still pictures [Aspect Bracket] Pressing the shutter button once automatically takes four pictures with aspect ratios of [4:3], [3:2], [16:9] and [1:1]. (The shutter sounds only once.) Select [Aspect Bracket] in the [Rec] menu •... -
Page 123: Using The Built-In Nd Filter
Taking pictures Using the built-in ND filter When you want to take pictures using a larger aperture than with the normal exposure settings in a bright outdoor location or with a slow shutter speed, you can use the built-in ND filter to reduce the amount of light that passes through the lens. Press the [ND/FOCUS] lever to activate the ND filter Press... -
Page 124: Compensating The Exposure
Taking pictures Compensating the exposure Use this function to adjust the exposure to the important part of the subject in case of large differences in brightness within the frame. Press the dial to select the Exposure Compensation display Press Selected (yellow) Select the Exposure Compensation value Setting display... -
Page 125: [Auto Bracket]
Taking pictures [Auto Bracket] In this mode, 3 pictures are automatically recorded with the selected exposure steps each time the shutter button is pressed. When an Exposure Compensation is set, the exposures are based on the set Exposure Compensation value. Press the [ ] button Press... - Page 126 Taking pictures [Auto Bracket] ● [Auto Bracket] cannot be used in the following cases: • With flash • With [Creative Control] Mode ([Miniature Effect] [Soft Focus] [Star Filter] [Smooth Defocus] [Radial Defocus]) • With the Scene Modes ([Panorama Shot] [Handheld Night Shot] [HDR] [3D Photo Mode]) •...
-
Page 127: Switching The Displays
Taking pictures Switching the displays You can determine if and which information should be displayed on the monitor icons for various settings and the level gauge (→128). Press the [DISP] button to switch the display Every time you press the button, the display will be switched. -
Page 128: Using The Level Gauge
Taking pictures Using the level gauge If you want to make sure that the camera is not tilted, for example, when you take a picture of a landscape, use the level gauge indication as a reference. Press the [DISP] button to switch the display Press the button until the level gauge is displayed (3 or 4 times). -
Page 129: Using The Quick Menu
Taking pictures Using the Quick menu In picture taking mode, you can quickly change the main settings for a still or a motion picture. Press the [Q MENU] button to display the Quick menu Select a menu item ■ Using the dial Press ■... -
Page 130: Using The Face Recognition Function [Face Recog.]
Taking pictures Using the Face Recognition function [Face Recog.] The default [Face Recog.] setting is [OFF]. When a face is registered, the setting will be [ON] automatically. ■ How the Face Recognition function works During recording (When [AF Mode] is set to (Face Detection)) •... -
Page 131: Registering Faces
Taking pictures Using the Face Recognition function [Face Recog.] Registering faces Up to 6 person’s faces can be registered along with such information as name and birthday. You can improve the Face Recognition function by the way you register faces: for example, register multiple faces of the same person (up to 3 pictures for one registration). - Page 132 Taking pictures Using the Face Recognition function [Face Recog.] Press to select the item for editing and then [Name] Select [SET] with cursor buttons, and then press [MENU/SET] Enter the name (Entering text (→44)) [Age] Setting a birthday. Select [SET] with cursor buttons, and then press [MENU/SET] Press to select year, month and day, set with , and then...
-
Page 133: Editing Or Deleting Information About Registered Faces
Taking pictures Using the Face Recognition function [Face Recog.] Editing or deleting information about registered faces Information about registered faces can be edited or deleted. Select [Face Recog.] in the [Rec] menu • For the setting procedures of the menu. (→25) Select [MEMORY] with cursor buttons, and then press [MENU/SET]... -
Page 134: Using The [Rec] Menu
Taking pictures Using the [Rec] menu You can change settings such as resolution and flash mode. • For the setting procedures of the menu. (→25) [Photo Style] This mode allows you to adjust the colors and picture quality according to kind of picture you want to create. -
Page 135: [Picture Size]
Taking pictures Using the [Rec] menu • For the setting procedures of the menu. (→25) [Picture Size] This mode allows you to set the resolution (number of pixels) for still pictures. The number of pictures which can be recorded depends on this setting and on [Quality]. -
Page 136: [Quality]
Taking pictures Using the [Rec] menu • For the setting procedures of the menu. (→25) [Quality] This mode allows you to set the compression rate for still picture data. ■ Settings Gives priority to picture quality and saves pictures in [Fine] JPEG file format. -
Page 137: [Iso Limit Set]
Taking pictures Using the [Rec] menu • For the setting procedures of the menu. (→25) [ISO Limit Set] This mode allows you to set the upper limit of ISO Sensitivity when [Sensitivity] is set to [AUTO] or [ ■ Settings: [AUTO] / [200] / [400] / [800] / [1600] / [3200] ●... -
Page 138: [Quick Af]
Taking pictures Using the [Rec] menu • For the setting procedures of the menu. (→25) [Quick AF] Focusing is automatically performed when camera blurring is small even when the shutter button is not pressed. (This increases battery consumption) ■ Settings: [ON] / [OFF] ●... -
Page 139: [Metering Mode]
Taking pictures Using the [Rec] menu • For the setting procedures of the menu. (→25) [Metering Mode] This function allows adapting the metering mode to different subjects and situations. ■ Settings [Metering Mode] Metering characteristics Conditions The brightness is detected in Normal usage (high probability of different sections of the frame. -
Page 140: [Multi Expo.]
Taking pictures Using the [Rec] menu • For the setting procedures of the menu. (→25) [Multi Expo.] This mode allows you to combine two or three still pictures into a single one. ■ Settings [Start] Start taking pictures. Decide on your composition and take the first picture Press to select [Next] and then [MENU/SET] •... -
Page 141: [Min. Shtr Speed]
Taking pictures Using the [Rec] menu • For the setting procedures of the menu. (→25) [Min. Shtr Speed] This mode allows extending the shutter speed range for automatic exposure control modes. For example, you can use slower shutter speeds to take brighter pictures in dark locations. -
Page 142: [Step Zoom]
Taking pictures Using the [Rec] menu • For the setting procedures of the menu. (→25) [Step Zoom] For details (→95). [Stabilizer] This mode automatically detects and reduces the effects of camera shake. ■ Settings: [ON] / [OFF] ● The setting is fixed to [ON] in [Handheld Night Shot] in [Scene Mode]. ●... -
Page 143: [Af Assist Lamp]
Taking pictures Using the [Rec] menu • For the setting procedures of the menu. (→25) [AF Assist Lamp] This mode allows you to set the camera to automatically turn on the AF Assist Lamp in dark locations to make automatic focusing easier. ■... -
Page 144: [Flash Synchro]
Taking pictures Using the [Rec] menu • For the setting procedures of the menu. (→25) [Flash Synchro] This mode allows you to set the timing for firing the flash to achieve different effects. ■ Settings: [1ST] / [2ND] Flash firing timing chart [1ST] is set Elapsed time The picture is taken (shutter is open). -
Page 145: [Flash Adjust.]
Taking pictures Using the [Rec] menu • For the setting procedures of the menu. (→25) [Flash Adjust.] This mode allows you to adjust flash output in order to e.g. take a picture of a small subject, or when the flash reflectance is extremely high or low. ■... -
Page 146: [Color Mode]
Taking pictures Using the [Rec] menu • For the setting procedures of the menu. (→25) [Color Mode] For details (→53). [Motion Deblur] For details (→53). [iHandheld Nite Shot] For details (→53). [iHDR] For details (→54). [Opt. Viewfinder] This mode allows you to set the monitor display when an external optical viewfinder is attached. -
Page 147: [Time Lapse Shot]
Taking pictures Using the [Rec] menu • For the setting procedures of the menu. (→25) [Time Lapse Shot] This mode allows you to program the camera to produce still pictures at a predetermined time and at predetermined intervals automatically. This allows capturing gradual changes at constant intervals for landscape scenes, animals/plants, and other applications. - Page 148 Taking pictures Using the [Rec] menu ● Pictures taken using this function cannot be stored in the built-in memory. ● This function is not intended for application-specific systems (monitoring cameras). ● If you leave the camera unattended during interval recording, make sure it cannot be stolen.
-
Page 149: [Date Stamp]
Taking pictures Using the [Rec] menu • For the setting procedures of the menu. (→25) [Date Stamp] The recording date and time can be stamped on still pictures. ■ Settings: [W/O TIME] / [WITH TIME] / [OFF] ● Date stamps on still pictures cannot be erased. ●... -
Page 150: Using The [Motion Picture] Menu
Taking pictures Using the [Motion Picture] menu Items in the [Rec] and [Motion Picture] menus with the same names have the same functions. If a setting in one menu is changed, the setting with the same name in the other menu will also be changed automatically. •... -
Page 151: [Continuous Af]
Taking pictures Using the [Motion Picture] menu • For the setting procedures of the menu. (→25) [Continuous AF] This mode allows the focus setting either to be constantly adjusted during motion picture recording, or to lock the focus position at the start of recording. ■... -
Page 152: Playback
Playback Viewing your pictures [Normal Play] When a card is in the camera, pictures are played back from the card. Without a card, pictures are played back from the built-in memory. Press the playback button The camera switches to the playback mode. -
Page 153: Enlarged Viewing
Playback Viewing your pictures [Normal Play] Enlarged viewing “Playback zoom” Turn the zoom lever toward the T side to enlarge the picture Current position of the enlarged section (Appears for 1 second) Each time you turn the zoom lever toward the T side, the camera increases the magnification of the selected area to 2x, 4x, [ND/FOCUS] lever... -
Page 154: Viewing Several Pictures Simultaneously
Playback Viewing your pictures [Normal Play] Viewing several pictures simultaneously “Multi Playback” Turn the zoom lever toward the W side to display several pictures Picture no./Total no. Motion pictures Panorama pictures (→76) [MENU/SET] • Move the zoom lever further toward the W side and you can switch the number of displayed pictures in the following order: 12-picture screen →... -
Page 155: Viewing Pictures By Their Recording Date
Playback Viewing your pictures [Normal Play] Viewing pictures by their recording date “Calendar Playback” Turn the zoom lever toward the W side while displaying a 30-picture screen to display the calendar screen Selected date [MENU/SET] • When you select a recording date using cursor buttons and then press [MENU/SET], the display changes to the 12-picture screen. -
Page 156: Playing Back Pictures Recorded As Exposure Series And With Interval Recording
Playback Viewing your pictures [Normal Play] Playing back pictures recorded as exposure series and with interval recording Still pictures taken in a sequence using the [ ] or [ ] exposure series settings or the time lapse function are grouped together when they are displayed. (Group display) ■... - Page 157 Playback Viewing your pictures [Normal Play] ● When pictures set to [Favorite] are played back using [Slide Show] or [Filtering Play], the pictures cannot be displayed in a group. ● The following modes are not available while a representative first exposure series picture is being displayed.
-
Page 158: Panorama Playback
Playback Viewing your pictures [Normal Play] Panorama playback Still pictures recorded with the [Panorama Shot] Scene Mode are displayed with a reduced height on a normal playback screen in order to show their complete width. ■ Enlarged display You can use the Playback zoom function to enlarge a picture. (→153) ■... -
Page 159: Viewing Motion Pictures
Playback Viewing motion pictures This camera was designed to play motion pictures using the AVCHD, MP4 and QuickTime Motion JPEG formats. Select a picture with the motion picture icon ([ ], [ etc.), and then press Playback starts. Recording time During playback, the elapsed time is displayed at the top right of the screen. -
Page 160: Capturing Still Pictures From Motion Pictures
Playback Capturing still pictures from motion pictures This function allows you to save a single still picture from a motion picture. Display the picture that you want to capture as a still picture by pausing a motion picture during playback Press [MENU/SET] •... -
Page 161: Splitting Motion Picture Takes
Playback Splitting motion picture takes A single motion picture take can be split into 2 parts. This is convenient when you want to keep just the necessary scenes, or if you wish to delete unnecessary scenes to increase free space on your card, such as when traveling. Select [Video Divide] in the [Playback] menu •... -
Page 162: Switching The Displays
Playback Switching the displays You can select if picture information (file number, etc.) and recording information (settings used for recording, etc.) are displayed when a picture is played back. Press the [DISP] button to switch the display Every time you press the button, the display will be switched. -
Page 163: Deleting Pictures
Playback Deleting pictures Pictures will be deleted from the card if the card is inserted, or from the built-in memory if not. (Deleted pictures cannot be recovered.) Press the [ ] button to delete displayed picture • A confirmation screen is displayed. Select [Yes] with cursor buttons, and then press [MENU/SET]. -
Page 164: To Delete Multiple (Up To 100)/All Pictures
Playback Deleting pictures To delete multiple (up to 100)/all pictures When you select a representative picture of a still picture group of an exposure or time lapse series, the group is deleted as a single picture. (All the pictures in the selected group are deleted.) Press the [ ] button to delete... -
Page 165: Different Playback Methods [Playback Mode]
Playback Different playback methods [Playback Mode] Recorded pictures can be played back in a variety of ways. • For the setting procedures of the menu. (→25) [2D/3D Settings] Switches the output format between 2D and 3D pictures. (Only available during HDMI output.) [Normal Play] Plays back all pictures. -
Page 166: [Slide Show]
Playback Different playback methods [Playback Mode] • For the setting procedures of the menu. (→25) [Slide Show] This mode automatically plays pictures in order and to music. It can prove to be helpful, e.g. when viewing on TV screen. Use cursor buttons to select the playback method and then press [MENU/SET] [All] Plays back all pictures. - Page 167 Playback Different playback methods [Playback Mode] Use cursor buttons to select [Start] and then press [MENU/SET] ■ Operations during a Slide Show The operation guide appears at the bottom right of the monitor. Pause/play Previous Next Volume down Volume up Stop Only while the camera is paused when playing back still pictures ●...
-
Page 168: [Filtering Play]
Playback Different playback methods [Playback Mode] • For the setting procedures of the menu. (→25) [Filtering Play] This mode allows you to select and display pictures that you want to play back, for example, pictures in any category or your favorite pictures. Press to select the playback method and then [MENU/SET]... -
Page 169: Retouching Pictures
Playback Retouching pictures [Auto Retouch] You can adjust the color and brightness of a still picture to bring them into balance. • New pictures are created after editing pictures with [Auto Retouch]. Before starting to edit, make sure that there is enough free space in the built-in memory or on the memory card. -
Page 170: [Creative Retouch]
Playback Retouching pictures [Creative Retouch] You can retouch recorded still pictures by selecting the effect that you want to apply. • New pictures are created after editing pictures with [Creative Retouch]. Before starting to edit, make sure that there is enough free space in the built-in memory or memory card. -
Page 171: Using The [Playback] Menu
Playback Using the [Playback] menu • For the setting procedures of the menu. (→25) [Title Edit] You can give titles, etc. to your favorite still pictures. Use cursor buttons to select [Single] or [Multi] and then press [MENU/SET] Select a still picture ●... -
Page 172: [Text Stamp]
Playback Using the [Playback] menu • For the setting procedures of the menu. (→25) [Text Stamp] With this mode, the recording date and time and the text registered in the [Baby], [Pet] Scene Modes, [Travel Date] and [Title Edit] can be stamped on the still picture. Use cursor buttons to select [Single] or [Multi] and then press [MENU/SET] Select a still picture... -
Page 173: [Video Divide]
Playback Using the [Playback] menu ■ Items that can be stamped [Shooting Date] [W/O TIME]: Stamps the recording date [WITH TIME]: Stamps recording date and time [Name] : Stamps the name registered in Face Recognition : Stamps the name registered in [Baby] or [Pet] [Location] Stamps the location registered in [Setup] menu’s [Travel Date] [Travel Date]... -
Page 174: [Resize]
Playback Using the [Playback] menu • For the setting procedures of the menu. (→25) [Resize] A picture’s resolution can be reduced to facilitate e-mail attachment and use in web pages, etc. (Still pictures recorded at the lowest setting of each aspect ratio such as [0.3M] cannot be reduced further.) Use cursor buttons to select [Single] or [Multi] and then press [MENU/SET]... -
Page 175: [Cropping]
Playback Using the [Playback] menu • For the setting procedures of the menu. (→25) [Cropping] This mode allows you to crop your still pictures, e.g. to improve the composition or to delete undesired parts of the subject. Use cursor buttons to select the picture and then press [MENU/SET] Use the zoom lever to enlarge the section of the picture to be cropped and then press [MENU/SET]... -
Page 176: [Leveling]
Playback Using the [Playback] menu • For the setting procedures of the menu. (→25) [Leveling] This mode allows you to correct slight slanting in a still picture. Use cursor buttons to select the picture and then press [MENU/SET] Press to adjust the angle and then [MENU/SET] •... -
Page 177: [Favorite]
Playback Using the [Playback] menu • For the setting procedures of the menu. (→25) [Favorite] By labeling your favorite pictures with a star ( ), you can play back your favorite pictures only, or you can delete all pictures except your favorites. Use cursor buttons to select [Single] or [Multi] and then press [MENU/SET] Use cursor buttons to select the picture and then press... -
Page 178: [Print Set]
Playback Using the [Playback] menu • For the setting procedures of the menu. (→25) [Print Set] This function allows you to add picture/picture no./date printing settings for when printing with DPOF print-compatible shops or printers. (Ask at the shop to check for compatibility.) Use cursor buttons to select [Single] or [Multi] and then press [MENU/SET] Use cursor buttons to select the picture and then press... -
Page 179: [Protect]
Playback Using the [Playback] menu • For the setting procedures of the menu. (→25) [Protect] This function allows you to mark important pictures so they cannot be deleted accidentally. Use cursor buttons to select [Single] or [Multi] and then press [MENU/SET] Use cursor buttons to select the picture and then press [MENU/SET]... -
Page 180: [Face Rec Edit]
Playback Using the [Playback] menu • For the setting procedures of the menu. (→25) [Face Rec Edit] With this function, you can edit or delete the recognition information for pictures with mistaken Face Recognition. Use cursor buttons to select [REPLACE] or [DELETE] and then press [MENU/SET] Use cursor buttons to select the picture and then press [MENU/SET]... -
Page 181: [Copy]
The following settings are not copied. Set them again after copying. - [Print Set] - [Protect] - [Favorite] ● Only pictures from Leica digital cameras may be copied (exceptions: Digilux, Digilux zoom, Digilux 4.3). ● Motion pictures recorded in [AVCHD] format cannot be set. - 181 -... -
Page 182: Viewing On A Tv Screen
Miscellaneous Viewing on a TV screen You can view pictures on a TV screen by connecting your camera to your TV with the HDMI mini cable (available as accessory (→8)) or the supplied AV cable. ● Also consult the TV’s instructions. Preparation: •... - Page 183 Viewing on a TV screen ■ To connect with the HDMI mini cable ● Always use the genuine Leica HDMI mini cable (available as accessory (→8)). ● There are restrictions on some playback functions. ● Bars may appear at the sides or at the top and bottom of the screen, depending on the aspect ratio setting.
-
Page 184: Hdtv Link (Hdmi)
CEC-compatible devices. Refer to your device’s instructions to verify compatibility with HDTV Link (HDMI). ● Always use the genuine Leica HDMI mini cable (available as accessory (→8)). ● If you are unsure whether the TV you are using is compatible with HDTV Link, read the instructions for the TV. -
Page 185: Turn On The Camera
Miscellaneous Viewing on a TV screen Preparation: Set [HDTV Link] to [ON] (→40). Connect the camera to a HDTV Link (HDMI)-compatible television set with the HDMI mini cable (available as accessory (→8)) (→182) Turn on the camera Press the playback button Proceed with the operation while referring to what is displayed on the TV screen •... -
Page 186: Viewing 3D Still Pictures
Miscellaneous Viewing on a TV screen Viewing 3D still pictures If you connect this camera to a 3D-capable TV, and play back still pictures that you recorded in 3D, you can enjoy impressive 3D still pictures on the TV. If a 3D-capable TV has an SD card slot, you can play back 3D still pictures that you recorded by inserting the card into the slot. - Page 187 Miscellaneous Viewing on a TV screen ● When an image is not suitable for 3D viewing (due to excessive parallax, etc.) • During Slide Show playback: The image is displayed in 2D. • During [Filtering Play]: A message appears confirming whether to display the image in 3D or not.
-
Page 188: Storing Recorded Still And Motion Pictures
To recorder’s input socket recording on your recorder first before stopping the playback on the camera. ● Always use the supplied genuine Leica AV cable. ● When using a TV with a 4:3 aspect ratio, always change the camera’s [TV Aspect] setting (→39) -
Page 189: Copying The Recorded Image Data To A Computer With The Available Software
Install the software to your computer Register your camera on the Leica Camera AG homepage a. Open an account at http://owners.leica-camera.com. As a result, you will receive access to the “Owners area”. b. Register your camera at “My products” by entering its serial number. Do so by following the respective instructions. -
Page 190: Using With Your Computer
Miscellaneous Using with your computer Still/motion pictures can be copied from the camera to your computer by connecting the two. • Some computers can read directly from the camera’s memory card. For details, see the your computer’s instructions. • If your computer does not support SDXC Memory Cards a message will be displayed requesting you to format the card. -
Page 191: Copying Still And Motion Pictures Recorded In [Mp4] (Except Avchd Motion Pictures)
[Access] is displayed. Connect the camera to the computer • Do not use cables other than the supplied genuine Leica USB cable. Using cables other than the above may cause a malfunction. Use cursor buttons on the camera to select [PC], and then press [MENU/SET] •... - Page 192 • It may not be possible to import if there are 1000 or more pictures on the card. • Motion pictures, 3D still pictures or RAW pictures cannot be read. ● Do not use any other USB cables except the supplied genuine Leica USB cable. ● Turn off the power before inserting or removing memory cards.
-
Page 193: Printing
USB cable Connect the camera to the printer • Do not use cables other than the supplied genuine Leica USB cable. Using cables other than the above may cause a malfunction. Use cursor buttons on the camera to select [PictBridge(PTP)]... - Page 194 Miscellaneous Printing ● Disconnect the USB cable after printing. ● Turn off the power before inserting or removing memory cards. ● Use a sufficiently charged battery. When the battery begins to run out of capacity while the camera is connected to the printer, the status indicator flashes and a warning beep sounds.
-
Page 195: Printing Multiple Pictures
Miscellaneous Printing Printing multiple pictures Press to select [Multi Print] in step (→193) Use cursor buttons to select the item and then press [MENU/SET] • [Multi Select]: Scroll between pictures with cursor buttons and, select the pictures to print with the [DISP] button. (Press the [DISP] button again to erase the selection.) Press [MENU/SET] when selection is complete. -
Page 196: Making Print Settings On The Camera
Miscellaneous Printing Making print settings on the camera The setting options include the number of printed pictures and their size. Make the settings before selecting [Print start]. Use cursor buttons to select the item and then press [MENU/SET] Item Settings [Print with Date] [ON] / [OFF] [Num.of prints]... -
Page 197: Using The External Electronic Viewfinder
Miscellaneous Using the external electronic viewfinder The external electronic viewfinder Leica EVF3 (available as accessory (→8)) allows controlling the image even if the camera is held below eye level or if the monitor image visibility is difficult, e.g. due to bright light from behind. -
Page 198: Using An External Flash Unit
Miscellaneous Using an external flash unit When you use an external flash unit such as the Leica CF22 (available as accessory (→8)), it can provide a longer effective flash range than the built-in flash. Preparation: • Set the camera ON/OFF switch to [OFF] and close the built-in flash. - Page 199 Miscellaneous Using an external flash unit ● An external flash cannot be attached simultaneously with an external viewfinder. ● You can set the aperture value, shutter speed and ISO Sensitivity on the camera even when an external flash unit is attached. ●...
-
Page 200: List Of Monitor Displays
Miscellaneous List of monitor displays The screens shown here are only examples. The actual display may vary. • Press the [DISP] button to change the display. ■ During picture taking mode 1 Recording Mode (→48) 9 Autofocus mode (→97) Custom Set (→91) 10 Self-timer (→116) - Page 201 Miscellaneous List of monitor displays The screens shown here are only examples. The actual display may vary. • Press the [DISP] button to change the display. ■ During picture taking mode 15 Self-timer (→116) 24 Built-in ND filter (→123) 16 Estimated number of remaining 25 Current date/time pictures or recording time capacity * World time...
- Page 202 Miscellaneous List of monitor displays ■ During picture taking mode (During zooming, for example) When Extended optical zoom is set Focus range Zoom ratio Optical Zoom range Digital Zoom range i.Zoom range ● When Step Zoom has been set (→95) Current zoom position (Focal lengths are the 35mm camera equivalents) ●...
- Page 203 Miscellaneous List of monitor displays The screens shown here are only examples. The actual display may vary. • Press the [DISP] button to change the display. ■ During playback mode 1 Playback Mode (→165) 8 Battery capacity (→15) 2 Protected picture (→179) 9 Built-in memory (→20)
- Page 204 Miscellaneous List of monitor displays The screens shown here are only examples. The actual display may vary. • Press the [DISP] button to change the display. ■ During playback mode 14 White Balance (→111) 19 Recording Mode (→48) 15 Shutter speed (→58) 20 Print settings (→178)
-
Page 205: Message Displays
[System Error] ● The lens is not working correctly. → Turn on power again. (Consult your dealer or your nearest Leica Customer Care center if the display still remains) [Some pictures cannot be copied] [Copy could not be completed] ●... - Page 206 → A message disappears when cable is also connected to another device. [This battery cannot be used] ● Use a genuine Leica battery (→8). ● The battery is not identifiable by the camera due to dirty terminals. → Wipe any dirt away from the terminals.
- Page 207 Miscellaneous Q&A Troubleshooting Before asking for repairs, check and try the following procedures. A message is displayed on the camera (→205) Battery- and power supply-related problems (→208) Recording-related problems (→208) Monitor-related problems (→211) Playback-related problems (→212) Other problems (→213) If the problem persists, performing [Reset] in the [Setup] menu may resolve the issue (→39).
-
Page 208: Q&A Troubleshooting
Miscellaneous Q&A Troubleshooting Battery, power The camera does not work even if the power is turned on. ● The battery is not inserted correctly (→18), or needs recharging. The monitor switches itself off even if the power is turned on. The camera switches itself off as soon as the power is turned on. - Page 209 Miscellaneous Q&A Troubleshooting Recording (continued) I cannot use [WB Bracket]. ● The built-in memory/the card is full. → Free space by deleting unwanted pictures (→163). The recorded pictures appear coarse, or there is noise. ● The ISO Sensitivity is high, or the shutter speed is slow. (The default [Sensitivity] setting is [AUTO] –...
- Page 210 Miscellaneous Q&A Troubleshooting Recording (continued) The subject appears distorted. ● An MOS sensor is used as the imaging device in this camera, so if the subject passes quickly in front of the lens, it will appear slightly distorted. Note, however, that this does not indicate a malfunction.
- Page 211 Miscellaneous Q&A Troubleshooting Monitor No picture is displayed on the monitor. ● [Opt. Viewfinder] is set to [ON]. → Press the [DISP] button to switch to monitor display. ● The display of an attached external viewfinder is selected. → Press the [EVF/LCD] button of the viewfinder to switch to monitor display. The brightness varies.
- Page 212 Miscellaneous Q&A Troubleshooting Playback Pictures are rotated. ● [Rotate Disp.] is activated (→40) I cannot view pictures. There are no recorded pictures. ● There are no pictures in the built-in memory or on the card (pictures are played from the card if inserted, from the built-in memory if not).
- Page 213 Miscellaneous Q&A Troubleshooting TV, computer, printer No image appears on the TV. The image is blurred or not colored. ● The connection is incorrect (→182). ● The television has not been switched to auxiliary input. ● Check the [Video Out] setting (NTSC/PAL) on the camera. (→39) (With camera model 18 460) The TV screen display differs from that of the monitor.
- Page 214 Miscellaneous Q&A Troubleshooting TV, computer, printer (continued) The camera does not communicate with the computer. ● The connection is incorrect (→190). ● Check whether computer has recognized the camera. → Set [USB Mode] to [PC] (→39). → Turn the camera off and then on again. The computer does not recognize the card (only reads the built-in memory).
- Page 215 Miscellaneous Q&A Troubleshooting Miscellaneous The menu is not displayed in desired language. ● Change the [Language] setting (→43). The camera rattles if shaken. ● This sound is made by the lens movement and is not a fault. The red lamp turns on when pressing shutter button halfway in dark locations. ●...
-
Page 216: Usage Cautions And Notes
Miscellaneous Usage cautions and notes When in use ● The camera may become warm if used for long periods of time, but this is not a fault. ● Keep the camera as far away as possible from electromagnetic equipment (such as microwave ovens, TVs, video games etc.). - Page 217 Miscellaneous Usage cautions and notes When not using the camera for a while ● Turn off the camera before removing the battery and the card (ensure that battery is removed to prevent damage due to over-discharge). ● Do not leave the camera in contact with rubber or plastic bags. ●...
- Page 218 Miscellaneous Usage cautions and notes Charging the battery ● The time required for charging varies depending on the conditions of battery usage. Charging takes longer at high or low temperatures and when the battery has not been used for some time. ●...
- Page 219 • Data containing personal information can be altered or lost due to malfunction, static electricity, accidents, breakdowns, repairs, or other operations. Leica Camera AG will not be liable for any damage that occurs, direct or indirect, as a result of the alteration or loss of data containing personal information.
-
Page 220: Leica Service Addresses
Leica products, including software supplied, either in writing, on the telephone or by e-mail. They are also the contact point for purchasing advice and to order instruction manuals. Alternatively, you can send us your questions using the contact form on the Leica Camera AG homepage. Leica Camera AG... - Page 221 • This product uses “DynaFont” from DynaComware Corporation. DynaFont is a registered trademark of DynaComware Taiwan Inc. • Leica is a registered trademark of Leica Microsystems IR GmbH. • Summilux is a registered trademark of Leica Camera AG. • Adobe...
- Page 222 Leica Camera AG / Oskar-Barnack-Straße 11 / D-35606 SOLMS / DEUTSCHLAND Telefon +49 (0) 6442-208-0 / Telefax +49 (0) 6442-208-333 www.leica-camera.com...
Need help?
Do you have a question about the D-LUX 6 and is the answer not in the manual?
Questions and answers