Hollis Prism 2 User Manual
Hollis prism 2
Hide thumbs
Also See for Prism 2:
- Technician service manual (203 pages) ,
- User manual (120 pages) ,
- User's & service manual (67 pages)
Table of Contents
Advertisement
Quick Links
Download this manual
See also:
User and Service Manual
Advertisement
Table of Contents

Related Manuals for Hollis Prism 2


Summary of Contents for Hollis Prism 2
- Page 1 user Manual L I M I T Rev. 5...
- Page 2 Hollis PRisM 2 this manual, specifications and features of the PrisM 2 are proprietary and copyright Hollis inc., 2012. this document cannot be copied or distributed without the prior agreement and authorization from Hollis inc.
- Page 3 Hollis PrisM 2 ccr only. it does not take the place of a recognized training agency instructor-led diver-training course or its associated training manual(s) and materials.
- Page 4 Hollis PrisM 2 rebreather. this includes new PrisM 2 divers as well as PrisM 2 certified divers who have been away from diving for an extended period of time and would benefit from an instructor-led refresher course to regain skills mastery of the Hollis PrisM 2.
- Page 5 WARNING: DeSIGN AND TeSTING the Hollis PrisM 2 has been designed and tested, both in materials and function to operate safely and consistently under a wide range of diving environments. You must not alter, add, remove, or re-shape any functional item of the Hollis PrisM 2. additionally, NEVER substitute any part of the Hollis PrisM 2 with third-party items which have not been tested and approved by Hollis for use with the PrisM 2.
- Page 6 WARNING: USeR-PACKeD RADIAl SCRUBBeR as of this writing, the Hollis PrisM 2 design does not include any technology or other device which can detect or warn of potentially dangerous levels of carbon dioxide (co ) within the breathing loop.
- Page 7 Hollis PrisM 2 is never weighted in such a way that it is not possible for the installed buoyancy device to overcome the flooded weight of the unit plus any diver-added non-detachable weights, and still provide enough positive buoyancy at the surface to keep the divers head well above water.
- Page 8 General Safety Statements & Warnings iii-vi IN WATER SKILLS PART 1 SYSTEM OVERVIEW SECTION 1 PRISM 2 IN-WATER SKILLS + DRILLS SECTION 1 ARTICLE: MINIMUM, MAXIMUM AND DESIGN PHILOSOPHY OPTIMAL LOOP VOLUMES AND WORK Manual Control or Computer Control OF BREATHING...
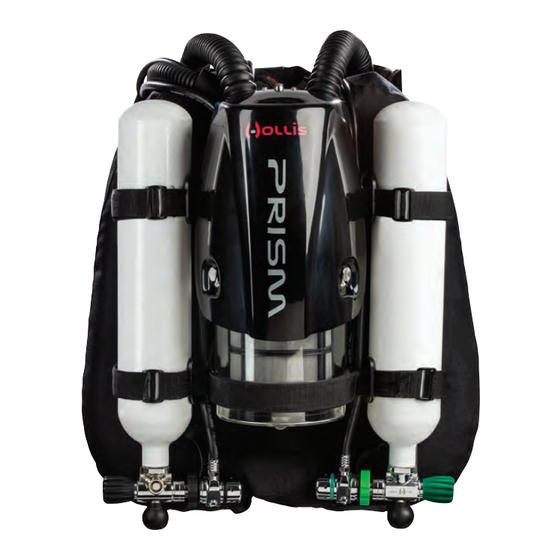
- Page 9 “sport” rebreather. The PRISM 2, like its forerunner the PRISM Topaz, is a digitally controlled electronic closed circuit rebreather with split front-mounted over the shoulder counterlungs (OTS-CL). It incorporates a radial design scrubber for the best possible duration and work-of-breathing.
- Page 10 YOUR PRISM 2 SCHEMATICS + DESIGN THE GAS PATH the PrisM 2 incorporates an over-the-shoulder split counterlung design. the gas flows through the loop from left to right shoulder as has become a standard in the recreational rebreather market (Fig. 1.1).
- Page 11 Failure to insure that the Red CO seal is properly installed may lead to injury or death. Fig. 1.2 WARNING: Breathing from the PRISM 2 without the Red Seal in place will result in 100% gas bypass of the scrubber. THE SCRUBBER BASKET the gas leaves the head plate and enters the radial scrubber basket through its center tube (Fig.
- Page 12 From the thermal jacket, the gas flows up through the scrubber basket flow vanes (Fig. 1.4). this restriction creates higher gas velocities in the sensor area without increasing work of breathing, further dropping the dew point of the gas as it reaches the oxygen sensors. By using natural condensation along the surface of the bucket wall and manipulating gas velocities in the area around the o sensors, we are able to keep the...
- Page 13 ADV (AUTOMATIC/MANUAL DILUENT ADDITION VALVE) Having the adV (Fig. 1.10) on the inhalation side of the loop makes sense for several reasons. should the oxygen content ever become dangerously low, dangerously high, or the diver begins feeling “abnormal”, a known normoxic gas is immediately available while still breathing from the loop prior to switching to bailout*.
- Page 14 OPV (OVER PRESSURE VALVE) the oPV (Fig. 1.13) is an automatic or manual adjustable pressure relief valve which is screwed into a fitting welded onto the front of the exhalation counterlung. to adjust the release pressure of the adV, simply turn the body of the valve clockwise to increase the cracking pressure and counter-clockwise to decrease cracking pressure.
- Page 15 Hollis (PrisM 2 Ver.) which have an operating range of 8.5 mV-14 mV in air and 40.6 mV-67 mV at 100% o at 1 atm pressure.
- Page 16 WHAT MATERIALS ARE USED TO MANUFACTURE THE HOLLIS PRISM 2 SENSORS? the body of the sensor is made of High-density Polyethylene (HdPe). the membrane on the front of the sensor is a thin teflon gas permeable membrane.
- Page 17 HOW DOES CHANGES IN AMBIENT TEMPERATURE INFLUENCE THE O SENSOR’S PERFORMANCE? temperature influences the signal output at a rate of 2.54% per °c. gradual ambient changes in temperature can be maintained within +-2% accuracy by processing the signal output through the resistor - thermistor temperature compensation network.
- Page 18 WHAT HAPPENS WHEN THE O SENSOR HAS BEEN EXPOSED TO WATER? the collection of condensation on the sensing surface of the sensor (standing water) reduces the signal output. once either drying or gravity removes the standing water, the signal output will return to normal within 30 seconds.
- Page 19 WHAT IS THE EXPECTED OXYGEN SENSOR LIFE? the operational life of the Hollis (PrisM 2) sensors are calculated as one year from the date they are put in service. there is a “do not use aFter” (date) also. Whichever date comes first is the proper time to discontinue sensor use.
- Page 20 ARE THE O SENSORS DATE CODED? oxygen sensors have a finite life. understanding the date code is vital to getting the benefit of the warranty period. as an example, the serial number 10734789 breaks down as follow: digit #1 a (1) denotes the year of manufacture as 2011; digits #2, #3 (07) indicate July as the month of manufacture;...
- Page 21 SOLENOID the PrisM 2 solenoid (Fig. 1.20) is a low power (0.65 watt) normally closed electromagnetic valve mounted in an isolated compartment in the head. the normally closed solenoid will only allow gas to flow when an electrical current is applied and the valve is momentarily opened.
- Page 22 THE PID CONTROLLER ARTICLE the PrisM 2 solenoid is controlled by state-of-the-art Pid control loop feedback circuitry (the controller). the Pid controller makes calculations based on an error value which is calculated as the difference between a measured process variable (how much oxygen is in your loop) and a desired setpoint (the o setpoint).
- Page 23 if a controller starts from a stable state at zero error, then further changes by the controller will be in response to changes in other measured or unmeasured inputs to the process that impact on the process, and hence on the process variable. Variables that impact on the process other than the manipulated variable are known as disturbances.
- Page 24 BUCKET SEALING O-RINGS there are two bucket sealing o-rings (Fig. 1.24) for redundant sealing of the breathing loop. standard user maintenance during system set-up and tear-down are required. BUCKET LATCHES Fig. 1.24 there are 3 nielson sessions 300 series stainless steel locking latches mounted on a stainless steel band (Fig.
- Page 25 BACKPLATE the Hollis PrisM 2 can be outfitted with any industry standard technical style backplate. the unit is currently shipped from the factory with a Hollis aluminum Backplate and solo Harness (Fig. 1.28). the style of threading, for the webbing on the backplate, is left to user preference.
- Page 26 Long yoke works best for them. if you have any questions, or need help finding which set-up works best for you, ask a PrisM 2 instructor, or go into your local Hollis dealer. they will be more than happy to help you get your rebreather properly fitted.
- Page 27 STABILITY BY GERARD NEWMAN ARTICLE What is stability? Briefly, it’s the ability to choose and maintain your position in the water column. When we have a stable platform for diving we are more comfortable, in better control and better able to observe our underwater surroundings.
- Page 28 counterlung position should be such that they are as close to your lungs as possible, both in the vertical and horizontal planes (Fig. 1.34). this will minimize static lung loading and decrease the work of breathing. the bottoms of the counterlungs should be secured to the waist strap to hold them in place when they are inflated and become buoyant.
- Page 29 For the sake of brevity we will give you a generic description of how to prepare the o-rings in the Hollis PrisM 2 for use, below. in the checklist “step-by-step” to follow, unless there are unusual...
- Page 30 1 eye protection Fig. 3.4 the PrisM 2 scrubber is easy to pack, and with experience should only take 5 to 10 minutes from set-up to clean up. Find a dry area away from and downwind of other people. if necessary,...
- Page 31 spread out a towel or other soft covering on the ground in a flat area, and lay a few sheets of paper towel or newspaper on top of that. Place the bottom foam pad (larger center hole) in the basket making sure it lays flat against the bottom and sides of the basket (Fig.
- Page 32 With the basket on the towel-covered ground, gently begin tapping the Fig. 3.9 basket where the vertical and horizontal braces meet (Fig. 3.9). this will begin to settle the granules in the basket. the trick is to tap hard enough on the cross braces that the vibrations cause the material to settle, but not so hard that the granules jump around.
- Page 33 PRE-PACKING THE PRISM 2 SCRUBBER While pre-packing the scrubber well in advance of a dive, or transporting...
- Page 34 if you will not be using the packed scrubber immediately, put the basket in an airtight container and seal the container. Put tape across the seal on the outside of the airtight container and write your name, the date you packed the basket, and the absorbent material used (Fig.
- Page 35 Fortunately, due to his quick actions, this incident resolved without tragedy. WARNING: The importance of working with checklists when setting up your PRISM 2 cannot be overstated! If you have not set-up your PRISM 2 using the checklists, DO NOT dive the rebreather. | 28...
- Page 36 We have broken the PRISM 2 checklists into 4 distinct sub-lists which should follow the steps encountered in the majority of real world diving situations.
- Page 37 PRisM 2 Assembly order: this is the list you will normally use to “build your rebreather” from its component parts. PRisM 2 operational Checklist: this is the checklist you will use to test all assembled components of the rebreather to make sure they are functioning properly as a whole prior to entering the water.
- Page 38 PRISM 2 COMPONENT INSPECTION KEY: W = WEAR / O = OPERATION / I = INSTALL diver installed gas supply Hoses 1. Check H-Plate / Harness / BC for Wear, (if installed) Damage or Missing Parts Pressure gauges H-Plate Harness (W) 6.
- Page 39 PRISM 2 COMPONENT INSPECTION KEY: W = WEAR / O = OPERATION / I = INSTALL 1: Check H-Plate / Harness / BC For wear, damage, or missing parts : 7 steps A: H-Plate Look for any bent or broken parts on the H-plate. Verify that the rubber cylinder pads are in place on the cylinder rests.
- Page 40 E: Dump valve(s) (O, W) inspect the buoyancy compensator dump valves. Momentarily open each valve and let a bit of air from the buoyancy compensator out to make sure they open and close freely. also inspect the air dump pull cords (Fig.
- Page 41 The Sniff Test sniff the air inside of the counterlung. it should smell clean and possibly have a hint of sanitizer smell to it. this is normal when using Hollis approved breathing loop cleaners, however a distinct smell of sanitizer is not normal and is probably due to inadequate rinsing after cleaning.
- Page 42 C: Threaded DsV/BoV assembly rings (W) check for cracks and thread stripping. the hose mounting rings Fig. 3.22 (Fig. 3.22) are welded to the counterlungs. Make sure the rings are firmly attached to the counterlung fabric. D: Breathing hoses, oetiker clamps & o-rings (W) check the counterlung-to-head hoses for holes, wear or age cracking (Fig.
- Page 43 E: o Addition valve (o) check the oxygen addition valve on the exhale counterlung for tightness by holding the base of the valve from the back of the counterlung through the counterlung fabric and attempt to tighten (twist clockwise) the threaded nut (Fig. 3.28). there should be no movement.
- Page 44 3: inspect DsV/BoV Breathing Hoses : 4 steps A: inhalation & exhalation hoses (W) While holding the hose by the threaded hose nuts, gently stretch them to insure the ends are secure. if there is any movement, check the hose clamps and hose material next to the clamps (Fig. 3.31) for wear or tears.
- Page 45 Fig. 3.34 (only on inhalation hose for dsV supplied systems) if your PrisM 2 is supplied with a dsV, the inhalation side breathing hose will house a one-way mushroom valve (Fig 3.35). (the inhalation mushroom valve on BoV supplied systems is housed in the BoV on the inhalation side of the BoV body).
- Page 46 DsV: there are three sealing o-rings on the dsV rotating barrel (Fig. 3.37). You will be checking the sealing of these during your positive and negative pressure tests. if any of these o-rings should fail, you will need to service the dsV. check the user service guide doc. 12-4091 for further information.
- Page 47 Fig. 3.39 attached to it have been serviced by a Hollis authorized repair facility. Failure to properly maintain the first stages could result in a free-flow of gas into the breathing loop and lead to serious injury or death.
- Page 48 Hollis repair facility. it is especially important for the oxygen side of the system to remain free from contamination, as all parts must remain oxygen clean.
- Page 49 NoTE: Solenoid Battery - For the computer to measure the dynamic load of the solenoid battery, the PrisM 2 must have a valid calibration stored in memory to allow the solenoid to fire. if, when you turn on the Wrist display, all three sensors display “fail”, the solenoid will not fire and...
- Page 50 PrisM 2 in water. Fig. 3.47 Failure to keep the battery compartment latches in working order can result in flooding of the battery compartment.
- Page 51 1st stage, solenoid supply hose and a pressurized oxygen cylinder to the solenoid and power up the PrisM 2 to check that the solenoid is firing and adding o to the breathing loop.
- Page 52 Have the unit serviced by an authorized Hollis service center. never dive your PrisM 2 with a failed solenoid.
- Page 53 to begin the cleaning process, remove the two o-rings from their grooves starting with the o-ring closest to the head (#1) (Fig. 3.52) and lay it on a clean towel. next, remove the o-ring closest to the edge of the bucket flange (#2) (Fig. 3.53). never use any sharp or metal objects to remove the o-rings, as that would damage the o-ring and/or the seating surface.
- Page 54 once the head to bucket sealing surface has been cleaned and the treated o-rings are in place on the flange, it is recommended that you temporarily replace the bucket on the head. this will keep debris off the cleaned surfaces until you are ready to mount the absorbent-filled basket assembly on the head in preparation for diving.
- Page 55 BLu / BLK = C: mV readings within range (o) (8.5 mV to 14 mV in air) the analytical industries Hollis (PrisM 2) o sensor voltage output should be between 8.5 and 14 mV in air, and 40 to 67 mV at sea...
- Page 56 Verify that the locking mechanisms lock firmly into place. WARNING: Damaged or worn latches must be replaced be- fore immersing the PRISM 2 in water or commencing div- Fig. 3.61 ing operations. Failure to verify that the scrubber bucket...
- Page 57 12: Basket Assembly (W) : 4 steps the basket assembly comes in four basic parts (Fig. 3.62): the basket, the basket lid, the center tube and the center tube o-ring. the basket assembly utilizes a strong nylon mesh to avoid rips and is also somewhat elastic so it will not create dust by abrading the absorbent along its walls during packing, transit or handling.
- Page 58 the easiest way to remove absorbent that has built up in the threads is to soak the top and basket threads in white vinegar for 10 to 15 minutes. if time is an issue, heat the vinegar to 100 °F/38 °c, and soak the parts.
- Page 59 PRISM 2 ASSEMBLY ORDER 1. Fill scrubber basket with CO absorbent + store in airtight container. Label Container: Date Filled, Grade, Time Used, Time Left, User date Packed: _______ grade: _______ time used: _______ time Left: _______ user: _______ Maximum Scrubber Duration: 240 min (0.5% SEV CO...
- Page 60 *You can dive the PrisM 2 using oxygen of less than 100% purity. see the “cal. PPo2 Function” in the PrisM 2 displays and electronics user Manual for instructions to do so.
- Page 61 3: install Regulators + Hoses on H-Plate install the oxygen regulator and hoses on the right side of the H-plate by running all the hoses under the bottom tank band strap on the inside of the tank bracket with the din valve facing outward toward where the tank will be installed.
- Page 62 the Bcd has three mounting grommet positions. depending on your trim in the water, you may want to raise or lower the Bcd position on the H-plate. it is recommended that you begin using the middle position. then adjust position, if needed, to aid in proper trim as experience is gained on the unit.
- Page 63 7: install Counterlung Breathing Hoses To Head : 2 steps A: Clean/lubricate o-rings, o-ring Groves And Mating surfaces remove, clean and prepare the o-ring(s), o-ring grove and mating surface for use, or replace if worn or damaged. B: install hose nuts finger tight. Do not over-tighten. to properly attach the counterlung hoses to the head, put the hose mount into the head connector (Fig.
- Page 64 B: inspect mushroom valves Look at the top of the dsV/BoV. the arrow denotes the gas flow direction (Fig. 3.70) and points at the exhalation mushroom valve (Fig. 3.71). Make sure the mushroom valve is intact and in good condition and the seat is firmly seated in the dsV/BoV assembly. C: install hoses onto DsV/BoV take the inhalation hose (mushroom valve installed in the Fig.
- Page 65 NoTE: if the PrisM 2 has been transported or disassembled in such a way that if there is any debris could have gotten on the o-rings, we recommend repeating this doubt about hose step.
- Page 66 to begin the cleaning process, using an o-ring removal tool, remove the two o-rings from their grooves starting with the o-ring closest to the head (#1) and lay it on a clean towel. next, remove the o-ring closest to the edge of the bucket flange (#2).
- Page 67 B: Make sure the Red Co seal is firmly seated in its groove (triple check) check that the gasket is in place and securely seated in its channel in the head plate by pushing down on it all the way around the gasket. recheck that the gasket is properly seated just before you install the scrubber basket and bucket assembly on the head.
- Page 68 13: Check scrubber Bucket : 4 steps A: Clean bucket sealing surface Before mounting the bucket to the head, give the bucket flange o-rings one last look for hair, lint, dirt or anything that might have fallen onto the lubricant. clean the sealing surface of the bucket with a clean, lint-free cloth.
- Page 69 When the bucket is close enough to the head that the latches can catch onto the Latch Keeper, flip the two side latches onto the keeper and lock them in place. Verify that the latches are locked by attempting to pull up on them.
-
Page 70: Table Of Contents
(hold for 1 minute minimum) 18. Verify Setpoint And Loop Contents 8. Flush Loop (2 times) 19. Don The PRISM 2 9. Calibrate Wrist & HUD (hold for 30 seconds minimum) 20. Pre-Jump 10. Check Solenoid & Wrist Display Battery (See hang tag on rebreather.) -
Page 71: Assembly Checklist Completed
14. Pre-Breathe (5 minutes) allow to sit for one minute; watch for signs of leaks. change wrist display to low setpoint Block nose and begin breathing from the PrisM 2 (in a safe 7. Positive Pressure Test (hold for 1 minute minimum) location) - Page 72 PRISM 2 OPERATIONAL CHECKLIST level instructions 1: Assembly Checklist Completed NoTE: get in the habit of 2: install Analyzed + labeled Gas Cylinders checking off each item on the checklist as you go and do Place the diluent tank under the two tank straps on the divers left. Place...
-
Page 73: Negative Pressure Test
5: oxygen system leak Test (Hold for 30 seconds min.) NoTE: at any time, but You will check to make sure there are no small leaks in the oxygen especially for delivery system (1st stages, hoses Qd fittings, valves). extended range diving, it is advisable A: slowly open oxygen valve, pressurize hoses, close valve to allow the loop to sit... -
Page 74: Positive Pressure Test
Worn o-rings in the dsV/BoV may also show up in the negative leak test. never dive a PrisM 2 that shows signs of a leaking loop, as that could compromise the integrity of the loop, possibly leading to injury or death. -
Page 75: Flush Loop (2 Times)
PrisM 2 that shows signs of a leaking loop, as that could lead to injury, and possibly death. C: Allow to sit for one minute, watch for signs of leaks Fully fill the loop with oxygen, with the oPV closed, until it vents gas. -
Page 76: Calibrate Wrist & Hud
NoTE: ” value programmed into the computer during system setup (see the electronics might “cal PPo ” programming in the PrisM 2 displays and electronics catch an inadequate user Manual). the system default is 0.98 Po oxygen flush, as the... -
Page 77: Check Solenoid & Wrist Display Battery
also, recording the mV values in oxygen and comparing those values with previous values can give us a good indicator if we have done a thorough flush of the loop. For instance, if the last time you calibrated the system, the mV values were 55, but a week later they are outputting 45 mV post-flush, you may want to consider flushing more oxygen through the loop to see if those mV values increase as you add more o... - Page 78 0.7 ata o . the default range for low or .21 .21 .21 high setpoints are 0.4 – 1.5. the PrisM 2 displays and electronics user Manual contains full details on how to program setpoints. Dive Setup+...
-
Page 79: Install Cover
11. install Cover screen after 20 attach the PrisM 2 cover to the back of the unit to protect the scrubber seconds. to make head. your life easier, it would be a good 12. -
Page 80: Check Adv, Bov If Equipped, And Bcd
PrisM 2 with leaks in the diluent system as catastrophic loss of pressure could occur during a dive. - Page 81 B. Block nose and begin breathing from the PRisM 2 (in a safe location) Pre-breathing gives you time to verify that all systems are go prior to entering the water. it is unlikely that even a 5 minute pre-breathe can identify a problem with the absorbent, or even verify that you have installed the absorbent basket in the loop! so don’t allow a pre-breathe...
- Page 82 PrisM 2. How you choose to distribute that weight is mostly a comfort issue, based on your physical build. the PrisM 2 has weight pockets sewn into the back of each counterlung.
-
Page 83: Don The Prism
0.19 Po setting in the computer. Do NoT dive your PrisM 2 until you verify the computer is maintaining your programmed loop Po 19. Don The PRisM 2 attach counterlung straps, crotch strap(s), cummerbund and waist strap, and tighten as needed. -
Page 84: Pre-Jump
20. Pre-Jump (see hang tag on rebreather) (Fig. 3.93) A: Begin Breathing Unit PRE-JUMP CHECKLIST Pre-breathing gives you time to verify that all systems are go prior to 1. Begin Breathing Unit 2. Check: ADV/BOV, O2 Add, Dil Add; BCD entering the water. - Page 85 & have fun constantly monitor the breathing loop PPo to ensure a safe breathing gas and proper function of your PrisM 2. Monitoring the PPo is your best protection and early warning of unit failure. Don’t forget to do your in-water bubble checks, and have a safe dive! WARNING: Never begin diving operations until a loop pre-breathe has been successfully completed.
- Page 86 THE POST-DIVE CHECKLIST name: date: 1. Verify and record batteries (solenoid/Wrist Display). solenoid battery: V:________ good replaced Wrist display battery: V:________ good replaced 2. Turn off, secure Wrist Display 3. Verify Heads Up Display Battery good replaced 4. Drain counterlungs of fluid 5.
- Page 87 1: Verify and record batteries (solenoid/Wrist Display) this is a good time to verify that the batteries in your PrisM 2 have enough power for continued use. should you need to replace a battery, it is better to find out now than to be scrambling for new batteries during set-up.
- Page 88 4: Drain counterlungs of fluid Your exhale counterlung will have fluid in it which contains both water from your dive environment (fresh or salt) and saliva and other bio- fluids. open the counterlung drain by loosening (unscrewing) the stainless steel locking collar and push the tip in toward the body of the drain.
- Page 89 9: Turn off diluent and drain lines, remove tank turn off the diluent tank valve. depress the adV until the diluent first stage and hoses are fully drained. the diluent first stage, loosen the tank straps, remove the tank. Make sure to put the cover on the first stage din fitting.
- Page 90 Hollis PrisM 2 dealer. 83 |...
- Page 91 NoTE: Why Sanitize Your Loop Daily? a rebreather “loop” collects all sorts of biological material during a dive. there is your saliva, which fortunately is composed of 98% water. However the other 2% consists of compounds such as electrolytes, mucous, blood and various enzymes that normally begin the process of breaking down food, and probably food particulates food particulates from a recently eaten meal or snack.
- Page 92 PRISM 2 eCCR MAINTENANCE / REPAIR LOG SHEET owner: _______________________________ date of report: ___________ reason for maintenance (check one) Pre-dive Failure Post-dive Maintenance Preventative/scheduled Maintenance Part replaced ___________________________________________________________ reason Parts needing service action operational observations replacement parts need to be ordered to complete this maintenance...
- Page 93 Recalibrate both displays on the surface. If this does not remedy the problem, you must have your PRISM 2 evalu- ated by an authorized PRISM 2 Service Technician. | 86...
- Page 94 PrisM 2, refer to the or shaking the unit lightly will help shed superficial bubbles quickly. article “stability” in Part 1 section 3.
- Page 95 sKiLL # 3 NoTE: dsV & BoV oPeration Open up, Shut down: Whenever the dsV/BoV is out of your mouth, the breathing loop must When operating the be sealed off “shut down”, so loop gas does not escape and water does dsV/BoV lever, try not enter the loop.
- Page 96 SKILL # 4 NoTE: MASK CLEARING unlike open circuit systems, there is no Mask clearing on rebreathers is substantially like you have been taught “purge button” on using open circuit gear, with one significant difference. unlike open the dsV to purge circuit mask clearing where you might exhale a full breath to clear a water from the mask, in rebreather diving your objective is to clear the mask of water,...
- Page 97 NoTE: MANUAL ADDITION OF DILUENT Gas physics and the Diluent addition the PrisM 2 comes equipped with a combination automatic/Manual valve diluent addition valve (adV) located on the front of your left (inhale) remember, as you counterlung, slightly below the breathing loop elbow. during descent, as...
- Page 98 SKILL # 8 MINIMUM (OPTIMAL) LOOP VOLUME & THE OVER-PRESSURE VALVE (OPV) the loop over-pressure valve (oPV) is located on the front right (exhale) counterlung. it is designed to purge excess gas pressure from the loop automatically, such as during ascent from depth when the volume of gas in the breathing loop is increasing.
- Page 99 MINIMUM, MAXIMUM, OPTIMAL LOOP VOLUMES, AND WORK OF BREATHING By dr. richard Pyle the volume of gas contained in a rebreather loop (the hoses, canister, and counterlung(s) of the rebreather plus the diver’s lungs) is seldom fixed. i define “minimum” loop volume as that volume of gas occupying the rebreather loop when the counterlung(s) are completely “bottomed-out”, and the diver has completely exhaled the gas from his or her lungs.
- Page 100 SKILL # 9 MANUALLY MAINTAIN SET POINT WHILE STATIONARY Manually maintaining set point is simply a function of replacing the oxygen in the loop as it is metabolized. as easy as it sounds though, in practice, it takes concentration since we use o at different rates throughout a dive.
- Page 101 Fortunately, this is where the diluting capacity of the diluent comes into play. By adding diluent, you automatically drop the Po in your loop. However, when descending on a rebreather, you must do so slowly, watching your Po on your Hud and wrist display to make sure it does not go above your set point.
- Page 102 While this may sound complicated because we measure our depth in feet or meters and you have to convert those numbers to atmospheres, the Wrist display has a handy feature on the dive screen titled “dilPPo2” (sElECT button X 1) which does all the math for you. it is important that the loop is fully flushed to insure a correct reading.
- Page 103 additionally, a diluent flush allows the introduction of a “safe” gas into the loop as a sanity breath if you feel the gas mix may be wrong or quickly reduce the Po if it has somehow increased to unsafe levels. in this instance you would not have to worry about the solenoid injecting oxygen.
- Page 104 10 m/30 fpm per minute to avoid a runaway ascent on your CCR. Until you have sufficient experience with your PRISM 2, you should consider using an up line during ascent. You will want to be continually dumping air from your...
- Page 105 SKILL # 14 CLEAR WATER FROM HOSE since learning skill # 3, dsV/BoV shutdown, you have become quite proficient at closing your dsV/BoV before removing it from your mouth underwater and on the surface. in a perfect world that would be the end of it.
- Page 106 each of your counterlungs has a drain valve located on the bottom of the counterlung. on the end of the drain valve you have a silver twist lock, which should be closed for diving. Fully loosen the lock mechanism. during your exhale cycle, push the drain nib back towards the valve body. this will open the drain and allow the liquid inside the counterlung to vent out.
- Page 107 WARNING: If you find a lot of water collecting in your inhalation counterlung during a dive, this IS NOT normal and indicates a potentially dangerous leak in the loop. If you find water building up in your inhalation lung, im- mediately switch to your bailout and abort the dive.
- Page 108 DIVING WITH OFF-BOARD OPEN CIRCUIT SYSTEM (BAILOUT TANK) the PrisM 2 has d-rings incorporated into the design specifically for use with a bailout tank. the tank must have the necessary attachment hardware installed for you to clip the bottle to the d rings. always clip the tank with the valve facing forward.
- Page 109 VALVE SHUT-OFF DRILLS in the unlikely event that one of the two regulator/hose systems (oxygen/ diluent) on the PrisM 2 loses containment, you would want to first bail out to off-board gas. then isolate which system is leaking, so you can make a judgment on how to safely return to the surface.
- Page 110 oxygen First stage and Hoses Let’s start by looking at a possible oxygen leak. the first rule of a closed loop is, anytime you turn off oxygen, you MUsT FiRsT switch to open circuit bailout. never breathe from a closed loop that does not have a working supply of oxygen.
- Page 111 First stage and Hoses the one quick disconnect on the o side feeds the manual oxygen addition valve. By disconnecting the manual o addition valve hose, you can diagnose whether the o leak into the loop is coming from the solenoid or the manual o addition valve, as these are the only two oxygen paths into the breathing loop.
- Page 112 You can use the sMB line to maintain your depth once it is on the surface and doing so will keep the sMB standing up in the water so it is easier to see from a boat or shore. reel the line in as you ascend and once on the surface you can re-stow the sMB and reel as you make your way back to the shore or boat.
- Page 113 STUDENT________ INSTRUCTOR________ 24. changing computer setpoints underwater STUDENT________ INSTRUCTOR________ 25. Bailing-out the computer to oc underwater STUDENT________ INSTRUCTOR________ 26. Working with PrisM 2 checklists STUDENT________ INSTRUCTOR________ optional skills 27. deploying an sMB STUDENT________ INSTRUCTOR________ 28. using a drysuit with your rebreather...
- Page 114 CLEANING SERVICE FACILITY & it is necessary to have a Hollis PrisM 2 service Facility complete a “Full service” annually to maintain safe operation of your PrisM 2. You may find some items that need attention before your scheduled anual service.
- Page 115 ROUTINE CLEANING RED CO SEAL Tools Needed: None if the gasket gets dirt or absorbent dust on it, remove the gasket from its grove and clean the surface of the gasket with warm, soapy water, rinse and allow to air dry. the gasket should feel “gummy” but not sticky to the touch.
- Page 116 For further disassembly see the “PrisM 2 user service guide” (doc. # 12-4091). DSV/BOV INHALATION HOSE + FITTINGS...
- Page 117 the mushroom valve and valve seat are delicate parts and should be cleaned with care. remove the o-ring on the outside edge of the valve body and set it aside. using a soft sponge soaked with steramine, gently wipe down the topside of the mushroom valve and then gently lift thevalve off the valve seat and wipe down the underside of the valve as well as the valve seat.
- Page 118 For further disassembly instructions see the “PrisM 2 user service guide” (doc. # 12-4091). SCRUBBER BUCKET + BASKET SPRING...
- Page 119 (e.g., dive light, weights, first stage, etc.). ALL OTHER EXTERNAL SURFACES though Hollis uses the best materials available, uV rays, salt water, and chlorine environments can be harsh on equipment. For that reason, it is essential to rinse all components with fresh water after use and avoid unnecessary uV exposures (Do NoT leave to dry or store equipment in sunlight).
- Page 120 Being that the united states is the PrisM 2’s home country, we might as well talk about the way things are done here.
- Page 121 (a far more complex method than Pressure swing absorption: {see the article “When to use the cal. PPo Function. diving Your PrisM 2 with o Fills of Less than 99.8% Purity.” in the PrisM 2 displays and electronics user Manual}) into its gaseous form. | 114...
- Page 122 71® deoxit® gold gn5 electrical contact cleaner other products not listed may be appropriate for use with the PrisM 2. if there is a particular product which you wish to use, please call the factory to make sure the product does not contain chemical components which may be harmful to components within the rebreather or the diver.
- Page 123 (standard configuration) up to 50 cu. ft / L BREATHING HOSES 1 1/2” X 15” OXYGEN SENSORS Hollis (PrisM 2) operational temperature range: 32 c - 122 F/50 operational Voltages: air: 8.5-14 mV, 100%o : 40.6-67 mV...
- Page 124 GLOSSARY OF TERMS Absorbent: chemical media used to remove CO from exhaled gas ADV: automatic diluent valve Bailout: redundant gas supply system BOV: bail out valve Breakthrough: where absorbent scrubber fails, no longer removing CO at an adequate rate Breathing Loop: parts of the rebreather that breathing gas circulates within Caustic Cocktail: very alkaline liquid (water mixed with CO absorbent material) CCR (CC): closed circuit rebreather...
- Page 125 NOTES: | 118...
- Page 126 United States Naval Sea Otters and other marine life in Monterey Surface Warfare Command, developed Bay. In 1970, Hollis made some of the first and delivered a unit called the “ATUBA” dives on the Electrolung rebreather using...
Need help?
Do you have a question about the Prism 2 and is the answer not in the manual?
Questions and answers