Table of Contents
Advertisement
Advertisement
Table of Contents

Related Manuals for Jands HOG 500


Summary of Contents for Jands HOG 500
- Page 1 Software Version 3.20...
-
Page 2: Fcc Statement
EMC COMPLIANCE This product is approved for use in Europe and Australia/New Zealand and conforms to the following standards: Australian / New Zealand European Norms Standards EN 55103-1 AS/NZS 4251.1 EN 55103-2 AS/NZS 4252.1 EN 60950 AS/NZS 3260 During immunity testing, this product operated according to the above standards with no degraded performance levels or permissible performance losses. -
Page 3: Table Of Contents
It is recommended that all service and repairs on this product be carried out by Jands Electronics Pty Ltd or its’ authorised service agents. -
Page 4: Table Of Contents
Table of Contents TABLE OF CONTENTS ......................II WELCOME TO THE HOG......................1 Introduction....................................1 Operational Overview ................................1 Using this Handbook................................2 Safety Information..................................4 Problem Solving..................................4 Software Updates ..................................5 Getting Additional Help ................................5 FINDING YOUR WAY AROUND ....................7 Programmer........................ - Page 5 Cloning (Copying) Parameters............................... 46 More on Selecting Fixtures ..............................46 More on Adjusting Levels..............................47 Removing Programming ................................ 48 Fan ......................................49 Grouping ....................................49 Path ......................................49 DMX Test Mode..................................50 XYZ MODE..........................51 Programming with XYZ Coordinates ............................ 51 MINI EFFECTS ENGINE......................
- Page 6 MIDI Show Control Messages (MSC) ........................... 96 24 Hour Clock..................................97 Astronomical Clock................................98 FREQUENTLY ASKED QUESTIONS ..................99 Hardware....................................99 Setup ...................................... 99 Disks and Fixture Library..............................100 Programming..................................100 Playback....................................101 EXTENDED KEY CHART.......................103 Pig functions ..................................103 Setup functions..................................103 External Keyboard ................................
-
Page 7: Welcome To The Hog
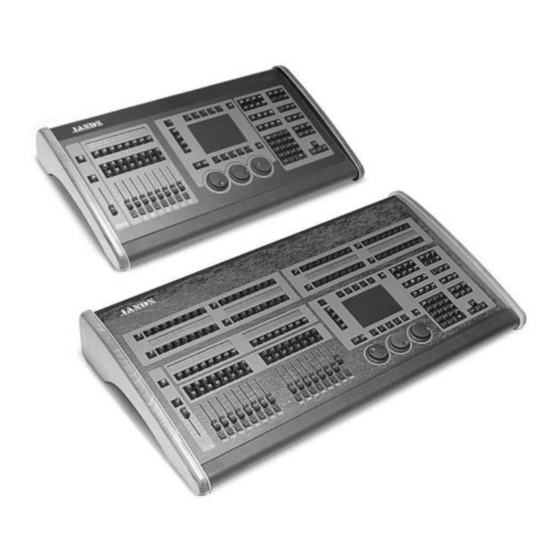
Welcome to the HOG Introduction The HOG 1000 and 500 have emerged through a collaborative effort between Jands Electronics and Flying Pig Systems, resulting in a family of consoles that combine the strengths of both companies: flexibility, power and ease of use, without overwhelming your budget. -
Page 8: Using This Handbook
Up to sixteen independent cuelists can be run simultaneously on their own Masters (eight on an HOG 500), each one with its own active cues and timings. For example, when working on sets, this allows each set to have its own cue list. Cue lists can be quickly copied from memory onto a fader, or sixteen/eight (HOG 1000/500) can be replaced—with crossfading—in one button press by changing the... - Page 9 ICBF ICBF stands for Intensity, Colour, Beam, Focus, and is an easy way to keep track of the parameters for an fixture or a group of fixtures. Intensity also known as level, or percentage. Colour the colour wheel, the gel string, and colour mixing. Beam the pattern and quality of the light;...
-
Page 10: Safety Information
Safety Information Please keep in mind the following safety instructions: • • • • Do not use the console if the power cord is damaged or not properly connected to an Earthed socket. • • • • Protect the system from extremes in temperature and wet weather. Operating temperature range for the console is 0 to 40 Celsius (32 to 104 F). -
Page 11: Software Updates
If for some reason you aren’t getting the answers you need, or if you have comments or suggestions related to the HOG, call Jands at +61 2 9582 0909. Someone is always available to field questions from 9:00 AM to 5:00PM (local time) Monday through Friday. Problems can also be e-mailed to Jands at jandsinfo@jands.com.au. - Page 12 This Page intentionally Left Blank 6 • • • • HOG – Version 3.20...
-
Page 13: Finding Your Way Around
MASTER MASTER There are sixteen playback masters on the HOG 1000 and eight playback masters on an HOG 500, each of which can independently play back its own cue list. All masters can run simultaneously with various custom settings. Actions such as add/swap, and button response can be individually set on each fader. -
Page 14: Menu Banks
To access each preset, simply press its button. A list of the presets can be called up for naming by pressing PIG and Position, Colour, Beam or Group as appropriate. THE HOG 500 DOES NOT HAVE MENU BANKS. TO ACCESS THE MENUS, YOU MUST USE EITHER THE EXTERNAL MONITOR OR A COMBINATION OF GROUP / POSITION / COLOUR / BEAM / EFFECT AND NUMBER KEYS. -
Page 15: Getting Started
Getting Started This chapter covers everything you need to know to get the console ready for programming. In general, it only takes four steps: Connect together the accessories, cables and console. Select the fixture types to use. Patch them. Program them. Connecting the Cables First, connect any external devices such as a keyboard, serial mouse/trackball or monitor to the appropriately marked connectors on the back panel. -
Page 16: Fixture Selection And Patching
Fixture Selection and Patching To select and patch the fixtures for a show, press the Setup button and then Patch on the top toolbar. Adding Fixtures to the Schedule Once you’ve opened the Patch window, first tell the console how many fixtures of each type you’ll be using: Press Add Fix to see a list of the fixture types available. - Page 17 Output> button on the toolbar and continue patching. Please note that whilst you can patch to both DMX outputs on an HOG 500, only output 1 connects to the DMX port on the back of the console. The ability to patch fixtures to both outputs allows shows to be used on both an HOG 500 and an HOG 1000.
- Page 18 Patch the Miniscan hpe @ 30. When you’re done, the patch list window will look similar to the one shown. Clearing Fixtures from the Patch To eliminate fixtures from the patch: Select the fixtures - just as if you were going to patch them, but do not press the ENTER button.
- Page 19 Options: Replace existing automenus: Removes all previous groups and palettes generated by auto menus, whether or not they would be overwritten. Note that if you have manually edited a group or palette in any way, it will not be deleted. Groups max repeat value: Specify the maximum repeat value for groups, eg, 2 generates all, even and odd, 3 generates all, even, odd, 1-4-7, 2-5-8, etc.
-
Page 20: Saving And Loading Shows
Saving and Loading Shows To avoid any potential loss of programming, save your show periodically while programming and at the completion of every programming session. Shows should be saved on 3.5 inch 1.4 MB HD floppy disks, formatted for IBM, just like those used with a PC. Disks can be formatted in the Setup-Shows window. IMPORTANT: Always back up your shows to floppy disk. - Page 21 Press New Show The console will ask for confirmation if a show already exists in memory. Press Okay to continue. The console is now ready to be programmed with a new show. From the Change Show window. Insert the floppy disk with the show you wish to load. Press Setup on the desk.
- Page 22 This Page intentionally Left Blank 16 • • • • HOG – Version 3.20...
-
Page 23: Quick Start
Quick Start This chapter gives a quick overview of how the HOG operates. Here you’ll find what’s minimally required to setup the console, program a cue, and play it back. This chapter is deliberately brief; for a complete explanation of how the console works, start with the next chapter. Setup the Console Connect any external devices such as a keyboard, mouse/trackball or monitor to the appropriately marked ports on the back panel. -
Page 24: Program A Cue
Press Auto Menu on the patch toolbar to open the Auto Menus window. Press Generate on the toolbar and the console will generate them automatically. Press Okay and then Close to return to the Patch window. Palettes have now been created on the menu banks. If you are using an HOG 1000, the LCD displays at the top of the console will display the contents of the Menu banks. -
Page 25: Record The Cue
Record the Cue Once a look has been created in the programmer it’s easy to record it as a cue. To record cue 1 on the first Playback Master: Press Record. Press the Choose button above Playback Master number 1. Playback the Cue Press Clear restore to empty the programmer. - Page 26 Choose 4 points of a rectangle on stage which correspond to the diagram above. The bigger the rectangle, the better. Create four focus palettes – one for each point: Upstage Right Y=10 Upstage Left X=10 Y=10 Downstage Right X=0 Downstage Left X=10 Aim all moving lights at each one of the four points and record them into the respective palettes.
-
Page 27: Programming
This chapter assumes that you have patched the console as covered in the previous chapter. Programming Styles The HOG 1000 and HOG 500 have been designed to be inherently flexible, often providing several different ways to achieve the same outcome. Which method is best for you will be determined by your programming style. - Page 28 Find the Group palette button labelled ALL Deschann and press it. This group was created when the Auto Menus function was used during set up. All desk channels are now selected. Alternatively: Type Group 2 ENTER on the keypad. Or you can select fixtures individually: Type in the numbers you want, eg, 32 Thru 55, or 1 Thru 5 + 9 - 3, or Group 2 - 7 You’ll notice that after you selected the All Desk Channels group that some of the palette...
-
Page 29: Adjusting Parameters
It’s not necessary to press ENTER after Full, it enters Sets the intensity at 100%. automatically. Sets an intensity level or a patch location: VL5 6 @ 40. Used for split fade times and sometimes fixture and cuelist selection: Time 5 / 7. Subtracts one item from a series: fixture 1 Thru 10 - 5. - Page 30 The Default setting is to show output values. To see fade times, delay times, or crossfade paths press Pig and either 2, 3, or 4 on the keypad. Alternatively, if you have a mouse or trackball connected, you can point to the setting you wish to view and click on the left mouse/trackball button to select it. Pressing the monitor button or clicking on the right mouse/trackball button will toggle between the console and the external screen.
-
Page 31: A Brief Playback Overview
Press Record. Press the Choose button above Master number 1. Cue 1 has now been recorded on fader 1. The time for cue 1 will automatically be the default times specified in the Control Panel. Don’t worry about setting your own times for now. When cue 1 was recorded on the fader, a cue list for that cue was automatically created. -
Page 32: Programming With Focus, Colour, And Beam
First, bring up the fader on cue 1 to full. The fader acts as a submaster for intensity only. It has no impact on colour, beam, or focus. Now press the Go button above Fader 1. The cue fades in with the programmed time. - Page 33 The white background in the output window shows what’s active in the programmer. If you can’t see a certain fixture, press Pig plus a keypad number to bring the chosen fixture type to the top. In the above example, press Pig plus 6 to bring the VL5 information to the top of the screen. Once you’re happy with the cue, record it: press Record and then ENTER.
-
Page 34: Recording Cues With Time
The currently selected parameters are highlighted (Gobo, Gobo2, Fx/prism). Pressing a toolbar button takes you straight to those parameters. Alternatively, repeated presses of the Position, Colour or Beam buttons advance the selection through the menu. Linked parameters In contrast to focus and colour, only the altered beam parameters were recorded in the cue. While it usually doesn’t make sense to record pan without tilt or magenta without cyan and yellow, beam parameters are best recorded separately. - Page 35 The All line in this window sets times for all parameters. Use the Intensity, Focus, Colour, and Beam lines to set times for all parameters of those types. Below these lines, times can be entered for specific parameters (time values can have up to 2 decimal places of precision eg, 5.11 seconds). To set different delay times, use the cursor keys and Set to change to the Delay column.
- Page 36 Changing the default cue times You can change the default times for fade and delay in the Control Panel window (Setup Panel). The console will automatically use these for your cues unless you make a change while programming. See Customising the Console. 30 •...
-
Page 37: Groups And Palettes
Groups and Palettes In addition to the palettes created by Automenus, you can create custom groups and palettes to meet your own specific needs. These may be combined with one another or manipulated in any way. Creating and Modifying Groups You can make your own groups for quick fixture selection. - Page 38 • They automatically update. Any change in the original palette will be automatically reflected in all cues that use it. • They can be named properly. These names appear across all display types. • Like groups, palettes can be made from any combination of fixture types. For example, a Red palette could contain red for scrollers, VL5’s, Cyberlights, Super Scans, and Roboscan 1220’s, assuring that colours match every time.
- Page 39 Embedded Palettes It’s possible to create a palette that is actually comprised of other palettes, making it easy to grab a palette giving different fixtures custom settings. One particularly useful application for this feature is with position palettes. Often stage looks are built up from many individual focus positions. Embedded palettes make putting multiple fixtures in their own focus positions as simple as one button press.
-
Page 40: Manipulating Groups And Palettes
Press Load. Select the palette to modify. Select the fixtures and modify their parameter settings as though you were initially setting them up in the programmer. Use Knockout or Undo to remove unwanted programming. Press Update. Modifying Palettes while running a Show While running a show, you can over-ride fixtures using the programmer. - Page 41 Merging Groups or Palettes Palettes (or Groups) can be combined with one another by selecting the Merge option Press Copy. The Options toolbar will have opened on top of the programmer toolbar Select the item to merge Press Merge from the Options toolbar, and apply any masking options that might be necessary.
-
Page 42: Cues, Cuelists, And Pages
Cues, Cuelists, and Pages This chapter covers cues, cuelists, and pages. You’ll learn how to edit, copy, and work with all three items. Manipulating Cues Viewing Cuelists To see a list of the cues within a cuelist, hold down Pig and press Choose button for desired fader’s cuelist. -
Page 43: Summary Of Recording Options
Select fixtures and adjust parameters. Hit Update. The command line will show Auto Update. A window will pop up showing all the cues and palettes that have been over-ridden. Note, the current cue of the “selected” master will always be selected by default. If the window does not pop up, then either you have not made any adjustments in the programmer, or you already had something Loaded. - Page 44 different ways to achieve a wide selection of looks. This would not be possible if the console always stored values for each parameter. However, this system can occasionally be confusing, and sometimes recorded cues don’t appear the same during playback as they did while in the programmer. This problem usually has one of two causes: 1) Active cues on the playback masters while recording.
-
Page 45: Cuelists
However, you can use the control panel window button “Edits Track Forward” to change the default. Merge and Remove Use these options after Record and Copy (Merge only) to combine or remove fixtures from existing cues rather than insert new cues. Masking/Use As we’ve seen, it’s possible to filter out Intensity, Focus (Position), Colour, Beam, or Time settings by pressing the relevant Use button(s) on the toolbar while recording (the default setting of the Use buttons is... -
Page 46: Pages
Press ENTER. HOG 500 users: If you do not have an external keyboard connected to your console you will not be able to enter cue names and other alphanumerical information. HOG 1000 users: If the external keyboard is not present but selected in the Control Panel window, you will not be able to change the name of the cuelist. - Page 47 The page is now the current page. Any changes you make as to which cuelists are on which masters will now affect this page. Creating a New Page To create a page, just press an empty page button, or press Page and an unused page number. As elsewhere, you can name pages using Set whilst in the page directory window.
- Page 48 Hold PIG and press Page to open page directory. Use cursor keys and Enter to select page to clear. Press Clear Page in toolbar. Press Okay to confirm or cancel to exit. Press Okay. Note: Clearing a page will only remove cuelists from the page that are not part of a template page. Also, it will not clear the name of the page.
- Page 49 By using the Save Activity function with multiple pages the need for page holdover can be negated, as you will always be able to crossfade smoothly between two completely separate cuelists on two separate pages. If you are using the console in a concert environment and have the cuelists for one complete song on each page, the Save Activity function is especially useful.
- Page 50 This Page intentionally Left Blank 44 • • • • HOG – Version 3.20...
-
Page 51: Advanced Programming
Advanced Programming This chapter covers the more complex aspects of programming. It begins by explaining the concept of tracking in greater detail than previous chapters. Understanding the reasoning and logic of tracking is the first step to mastering the console. Tracking The HOG 1000 and 500 are tracking consoles –... -
Page 52: Cloning (Copying) Parameters
Only the items that are programmed since the last record actually get recorded in the cue. As cues are executed in a cuelist, the console automatically calculates the output state for that point in the cuelist. If Maintain State is deselected, output will be the same as the programmed cues. Cue four was recorded by deselecting Track Forward on the recording toolbar (which appears after Record is pressed). -
Page 53: More On Adjusting Levels
Only Only selects the intersection between two groups. For example: Selecet a group containing fixtures 1 through 3. Press Select and then Only. Select a group containing fixtures 2 through 6. Fixtures 2 and 3 will now be selected in the Programmer. Calibrate Calibrate is used with XYZ programmingto establish stage co-ordinates. -
Page 54: Removing Programming
+10 increases the intensities of selected fixtures by 10%. -10 decreases the intensities of selected fixtures by 10%. Taking a Snapshot of Live Output Pressing Active followed by ENTER, the console takes a “snapshot” of the console’s current output and loads this into the programmer. -
Page 55: Fan
Select the fixture(s). Press KnockOut. Fanning Parameters over a Range Fan automatically programs several fixtures at once to create symmetrical looks. When used with pan and tilt, fixtures placed in a line will be aimed so they form a fan or a knot. To use Fan: Select the fixtures to program. -
Page 56: Dmx Test Mode
Shake Chaotic, sawtooth fade over the course of the cue. Path settings can be changed in the Cuelist or Programmer Times windows. Use the cursor and ENTER/Set keys to set fade in and fade out paths: Default paths for fixtures are set in the fixture library. DMX Test Mode To bring up a specific DMX channel in the Programmer, use the DMX Test Mode. -
Page 57: Xyz Mode
XYZ Mode This chapter explains hows to program positions in a 3 dimensional space using X, Y, and Z coordinates. Once you’ve read it, you should be able to calibrate fixtures for use in a 3 dimensional space, program cues using XYZ coordinates and transfer a stage show from one stage to another with minimal effort. - Page 58 To calibrate fixtures: Choose 4 points of a rectangle on stage which correspond to the diagram above. The bigger the rectangle, the better. Create four focus palettes – one for each point: Upstage Right Y=10 Upstage Left X=10 Y=10 Downstage Right X=0 Downstage Left X=10 Aim all moving lights at each one of the four points and record them into the respective palettes.
-
Page 59: Mini Effects Engine
Mini Effects Engine This chapter covers the Mini Effects Engine both in summary and in detail. The Mini Effects Engine is a way of creating dynamic effects very quickly. You can use it to make circle effects, ballyhoos, shutter chases, fluctuating rainbows, and many more. Previously, to make a dynamic effect, you had to create each static look first, turn them into a chase, and finally run the cuelist to obtain the effect. -
Page 60: Making Custom Effects
Offset Offset refers to where in an effect cycle a fixture begins the effect. A single effect can have many looks by using different offsets. Many of the preprogrammed effects in the Effects window have several permutations with different offsets depending on the number of fixtures. Fanning Effects A quick way to evenly spread the offsets across a range of fixtures is to fan them;... - Page 61 To store a new effect: Create the effect as above. Press Record, and mask out any unwanted parameters (eg, intensity in a movement effect). Choose an Effects button. The new effect button will store the effects you set up. An IFCB indicator in the palette button will show what parameter types have been stored.
- Page 62 This Page intentionally Left Blank 56 • • • • HOG – Version 3.20...
-
Page 63: Cuelists
Cuelists As well as being completely spread out, it’s possible to have an entire show’s programming placed inside one cuelist, under the control of one Master. To achieve this flexibility, cuelists are designed so that: • Each cue can have many different times. •... -
Page 64: Timing
Open current cuelist window by holding Pig and pressing Choose button of cuelist to view. Select cue by moving the cursor box over its name/number. Press Set. Type in the new number from the keypad, followed by ENTER. Cue numbers can have up to 4 digits to the right of the decimal (eg, 1.0001). To change a cue name, type in a name instead of a number. - Page 65 Setting the Wait Time The wait time can only be adjusted using the cuelist window. There are five options for a wait time: Represented by an empty wait box; the cuelist stops executing cues and waits for Go. Halt Wait The cuelist waits this time after the first cue starts before starting this one.
-
Page 66: Special Cues
Open the relevant cuelist window by holding Pig and pressing the Choose button on the master. Press Learn from the toolbar. Now press the Go button as if you were running your show. The console will automatically note the times between your Go button presses and insert them into your cuelist as Wait times. -
Page 67: Virtual Masters
Move the cursor to the Count box on the cuelist screen. Press Set, allowing you to edit the value within the box. Type in a number from the keypad and press Enter. When deciding on the iteration number that you enter in the count box, it should be remembered that the value represents the number of times that the link cue executes, so if you want your loop to run four times, you should enter a value of three in the Count box. -
Page 68: Macrocues And Macros
To release a cuelist or macro running on a virtual master, hold down the cuelist/macro button on the menu bank and press Release. If you are using an HOG 500, this is not possible. Macrocues and Macros Macrocues are cues that store keypreses and other actions that the user may perform such as mouse clicks and button presses. - Page 69 Cuelists that are recorded in the macro directory automatically have an option set that stops and releases them once the end of the cuelist is reached. This allows them to run on virtual masters cleanly and neatly; once they have completed they release themselves ready to be re-run. Inserting a Macro Cue Within a Cuelist Sometimes it is desirable to include a macro command within a cuelist.
- Page 70 500 don’t have touchscreens whereas the WHOLE HOG II does, the HOG 1000 has more faders that the HOG 500 etc, macros are not portable across the different hardware platforms. Macro cues that are 64 • • • • HOG – Version 3.20...
-
Page 71: Cuelist And Macro Directories
loaded onto a different hardware platform from the one they were created on will be converted into blank cues. The comment field of the cue contains the name of the button that was in the macro cue in case you need to reconstruct the macro on the new platform. -
Page 72: Cuelist Contents Window
Cuelist Contents Window It is only possible to view this screen if you have an external monitor connected to your HOG. To view this screen, hold Monitor and then press Content on the toolbar to open the cuelist contents window for the selected cuelist: This window shows what is programmed in the current cue of a cuelist. - Page 73 Press Unblock from the cuelist toolbar. Select the cues to unblock. Press ENTER. Renumber Pressing Renumber in the bottom cuelist toolbar renumbers the subsequently selected cues. This is useful if you have mixed up the fixture numbering and you wish to bring some semblance of order to the fixture numbering.
- Page 74 This Page intentionally Left Blank 68 • • • • HOG – Version 3.20...
-
Page 75: Playback
Playback The HOG is designed for maximum playback flexibility: • Cuelists provide powerful timed playback for theatrical shows. They can be fully integrated with Timecode inputs from MIDI, triggered via MIDI show control, or MIDI notes. • Masters running independent cuelists can be operated simultaneously to control unstructured shows. •... -
Page 76: Other Playback Controls
Other Playback Controls Grand Master The Grand Master is the overall intensity control for the entire console. Most often, it’s simply left at full. Only intensity parameters are controlled by the Grand Master; it has no impact on colour, beam or focus parameters. -
Page 77: Master Precedence
Note that the percent value relates to the length of the fade. So increasing the percent value increases the length of the fade and vice-a-versa. Master Precedence Because the console can simultaneously run sixteen (or eight) separate cuelists on faders and more on virtual masters, there is possible conflict over which master actually has control of a parameter. - Page 78 All these options are stored in the cuelist. If you change to a different cuelist (by changing page, for example), the option settings may change and the Master will behave differently. Flash Button Action Flash buttons are the buttons found below the row of faders, and are useful for bumping Intensity on and off.
-
Page 79: Chases
For high priority. Use this to make sure that something won’t get over- High Priority ridden. For low priority. The cuelist releases automatically when another fader is Release on next Go activated, even if not fully over-ridden. In normal operation, the console automatically releases masters that have been fully over-ridden (a process called ‘stomping’). - Page 80 Hold down the master’s Choose button. The parameter wheel display will change to show Rate and Fade % (the right wheel becomes the console rate, a console-wide rate control). Adjust the left (Rate in Beats Per Minute) and centre (Crossfade in %) parameter wheels.
-
Page 81: Saving And Merging Shows
Saving and Merging Shows Often you will want to store your show onto floppy disk. In addition, you may want to merge old programming from earlier shows into your current shows. Or, if you have been programming a show with a colleague on a separate console, you may want to combine the two shows together for playback on one console. -
Page 82: Merging Shows
item as it is loaded. Load Finished Okay appears when everything has been loaded successfully. Press Okay to return to the shows window. Press Okay to exit shows window. Naming a Show To avoid mixing up disks and accidentally overwriting a different show, give your show a name before saving it. - Page 83 There are occasionally times when you may wish to save a show as a previous version, for instance, you may wish to save as version 2.3 (build 32) so that you can load the show into a Jands Hog. Pressing the Save As button on the toolbar will display a selection of choices to save your show as.
- Page 84 It is recommended that a show is also saved normally. A show saved as a previous version may not retain all features of your show. Creating a New Show To clear the console and start with a fresh blank show, there are three ways to proceed: •...
-
Page 85: Customising The Console
Customising the Console The HOG’s settings can be customised to fit your requirements. This customisation is done using the Control Panel window. To open the Control Panel window, press Setup followed by Panel. Programming and Playback Defaults and Settings The HOG treats certain parameters as a group; for example, it Separate parameters normally makes sense to record colour mixing parameters (Cyan, Magenta and Yellow) as a group. -
Page 86: Hardware Control
Lets you choose the resolution of the monitor you have plugged in. Monitor Press Enter and use the cursor keys to set the resolution via the drop down pick box. Press Enter to accept your selection. You can choose between (None, 640 x 480, 800 x 600, and 1024 x 768) Lets you select the language to match your keyboard layout. -
Page 87: Console Locking
This function will only work on an HOG 1000. The HOG 500 does not have any menu palettes and hence it will not have the Menus option in the toolbar. -
Page 88: Event Monitor
Although future software versions will be loaded from the Control Panel, for the time being it must be done differently. The quickest way to upgrade your HOG is through the Internet; to access the Jands page on the World Wide Web, use http://www.jands.com.au. Select the Download page, then choose HOG & Hog Software and go to Operating System Software. -
Page 89: Memory Control
Insert the first disk into the disk drive. Hold down the ENTER key on the keypad Turn on the console power. When the menu appears on the screen, press 2, Reload The first disk will load into the console. The console will then ask for the second disk. - Page 90 This Page intentionally Left Blank 84 • • • • HOG – Version 3.20...
-
Page 91: Advanced Patch Functions
Advanced Patch Functions This chapter covers patch window functions – such as fixture renumbering, paths, etc – not covered in the Getting Started Chapter. Different Patch Views In addition to the first DMX address for each fixture, there are two other views that show patch information. - Page 92 Renumbering Fixtures It is possible to renumber fixtures in order to access them easier. By default fixture numbers start with 1 for each type of fixture. Renumbering allows fixtures to be numbered continuously across types. For example, Cyberlight unit numbers could start at 26. Renumbering eliminates the necessity of having to select fixture types.
- Page 93 Open the Fixture Editing Spreadsheet. This is found in the Patch Window. To open the Fixture Editing Spreadsheet from the Main display, press Setup, Patch, Edit Fix. Use the Group button and the toolbar to select the type of fixture for which you wish to change the alignment. Use the cursor keys to move around the Fixture Editing Spreadsheet.
- Page 94 This Page intentionally Left Blank 88 • • • • HOG – Version 3.20...
-
Page 95: Console Inputs
Console Inputs This chapter covers the use of MIDI, and Timecode inputs. These features are accessed through the Inputs Control Panel window To open the Inputs Control Panel window, press setup and Inputs. MIDI Timecode The HOG can only receive MIDI Timecode. It has programmable error correcting features. The console can also simulate Timecode to help with programming when the Timecode source is not ready. - Page 96 Bad Timecode tapes will have drop outs that look to the console like Timecode jumps. Increase the value in the Jump after /frms: entry box to reduce the sensitivity of the console to jumps in Timecode signal (the default value is 15 frames). Programming Timecode into Cuelists Timecode functionality is built into the normal cue list timing structure (wait), making it very easy to run programmed cues to Timecode.
-
Page 97: Midi
MIDI MIDI Receive The console can receive: • MIDI note data, such as from a MIDI keyboard, another HOG or a Whole Hog II. • MIDI show control (MSC) messages, such as from a show control sequencer, or another console with MSC support. - Page 98 Here is the default MIDImap.txt file from an HOG show disk: version = 40 ; NB: MIDI Note & Controller numbers range from 1 to 128 group_menu = note:1 position_menu = note:2 colour_menu = note:3 beam_menu = note:4 macro_menu = note:5 page_menu = note:6 choose = note:7 go = note:8...
- Page 99 MIDI Map File Format The console events that can generate MIDI and their map file name are listed below: Whole Hog II JandsHog Map file name Choose buttons Choose buttons Select Buttons choose Go buttons Go buttons Go buttons Halt buttons Halt buttons Halt buttons halt...
-
Page 100: Midi Serial Output
Controllers 33 to 64 are the LSB parts of controllers 1 to 32, so are unavailable. Console button events can only map to MIDI notes, polyphonic aftertouch and program change (note that faders are also button events as they refer to which fader was used; the actual values are sent separately). Continuous values (like a fader position) can only be sent via a controller, pitch wheel or channel aftertouch. - Page 101 Open the Input Panel Window. Press “Serial Out” to turn serial out on. It can be used in conjunction with “Notes Out” or “MSC Out”. Open the cuelist window, and move the cursor to the cue which is to output the message. Edit the comment box and type in a MIDI message as described below.
-
Page 102: Midi Show Control Messages (Msc)
MIDI Show Control Messages (MSC) For a full description of how MIDI Show Control works, we recommend reading the latest MIDI Show Control Recommended Practice from the MIDI Association. MSC messages contain a device ID and a format number. Make sure that you setup these numbers in the window entry boxes correctly. -
Page 103: 24 Hour Clock
24 Hour Clock The 24 Hour Clock and time related functions are also accessible through the Inputs Panel. The 24 Hour Clock panel allows you to set the time and date in the console, as well as program daily and hourly triggers for comment macro style commands. -
Page 104: Astronomical Clock
You can enter multiple hourly triggers, although only 4 triggers will show on screen at any one time. By using the cursor keys, you can scroll through the list of triggers. Astronomical Clock The astronomical clock functions share the real time clock triggers window found by pressing Setup, Inputs, 24 Hr Clock. -
Page 105: Frequently Asked Questions
Frequently Asked Questions If you’re having difficulty figuring out how to do something or why the console is behaving the way it is, look through the following section to find a problem that matches your own. Hardware I have to reload a show from disk every time I turn on the power. It’s likely that the battery is flat. -
Page 106: Disks And Fixture Library
Disks and Fixture Library Are show disks recorded with early versions of software compatible with later versions of software? Yes. Are show disks recorded with later versions of software compatible with earlier versions of software? Typically no. In my library file, why does Douser = b still allow the channel to be controlled on the fader? It is set as htp8bit. -
Page 107: Playback
Do I have to keep pressing Back space after set to erase what’s already there. No. Just start typing and the old items get wiped out. If I accidentally hit Update, how do I get rid of it? Press Backspace. Do I need to press the @ before Full, ie, 6 Full. - Page 108 I have a chase Master running strobe chases. If Q8 then goes on my main Master it seems to dim all the fixtures and change their position focus. Why does it do this? Q8 does not have any Trackspot data in it at all. This is because you have the cuelist option Maintain state on, and ...but not in jumps off.
-
Page 109: Extended Key Chart
Extended Key Chart This chapter gives a quick reference to keystroke commands. Pig functions The chart below shows what happens when PIG is pressed in combination with other items: Parameter Wheels Fine movement for parameters larger than 8 bit. Palettes and Groups Deselects chosen palettes and groups. -
Page 110: Key Mapping
Shift + Choose x Tab + Go x ~` + Stop x Number Number Number “ Cursors At @ Full Cursors Return/ Enter Shift + Tool keys Tab + Window Ctrls Enter Func Func Back- Backspace space The main command keys might perform unwanted operations if accidentally pressed. So on an HOG external keyboard, the Alt key must be held down in order for the command to be accepted. -
Page 111: Fixture Library
Fixture Library The console uses “fixture library files” to find out about the different fixtures you might be using. The files contain information such as the number of channels, whether the channels are 8 bit or 16 bit resolution, any important step values for a channel, and their associated names, etc. -
Page 112: Making A New Fixture
Yellow = c Colour = c Colour 2 = c Colour <> = c Color = c Color 2 = c Color <> = c Gobo = b Gobo 2 = b Prism = b Fx/prism = b Gobo <> = b Gobo 2 <>... -
Page 113: Writing A Fixture File
• I,C,B,F denote Intensity, Colour, Beam, and Focus • X is for non-editable, undisplayed parameters. Add the fixture file to the disk, and to types.txt Copy the fixture file into the library directory. Then edit “types.txt”: increase the number on the “count =“ line, then add the name of the library file on a new line. - Page 114 optional Default crossfade path: crossfade = 0 0 is linear; 1 is snap change at start; 2 is snap change at end optional If the parameter name is new (ie, not in kind = + “function.txt”), you can specify a kind using “i,c,b,f,+,x”...
- Page 115 XYZ Information The required items for the XYZ system to work properly are: Pan and Tilt Deflection – the angle the beam moves between min and max DMX. Pan Movement (normal or inverted) – if increasing pan moves the head or mirror clockwise when looking out from the lamp, the direction is normal, otherwise it is inverted Tilt Movement (normal or inverted) –...
- Page 116 • Do not set strobe as an htp8bit intensity channel (because that would mean that you could not dim cuelists with programmed strobes without the strobe rate changing). If you want strobe on faders - hold “Select” and then fade. Fader/flash does ICBF cuelist is an option that can be set in the cuelist window under options.
- Page 117 Intellabeam highend.lib Ibeam12 Cyberlight m1 highend.lib Cyber m1 Cyberlight Cx highend.lib Cybercx Emulator DMX highend.lib Emu DMX Intellabeam-Lo highend.lib IbeamLo Ibeam 13ch _lib.lib Ibeam13 Dataflash _lib.lib Dataflas Studiocolor _lib.lib Studio Cyberlight m2 highend.lib Cyber m2 Cyber m2 Litho _lib.lib Cyber m2 Cyber m1 Litho highend.lib Cyber m1...
- Page 118 Imagescan Mode 2 martin.lib Imagesc Mac 600 m2 _lib.lib Mac600 Mac 500 m2 _lib.lib Mac500 Roboscan 518 ml martin.lib Robo518 Nat 1200 _lib.lib Nat1200 Nat 2500 _lib.lib Nat2500 MM1200DX coemar.lib mm1200dx MM1200 zoom coemar.lib mm1200 Samurai _lib.lib Samurai Nat1200DX coemar.lib Nat12dx Pchmi coemar.lib...
- Page 119 Fixture Library • • • • 113...
-
Page 120: Hardware Notes
Hardware Notes MIDI Ports There are three MIDI ports on the back of the HOG. MIDI In, MIDI Thru and MIDI Out. The connectors are 180 5 Pin DIN type. They are wired as follows: Pin 1 Not Used Pin 2 Digital Ground Pin 3 Not Used... -
Page 121: Parallel Port
Parallel Port The Parallel port is used for connecting a parallel printer to the HOG. The connector is a 25 Pin female “D” Sub-Connector and is wired as follows. Pin 1 Strobe Pin 2 Pin 3 Pin 4 Pin 5 Pin 6 Pin 7 Pin 8... -
Page 122: Keyboard Port
Pin 12 Not Used Pin 13 Horizontal Synchronisation Pin 14 Vertical Synchronisation Pin 15 Not Used Keyboard Port The Keyboard port allows an IBM AT style computer keyboard to be connected to the HOG. The port is a 5 Pin female DIN connector and is wired as follows Pin 1 Keyboard Clock Pin 2... - Page 123 This Page intentionally Left Blank Hardware Notes • • • • 117...
-
Page 124: Index
Index Comments, 58 Connecting the Cables, 9 Console Rate, 70 Contents, 66 Contrast, 9, 80 @, 3 Control Panel, 79 Copy, 37 Groups and Palettes, 34 Crashes, 4 Croak, 4 +10%, 48 Crossfading, 42 Cue, 2 Cue Numbers, 25 Cue Only, 38 Cue Storage, 25 Cuelist, 2, 39 -10%, 48... - Page 125 Making, 106 Maintain state, 73 Orientation, 13, 87 Manual Crossfades, 70 Fixture Selection, 10 Manual Fade, 72 Flash, 69 Manual Override, 70 Flip, 47 Mark, 60 Focus, 3, 26 Mask, 32, 39 Formating Disks, 76 Masters, Playback, 69 Full, 18 Memory, 83 Menus, 81 Merge, 32, 33, 36...
- Page 126 Path, 3, 49 Pause, 69 Pig, 3 Temperature, 4 Playback Masters, 7, 69 Template Pages, 43 Ports Terminology, 2 Connection, 9 Tilt Invert, 13, 87 Position, 7, 26 Timecode, 89 Power, 9, 17 Learn Timing, 59 Preset Focus, 31 Programming, 90 Prev, 46 Reset, 90 Priority, 72...
Need help?
Do you have a question about the HOG 500 and is the answer not in the manual?
Questions and answers