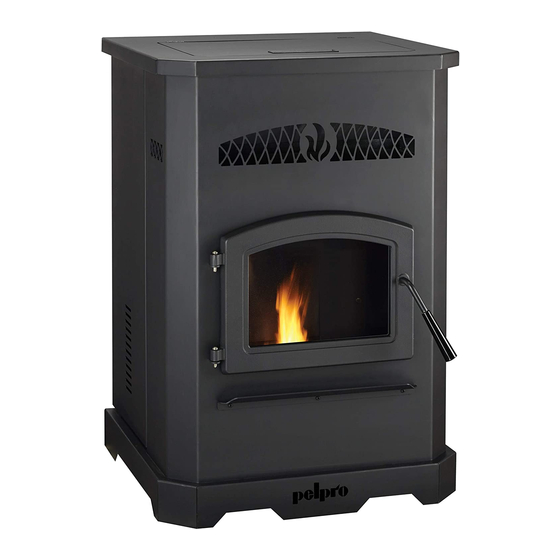
Pelpro PP130 Owner's Manual
Pp130 pellet stove
Hide thumbs
Also See for PP130:
- Owner's manual (40 pages) ,
- Owner's manual (40 pages) ,
- Owner's manual (44 pages)
Table of Contents
Advertisement
INSTALLER: Leave this manual with party responsible for use and operation.
OWNER: Retain this manual for future reference.
PP130 Pellet Stove
Model(s):
PP130
Portland
Tested and
O-T L
Listed by
Oregon USA
C
US
OMNI-Test Laboratories, Inc.
Report #: 061-S-88-2
SAFETY NOTICE: PLEASE READ THIS ENTIRE MANUAL
BEFORE INSTALLATION AND USE OF THIS PELLET FUEL-
BURNING ROOM HEATER. FAILURE TO FOLLOW THESE
INSTRUCTIONS COULD RESULT IN PROPERTY DAMAGE,
BODILY INJURY OR EVEN DEATH. CONTACT LOCAL BUILD-
ING OFFICIALS ABOUT RESTRICTIONS AND INSTALLATION
INSPECTION REQUIREMENTS IN YOUR AREA.
Questions, problems, missing parts?
Before returning to your retailer, visit
www.pelprostoves.com or call customer
service at 877-427-3316.
This heater meets the U.S. Environmental Protection Agency's emission limits for wood heaters sold after July 1, 1990.
1
Owner's Manual
Installation & Operation
NOTICE: SAVE THESE INSTRUCTIONS
7086-171D • July 10, 2014
WARNING
If the information in these instruc-
tions is not followed exactly, a fi re
may result causing property damage,
personal injury, or death.
• Do not store or use gasoline or other fl am-
mable vapors and liquids in the vicinity of this
or any other appliance.
• Do not overfi re - If heater or chimney connec-
tor glows, you are overfi ring. Overfi ring will
void your warranty.
• Comply with all minimum clearances to com-
bustibles as specifi ed. Failure to comply may
cause house fi re.
WARNING
Hot glass will cause burns.
•
Do not touch glass until it is cooled
•
NEVER allow children to touch glass
•
Keep children away
•
CAREFULLY SUPERVISE children in same room as
fi replace.
•
Alert children and adults to hazards of high temperatures
•
High temperatures may ignite clothing or other
fl ammable materials.
•
Keep clothing, furniture, draperies and other fl ammable
materials away.
To obtain a French translation of this manual, please contact
your dealer or visit www.pelprostoves.com
Pour obtenir une traduction française de ce manuel, s'il vous
plaît contacter votre revendeur ou visitez www.pelprostoves.
com
HOT SURFACES!
Glass and other surfaces are hot
during operation AND cool down.
NOTE
www.pelprostoves.com
Advertisement
Table of Contents

Related Manuals for Pelpro PP130


Summary of Contents for Pelpro PP130
- Page 1 fi re may result causing property damage, personal injury, or death. PP130 Pellet Stove • Do not store or use gasoline or other fl am- Model(s): mable vapors and liquids in the vicinity of this PP130 or any other appliance.
-
Page 2: Quick Start Guide
QUICK START GUIDE *Before you plug in this appliance, follow these instructions* Turn Dial Control to OFF. Add pellets to hopper and close lid. All material needs to be removed from the door glass and fi rebox before operation Plug power cord into wall Verfi... -
Page 3: Table Of Contents
Safety Alert Key: • DANGER! Indicates a hazardous situation which, if not avoided will result in death or serious injury. • WARNING! Indicates a hazardous situation which, if not avoided could result in death or serious injury. • CAUTION! Indicates a hazardous situation which, if not avoided, could result in minor or moderate injury. •... - Page 4 CAUTION IMPORTANT After reading these instructions, if you have any doubt It is highly recommended that the pellet heater about your ability to complete your installation in a pro- and chimney be installed by a qualifi ed installer. A fessional manner you should obtain the services of an qualifi...
-
Page 5: Listing And Code Approvals
239 lbs and (UM) 84-HUD. These heaters meet the US Environmental Protection Agency’s Emission limits for pellet heaters. Under specifi c conditions the PP130 stove has shown to deliver heat at rates WARNING ranging from 11,000 to 50,000 BTU/hr. Fire Risk Pelpro disclaims any responsibility for, and the B. -
Page 6: General Information
General Information A. Fire Safety Fuel Material and Fuel Storage (Cont’d) To provide reasonable fi re safety, the following should be Lower Ash Content Material given serious consideration: • Most softwoods • Install at least one smoke detector on each fl oor of your •... -
Page 7: General Operating Information
General Operating Information A. User Dial Control The appliance has one dial control located on the side of the unit used for daily operation. There are four primary settings on this dial. 1) OFF: When the dial indicator is in the off position the unit will go into a shut down and remain off until the dial is turned to one of the other three settings. -
Page 8: Firepot Purge
F. Starting Your First Fire Priming the Feed Tube (Cont’d) 1) Turn the dial control to “OFF”. A FIREPOT THAT IS MORE THAN HALF FULL IS OVER- 2) Make sure the fi repot is clean, inplace, and free of FILLED. DO NOT OVERFILL FIREPOT FOR IGNITION. debris. -
Page 9: Your Pellet Appliance - General Operating Parts
WARNING HOT SURFACES! Glass and other surfaces are hot during operation AND cool down. Hot glass will cause burns. • DO NOT touch glass until it is cooled • NEVER allow children to touch glass • Keep children away • CAREFULLY SUPERVISE children in same room as appliance. -
Page 10: Led Color Coding Chart And Explanation
I. LED Color Coding Chart and Explanation Number of Description Notes Color Flashes between pauses Green Steady ON while Feed Motor is running continuously. When priming the feed system and fi lling priming feed tube (This primes the feed tube). the fi... -
Page 11: Ignition Cycles
J. Ignition Cycles M. Clear Space 1. At the beginning of each ignition cycle, it is normal to see Mantel: Avoid placing candles and other heat-sensitive some smoke in the fi rebox. The smoke will stop once objects on mantel or hearth. Heat may damage these objects. the fi... -
Page 12: Maintaining & Servicing The Appliance
Maintaining & Servicing the Appliance A. Proper Shutdown Procedure C. General Maintenance 1. Types of Fuel CAUTION The type of fuel you are burning will dictate how often you have to clean your fi repot. Shock and Smoke Hazard If the fuel you are burning has a high dirt or ash content, it •... - Page 13 2. Cleaning Firepot with the Firepot Clean-Out Tool; 3. Ash Removal from Firebox • Frequency: Weekly or more often as needed • Frequency: Weekly or more frequently depending on • By: Homeowner ash build-up. • By: Homeowner a. Turn dial to off. a.
- Page 14 6. Cleaning the Glass 8. Cleaning the Exhaust Path, Baffl es & Drop Tube • Frequency: Monthly or every 25 bags or more fre- • Frequency: When clear view of the fi repot becomes quently depending on ash build-up. obscure •...
- Page 15 10. Cleaning Convection Blower - Requires No Lubrication • Frequency: Monthly depending on Dust/Dirt build-up • By: Homeowner or Qualifi ed Service Technician a. Be sure the appliance is allowed to cool and has been unplugged. b. Remove the right side panel c.
-
Page 16: High Ash Fuel Content Maintenance
D. High Ash Fuel Content Maintenance • Frequency: As needed • By: Homeowner Conditions that make the fi repot fi ll quickly with ashes and clinkers and require higher maintenance for the appliance include: · Poor quality pellet fuel. · Lack of maintenance. -
Page 17: Frequently Asked Questions
E. Frequently Asked Questions What causes my glass to become dirty? What is the metal object with the bend in it for that If the glass has white ash build up it is normal and the came inside the plastic bag? glass should be cleaned. -
Page 18: Replacement Parts
Replacement Parts A. Convection Blower Replacement B. Exhaust Blower Replacement 1. Turn the dial control to the off position. Unplug the 1. Turn the dial control to the off position. Unplug the power power to the unit. to the unit. 2. -
Page 19: Snap Disc Replacement
D. Igniter Replacement C. Snap Disc Replacement 1. Turn the dial control to the off position. Unplug the Power - Manual Reset power to the unit. 1. Turn the dial control to the off position. Unplug the power 2. Remove the right side panel & unplug the wire leads to the unit. -
Page 20: Glass Replacement
F. Glass Replacement I. Control Board Replacement 1. Open the door from the appliance by lifting door off of 1. Turn the dial control to the off position. Unplug the power hinge pins and lay on a fl at surface face down. to the unit. -
Page 21: Getting Started
Attic mounted duct work and air handler joints and seams taped or sealed Minimum Vacuum MODEL Requirements WARNING PP130 0.17 inches W.C. Risk of Asphyxiation! Negative pressure can cause spillage of combustion fumes and soot. www.pelprostoves.com 7086-171D • July 10, 2014... -
Page 22: Locating Your Appliance & Chimney
D. Locating Your Appliance & Chimney F. Tools And Supplies Needed Location of the appliance and chimney will affect performance. Tools and building supplies normally required for • Install through the warm airspace enclosed by the building installation, unless installing into an existing masonry envelope. -
Page 23: Dimensions And Clearances
Dimensions and Clearances B. Clearances to Combustibles (UL and ULC) MODEL: PP130 A. Appliance Dimensions 24-1/2 [622] 4-1/2 2-1/2 [114] [64] Vertical Installations (Interior Flue) Straight Back Against Wall Inches Millimeters Back Wall to Flue Pipe Side Wall to Appliance... -
Page 24: Hearth Pad Requirements (Ul And Ulc)
C. Hearth Pad Requirements (UL and ULC) Use a non-combustible fl oor protector, extending beneath appliance and to the front, sides and rear as indicated. Mea- sure front distance “M” from the surface of the glass door. Must extend 2 inches [51mm] beyond each side of pipe (shaded area) *C: Exception for Horizontal Installations:... -
Page 25: Vent Information
Vent Information A. Chimney and Exhaust Connection B. Venting Termination Requirements Chimney & Connector: Use 3 or 4 inch (76-102mm) CAUTION diameter type “L” or “PL” venting system. It can be vented vertically or horizontally. Do not terminate vent in any enclosed or semi-enclosed 2. -
Page 26: Pellet Venting Charts
C. Pellet Venting Charts WARNING The maximum horizontal venting allowed with no vertical vent- ing attached is 48 inches (1219mm) including one 90° elbow Fire Risk or two 45° elbows. This is our recommended horizontal vent- • Only LISTED venting components may be used. ing installation. -
Page 27: Venting Systems
Venting Systems A. Vertical - Interior - Typical Installation C. Vertical into Existing Class A Chimney PREFERRED METHOD #1 Rain Cap Rain Cap 12 in [305 mm] 12 in [305 mm] Flashing Minimum Flashing Minimum above roof above roof penitration penitration Firestop Firestop... -
Page 28: Masonry
WARNING WARNING Fire Risk Improper installation, adjustment, alteration, service or main- Inspection of Chimney: tenance can cause injury or property damage. Refer to the • Masonry chimney must be in good condition. owner’s information manual provided with this appliance. For •... -
Page 29: Through The Wall
F. Through The Wall Horizontal termination cap must be a minimum of 6 inches. In Canada, where passage through a wall or partition of (152mm) from the wall. Approved for mobile home instal- combustible construction is desired, the installation shall lations. -
Page 30: Mobile Home
Mobile Home CAUTION A. Mobile Home Installation THE STRUCTURAL INTEGRITY OF THE MOBILE HOME FLOOR, WALL AND CEILING/ROOF MUST BE MAINTAINED You must use an authorized Outside Air Kit Do NOT cut through: for installation in a mobile home. • Floor joist, wall, studs or ceiling trusses. •... -
Page 31: Appliance Set-Up
Appliance Set-Up D. Hopper Extension (Optional Accessory) A. Removal From Pallet 1. Remove 2 screws from hopper lid. Remove lid (Beware 1. Remove 2 lag bolts from pallet. of the hopper switch when removing). 2. Remove side panels. 3. Pull brackets out from base. 2. -
Page 32: Troubleshooting
Troubleshooting Symptom Possible Cause Corrective Action Plug in appliance - No No Power to outlet. Check circuit breaker at service panel. response. 5 amp fuse defective or blown Find and repair the short circuit source, then replace Snap disc tripped or defective. the Control Board. - Page 33 Symptom Possible Cause Corrective Action Slow or smoky start-up Dirty exhaust and/or venting system. Check for ash build up in unit, including behind rear and/or lazy fl ame panels, fi rebox, exhaust blower and venting. Not enough combustion air Adjust the trim Misaligned igniter Center the igniter in the chamber Wet fuel / poor quality fuel...
- Page 34 Following correction of any Alarm, turn the dial control to the OFF position, wait 10 seconds and turn back to desired setting OR unplug the unit, wait 10 seconds then restore power. Alarm Possible Cause Corrective Action (LED Flashing RED) 1 Flash: Empty Hopper No fuel is delivered to the fi...
-
Page 35: Reference Materials
Reference Materials A. Component Function When describing the location of a component, 1. Control Board it is always AS YOU FACE THE FRONT OF THE The control board is located on the right side of the appliance APPLIANCE. behind the lower right side panel. 13. -
Page 36: Replacement Parts
C. Replacement Parts PP130 Service Parts Beginning Manufacturing Date: Apr 2014 Pellet Stove Ending Manufacturing Date: Active IMPORTANT: THIS IS DATED INFORMATION. When requesting service or replacement parts for Stocked your appliance please provide model number and serial number. All parts listed in this manual must be ordered from a dealer. -
Page 37: Door Assembly
PP130 Service Parts Beginning Manufacturing Date: Apr 2014 Ending Manufacturing Date: Active #5 Door Assembly IMPORTANT: THIS IS DATED INFORMATION. When requesting service or replacement parts for Stocked your appliance please provide model number and serial number. All parts listed in this manual must be ordered from a dealer. -
Page 38: Service & Maintenance Log
D. Service & Maintenance Log Date of Service Performed By Description of Service 7086-171D • July 10, 2014 www.pelprostoves.com... -
Page 39: Warranty
E. Warranty Hearth & Home Technologies, Inc. PELPRO LIMITED WARRANTY Hearth & Home Technologies Inc., on behalf of its hearth brands (“HHT”), extends the following warranty for PELPRO wood and pellet hearth appliances that are purchased form an HHT authorized dealer. WARRANTY COVERAGE: If an inspection by the dealer indicates that a limited warranty claim is justified, and all conditions of this limited warranty have been met, the manufacturer's total responsibilities and liabilities shall be to repair or replace, at the manufacturer's option, the... - Page 40 CONTACT INFORMATION: 1445 North Highway Colville, WA 99114 Please contact the Hearth & Home Technical Group with any questions or concerns. www.pelprostoves.com We recommend that you record the following pertinent information for your heating appliance. Date purchased/installed: Serial Number: Location on appliance: Store purchased from: Store Location: Notes:...
Need help?
Do you have a question about the PP130 and is the answer not in the manual?
Questions and answers