Table of Contents
Advertisement
Advertisement
Table of Contents

Related Manuals for Doro PhoneEasy 632


Summary of Contents for Doro PhoneEasy 632
- Page 1 ® Doro PhoneEasy English...
-
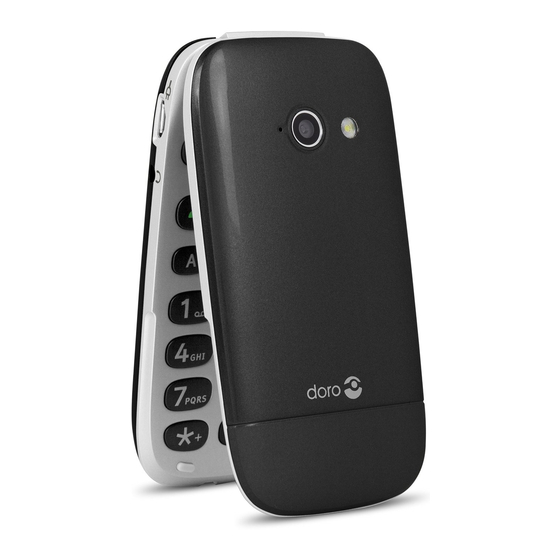
Page 2: Product View
Note! All illustrations are for illustrative purposes only and may not accurately depict the actual device. English 14. Arrow buttons Earpiece Display 15. Camera lens 16. Camera flash/Torch Left selection button Microphone 17. Loudspeaker 18. Assistance button Call button Speed dials 19. - Page 3 The items supplied with your phone might vary depending on the soft- ware and accessories available in your region or offered by your service provider. You can obtain additional accessories from your local Doro deal- er. The supplied accessories provide the best performance with your...
-
Page 4: Table Of Contents
English Contents Congratulations on your purchase ............... 1 Get started..................... 1 Insert SIM card, memory card and the battery ........1 Charge the phone.................. 2 Get to know your phone ................3 Assistive functions................. 3 Turn the phone on and off ..............3 Start-up wizard .................. - Page 5 Sound & Display ..................42 Audio setup ..................42 Tone setup (ringtone) ................43 Ringtone volume ................43 Silent ....................43 Alert type....................43 Extra tone.....................44 Main menu...................44 Wallpaper.....................44 Text size ..................44 Idle display ...................44 Themes ..................45 LCD backlight..................45 Brightness .................45 My Doro Manager..................45 Create account ..................45...
- Page 6 English Log in/Log out ..................46 Options....................46 Sync. intervals ..................46 Account details ..................47 Additional functions ..................47 FM radio ....................47 Torch.....................48 Calculator.....................49 Games....................49 Status ....................49 Alarm ....................50 Calendar....................50 Daily reminder ..................51 Notes ....................51 Weather....................52 Display status symbols ...............52 Display main symbols .................53 Reset settings..................54 Troubleshooting ...................54...
-
Page 7: Congratulations On Your Purchase
Also fea- tures direct memories and SMS button, safety functions and remote management and back up with My Doro Manager. For more information about accessories or other Doro products please visit www.doro.com. -
Page 8: Charge The Phone
English scratch or bend the contacts on the card. To remove or replace the card, push the card in until you hear a click and then pull the card out. Insert the SIM card by gently sliding it into the holder. Make sure that the SIM card’s contacts are facing down and that the cut off cor- ner is pointing out. -
Page 9: Get To Know Your Phone
English If the phone is turned off when the charger is connected to the phone only the battery charge indicator will be shown on the display. Note! To save power the LCD backlight goes off after a while. Press any button to illuminate the display. -
Page 10: Start-Up Wizard
English Enter the PUK code and confirm with OK. Enter a new PIN code and confirm with OK. Re-enter new PIN code and confirm with OK. Start-up wizard When starting the phone for the first time, you can use the Start-up wiz- ard to set some basic settings. -
Page 11: Enter Text
• Press Menu Phonebook -New contact- Add. ® To perform the example on your Doro PhoneEasy 632 you should do the following: Press Menu, scroll to Phonebook and press OK. Select -New contact- and press Add. Enter text Enter text manually Select character •... -
Page 12: Hearing Aid Compatible
English Change writing language Press and hold # for a list of available languages. Select language with and press OK to confirm. Enter text with predictive text ™ In some languages you can use the Smart ABC (eZiType ) input method which uses a dictionary to suggest words. -
Page 13: Phone Settings
English be some newer wireless technologies that have not been tested yet for use with hearing aids. To ensure that a specific hearing aid works well with this telephone, test them together before making a purchase. The standard for hearing aid compatibility contains two types of ratings: •... - Page 14 English Set the time and date format Press Menu Settings General Time & date format: • Time format 12 hours or 24 hours. • Date format and select the desired date format. Press OK to confirm. Language The default language for the phone menus, messages, etc. is determined by the SIM card.
-
Page 15: Calls
English Enter new PIN and press OK. Repeat to confirm. Phone lock The phone lock protects your phone from unwanted usage. If activated, phone is locked after restart and the phone code needs to be entered to unlock. Settings Security Phone lock. -
Page 16: Receive A Call
English Receive a call Open the flip and press to answer. Alternatively press Silent to switch off the ringsignal or press /close the flip to reject directly (busy signal). Press to end the call. To answer an incoming call by opening the flip, see Answer mode, p.13. Tip: Press and hold +/–... -
Page 17: Call Options
English Call options During a call the selection buttons ) give access to additional functions. Options (left selection button) • Hold single call or Retrieve single to hold or retrieve the current call. • End single call to end the current call (same as •... -
Page 18: Sos Calls
English SOS calls As long as the phone is switched on, it is always possible to place an SOS call by entering the main local emergency number for your present loca- tion followed by Some networks accept calls to emergency numbers without a valid SIM card. - Page 19 English • Received calls to show the elapsed time of all received calls. • Reset all Yes to reset all. Press OK to confirm. Answer mode Press Menu Settings Calls Answer mode: • Open to answer On to answer incoming calls by opening the flip.
- Page 20 English Tip: Repeat and select Deactivate to disable call waiting, or Query status to display if call waiting is active or not. Call divert You can divert calls to an answering service or to another phone number. Set up which calls should be diverted. Select a condition and press OK, then select Activate, Deactivate or Query status for each.
-
Page 21: Phonebook
English Fixed dial (FDN) You can limit calls to certain numbers saved on the SIM card. The list of allowed numbers is protected by your PIN2-code. Note! A password is needed to apply fixed dial. Contact your service provider to get the password. Press Menu Settings Security... -
Page 22: Manage Phonebook Contacts
English • My pictures to select an existing picture. Select Ringtone Edit to associate ringtone to the contact, see Tone setup (ringtone), p.43. • System to select from preinstalled files. • User to select from your downloads. Press Save. Tip: For international calls, always use + before the country code for best operation. -
Page 23: Phonebook Settings
English • Send vCard: • Send by SMS, see Create and send text message (SMS), p.25. • Send by MMS, see Create and send picture message (MMS), p.26. ® • Send by Bluetooth, see Bluetooth , p.36. • As e-mail, see Create and send e-mail, p.27. Press OK to confirm. - Page 24 English • Off to display only the names of contacts. Press OK to confirm. Voice mail If your subscription includes an answering service, callers can leave a voice mail message when you are unable to answer a call. Voice mail is a network service and you may need to subscribe to it first.
- Page 25 English ICE (In Case of Emergency) First responders can access additional information such as medical infor- mation from the victim's phone in case of emergency. In the event of a trauma, it is critical to have this information as early as possible to in- crease the chances of survival.
-
Page 26: Assistance Button
English Assistance button CAUTION When an assistance call is activated the phone is pre-set to handsfree/ speakerphone mode. Do not hold the device near your ear when the handsfree mode is in use, because the volume may be extremely loud. The assistance button allows easy access to contact your predefined help numbers (Number list) should you need help. -
Page 27: Activation
English IMPORTANT! Information to the recipient of an assistance call, when Confirm with "0" is activated. • After receiving the assistance message, each number in the Number list is called sequentially. • To confirm the assistance call, the recipient needs to press 0 . •... -
Page 28: Activate Text Messages (Sms)
Number list when an assistance call occurs. The message con- ® tains date, time, and the positioning information of the Doro PhoneEasy user. The message is not editable. If no position can be found the mes- sage contains the latest known position. -
Page 29: Assistance Settings
Silent no sound indication, like a normal call. Press OK to confirm. Point the way ® Your Doro PhoneEasy 632 is equipped with a GPS (Global Positioning System) receiver. The GPS is activated when you enter the Point the way application. - Page 30 English Calibration You need to calibrate the compass on your device before using the Point the way application and the compass. Move away from any interference such as steel-frame buildings, electric appliances, computer equipment or anything being magnetic. Wave your phone in a figure 8 pattern. Press Menu Point the way Point the way.
-
Page 31: Compass
English • Exit to exit. Compass ® Your Doro PhoneEasy 632 can also be used as a compass. Use the compass needle to guide you in a general direction. The needle always point toward North. For best result, hold the phone flat in your hand and horizontal to the ground (A). -
Page 32: Create And Send Picture Message (Mms)
English Create and send picture message (MMS) A picture message can contain text and media objects such as pictures, sound recordings and video. Both you and the recipient must have sub- scriptions that support picture message. The settings for picture mes- sage are supplied by your service provider and can be sent to you automatically via text message. -
Page 33: Create And Send E-Mail
English Recording starts immediately. Press Stop when done and press Yes to save. Select recipient from Phonebook. Alternatively, select Enter number to add recipient manually and press Done. Press Add to add more recipients. Press Send to send. Create and send e-mail IMPORTANT! Using data services can be costly. -
Page 34: Inbox, Outbox And Sent
English Download e-mail • Press Menu Messages E-mail Inbox. Note! After configuring your account, you can view previously retrieved e- mail offline or connect to the e-mail server to view new messages. After you retrieve e-mail messages, you can view them offline. Inbox, Outbox and Sent Press shortcut button Alternatively press Menu... -
Page 35: Message Settings
English • Details (MMS only) to view details of the message. Press OK to confirm. Message settings Predictive text Press Menu Settings Messages Predictive text. Select On to enable, or Off to disable. Press OK to confirm. Writing language Press Menu Settings Messages Writing language. - Page 36 English Enter the service centre number. Press Clear to delete. Press OK to confirm. Cell broadcast You can receive messages on various topics from your service provider, such as weather or traffic conditions in a particular region. For available channels and relevant channel settings, contact your service provider. Cell broadcast messages cannot be received when the device is roaming.
- Page 37 English • Phone to store in the phone memory. • Memory card to store picture messages to the memory card. Press OK to confirm. MMS profile These settings are needed to use the picture messages function. The set- tings for picture messages is supplied by your service provider and can be sent to you automatically.
- Page 38 E-mail settings Enables you to review and create e-mails using your personal or company e-mail account. In order to utilise the e-mail service on your Doro Pho- ® neEasy 632 you need to configure an e-mail account. You can add up to 10 different e-mail accounts.
-
Page 39: Camera
English Select Messages or E-mail: • Short (4 seconds) • Long (12 seconds) Press OK to confirm. Note! If Alert type is set to Ring only the phone will not vibrate. Reminder The reminder alerts you once if you haven't checked your messages or listened to your voice mail within 10 minutes from receipt. -
Page 40: Video Camera
English • Send Send by MMS, see Create and send picture message (MMS), p.26. ® • Send Send by Bluetooth, see Bluetooth , p.36. • Send As e-mail, see Create and send e-mail, p.27. • Delete to delete. Press Yes to confirm or No to return. •... -
Page 41: Picture Gallery And Video Gallery
English For more video camera settings, see Camera settings, p.35. Picture gallery and Video gallery View your saved pictures or videos Press Menu Camera Picture gallery or Video gallery. to select a picture or video. Press Options: • View for single view. Press Back to return. to play and stop the video (video only). -
Page 42: Connectivity
Press OK to confirm. Note! With higher quality, less pictures or videos can be stored in the internal memory. If you insert a compatible external memory (micro SD) card into your Doro ® PhoneEasy 632, you can change the default storage location, this allows you to save more files on your device, like pictures and videos. - Page 43 English Press Menu Settings Connectivity Bluetooth Device name. ® Enter the name your Doro PhoneEasy 632 should appear with for other Bluetooth devices. Press Done to confirm. Search device Search for available Bluetooth audio devices. Press Menu Settings Connectivity Bluetooth Search device.
-
Page 44: Bluetooth Beacon
English • High (Confirmation may be needed for full access for paired devices.) • Information Press OK to confirm. Bluetooth beacon ® Bluetooth beacons are devices using Bluetooth to determine position. Pair once with the unit. After pairing, you can select to turn off Bluetooth in your phone to improve the battery performance. -
Page 45: Mobile Data
Using data services can be costly. We recommend that you check your data rates with your service provider. Function on or off Restricts internet browser, Weather, My Doro Manager, MMS and e-mail. Select Off to avoid data charges. Press Menu... -
Page 46: Network Setup
English Data roaming Your phone automatically selects your (service providers) home network if within range. If not within range, you can use another network, provided your network operator has an agreement that allows you to do so. This is called roaming. Contact your service provider for more information. Press Menu Settings Connectivity... -
Page 47: Connect The Phone To A Computer
English Network information • View your current network settings. Services This menu may contain pre-programmed services from your network pro- vider depending on network support and subscription. • Press Menu Settings General Services. Connect the phone to a computer Connect the phone to a computer and start transferring pictures, music and other file types. -
Page 48: Sound & Display
English Select a folder, eg Photos and press Open. Select a file and press Options: • Play (audio/video/music), press to Play or to Stop. • View (photos/images) for single view. • Send Send by MMS to send as picture message or Send by Bluetooth to send to a Bluetooth device. -
Page 49: Tone Setup (Ringtone)
English • HAC mode for use with hearing aid. Press OK to confirm. Note! Try different settings to find the one that suits your hearing the best. Tone setup (ringtone) Select a ringtone with the best tone curve adjustments and frequencies to best fit your needs. -
Page 50: Extra Tone
English • Vib. and ring for vibration and ringtone. • Vib. then ring to start with vibration and adds ringtone after a short while. • Silent for no sound or vibration, the display light is lit. Press OK to confirm. Extra tone You can select to enable warning and error tones to alert you of low bat- tery power, phone and SIM card errors, etc. -
Page 51: Themes
Level 1, Level 2 or Level 3. Press OK to confirm. My Doro Manager Create a My Doro Manager account to get the most out of your phone. Ac- cess the phone using any web browser, www.mydoromanager.com. Easily view and share your photos or videos. -
Page 52: Log In/Log Out
Settings My Doro Manager Log in. Enter your phone number as user name. Enter your password and press Log in. Options You can select to synchronise your phone with My Doro Manager. Press Menu Settings My Doro Manager Options: •... -
Page 53: Account Details
Press Menu Settings My Doro Manager. Select Account to view your account information details. Enter the phone code and press OK to confirm. The default phone code is 1234. -
Page 54: Torch
English Tip: Disconnecting the headset will also turn off the radio. Loudspeaker Press Menu FM radio Options Loudspeaker to adjust the sound volume. To turn off, select Off. Channel list (editing the channel list) Press Menu FM radio Options Channel list. Select the channel you wish to edit and press Options: •... -
Page 55: Calculator
English Set the automatic switch off time Press Menu Settings General Torch: • 1 min to turn off automatically after 1 min. • 2 min to turn off automatically after 2 min. • No limit to turn of manually (default). Press OK to confirm. -
Page 56: Alarm
English Press Menu More Status. to scroll the list. Press Back to return to standby mode. Alarm Press Menu Organiser Alarm Enter the alarm time using the keypad. • For a single occurrence, select Single. • For a repeated alarm, select Repeated. Scroll through the list of days and press On to enable or Off to disable the alarm for each day. -
Page 57: Daily Reminder
English View all Press Menu Organiser Calendar. Select a task and press Options View all. Press Options Edit, Delete or Delete all. Press OK to confirm. Note! The calendar will work even when the phone is switched off. Do not press Yes to power on if wireless phone use is prohibited or when it may cause interference or danger. -
Page 58: Weather
English Weather IMPORTANT! Using data services can be costly. We recommend that you check your data rates with your service provider. View the Weather for your chosen city. Press Menu Weather. Press Back to return to standby mode. Note! In order to see the weather, you must first select a city. Weather settings Press Menu Settings... -
Page 59: Display Main Symbols
English Voice mail message Unread text message/SMS received Unread picture message/ Unread e-mail Display main symbols Charger connected Mute Message sending success Charger removed Message sending failed Headset in Error Headset out Warning Speaker on Query Speaker off Done (confirmed) Incoming call New message Outgoing call... -
Page 60: Reset Settings
English Reset settings Press Menu Settings Security. Select Reset settings to reset the phone settings. All the changes that you have made to the phone settings will be reset to default settings. Enter the phone code and press OK to reset. Tip: The default phone code is 1234. - Page 61 English Standby time decreases Battery charge capacity Install a new battery. too low Too far from base sta- Searching the network consumes battery power. tion, phone is constantly Find a place with a stronger signal, or tempora- searching for signal rily turn off the phone.
-
Page 62: Safety Instructions
English Failure to add a contact Phonebook memory full Delete contacts to free up memory. Failure to set a function Function not supported Contact your service provider. or subscribed from network Failure to send or download MMS Phone memory is full Delete received MMS or select to set the default and it is not possible to storage for MMS to be saved on a memory card... -
Page 63: Medical Units
English Parts of the unit are magnetic. The unit can attract metal objects. Do not keep credit cards or other magnetic media near the unit. There is a risk that information stored on them can be erased. Medical units The use of equipment that transmits radio signals, for example, mobile phones, can in- terfere with insufficiently protected medical equipment. -
Page 64: Protect Your Hearing
English WARNING Danger of explosion if battery is incorrectly replaced. To reduce risk of fire or burns, do not disassemble, crush, puncture, short external contacts, expose to temperature above 60° C (140° F), or dispose of in fire or water. Recycle or dispose of used batteries according to the local regulations or reference guide supplied with your product. -
Page 65: Care And Maintenance
As a matter of precaution, we recommend disconnecting the charger during a thunderstorm. Batteries are consumables and are not included in any guarantee. This guarantee does not apply if batteries other than DORO original batteries are used. Copyright and other notices ®... -
Page 66: Content Copyright
Doro does not provide a warranty for or take any responsibility for the functionality, con- tent, or end-user support of third-party apps provided with your device. By using an app, you acknowledge that the app is provided as is. -
Page 67: Specific Absorption Rate (Sar)
The maximum limit according to ICNIRP is 2.0 W/kg measured over 10 g tissue. Declaration of Conformity ® Doro hereby declares that Doro PhoneEasy 632 conforms to the essential require- ments and other relevant regulations contained in the Directives 1999/5/EC (R&TTE) and 2011/65/EC (RoHS). - Page 68 PhoneEasy 632 (1021) English Version 1.0 0700 ©2014 Doro AB. All rights reserved. www.doro.com REV 12232 — STR 20140611...
Need help?
Do you have a question about the PhoneEasy 632 and is the answer not in the manual?
Questions and answers