Table of Contents
Advertisement
Quick Links
Advertisement
Table of Contents

Related Manuals for Doro 6526


Summary of Contents for Doro 6526
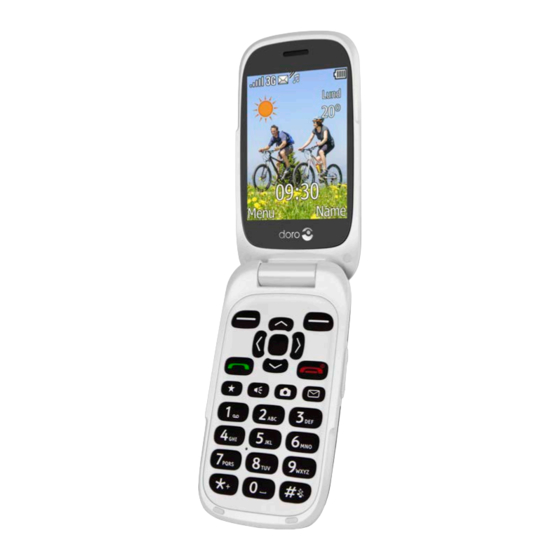
- Page 1 Doro 6526 English...
- Page 3 The items supplied with your phone might vary depending on the software and accessories available in your region or offered by your service provider. You can obtain additional accessories from your local Doro dealer. The sup- plied accessories provide the best performance with your phone.
-
Page 4: Table Of Contents
English Contents Congratulations on your purchase ..............1 Get started ..................... 1 Insert SIM card, memory card and the battery........1 Charge the phone................... 2 Get to know your phone................3 Assistive functions.................. 3 Turn the phone on and off..............3 Start-up wizard.................. - Page 5 LCD backlight..................41 Brightness ..................42 ® Doro Connect & Care .................. 42 Introduction..................42 ® How to use the Connect & Care service on your Doro phone... 43 Set the Assistance Button to Connect & Care ® ........43...
- Page 6 English File manager....................44 Internet......................45 Use the web browser ................45 Use the Facebook application.............. 46 More......................47 FM radio ....................47 Torch..................... 48 Calculator ..................... 49 Games....................49 Status....................50 Organiser ...................... 50 Alarm ....................50 Calendar ....................50 Daily reminder..................
- Page 7 English Correct disposal of this product............61 Correct disposal of batteries in this product ........62 Declaration of Conformity ..............62...
-
Page 8: Congratulations On Your Purchase
Share photos and listen to your favourite MP3 music or FM radio. Other practical features include weather, reminders, wake-up alarm, vibrating ringer and more. For more information about accessories or other Doro products please visit www.doro.com. Get started Insert SIM card, memory card and the battery... -
Page 9: Charge The Phone
English Insert the battery by sliding it into the battery compartment with the contacts facing downwards to the right. Replace the battery cover. IMPORTANT! This device accepts micro SIM or 3FF SIM card. Use of incompatible SIM cards may damage the card or the device, and may corrupt data stored on the card. -
Page 10: Get To Know Your Phone
English Save energy When you have fully charged the battery and disconnected the charger from the device, unplug the charger from the wall socket. Get to know your phone Assistive functions Use the symbols below to guide you through supporting sections in the manual. -
Page 11: External Display
English Tip: You can run the start-up wizard later if you want. From standby mode, press Menu Settings General Start-up wizard. External display The external display shows the time, a number of status indicators, and no- tifications for incoming calls. The external display can only display charac- ters in black and white. -
Page 12: Enter Text
• Phonebook -New contact- Add. To perform the example on your Doro 6526 you should do the following: Example 1 (use the selection buttons) Press Menu, scroll to Phonebook and press OK. Select -New contact- and press Add. Example 2 (use the navigation buttons) -
Page 13: Volume Control
English Enter text with predictive text In some languages you can use the Smart ABC (eZiType ™ ) input method which uses a dictionary to suggest words. • Press each key once, even if the displayed character is not the one you want. -
Page 14: Phone Settings
English Silent Silent is a fixed profile with Keypad tone, Message tone and Ringtone dis- abled, while Vibration, Tasks, Daily reminder and Alarm are unchanged. • Press and hold shortcut button # to activate or deactivate silent mode. Headset When a headset is connected, the internal microphone in the phone is au- tomatically disconnected. - Page 15 English Language The default language for the phone menus, messages, etc. is determined by the SIM card. You can change this to any other language supported by the phone. Press Menu Settings General Language. to select a language. Press OK to confirm. Block function Press Menu Settings...
-
Page 16: Calls
English Press Menu Settings Security Phone lock. Select On to enable, or Off to disable. Press OK to confirm. Note! You need to enter current phone code. Default phone code is 1234. Whitelist A whitelist works much like a spam filter, once activated, you can only re- ceive incoming calls from contacts saved in the phonebook. -
Page 17: Call Information
English Press to end the call. To answer an incoming call by opening the flip, see Answer mode, p.12. Tip: Press and hold +/– to temporarily switch off the ringsignal without opening the flip. Call information During a call, the outgoing or incoming phone number and the elapsed call time is displayed. -
Page 18: Speed Dial
English Speed dial Use 0 and 2 – 9 to speed dial an entry from standby. Press and hold the corresponding key. • Add speed dial numbers Press Menu Settings Phonebook Speed dial. Select 0 Add and select an entry from the phonebook. Press OK to confirm. -
Page 19: Call Settings
English • Delete to delete the call. Delete all to delete all calls in the call log. • Save to save the number in the phonebook Create new cre- • ate new contact, or Update update existing contact. Call settings Call time During a call, the duration of the call is shown. - Page 20 English • During a call, press Options Answer. Activate call waiting Press Menu Settings Calls Call setup. Select Call waiting Activate. Press OK to confirm. Tip: Repeat and select Deactivate to disable call waiting, or Query status to display if call waiting is active or not. Call divert You can divert calls to an answering service or to another phone number.
-
Page 21: Phonebook
English • All calls to call but not to receive incoming calls. When roaming to block incoming calls while roaming (operating • in other networks). Press OK to confirm. Select Cancel all to cancel all call barring (password needed). Press OK to confirm. -
Page 22: Manage Phonebook Contacts
English Select Edit to associate picture to the contact, see Pho- Picture nebook picture, p.16. Take picture to use the camera to take a picture. • My pictures to select an existing picture. • Select Edit to associate ringtone to the contact, see Ringtone Tone setup (ringtone), p.39. -
Page 23: Phonebook Settings
English • From SIM to copy all phonebook contacts from the Copy all SIM card to the phone memory, or From phone to copy all con- tacts from the phone memory to the SIM card. Press Yes to con- firm or No to abort. •... - Page 24 English Press Menu Settings Phonebook Phonebook picture: On to display the contact’s associate picture if existing. • Off to display only the names of contacts. • Press OK to confirm. Voice mail If your subscription includes an answering service, callers can leave a voice mail message when you are unable to answer a call.
-
Page 25: Ice (In Case Of Emergency)
English ICE (In Case of Emergency) First responders can access additional information such as medical infor- mation from the victim's phone in case of emergency. In the event of a trauma, it is critical to have this information as early as possible to in- crease the chances of survival. -
Page 26: Assistance Button
English Assistance button CAUTION When an assistance call is activated the phone is pre-set to handsfree/ speakerphone mode. Do not hold the device near your ear when the handsfree mode is in use, because the volume may be extremely loud. The assistance button allows easy access to contact your predefined help numbers (Number list) should you need help. -
Page 27: Activation
English IMPORTANT! Information to the recipient of an assistance call, when Confirm with "0" is activated. After receiving the assistance message, each number in the Number • list is called sequentially. • To confirm the assistance call, the recipient needs to press 0 . If the recipient doesn’t press 0 within 60 seconds (after •... -
Page 28: Activate Text Messages (Sms)
English Repeat until you have 5 contacts (maximum). Tip: To edit or delete an existing entry, select it and press Options Edit or Delete. Activate text messages (SMS) A text message can be sent to the contacts in the numbers list when the assistance button is pressed. -
Page 29: Messages
English • High to use loud signals (default). Low to use one low signal. • Silent no sound indication, like a normal call. • Press OK to confirm. Messages Create and send text message (SMS) Note! Before you can send any text messages, you need to save your message centre number. -
Page 30: Create And Send Voice Message
English or press Menu Messages Create new MMS. Write your message, see Enter text , p.5. Press Options Add picture: My pictures to select a file. • Take picture to use the camera to take a picture. • Note! If you add more than one picture, the following pictures are increasingly compressed by the phone (scaled down). -
Page 31: Create And Send E-Mail
English Create and send e-mail IMPORTANT! Using data services can be costly. We recommend that you check your data rates with your service provider. You can send or view e-mail messages using your personal or company e- mail account. See E-mail settings, p.29 on how to setup your e-mail. Press the shortcut button or press Menu Messages... -
Page 32: Inbox, Outbox And Sent
Gmail / Yahoo ac- count. Please use the following process to activate the use of your account on your Doro phone or you may receive a ‘pop up’ message that the ‘au- thentication process has failed’. -
Page 33: Message Settings
English • Edit to edit the message, then press Send. Forward to forward the message. Edit the message (if desired), • then press Send. • Use address to display e-mail addresses contained in the message. Create new or Update. • Options Save Send mail to write a new e-mail. - Page 34 English SMS settings Press Menu • Settings Messages SMS settings. Memory status From SMS settings, select Memory status to display the memory space used on the SIM card and in the phone memory. Phone memory can store up to 450 messages. Press Back to return.
- Page 35 English Memory status From MMS settings, select Memory status to display the memory space used on the memory card (if inserted) and in the phone memo- ry. Phone memory can store up to 8 MB. Press Back to return. Storage Picture messages are saved by default in the phone memory.
- Page 36 E-mail settings Enables you to review and create e-mails using your personal or company e-mail account. In order to utilize the e-mail service on your Doro 6526 you need to have an already configured e-mail account such as Google Mail, Yahoo or Hotmail.
- Page 37 English • Hotmail • Yahoo Enter your E-mail address and your Password. Press OK to confirm. Set up other accounts Follow the steps below if your service provider is not in the list. Contact your service provider for correct settings. From E-mail Select: Select Other e-mail accounts.
-
Page 38: Camera
English Select Messages: Short (4 seconds) • Long (12 seconds) • Press OK to confirm. Note! If Alert type is set to Ring only the phone will not vibrate. Reminder The reminder alerts you once if you haven't checked your messages or lis- tened to your voice mail within 10 minutes from receipt. -
Page 39: Video Camera
English • Send by MMS, see Create and send picture message Send (MMS), p.22. ® Send by Bluetooth, see Bluetooth , p.34. • Send Send by e-mail, see Create and send e-mail, p.24. • Send Delete to delete. Press Yes to confirm or No to return. •... -
Page 40: Picture Gallery And Video Gallery
English • Use Lamp to switch the lamp on or off. Note! Zoom may reduce video quality. For more video camera settings, see Camera settings, p.33. Picture gallery and Video gallery View your saved pictures or videos Press Menu Picture gallery or Video gallery. Camera to select a picture or video. -
Page 41: Connectivity
Note! With higher quality, less pictures or videos can be stored in the internal memory. If you insert a compatible external memory (micro SD) card into your Doro 6526, you can change the default storage location, see Storage, p.28. This allows you to save more files on your device, like pictures and videos. - Page 42 English Device name Press Menu Settings Bluetooth Device name. Enter the name your Doro 6526 should appear with for other Blue- tooth devices. Press Done to confirm. Search device Search for available Bluetooth audio devices. Press Menu Settings Bluetooth Search device.
-
Page 43: Internet Profile
Using data services can be costly. We recommend that you check your data rates with your service provider. Function on or off Restricts features like internet browser, Facebook, Connect & Care, Weath- ® er, My Doro Manager , MMS and e-mail. Select Off to avoid data charges. -
Page 44: Network Setup
Func- tion on/off. Select On to enable, or Off to disable. Press OK to confirm. Data counter The data counter gathers traffic information from internet browser, Weath- er, My Doro Manager ® , MMS and e-mail. Press Menu Settings Connectivity... -
Page 45: Connect The Phone To A Computer
English • Network mode to select another network. Select Automatic to select network automatically or Manual to select network manually. Service selection GSM service only. • 3G service only. • Automatic: switch between GSM and 3G for best service. • IMPORTANT! If you set your phone to use GSM only or 3G only, you will not be able to make any calls, including emergency calls, or use... -
Page 46: Sound & Display
English Disconnect the USB cable safely Make sure to enable the hardware to be safely removed. Disconnect the USB cable. Note! Computer instructions may vary depending on your operating system. See the documentation of your computer's operating system for more information. Sound &... -
Page 47: Ringtone Volume
English Tip: Set up the Alarm, Message tone, Keypad tone, E-mail tone, Closing tone, Opening tone, Power on and Power off in the same way. Ringtone volume Press Menu Settings Sound Volume. to change the ringtone volume. Press OK to confirm. Silent Press Menu Settings... -
Page 48: Wallpaper
English Press Menu Settings Display Main menu: Select Grid or List. Press OK to confirm. Wallpaper Press Menu Settings Display Wallpaper. to display available wallpapers. Press OK to confirm. Text size You can adjust the text size for the menu and messages. Press Menu Settings Display. -
Page 49: Brightness
Doro Connect & Care ® already comes preinstalled in your new Doro phone so it’s here ready to go. It is easy for your family too, they just need to download the Doro Connect & ®... -
Page 50: How To Use The Connect & Care
® Set the Assistance Button to Connect & Care Your Doro phone comes with an Assistance Button on the rear of the hand- set. The Assistance Button can be configured to automatically trigger an as- sistance call to contact your predefined help numbers. For more info on how to set this up, see Assistance button , p.19. -
Page 51: File Manager
English If you have activated the Connect & Care ® service, the Assistance Button on your Doro phone can be incorporated into the Doro Connect & Care ® service instead of triggering an assistance call to your predefined help numbers. -
Page 52: Internet
English • Sort by Name/Time. • Open. Se- Copy/Move Phone/Memory card Options lect a folder, eg Photos and press Options Paste. Press OK to confirm. Supported formats: • Picture format: BMP/GIF/JPG/PNG. Photos taken with the built in camera are saved as JPG. Audio format: WAV/AMR/MIDI/MP3/AAC/AAC+. -
Page 53: Use The Facebook Application
English A to close the current tab, if multiple tabs are used. • B to go to previous or next website. • C to access Bookmarks, History, Saved Pages, Downloads, Set- • tings, Find in Page, Homepage and Help. D to refresh current website. •... -
Page 54: More
English Scroll to Log out and press . Confirm with Yes. Language • to scroll down to change the language of the Facebook app. Press to select. More More menu contains: FM radio Games Calculator Status FM radio FM radio has a frequency range from 87.5 to 108.0 MHz. To listen to the radio you need to connect a compatible headset that works as antenna. -
Page 55: Torch
English Loudspeaker Press Menu FM radio Options Loudspeaker Select On. to adjust the sound volume. To turn off, select Off. Channel list (editing the channel list) Press Menu FM radio Options Channel list. Select the channel you wish to edit and press Options: •... -
Page 56: Calculator
English Set automatic switch off time Press Menu Settings General Torch: • 1 min to turn off automatically after 1 min. • 2 min to turn off automatically after 2 min. No limit to turn of manually. • Press OK to confirm. Note! The torch will drain the battery very quickly. -
Page 57: Status
English Status Scroll through the Status list to get further information about the icons shown on top of your display. Icons shown on the display varies depending on your phone status. Press Menu More Status. to scroll the list. Press Back to return to standby mode. Organiser Organizer menu contains: Daily reminder... -
Page 58: Daily Reminder
English Enter date, then press Enter time, then press Enter subject, see Enter text , p.5. When done, press OK. Options Press Menu Organiser Calendar Options: Select View to show tasks for the selected date. • Select Jump to date and enter the date. •... -
Page 59: Notes
English Tip: For more options select an existing entry, and press Options Skip reminder, Add, Edit, Delete or Delete all. Notes Press Menu Organiser Notes Add. Enter your note using the keypad, see Enter text , p.5. Press OK to confirm. Tip: For more options select an existing entry, and press Options View, Edit, Delete or Delete all. -
Page 60: Display Main Symbols
English Ring + vibration Alarm active Vibration only Battery level Silent Call divert activated Bluetooth on, visible to Roaming (in other network) others Bluetooth on, invisible to Missed call others Headset connected Bluetooth connected Voice mail message received Unread text message/SMS Unread picture message/ Unread e-mail Display main symbols... -
Page 61: Reset Settings
English Reset settings Press Menu Settings Security. Select Reset settings to reset the phone settings. All the changes that you have made to the phone settings will be reset to default settings. Enter the phone code and press OK to reset. Tip: The default phone code is 1234. -
Page 62: Areas With Explosion Risk
English manufacturer of the equipment to determine if it has adequate protection against exter- nal radio signals, or if you have any questions. If notices have been put up at health care facilities instructing you to turn off the unit while you are there, you should comply. Hospi- tals and other health care facilities sometimes use equipment that can be sensitive to ex- ternal radio signals. -
Page 63: Protect Your Hearing
English Protect your hearing This device has been tested to comply with the Sound Pressure Level requirement laid down in the applicable EN 50332-1 and/or EN 50332-2 standards. WARNING Excessive exposure to loud sounds can cause hearing damage. Exposure to loud sounds while driving may distract your attention and cause an accident. -
Page 64: Protect Your Personal Data
English It is prohibited to use the unit in flight. Turn off the unit before you board a plane. Using wireless telecom units inside a plane can pose risks to air safety and interfere with tele- communications. It may also be illegal. Protect your personal data Protect your personal data and prevent leakage or misuse of sensitive information While using your device, be sure to back up important data. -
Page 65: Warranty
English Do not keep the unit in warm places. High temperatures can reduce the lifespan for • electronic equipment, damage batteries and distort or melt certain plastics. Do not keep the unit in cold places. When the unit warms up to normal temperature, •... -
Page 66: Specifications
Doro reserves the right to revise this document or withdraw it at any time without prior notice. -
Page 67: Hearing Aid Compatibility
Lund, Sweden. To be valid, such a request must be made within three (3) years from the date of the distribution of this product by Doro AB, or in the case of code licensed under the GPL v3 for as long as Doro AB offers spare parts or customer support for this product model. -
Page 68: Specific Absorption Rate (Sar)
English M: To use your hearing aid in this mode, make sure that your hearing aid is set to • "M-mode" or acoustic coupling mode, and position the phones receiver near the hearing aid’s built-in microphone. For the best results, try using the phone in differ- ent positions relative to your hearing aid—for example, placing the receiver slightly above the ear may result in better performance for hearing aids with microphones positioned behind the ear. - Page 69 Declaration of Conformity Hereby, Doro declares that the radio equipment type DSB-0040 (Doro 6526) is in compli- ance with Directives: 1999/05/EC or 2014/53/EU and 2011/65/EU. The full text of the EU declaration of conformity is available at the following internet address: www.doro.com/dofc.
- Page 70 DFC-0040 (Doro 6526) (2011,2021,2031,2051) English Version 3.1 © 2017 Doro AB. All rights reserved. www.doro.com REV 18355 — STR 20160622...
Need help?
Do you have a question about the 6526 and is the answer not in the manual?
Questions and answers