Table of Contents
Advertisement
Available languages
Available languages
GENERALAire
INSTALLER: PLEASE FILL OUT AND MAIL GUARANTEE CARD AFTER INSTALLATION
IS COMPLETE. LEAVE INSTALLATION INSTRUCTIONS WITH HOME OWNER
PRECAUTION: The installer should be an experienced service technician. Disconnect electrical power before
beginning installation. Do not install where temperatures fall below 32 degrees F or where plenum temperatures
exceed 200 degrees F. When wiring into a multi-speed blower circuit see Step 7D.
INSTALLATION: The humidifier may be mounted with
the 6" outlet to the right or left by inverting the cabinet and
reversing the positions of the distributor trough and drain
pan. The humidifier may be mounted on the warm or
return air plenum with equal efficiency.
See Typical Installations.
ADDITIONAL MATERIALS THAT MAY BE NECESSARY:
1. 1/4" diameter plastic supply tubing or 1/4" copper
supply tubing for hot water applications
2. 6" diameter galvanized by-pass pipe
3. electrical wire and wire nuts
4. air pressure switch (G.F. Model #12500 suggested)
1
Select location on vertical surface of warm or return air plenum for
mounting humidifier. For plenum sizes 9 1/2" to 15" use 1040AD adapter
plate and five screws, 3 screws in top (supplied with DM model only).
Stick mounting template in place making sure the template is level. Do
not install humidifier or 6" bypass pipe where the blanked off ends of a
cooling coil will restrict air flow to the humidifier. Extend horizontal
centerline from template to the adjacent plenum. Scribe 6" circle 10" to
15" from side of humidifier, on cabinet centerline, using connecting collar
as guide.
3
Cut out center section of template and 6" hole. Hang humidifier cabinet
and insert remaining four screws. Tighten all 8 screws. Install
connecting collar after drilling 1/8" holes for screws. Connect by-pass
pipe to collar and humidifier cabinet. Using holes at top and bottom of
humidifier bypass opening drill 2---1/8" holes through bypass pipe and
screw by-pass pipe to humidifier cabinet.
R
R
ESIDENTIAL
WARM AIR
HIGH BOY
ALLOW 2 1/2 INCHES CLEARANCE
ABOVE THIS SURFACE FOR SERVICING
Top Of Template
TEMPLATE FOR INSTALLING
BYPASS HUMIDIFIER
FOLLOW INSTRUCTIONS PACKED WITH HUMIDIFIER
1. REMOVE PROTECTIVE PAPER FROM BACK OF TEMPLATE AND STICK IN LEVEL POSITION.
2. CENTER PUNCH AND DRILL THE FOUR SIDE MOUNTING HOLES WITH A 1/8 " DIA. DRILL.
3. HANG HUMIDIFIER FROM FOUR SIDE SCREWS AND INSTALL DRAIN PAN, EVAPORATOR
PAD AND DISTRIBUTOR TROUGH.
WHEN INSTALLING ON BASEMENT TYPE FURNACE, EXTEND THIS LINE
FOR LOCATING HOLE ON ADJACENT PLENUM
4. TIGHTEN SCREWS AND ADJUST HUMIDIFIER UNTIL LEVEL.
5. REMARK FOUR REMAINING HOLES IF NECESSARY.
6. REMOVE HUMIDIFIER, DRILL REMAINING HOLES AND CUT OUT CENTER SECTION OF
TEMPLATE.
CUT ON THIS LINE
TEMPLATE NO. 1042-25
IF FURNACE JACKET EXTENDS MORE THAN 3" OUTWARD FROM THE PLENUM SURFACE
ALLOW 4" CLEARANCE BELOW THIS LINE FOR EASY ACCESS TO DRAIN HOSE CONNECTION.
A
T
P
IR
REATMENT
RODUCTS
RETURN AIR
DRAIN
DRAIN
WARM AIR
COUNTER-FLOW
GENERALAire
R
AC SERIES
HIGH EFFICIENCY AIR CLEANER
2
Center punch the four side mounting holes on the template and drill
with an 1/8" drill bit. Insert four sheet metal screws in the side
mounting holes until the heads project about 3/8". Hang humidifier
from the four screws and install drain pan, evaporator pad and
distributor trough. Adjust humidifier until level and tighten four
screws. Remark four remaining holes if necessary. Remove
humidifier and drill four remaining holes.
4
COPPER
TUBING
PLASTIC
TUBING
Mount the self tapping saddle valve on either a cold or a hot water
pipe.
A side or top mount is best to avoid clogging from pipe
sediment. Connect 1/4" O.D. tubing to the saddle valve. Copper
tubing requires a brass compression nut and brass sleeve. Plastic
tubing requires a brass insert inside the tubing, a plastic sleeve on
the outside with a brass compression nut.
NOTE: DO NOT USE PLASTIC TUBING ON HOT WATER OR IN
CONTACT WITH ANY HOT PLENUM SURFACE OR DUCT.
INSTALLATION OF THIS SADDLE VALVE MUST MEET OR
EXCEED LOCAL CODES AND ORDINANCES.
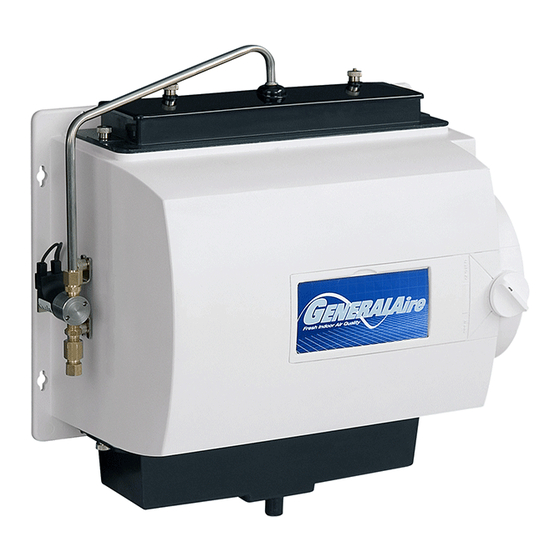
1042 SERIES
FLOW-THROUGH
BYPASS HUMIDIFIER
FOR INSTALLATION ON A VERTICAL
PLENUM SURFACE OF ANY
FORCED AIR FURNACE
RETURN AIR
RETURN AIR
DRAIN
WARM AIR
LOW BOY
WARM AIR
Advertisement
Table of Contents

Related Manuals for GeneralAire 1042 SERIES


Summary of Contents for GeneralAire 1042 SERIES
- Page 1 GENERALAire ESIDENTIAL REATMENT RODUCTS 1042 SERIES INSTALLER: PLEASE FILL OUT AND MAIL GUARANTEE CARD AFTER INSTALLATION FLOW-THROUGH IS COMPLETE. LEAVE INSTALLATION INSTRUCTIONS WITH HOME OWNER BYPASS HUMIDIFIER PRECAUTION: The installer should be an experienced service technician. Disconnect electrical power before beginning installation.
- Page 2 SADDLE VALVE INSTALLATION INSTRUCTIONS Copper Pipe 1. Retract piercing pin into valve body by turning handle counterclockwise. 2. Screw valve body into upper bracket and tighten. 3. Place rubber gasket over piercing pin. 4. Assemble saddle valve over copper pipe using enclosed screws, nuts and lower bracket.
- Page 3 REATMENT RODUCTS DÉRIVATION VENTILÉE 1042 SERIES INSTALLATEUR : VEUILLEZ REMPLIR ET POSTER LA CARTE DE GARANTIE UNE FOIS L'INSTALLATION TERMINÉE. LAISSER LES DIRECTIVES D'INSTALLATION AU PROPRIÉTAIRE DE LA MAISON. PRÉCAUTION : L'installateur doit être un technicien qualifié et expérimenté. Couper l'alimentation électrique POUR UNE INSTALLATION SUR LA avant de commencer l'installation.
- Page 4 INSTRUCTIONS D'INSTALLATION POUR LE ROBINET-VANNE À ÉTRIER Tuyau en cuivre 1. Rétracter la tige à perforation dans le corps de la vanne en tournant la poignée dans le sens horaire. 2. Visser le corps de la vanne dans le support supérieur et serrer. 3.
- Page 5 990-37-76 ORIFICE & STRAINER ASSEMBLY 990-16-76 ORIFICE FITTING 990-17 STRAINER SCREEN 990-18 STRAINER BODY 1137-3 DRAIN PAN P-163 HOSE CLAMP 1099-16 DRAIN TUBE GENERALAire ESIDENTIAL REATMENT RODUCTS FILL OUT AND MAIL THIS WARRANTY CARD AND LITERATURE REQUEST FORM LEANERS AND...
- Page 6 Magnuson-Moss Warranty Act.) GENERAL FILTERS, INC. 43800 GRAND RIVER AVE. NOVI, MICHIGAN 48375-1115 WWW.GENERALAIRE.COM CANADIAN GENERAL FILTERS, LTD. 39 CROCKFORD BLVD. SCARBOROUGH, ONTARIO M1R3B7 WWW.CGFPRODUCTS.COM CARE AND MAINTENANCE Your Humidifier is engineered to give helpful and trouble-free humidification. For maximum efficiency the following cleaning procedures should be carried out at the end of each heating season: 1.
- Page 7 LISTE DES PIÈCES POUR L'HUMIDIFICATEUR N° 1099-9 ÉCROU À AILETTES N° 1137-35 COUVERCLE DU BAC N° 1137-4 GOULOTTE DU DISTRIBUTEUR N° 1042-5 TUYAU DU DISTRIBUTEUR N° 990-13 BLOC ÉVAPORATEUR ASSEMBLAGE DU BOÎTIER N° 1042-16 (24 V.) N° P-103 ÉCROU À COMPRESSION N°...
- Page 8 GENERAL FILTERS, INC. 43800 GRAND RIVER AVE. NOVI, MICHIGAN 48375-1115 WWW.GENERALAIRE.COM SOINS ET ENTRETIEN Votre humidificateur est conçu pour fournir une humidification d'appoint sans problèmes. Pour bénéficier d'un fonctionnement maximum, suivre les étapes de nettoyage ci-dessous à la fin de chaque saison froide ! 1.
Need help?
Do you have a question about the 1042 SERIES and is the answer not in the manual?
Questions and answers
Should this be opened or closed?
The GeneralAire 1042 Series humidifier should be opened for maintenance, such as cleaning or replacing parts like the evaporator pad. However, it should remain closed during normal operation to function properly.
This answer is automatically generated
why is the water still running when the furnace is not working
Water may still be running in the GeneralAire 1042 SERIES when the furnace is not working due to a malfunctioning electric solenoid valve or humidistat. The solenoid valve controls the water supply, and the humidistat provides low-voltage control. If either component is stuck or faulty, water may continue to flow even when the furnace blower or burner circuit is not energized. Checking and possibly replacing these components can resolve the issue.
This answer is automatically generated