
Related Manuals for BURY CC 9060 Smart


Summary of Contents for BURY CC 9060 Smart
-
Page 1: Table Of Contents
CC 9060 Smart Index Introductory information 1. General 2. Security guidelines Installation of the hands-free car kit 3. Scope of supply 4. Positioning and mounting 5. Connections on the electronics box 6. Installation of the loudspeaker switch box AC 5120 7. -
Page 2: Introductory Information
Congratulation on purchasing a BURY hands-free car kit. You have cho- sen a high quality product that is extremely easy to use. All aspects of BURY production through to sales and service are subject to strict qua- lity management according to DIN EN ISO 9001. All BURY hands-free car kits meet CE and e1 security standards. - Page 3 Faults Do not commission the device if you detect or assume a defect. In this case, contact a Bury specialised dealer or our hotline. Improper repair efforts can be dangerous for you. Therefore, only skilled personnel may perform inspections.
-
Page 4: Installation Of The Hands-Free Car Kit
Installation of the hands-free car kit 3. Scope of supply 150 cm... - Page 5 The hands-free car kit (HFCK) is supplied with different combinations of components, depending on the sales regions (countries). The operating manual refers to all versions. Description of the components: 1) Electronics box 2) Monitor and installation pad 3) Fixing screws for electronics box, rider, adhesive pad, cleaning cloth 4) Microphone 5) Installation and Operating manual on CD...
-
Page 6: Positioning And Mounting
Installation of the hands-free car kit 4. Positioning and mounting Step 1: First of all, please choose the most convenient position for the monitor and the installation pad in your vehicle by attaching the monitor / hook- and-loop fastener to the pad and checking different positions in the vehicle. - Page 7 Example of installation:...
- Page 8 Installation of the hands-free car kit Step 2: Depending on the vehicle type and its equipment (e.g. airbags), it is reasonable to install the microphone either at the A-pillar, at the sun shield or at the roof interior. For details about the equipment features please refer to the vehicle documents.
-
Page 9: Connections On The Electronics Box
5. Connections on the electronics box With the combinations of the product versions, different electronic bo- xes can be used. These differ in terms of the arrangement and number of the connections and in terms of their dimensions. Box 1 is eventual- ly going to be completely replaced by Box 2. - Page 10 3 – Connection for additional accessories At this connection you can, for instance, connect a special 3 key remo- te control from the BURY accessories. Please ask one of our specialist retailers or contact our hotline for further information.
- Page 11 4 - Voice output of the hands-free car kit Version 1: Refer to separate chapter: Installation of the audio switch box AC 5120 Version 2: Connect the external loudspeaker here if you do not want to or are not able to make use of the vehicle’s own sound system. When installing the loudspeaker, make sure it is positioned the correct distance from the microphone.
- Page 12 8 - Internal loudspeaker switch box The cable provided serves the purpose of transferring the voice output to one of the loudspeakers in the car. In the best case scenario, this speaker should be on the passenger side of the vehicle in order to pro- vide sufficient distance from the microphone and to prevent possible echoes from occurring.
-
Page 13: Installation Of The Loudspeaker Switch Box Ac 5120
If your car radio doesn‘t have this function, then the signals will be suppressed by the speaker switch box. You can use the AC 5120 through the connections that your BURY hands free car kit offers, which guarantee voltage supply via molex plugs and also have a speaker output. - Page 14 Installation of the hands-free car kit Now disconnect the (a) and/or the (b) loudspeaker connector from the speaker socket on the radio at the back. Connect this connector with the suitable socket (3) on the AC 5120. Now con- nect the plug (4) with the radio. Depending on the switcher position (5), the voice of your conversation partner will be fed back through either the front right speaker, the front left speaker, or through both of the front lou- dspeakers.
- Page 15 Different connections of the ISO plug on the radio The layout of the pins on the ISO plug used in a car depends on the type of car. Before using the switch box, you should make sure that the connections are correct in order to prevent possible damage to the device.
- Page 16 Installation of the hands-free car kit In the operating manual of the radio device, you can find the pin assignment for the “mute” signal. This signal can occur on one of three cables marked with “mute1”, “mute2”, or “mute3”. mute 1 mute (yellow) mute 2 radio device...
-
Page 17: Installation Instructions For The Fuses
7. Installation instructions for the fuses If you install the hands-free kit without the AC 5120 switch box then the power supply must be secured with a fuse in the way described below. Please cut through the red, the black and the blue cable by means of a wire cutter or scissors. Now insert the two endings of the red cable resulting from the cut into one of the binders, then close it. -
Page 18: Operating Guidelines
Operating guidelines 8. Using the hands-free car kit for the first time After power supply of the hands free car kit (HFCK) is sucessful con- nected, the HFCK is activated when you have started the vehicle. After this, you have to select the menu language if several are available for you to select. - Page 19 and activated voice recognition for instance, the HFCK will start the voice control system automatically. The HFCK signals that it is ready to receive a command by emitting an acoustic signal. If you aren’t sure of the right command to use, then simply state „HELP / WHAT CAN I SAY“.
-
Page 20: Handling Via Touch Screen
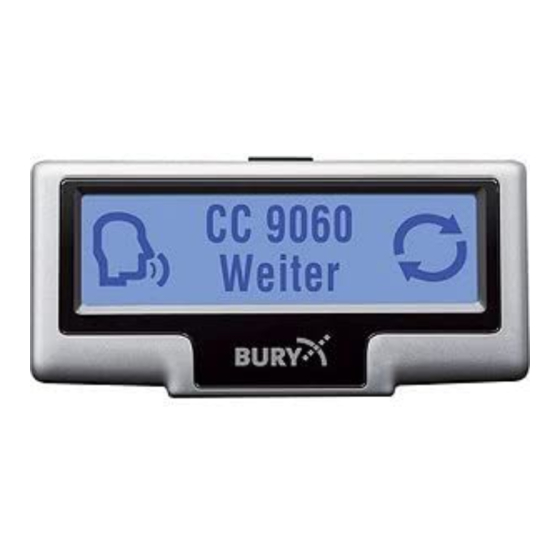
Operating guidelines 11. Handling via Touch screen The display is divided up into several zones. In almost all of the menus you can find symbols on the left and the right with which you are able to initialise functions directly or browse through in the menu. In the centre of the display you nearly always find two lines of text with menu items which you can also select by pressing them briefly. - Page 21 If it is not possible to establish a connection, please check and update the software release (firmware) of your mobile phone or of the HFCK. You will find an overview dealing with this subject on the Internet at www.bury.com. Note: In the internet you can find an overview with a large number of mobile telephones which have been tested with this hands-free car kit.
-
Page 22: Menu Navigation
Operating guidelines 13. Menu navigation Here you will find all menus which are necessary for the operation and configuration of the system. These can be selected through the touch screen or using voice control. You are also able to select additional frequently used commands via voice control which otherwise first appear later in the menu tree. - Page 23 numbers of the actual telephone number (wait a moment so that the HFCK can repeat the entry). When you have entered the last number block of the telephone number, you can check the complete telephone number once again with the voice command „PLAYBACK“. Here are some more commands: The complete entry will be deleted, Delete all...
- Page 24 Operating guidelines Here you can search for entries through a letter field. Read out the first Fast search letters of the first name and surname (depending on the sort sequence) which you want to find. The first entries with this letter will then be displayed.
-
Page 25: Call Lists
In all the HFCK can store 150 voice commands. This voice command (voice tag) is valid for all numbers which are allocated to this name. A corresponding inquiry follows about which of these numbers you want to call. Note: In order to make voice recognition easier for the HFCK, please do not use voice commands for your voice commands (voice tags) which are also used by the HFCK. - Page 26 Operating guidelines If you activate the music function via the touch screen, an inter- face appears in the display with which you can change the volu- me level and either play back, stop or skip music tracks. The following functions are available for playing and are shown on the display: | ...
-
Page 27: Voice Dial
Settings In this menu point, you can configure the HFCK through five further Settings submenus. Bluetooth Bluetooth In the Phone list, the telephones are listed which have already been ® successfully connected with the HFCK via Bluetooth . The list is able to hold a maximum of ten telephones. - Page 28 Operating guidelines The HFCK works in general independent from the speaker, that means Speaker it can immediately be operated without a ‚voice training‘. Then user adaptation training is only needed if you speak a strong dialect. The HFCK reads twenty terms aloud to you which you have to repeat so that the system can ‚get used to‘...
- Page 29 The volume level for the voice feedback and the selected ring tone can be set in an additional sub menu. Volume Available as voice commands are „LOUDER“, „LESS“, „MAXIMUM“, Speech „MINIMUM“ and „ACCEPT“. Rington Display Display This menu point makes it possible for you to adjust the display in a range of different ways.
- Page 30 Operating guidelines Device In the Call answering menu item, you can make the settings concer- Device ning the answering of calls, the menu languages, the telephone book options, for the system itself, and for the willingness to answer calls. With the call answering function you can specify as to whether you Call answering want to answer an incoming call manually via the touchscreen, by voice command, or automatically.
- Page 31 HFCK under Version info. If a new System item of firmware should become available for the HFCK, then under the menu item Software update and using the BURY Update Suite, you are able to update the HFCK. Version Info...
-
Page 32: Accepting, Making, Ending Calls
Bedienungsanleitung 14. Accepting, making, ending calls You will be alerted of an incoming call via the voice output and the ring tone. Your vehicle‘s sound system will switch onto mute. If the caller sends their telephone number with the call, this will be shown in the display unless the number is saved in your phone. - Page 33 If you receive another call during an active telephone call, this will be indicated to you both acoustically and visually. If you press down brief- ly in the centre of the HFCK’s display, a sub menu will appear. You can then switch over to the private mode, and you are able to accept or decline a second call on your mobile phone, stop a conversation or ini- tialise functions such as conference calling.
-
Page 34: Further Information
Further Information 15. Service In case of general or technical queries, suggestions and comments, please do not hesitate to contact our team at any time: BURY GmbH & Co. KG Robert-Koch-Straße 1-7 32584 Löhne Hotline: +49(0)180 5 - 842 468*... - Page 35 Federal Communications Commission (FCC) Compliance Statement - United States This device complies with part 15 of the FCC Rules. Operation is subject to the following two conditions: 1 This device may not cause harmful interference, and 2 the device must accept any interference received, including interfe- rence that may cause undesired operation.
Need help?
Do you have a question about the CC 9060 Smart and is the answer not in the manual?
Questions and answers